

vRealize Automation 6 Service Blueprint
September 8, 2014We’ve got the main section of vCAC (now renamed vRealize Automation) setup and running and have created some blueprints to create some servers, but that’s really just the tip of the iceberg. We can utilize vCAC to perform tasks as well and in my opinion this is where vCAC really makes a big difference.
Service Blueprints
Instead of creating server blueprints, now we create service blueprints. They’ll be a similar setup to what you’ve seen in previous posts. Go to the Advanced Services Tab –> Service Blueprints and click the green “+” sign to add a new blueprint.

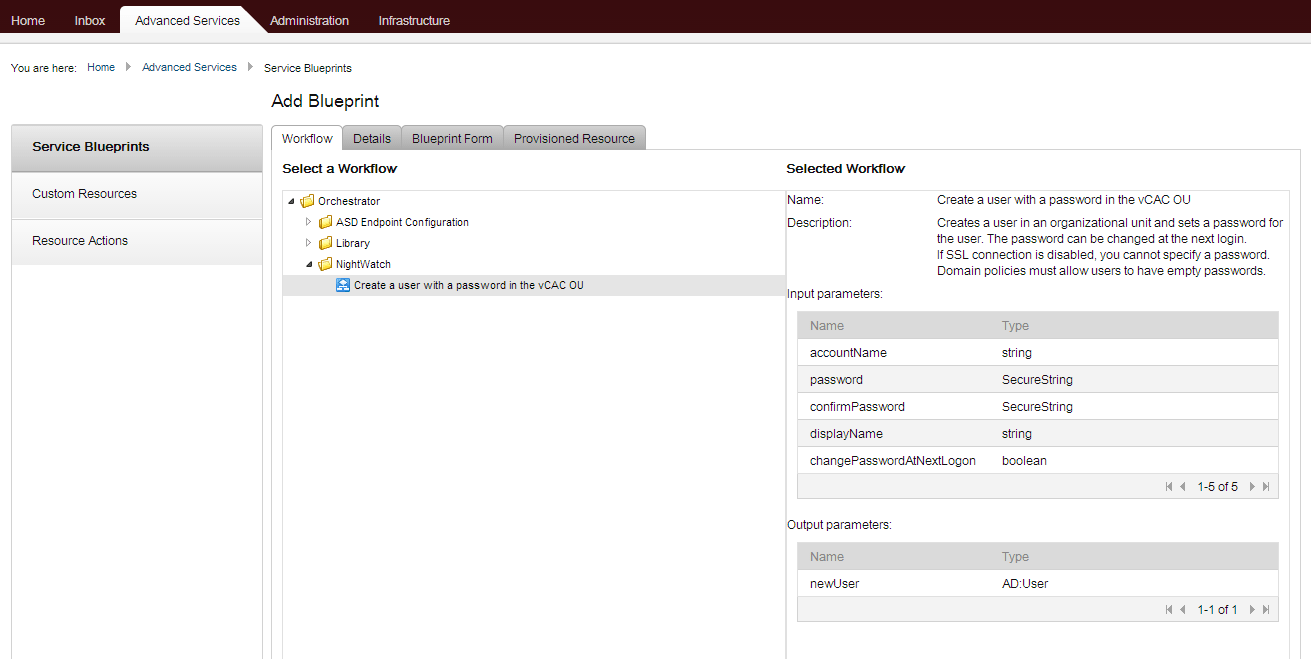
You’ll see the “Orchestrator” tree available since we added it as an endpoint in a previous post. Notice that we can pick from already created vCO workflows. This is great if you’re already utilizing vCO to perform some of your routine tasks. Not only that but there is a pretty big community where you can share your vCO workflows and import them to quickly “vRealize” the capabilities of vCAC. (yeah, sorry for the pun but you knew it was coming at some point right?)
In the example below, I’ve selected a custom workflow that I created that creates a user in a specific OU that I’ve pre-created.
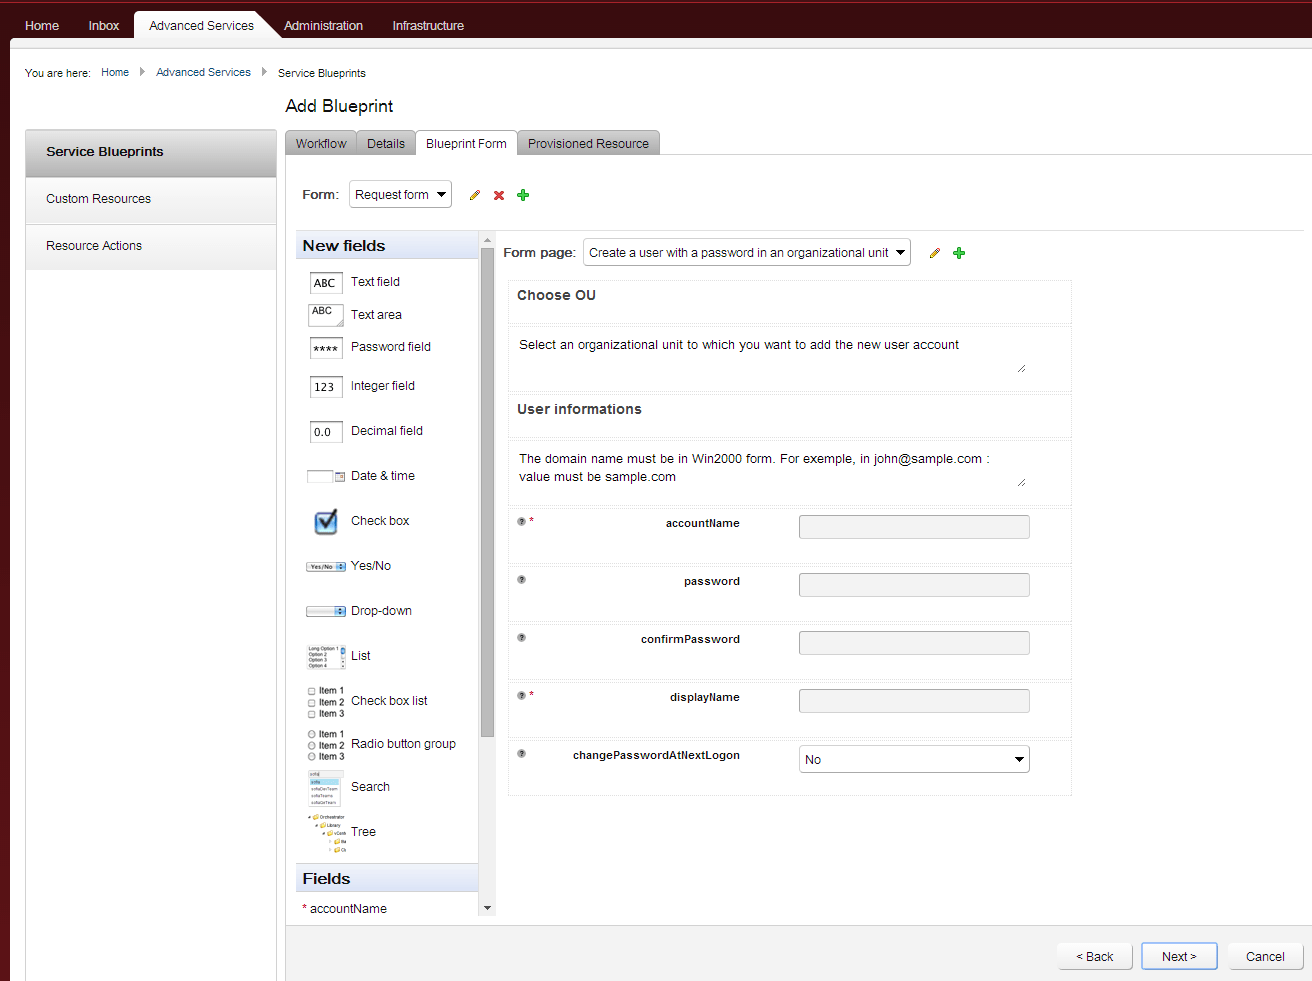
Next, I go over to the “Blueprint Form”. This is what the user will see when they request this service request. You can modify this if you’d like. In my example I’ve left the defaults.
Sidebar – If you look back to your vCO workflow, you’ll likely see a match between the inputs in vCO and your vCAC request form. If you don’t, there is either a problem, or you’ve hard-coded some information and removed it from the form to limit the choices the user will be making. Also, take note that the
Below is what the inputs from my vCO workflow looked like. Take note the parameter types for this vCO workflow are all of type “String”. This will be important in our next post.
OK, back to the service blueprint and finish with the rest of the settings. I’ve left everything defaulted as this is a pretty simple workflow.

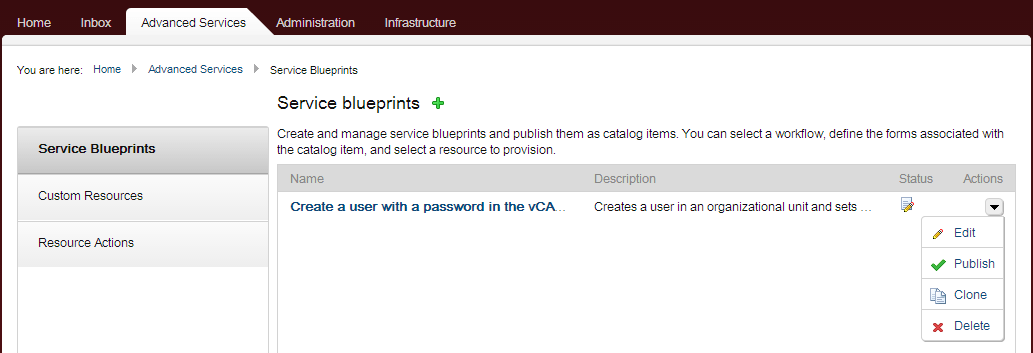
My service blueprint now exists, but just like a server blueprint, we have to publish it to our users. Click the dropdown and go to publish.
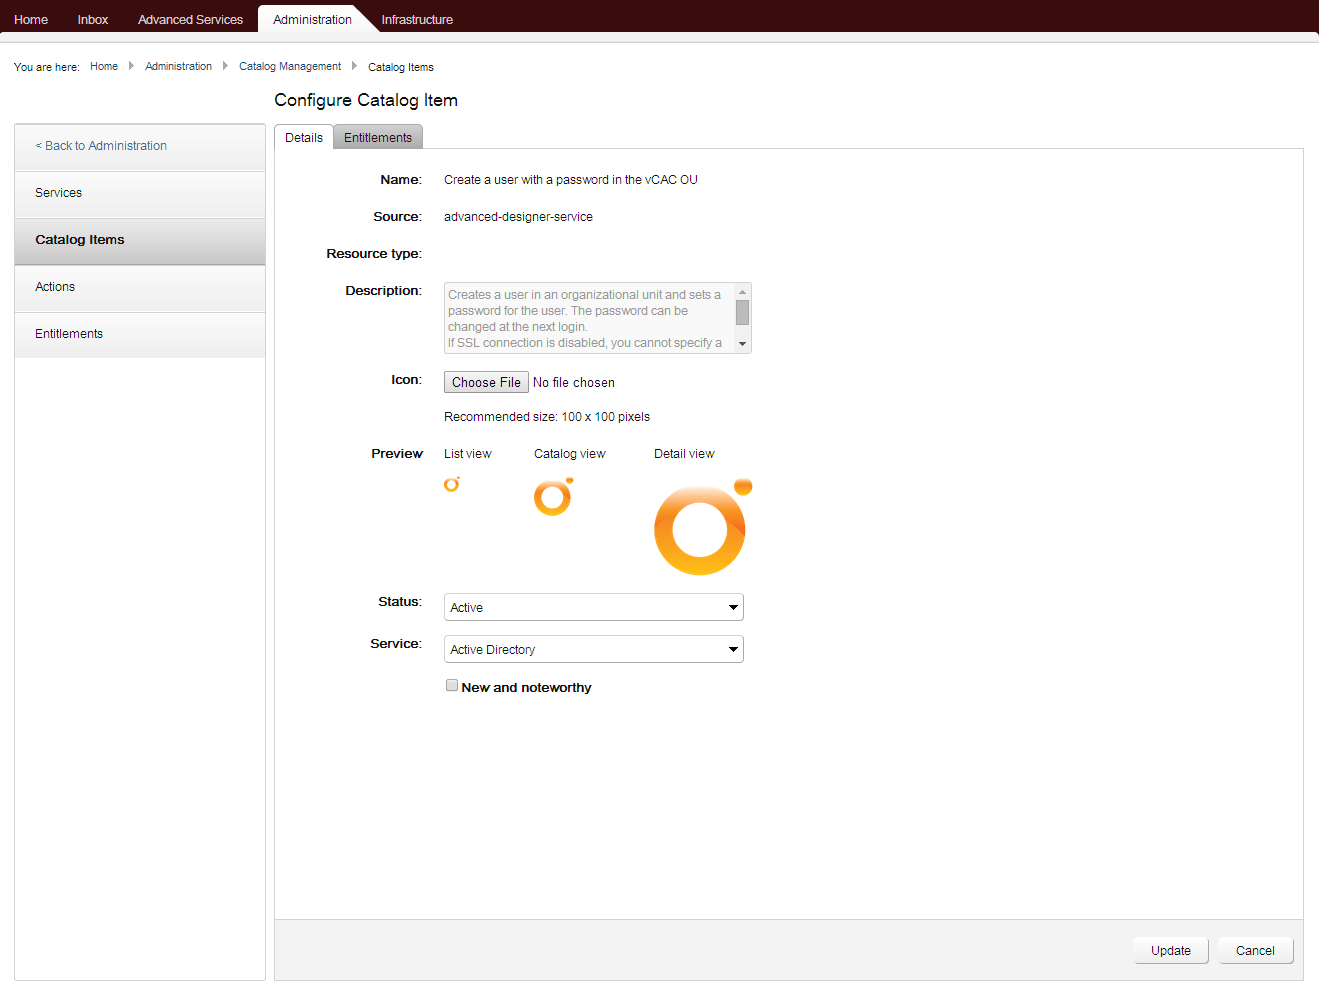
Now we can go to the Administration Tab –> Catalog Management –> Catalog Items. Find the service blueprint you just created and click the configure link from the drop down.

Here we’ll add some details about the blueprint and customize the way it looks. Most importantly, we need to make sure the status is active and that we’ve assigned it to a “service”. Remember that a service is actually a group of items that are similar. Sometimes this term is a little misleading. I’ve got a service called Active Directory where I’m storying anything related to Active Directory operations.
Next, go to entitlements. Add a group of users who should be able to run this blueprint. When you’re done, log out and log back into vCAC with a user you’ve provisioned the service for.

I’ve logged back into the vCAC portal as a user with permission to run the new Service Blueprint. Notice that I have a tab listed called “Active Directory”. This is the “service” that we talked about previously.
Find the Service Blueprint, and click Request.

Enter some information in about the request, such as a description and a reason. This is more important if you have an approval process.

Go to the next tab where you need to fill out the form. This is the information that is used as variables in the vCO workflow. For instance If I create a new user, I need to know the name of the new user. When you’re ready, click submit.
You should see a successful request message.

If you go to the “Requests” tab, you’ll be able to monitor the status of the request.

I’ve checked Active Directory just to be sure that the service blueprint worked as it says it did. You can see that a new user was created in my OU.

Summary
This was a basic example of how to use vCAC to do some work for you by accessing existing vCO workflows. You should be able to see how powerful of a tool this could be now that you can build machines from template and also perform actions. Think how useful this could be to a department such as Human Resources. For a new hire, they could run a single workflow that:
- Created a new users
- Created an email address
- Updated their direct reports and contact information in AD
- Built them a virtual desktop
- Sent an email to the company welcoming them.
And that list could much larger. How much time would this save if they ran a workflow instead of opening several service tickets with different departments?
In the next post we’ll take a closer look at some of the integration between vCAC and vCO.

