

Create a Day 2 Operations Wrapper
November 16, 2015Just deploying virtual machines in an automated fashion is probably the most important piece of a cloud management platform, but you still need to be able to manage the machines after they’ve been deployed. In order to add more functionality to the portal, we can create post deployment “actions” that act on our virtual machine. For instance an action that snapshots a virtual machine would be a good one. We refer to these actions that take place after the provisioning process a “Day 2 Operation”, probably because it’s likely to happen on the second day or later. Clever huh?
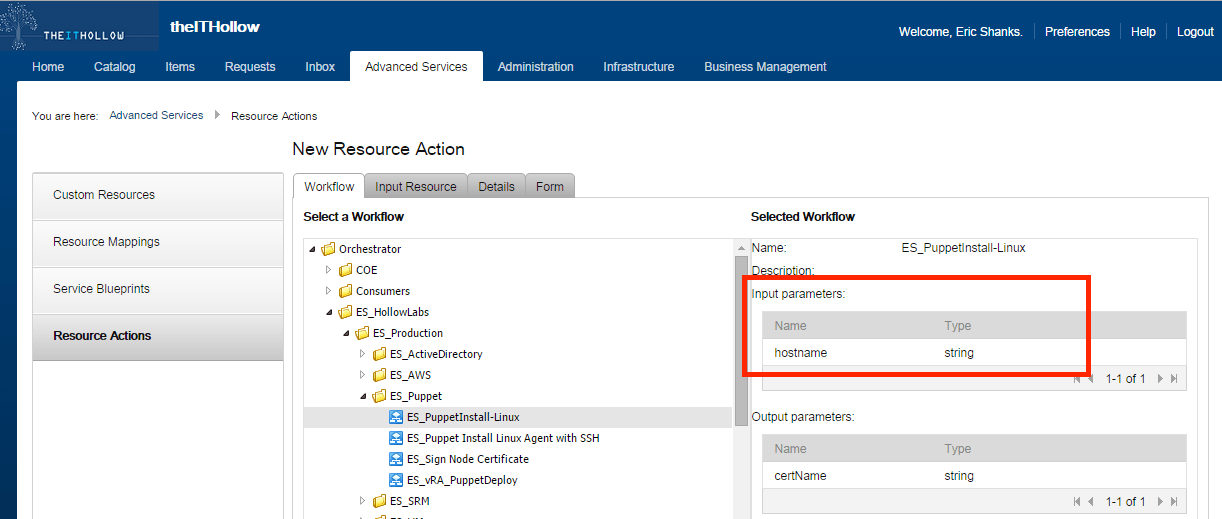
But often I run into a snag when trying to provision these types of actions. The examples below are actions I created to install the Puppet agent on a virtual machine. I already have a vRealize Orchestrator workflow that installs the Puppet agent on a virtual machine and the only input the workflow requires is a hostname. So I log into the vRealize Automation portal as a Service Architect and go to my Advanced Services to create a new resource action. I browse to the workflow I’ve created and select it from the list. Notice that the Input parameter shows only a single input named hostname and of type string.
Once I click next I’m asked for resource mapping information. The resource type and input parameter are blank and there is no option to select anything or move on. This is due to the fact that vRA needs to know how to pass these parameters to another system. vRA doesn’t know what “hostname” is or how to handle it.
There are a couple of ways around this but one method is to slightly tweak our vRealize Orchestrator Workflow to add a “wrapper”. If we login to vRO we can modify our Day 2 Action to require a Virtual Machine object instead of a string with the hostname.
To get a feel of what I did, you can take a look at the schema of the workflow itself. You can see I’ve added a single script element at the beginning of the workflow and it’s only purpose is to read a VC:VirtualMachine object and output a hostname. From there we pass the hostname over to the original workflow to be executed.

When we look at the visual binding of the wrapper script, we see the input and output types.

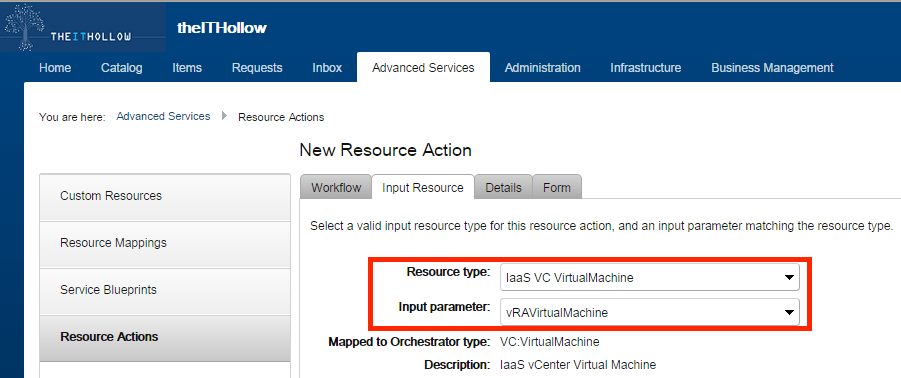
So now, lets try to add the Day 2 action again in vRA. We go back to our Advanced Services and try to add the new workflow. You can see that now the input parameters are different from when we first tried to do this. Now it’s looking for a VC:VirtualMachine object which vRealize Automation understands.
When we click next, we’re then presented with our resource mapping screen again, but this time the information if already filled out for us and looks to be working!
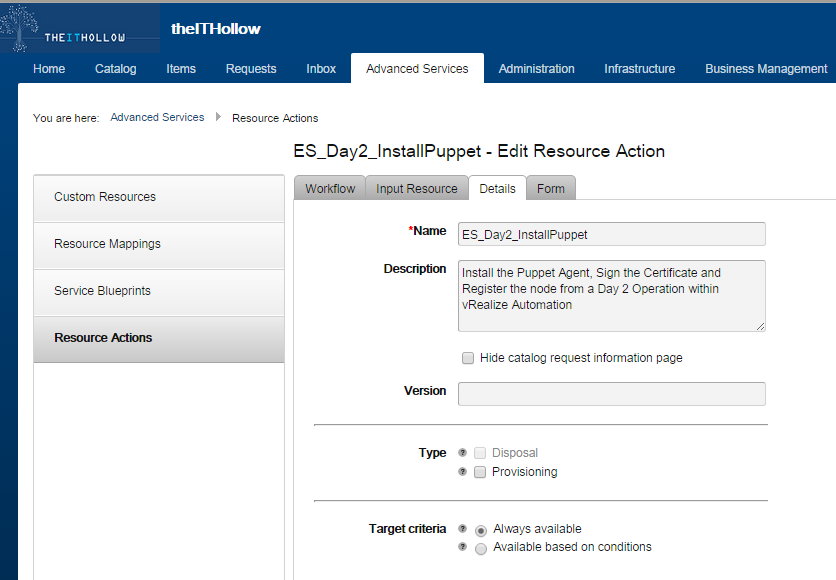
I move along to the details screen and finish filling out the information to create the action.
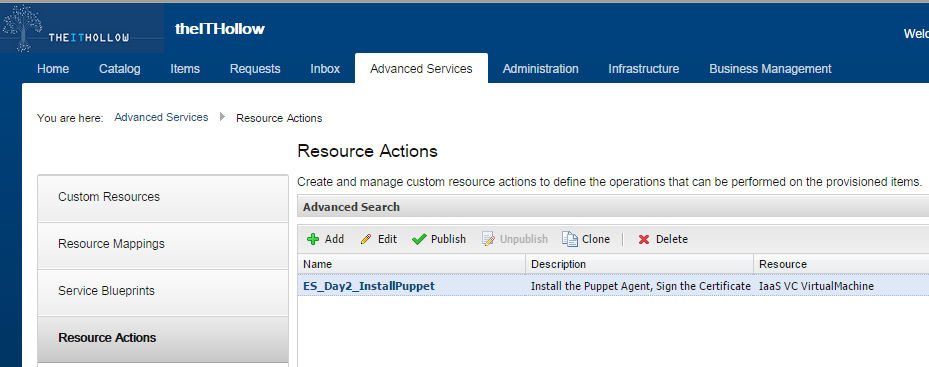
Once the action is created I publish it.
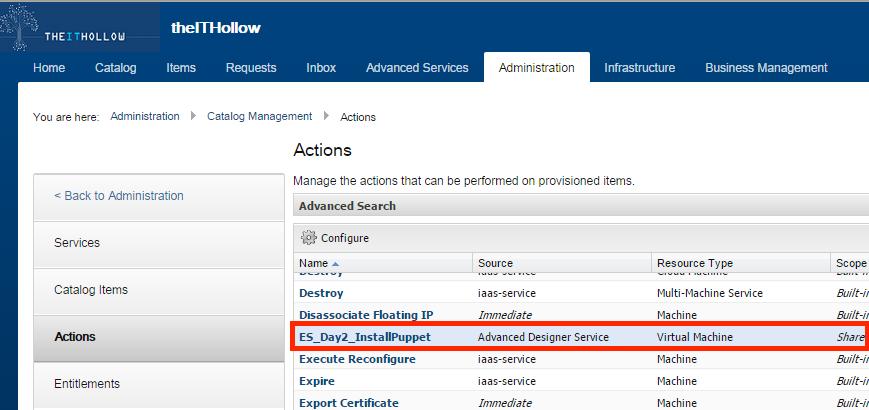
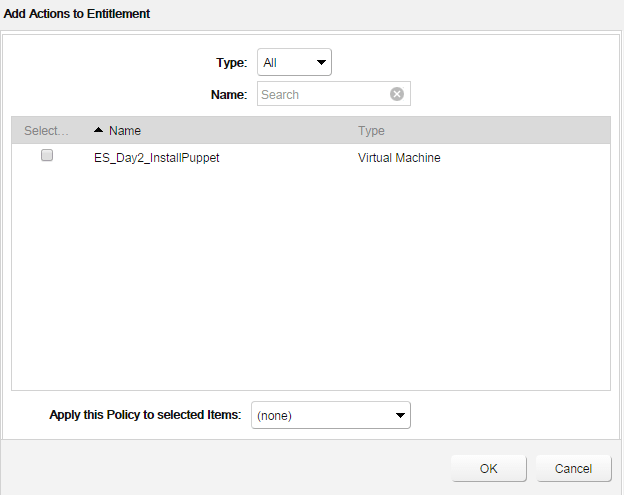
Just like any server blueprint that we might create, we then have to configure the item with an icon and assign users with an entitlement.
The end result is that I have a workflow to deploy the Puppet Agent to a virtual machine after it’s been provisioned.

Final Thoughts
In case you’re wondering why I don’t just install puppet during the MachineProvisioned Stub in vRA, it’s because I’m running this in my home lab with only 10 puppet licenses. Adding this as a day 2 operation give me the flexibility to only install Puppet on nodes when I want to go test out some Puppet code. There are certainly many actions that could be used for a corporate environment though, like allowing users to storage vMotion their machine or snapshot\restore VMs at their leisure.


How do you do this in vRA 7.3?
It’s similar but has different names from version 6.x
Check the design tab –> XaaS –> Resource Actions.
The process is very similar.