

Azure Cloud Services
September 7, 2016Azure provides a Platform-as-a-Service offering called a “Cloud Service.” Instead of managing every part of a virtual machine (the middle-wear and the application) it might be desirable to only worry about the application that is being deployed. An Azure cloud service allows you to just focus on the app, but does give you access to the underlying virtual machine if you need to use it.
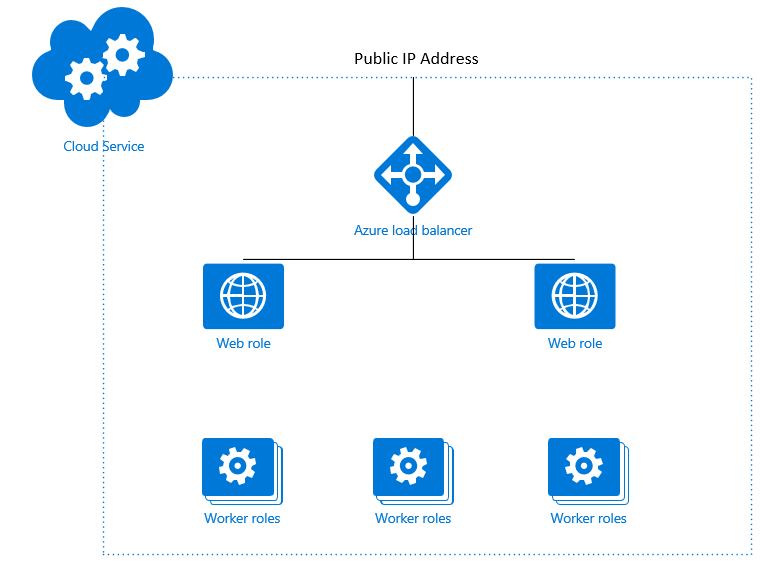
So what makes up an Azure Cloud Service? There are two main types of virtual machines that are deployed through a cloud service; web roles and worker roles. Web roles are Windows servers with IIS installed and ready to use on them. Worker roles are Windows servers without IIS installed. In addition to the Windows instances that will be deployed, a cloud service also includes a load balancer that will automatically load balance the web roles, and an IP Address will be assigned to the load balancer. One thing to note is that the web server roles have an agent installed on them as well so that the load balancer can determine if the server is working correctly and if it needs to remove a server from the load balancer.
Deploy a Cloud Service through Microsoft Visual Studio
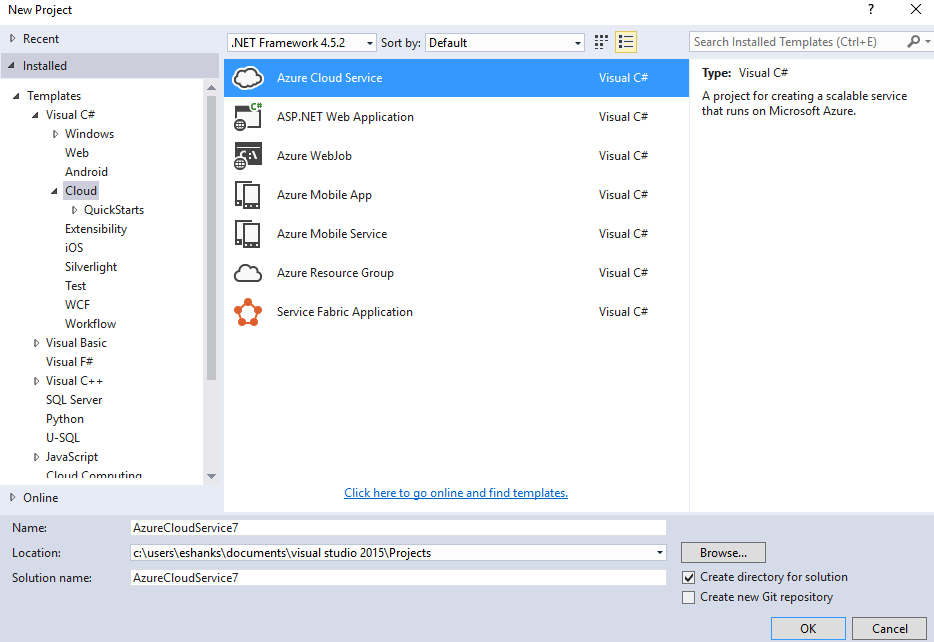
One of the great features about a cloud service is that it can be completely deployed through Microsoft Visual Studio. This puts the application deployment control directly into the hands of the developers who are coding it. To get started, you’ll need to install Microsoft Visual Studio and then install the Azure SDK. Once this is complete, create a new project and select the “Azure Cloud Service” template under the “Cloud” menu.
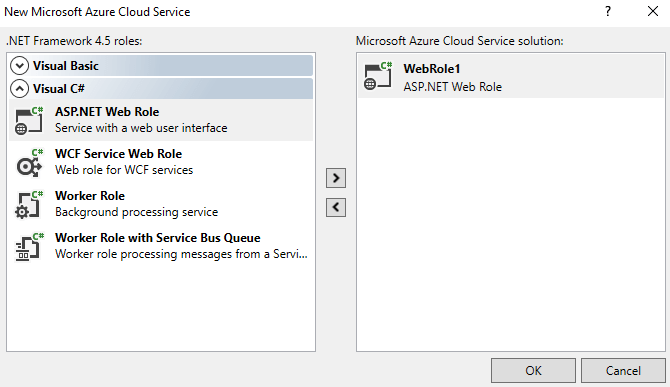
Next, I’m selecting a Web Role to be added.
NOTE: even though a cloud service can include worker nodes, this example is only using web roles for a simple demo.
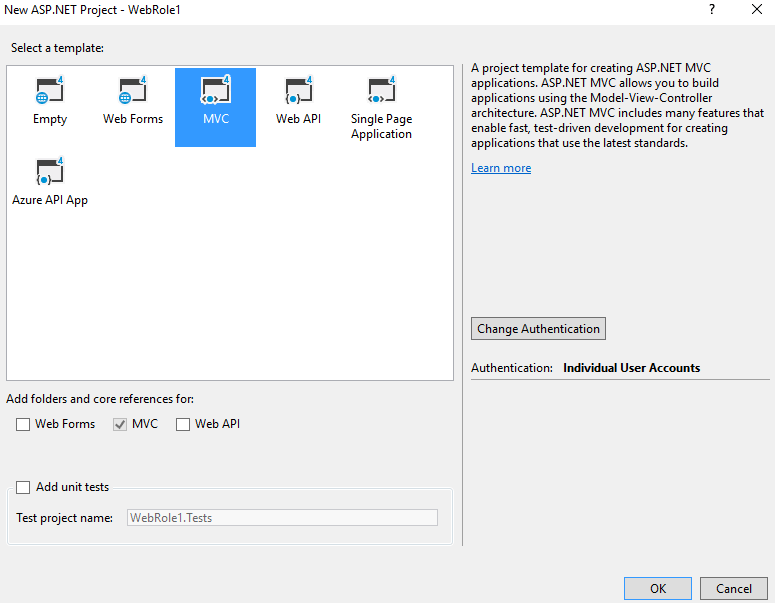
Next I’m selecting an Model-View-Controller type of web role.
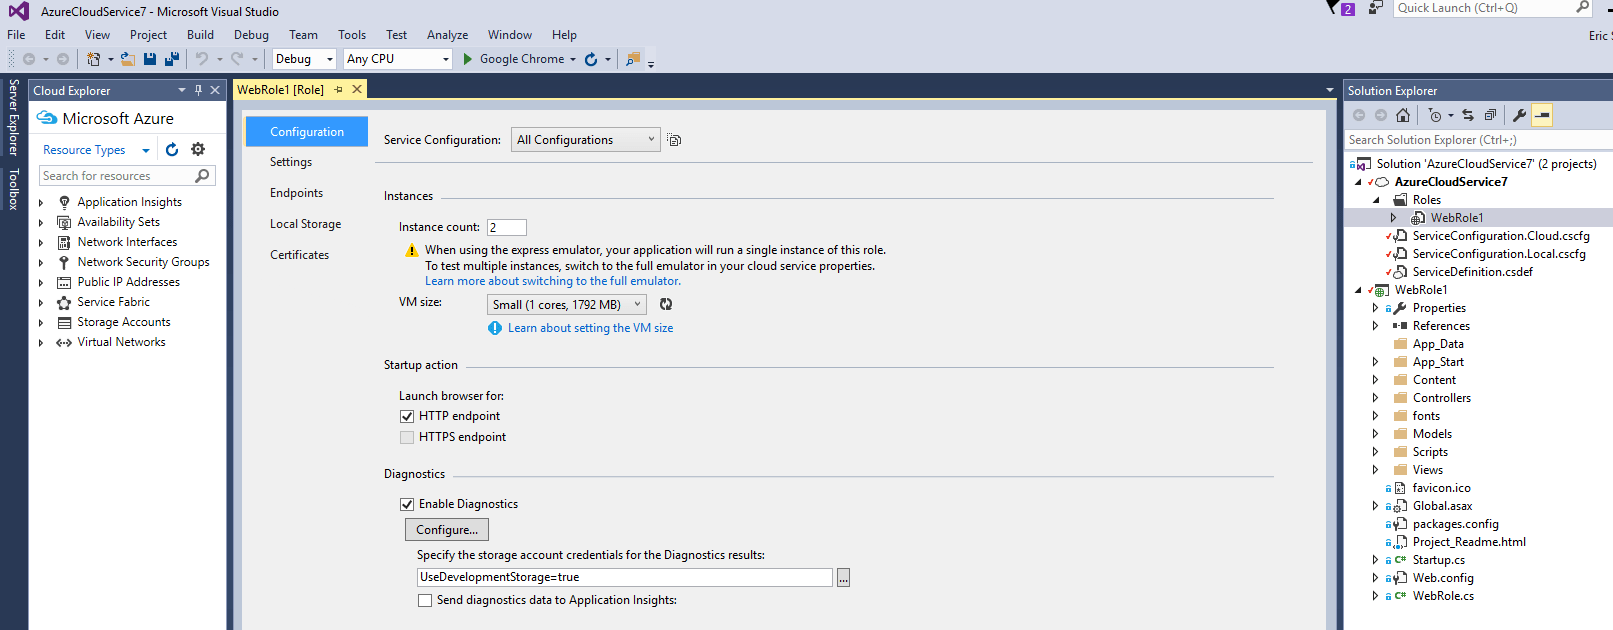
Now that you have a project created, you can make modifications to your web page. Things like adding graphics and the main work of building a web service for whatever your business purpose is. I’ve made a few modifications from the default template, but you can just deploy the plain template if you’re learning. One thing I did do, was to click on my WebRole1 object and change the instance count to two. This means that I’ll be deploying two web servers as part of this cloud service.
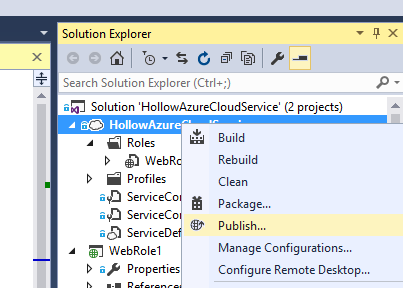
Publish Your Cloud Service to Azure
Once your web service is ready to go, right click on the service and click “Publish…”

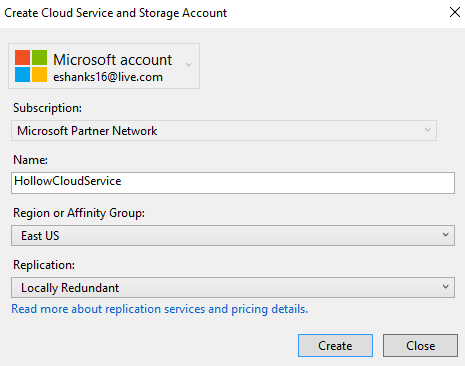
You may need to provide your Azure portal login first thing. After that, select the subscription that this service will be billed under and give the cloud service a name. This name must be unique in Azure, not just your account. Select a region or affinity group and the replication methodology for your servers.
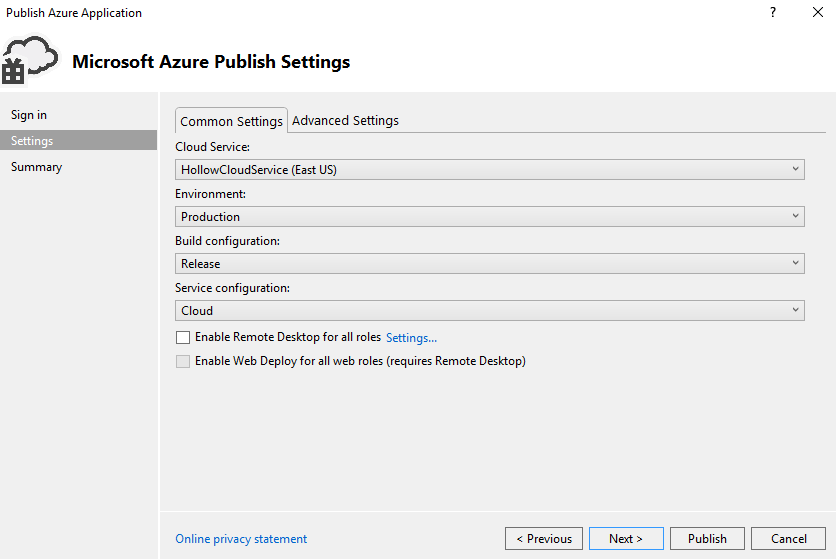
Next you’ll be able to select an environment (either staging or production) and will also have an opportunity to enable remote desktop for all of your roles in case you need to login to these servers for futher configuration.
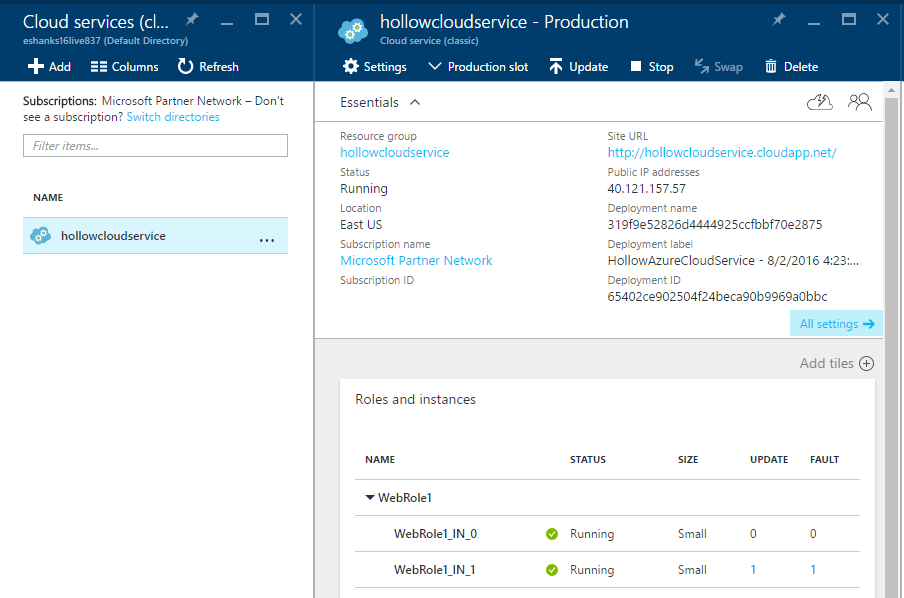
Wait for your service to be deployed. After this is complete you can look at the “Cloud services (classic) menu in Azure and will see an entry that matches your cloud app. Notice that you’ll have a Site URL, Public IP Address and a status for all of your instances listed. It’s also worth noting that the roles have been added to separate update and fault domains so that an outage won’t take down your whole cloud service.
Go to your URL and you should see your web service running and load balanced.
Add Functionality
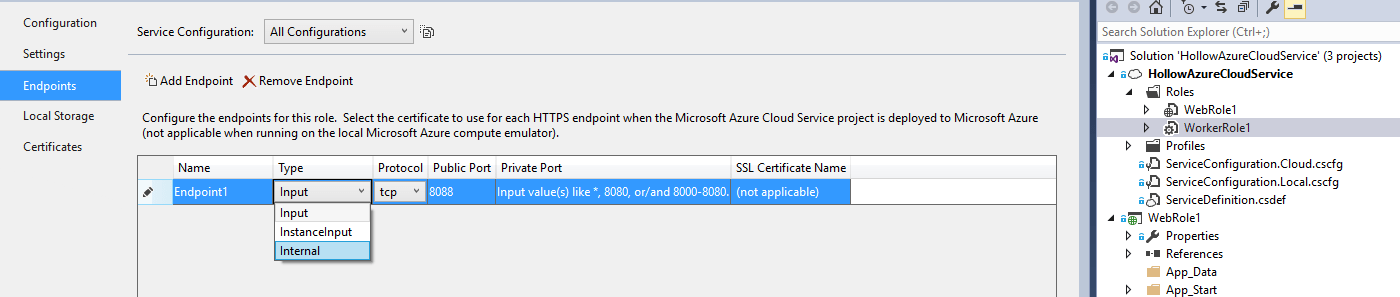
We can look at our Visual Studio code again and add whatever options that we need to add. One thing that might need to be added is some worker nodes. Worker nodes may be scaled out in the same manner that the web roles were. The worker nodes may have an http listener to perform actions or really anything you need it to do. One thing to be aware of though is many times you don’t want your worker roles to be accessed from the Internet. Generally the worker roles only communicate with the front-end web services and not the Internet. To do this we can change our endpoint inputs for the worker roles. In the example below, I’ve added a worker role and added an endpoint on port 8088. Then under type we can change it from an “Input” endpoint to an “Internal” endpoint so that it is only accessible from within the cloud service container.
Summary
Cloud Services is a nice way to add some functionality when you need to deploy web and app servers together. It can ease your operational tasks because it will deploy your load balancers operating systems for web and app servers for you. You can also combine this with some PaaS Services like a service bus so that you can even more functionality and deploy the whole thing through Visual Studio.


[…] Azure Cloud Services […]