

UCS Director Network Policies
October 17, 2016The UCS Director Virtual Data Center construct requires several underlying policies in order to become an item that virtual machine can be deployed on. One of these items is the networking policy which includes IP Pools, VLANs, vNic rules and port group selection.
IP Pool Policy
Before creating any Network Policies it may be necessary to create an IP Pool Policy. The IP Pool is used to distribute IP Addresses from UCS Director instead of an IPAM solution or DHCP. If either of those methods are to be used, this section can be skipped.
To create an IP Pool Policy go to the Policies drop down and select “Virtual/Hypervisor Polices”–> Network. Then select the “Static IP Pool Policy” tab.
Click “Add” to add a new policy. Enter a policy name and description and then you are able to specify whether the IP addresses are allowed to overlap or if they’re assigned to a specific person or container. Click the plus sign to define the pool.

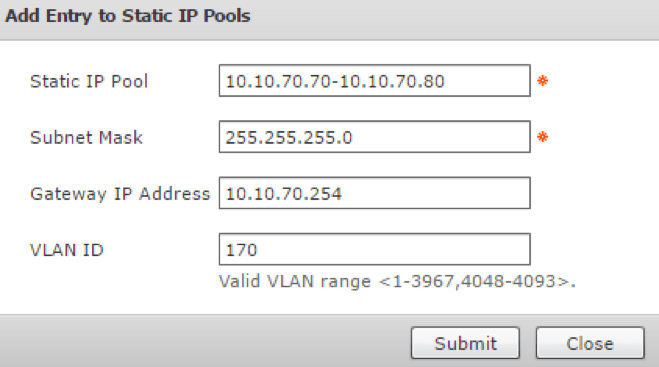
Define your IP Pool here along with a subnet mask, gateway and VLAN ID. Then click “Submit”.
Repeat this process for any additional pools.
VMware Network Policy
The VMware Network Policy determines how vNICs will be placed in the vSphere environments. To create a new VMware Network Policy go to the Policies drop down and select “Virtual/Hypervisor Polices”–> Network. Then select “VMware Network Policy”.
You’ll notice that there may be some default network policies listed here. These can be deleted if you wish to create your own policies from scratch. Network polices are created by default when you add a cloud account.
Click “Add” to define a new network policy. Enter a policy name and description. Then select which cloud this policy belongs with.
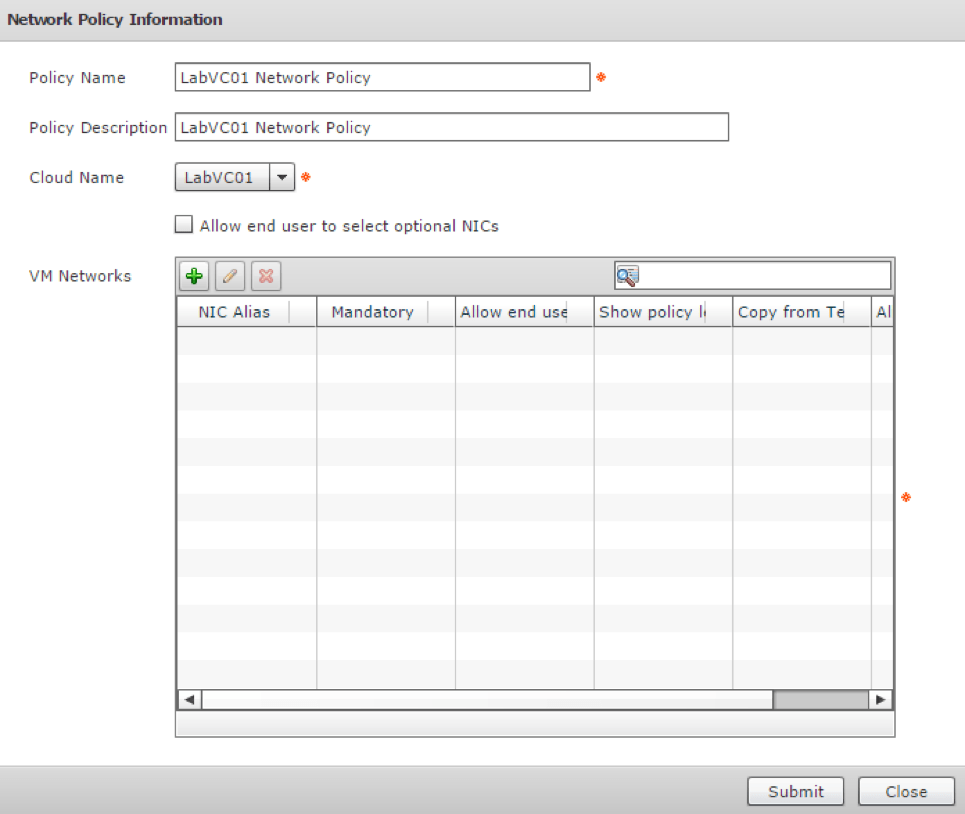
From here, we’ll enter a list of VM Networks that can be added. Click the Plus button.
Add a NIC Alias name and select the options appropriate for your environment.
Allow end user to choose portgroups: Select this if the person requesting the VM will pick a portgroup manually.
Show policy level portgroups: Checking this check box along with the “Allow end users to choose portgroups” check box lists all the selected portgroups of NICs in the policy.
Copy Adapter Type from Template: Select this to use either Flexible, E1000, VMXNET3 etc from the vSphere Template
Allow end user to override IP Address: Use this option to allow the requester to plug in an IP Address instead of using a policy.
Adapter Type: Define the VM adapter type that will be used, unless you’ve selected “Copy Adapter Type form Template”
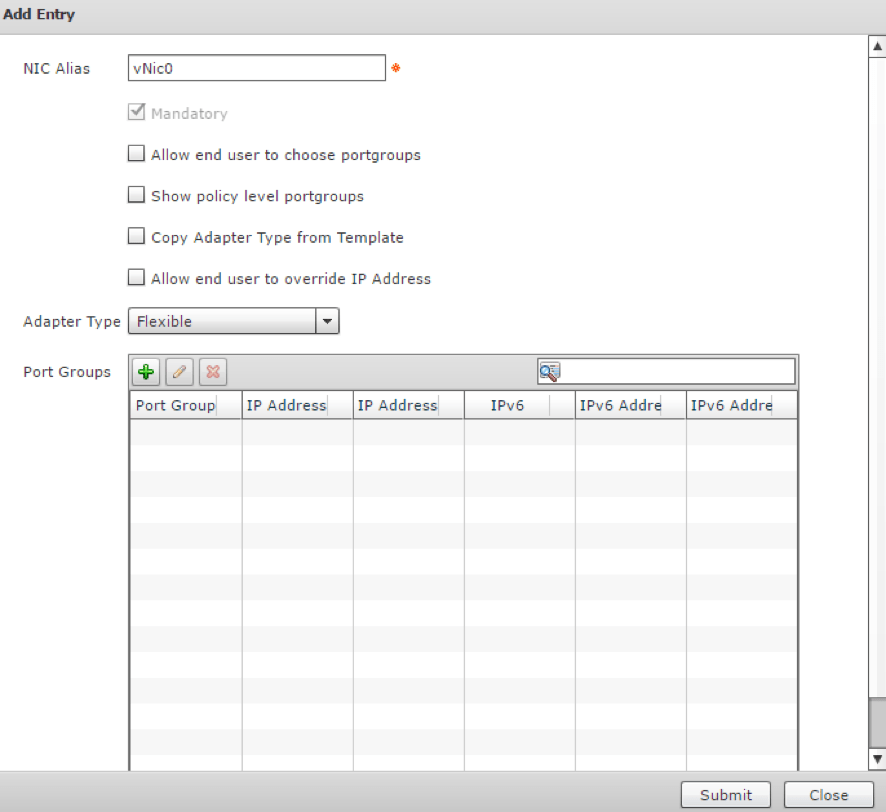
Click the plus sign to select the port groups associated with your cloud.
Select the portgroup that virtual machines will be deploy on and then the IP Address configurations for those VMs. Select Static for the type, and IP Pool Policy for the Address Source to use the IP Pool Policy that was created in the previous section. Otherwise select DHCP.

Click Submit and OK, three times. Repeat this process for additional clouds and port groups.

Summary
After completing these steps, a VMware Network Policy should be available for selection as part of a VDC. Network policies are essential to determine how virtual machines will be placed onto vSphere portgroups. If you have a different environment such as Hyper-V then you’ll want to choose a different network policy type, but the same kinds of questions and concepts will still apply.


[…] Cisco UCS Director Network Policies […]