So far we’ve talked a lot about using our automation solution to automate network deployments with NSX. But one of the best features about NSX is how we can firewall everything! Lucky for us, we can automate the deployment of specific firewall rules for each of our blueprints as well as deploying brand new networks for them.
Use Case: There are plenty of reasons to firewall your applications. It could be for compliance purposes or just a good practice to limit what traffic can access your apps.
Build It
If you haven’t already gone through the process of setting up NSX and connecting it to vRealize Automation, you should do this first. Assuming you’ve already done this then lets begin.
Security Groups
Once the basic setups have been done, login to your vCenter web client and go to the Networking and Security tab. Specifically go to the Service Composer. We’ll start by adding a new security group which will group our machines together. In the working pane click the icon with the plus sign to add a new security group.
Give the security group a name and a description. 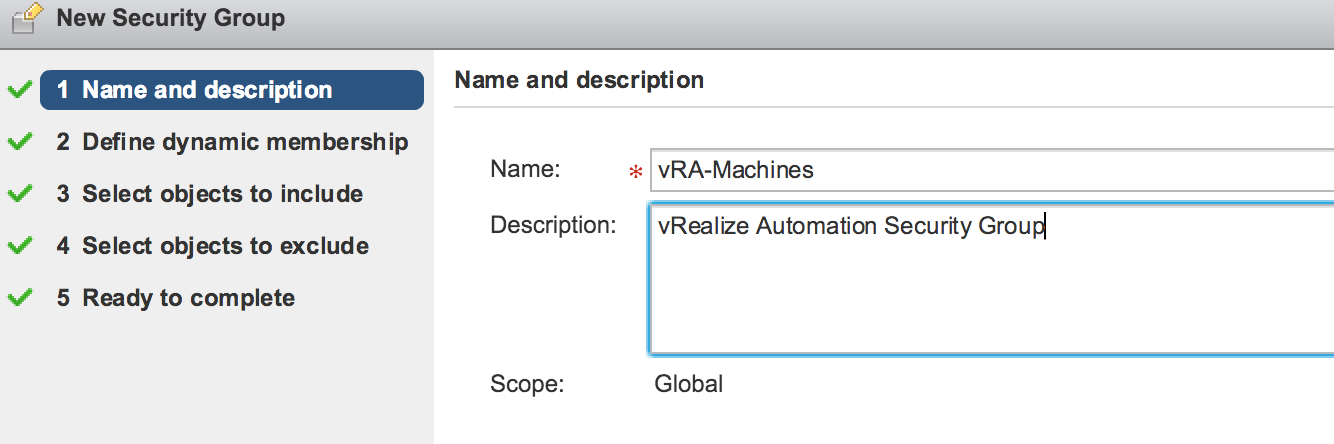
Next, we’ll setup some dynamic membership. This will allow us to deploy many virtual machines, but they will all automatically be added to the group based on some criteria. For this example I’m using a VM Name that contains “Hollow-” in it. This is the machine prefix listed in my vRealize Automation Business Group. That way any machines I build in vRA will be added to this group by default.
After we set the dynamic memberships, we can also select other object that will be included. We can select other groups, or vCenter objects such as a virtual switch, or cluster if we choose.
If we need more control we can also automatically select objects to exclude. Maybe certain VMs that are in the above groups should be whitelisted. We can add them here.
Review the settings and click Finish.
Security Policies
Now it’s time to set the policy. Go to the “Security Policies” tab in the Service Composer.
Click the icon with the “+” icon on it again to create a new security policy. Then give the new policy a name and description.
The next screen we’ll skip over because we’re not doing any guest introspection. If you’re using any Activity Monitoring or third party security solutions, be sure to complete this screen.
Now we’re at the guts of the policy. Click the green “+” sign to add a new set of firewall rules.
Fill out your rules for your own purposes. For a demo, I’ve setup a pair of rules to block SSH but allow pings. 
Add any network introspection services that you may have. Again for this setup, I’m not using any of these so I’ve skipped it. 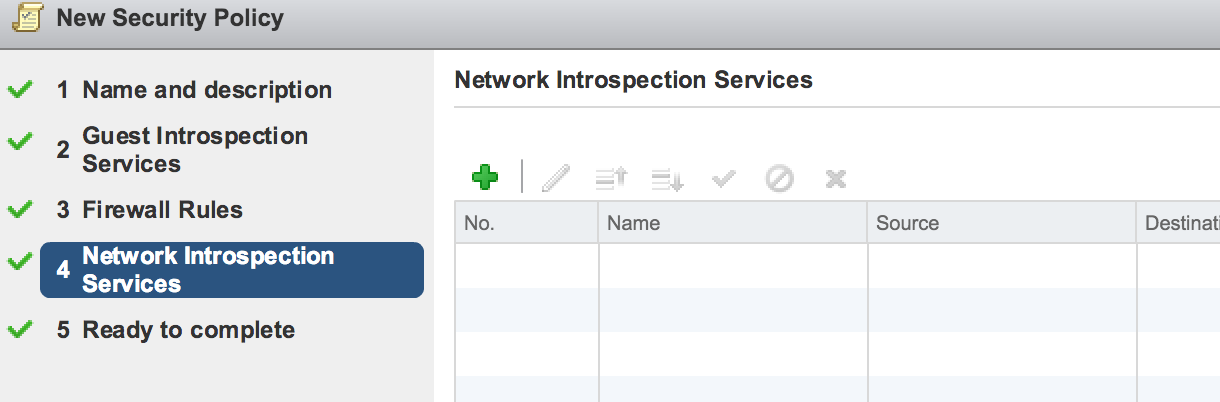
Review the settings and click “Finish”.

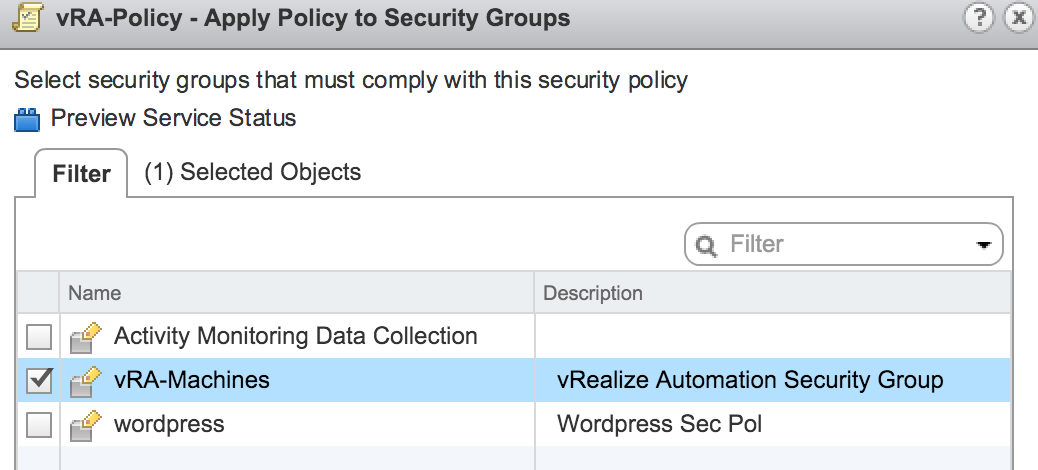
When you’ve finished creating the security group and the policies, go to Actions and select “Apply Policy”.
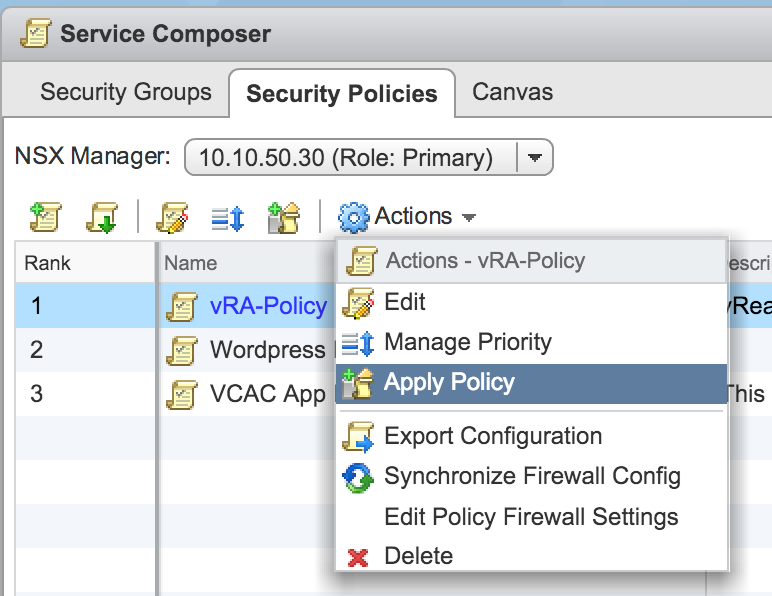
Select the security groups in which the policy should apply.
Configure vRealize Automation
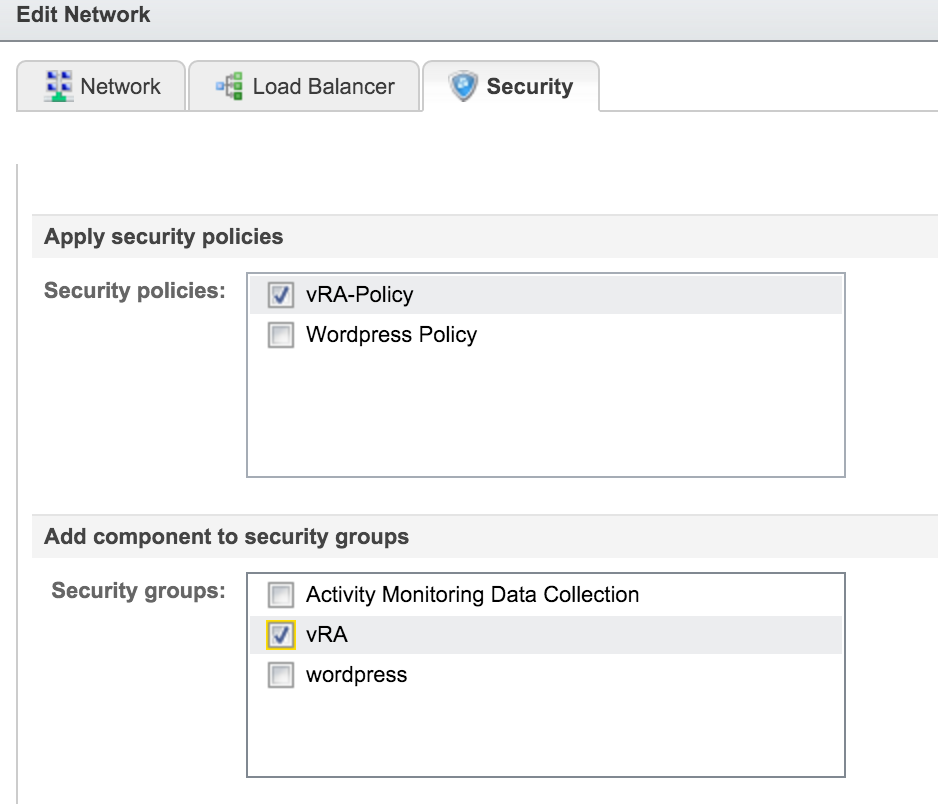
Now we can go over to our vRealize Automation portal and edit our blueprints. I’ve selected a multi-machine blueprint that I already had created for a Routed network. If we look at the “Build Information” tab, we’ll see our virtual machines and we can click “edit” under the network tab.

From here we can click on the “Security” tab and we can then manually select the Security Policies or Security Groups that we created earlier. However, in our case, we created a dynamic security group rule so we don’t need to manually apply these. As long as our virtual machines are deployed with a name that starts with “Hollow-” they’ll automatically be assigned correctly.
Deploy VMs
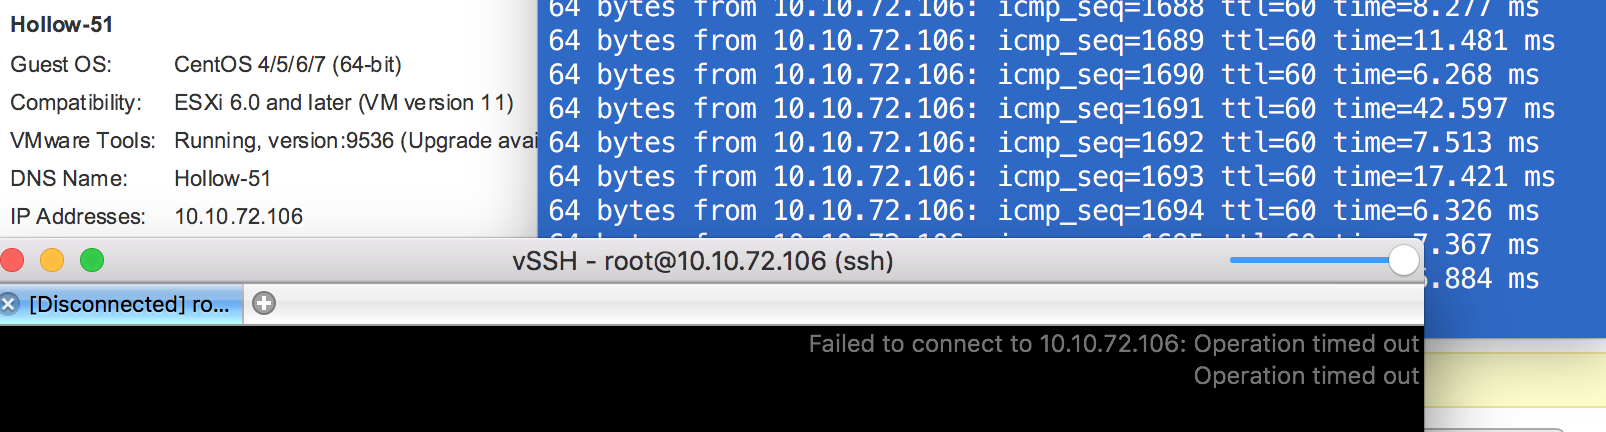
Now we can deploy some virtual machines from our blueprint. Once the build completes, we can look in NSX and see the security groups. We can see that there are now three virtual machines in the group. (The blueprint had three VMs in it).
If we lookup our virtual machine in vCenter we find our IP Address and we are able to ping it. We are unable to connect to it through an SSH session however.