I’m a big advocate for building your cloud apps to take advantage of cloud features. This usually means re-architecting them so that things like AWS Availability Zones can be used seemlessly. But I also know that to get benefits of the cloud quickly, this can’t always happen. If you’re trying to reduce your data center footprint rapidly due to a building lease or hardware refresh cycle quickly approaching, then you probably need a migration tool to accomplish this task.
Recently, I demoed CloudEndure to see how their solution works. This post will take you through the steps of migrating a Windows instance in my vCenter home lab, to my AWS environment. If you’d like to follow along in your own environment, request a free trial form CloudEndure here: https://appce.cloudendure.com/appce/?mod=signups&act=check
Prepare your AWS Environment
Before you can use a migration tool to move servers to the cloud, you’ll need to have the permissions to do so. To do this in AWS, you’ll need to setup a user account with programmatic access and a policy attached to that user that allows it to do the migrations. To do this from the AWS console, login to your AWS Account and go the the Identity and Access Management service (IAM).
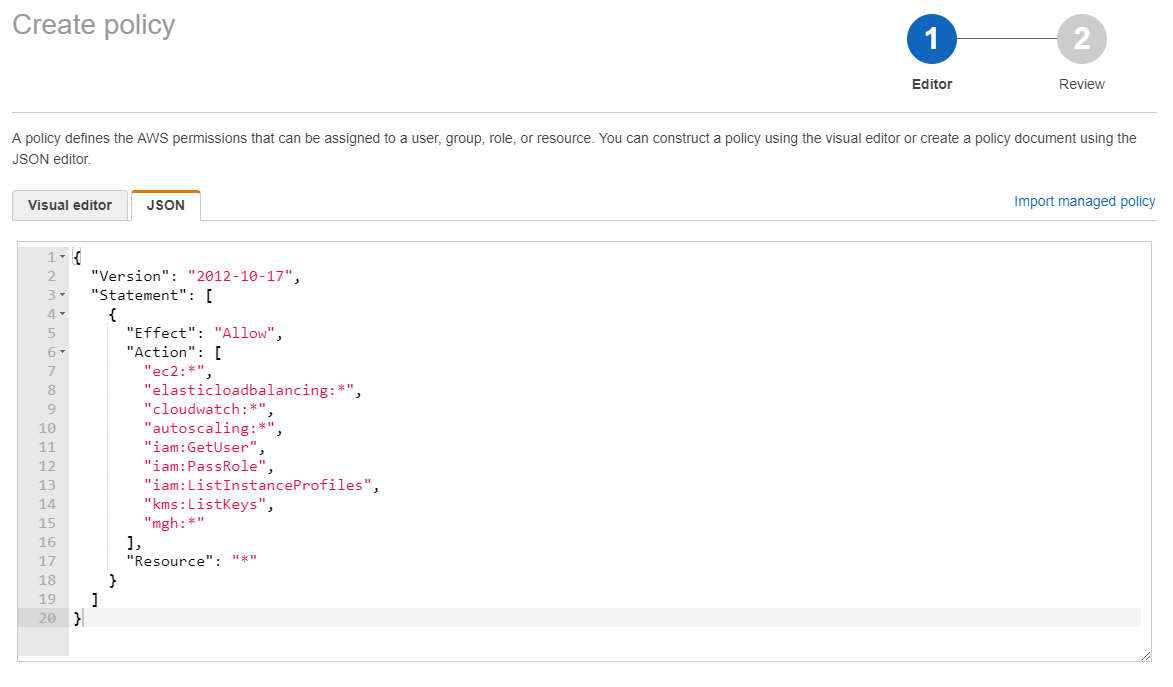
First, we’ll create a policy so click on the policies menu within the IAM service window. Click the “Create policy” button. Within this screen, you can select the services you want, or better yet, select the JSON tab and paste in the following json policy. NOTE: don’t worry if you don’t understand this, the CloudEndure portal shows you exactly what policy is needed.
{
  "Version": "2012-10-17",
  "Statement": [
    {
      "Effect": "Allow",
      "Action": [
        "ec2:*",
        "elasticloadbalancing:*",
        "cloudwatch:*",
        "autoscaling:*",
        "iam:GetUser",
        "iam:PassRole",
        "iam:ListInstanceProfiles",
        "kms:ListKeys",
        "mgh:*"
      ],
      "Resource": "*"
    }
  ]
}
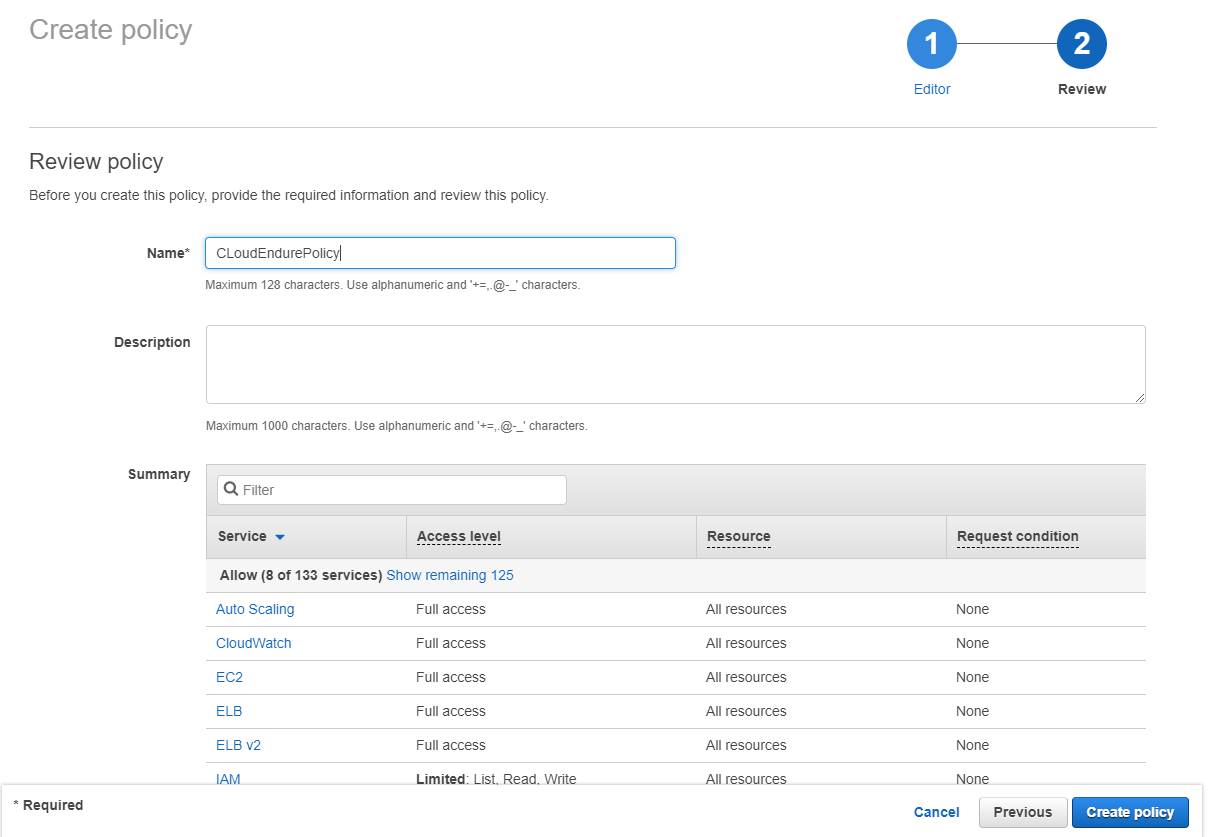
Click the “Review Policy” button. On the next screen give the policy a name and then click the “Create policy” button.
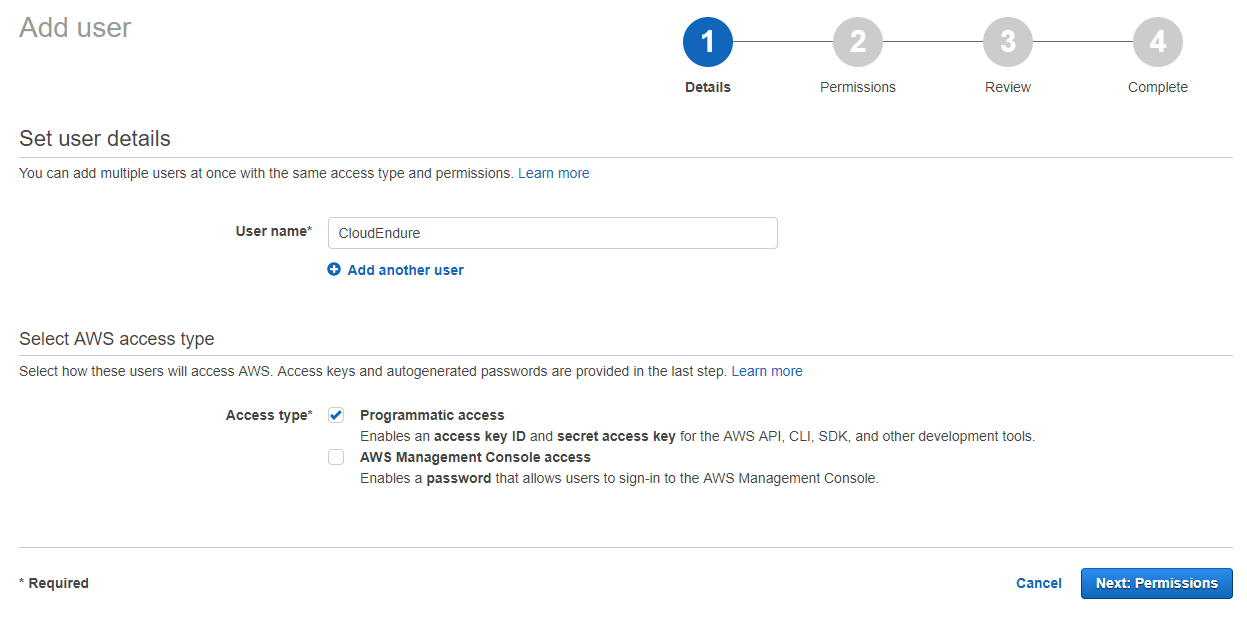
Now that the policy is created, it’s time to add an IAM user who has programmatic access to AWS. Go to the IAM console again and this time select “Users” from the menu. Click the “Add user” button. Give the user a name and select the “Programmatic access” check box to allow access to the API. Next, click the “Next: Permissions” button.
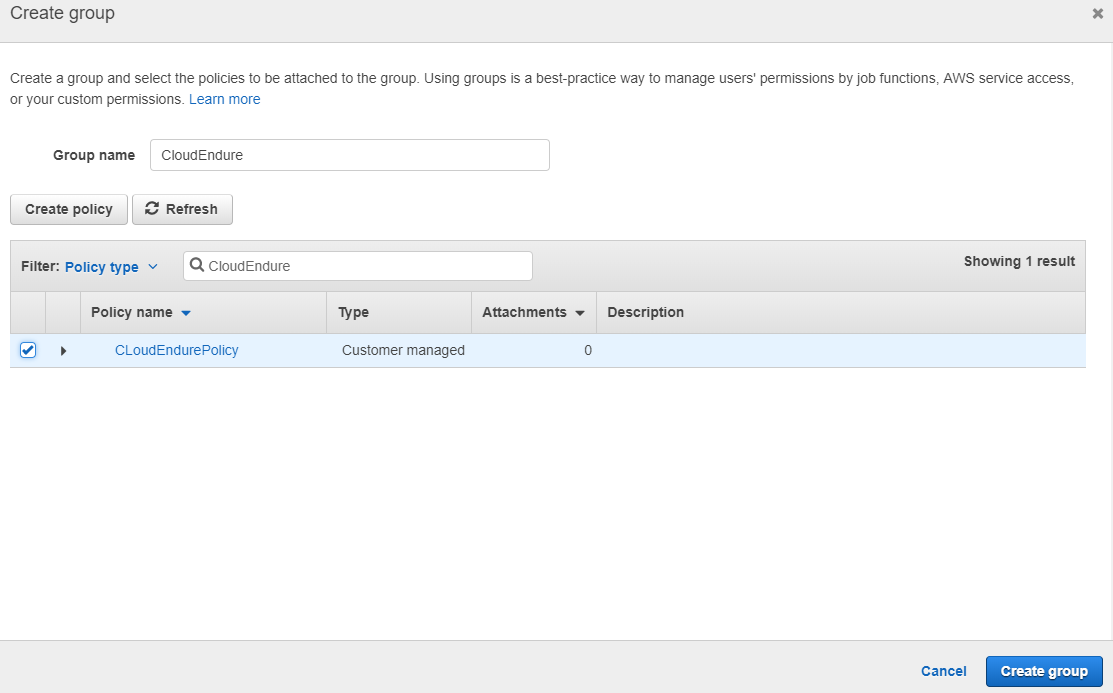
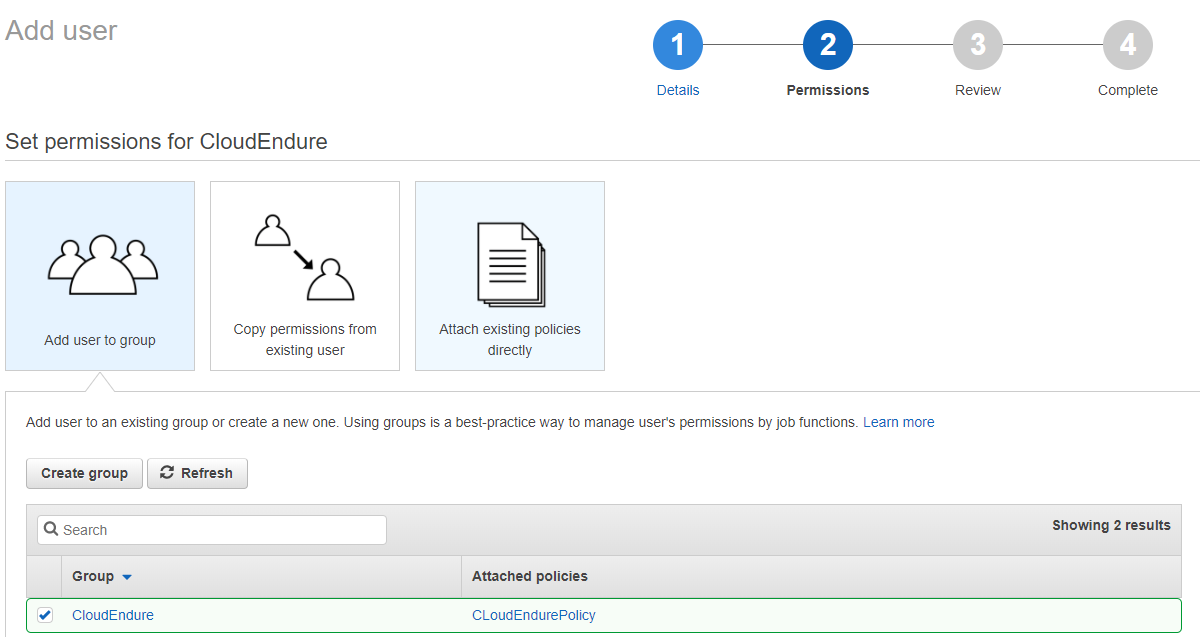
At this point it’s a good idea to add users to a group and then assign the permissions to the group instead of the user, but that choice is up to you. I clicked the “Create Group” button to add the user to create a group where I added a name. The important piece is to then select the policy you created earlier to assign it to the user or group.
You’ll see the permissions added.
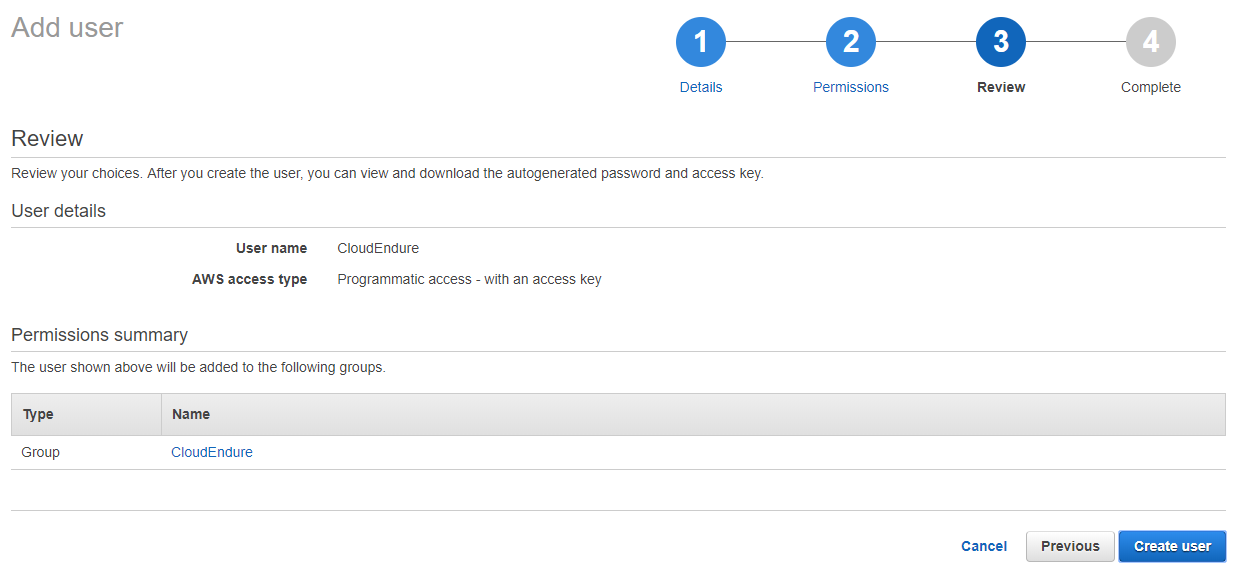
Click through the wizard to review and complete the permissions piece of the install. Click the “Create user” button.
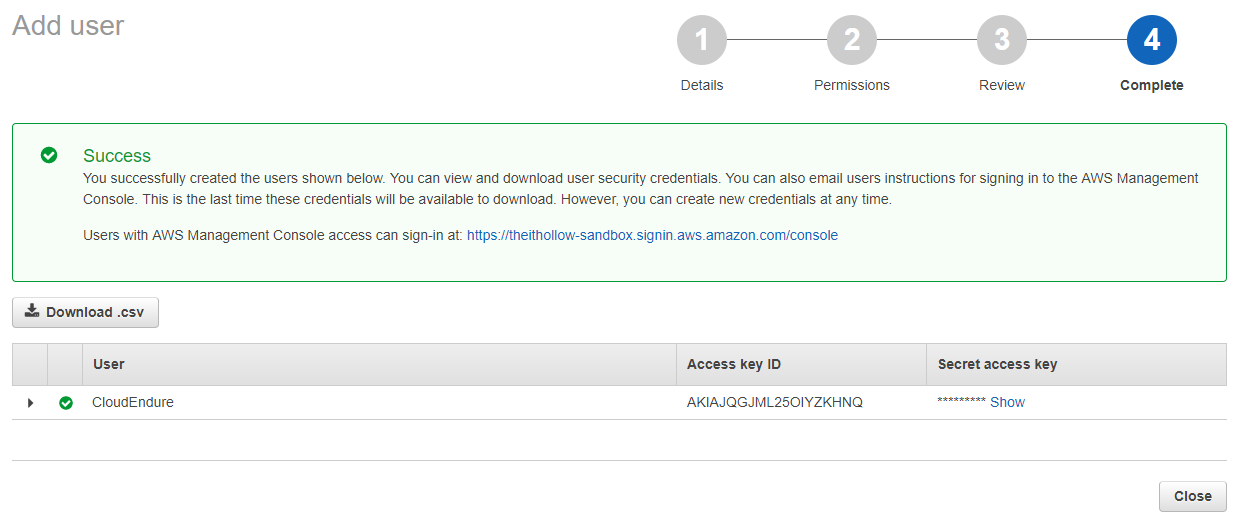
On the last screen, be sure to copy the Access key ID and Secret access key. This is the only opportunity to get the secret access key. This also provides access to the environment, so protect it. Don’t post it on your blog or something foolish. :)
Setup CloudEndure
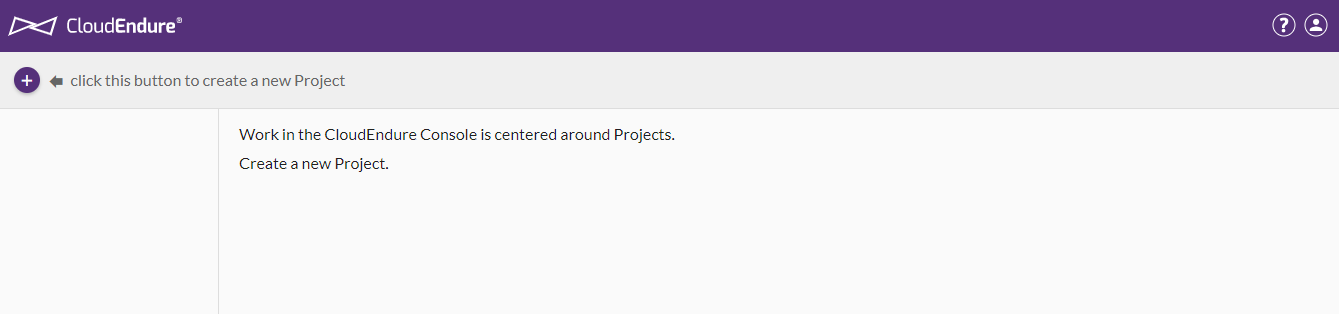
When you activate your CloudEndure license you’ll get a SaaS portal to log into. The first thing you’ll do is to create a new project. Do this by clicking the plus symbol.
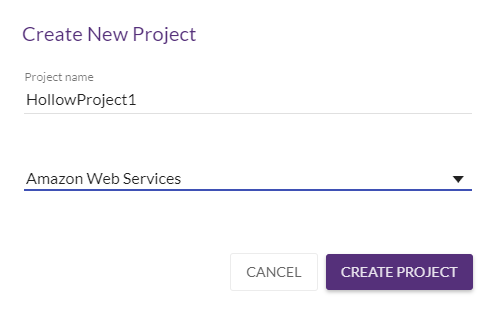
Give the project a name and then select which cloud in which you’ll be migrating. Click “Create Project”
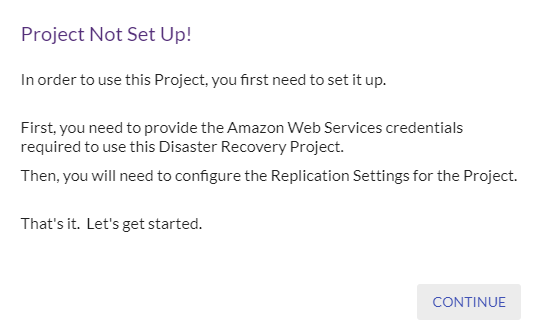
Once you create the project you’ll see a message warning you that it’s not been setup yet. Click “Continue” to get started with that.
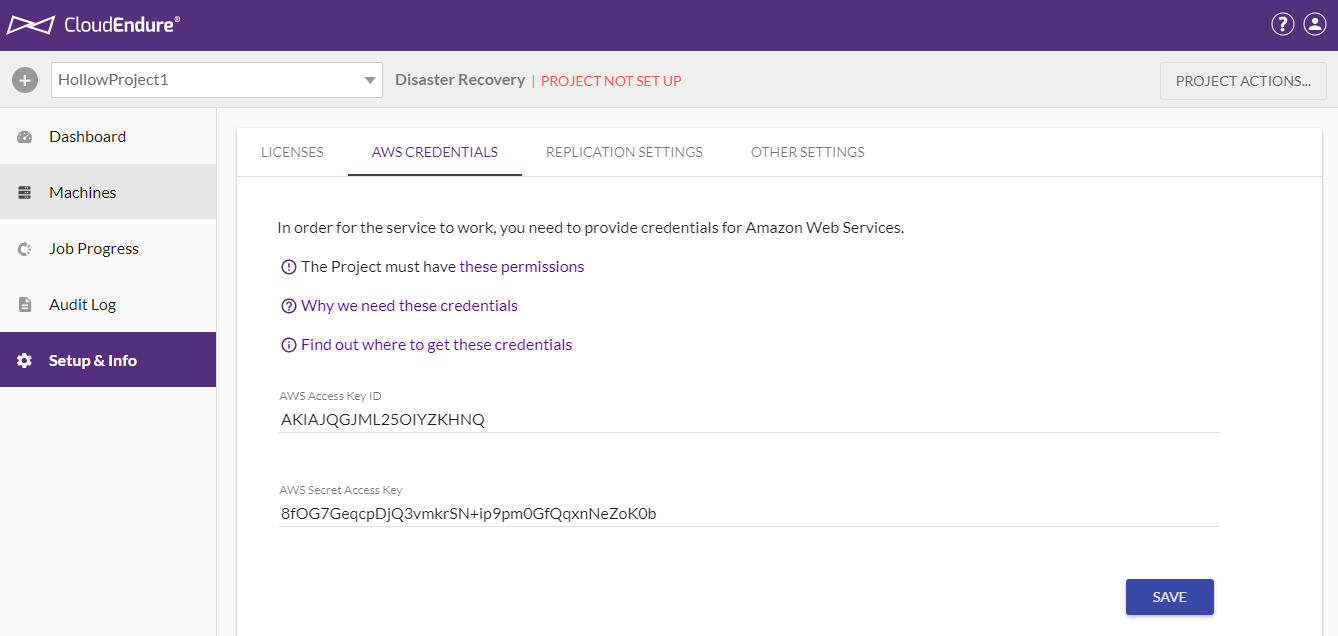
The first thing you’ll need to do in the setup window is to add the AWS Access keys which you copied from the AWS Setup section above. Paste them in here and click Save. Also notice that if you weren’t sure about how to setup the AWS permissions, there are links to the policies so you can easily retrieve them from the wizard.
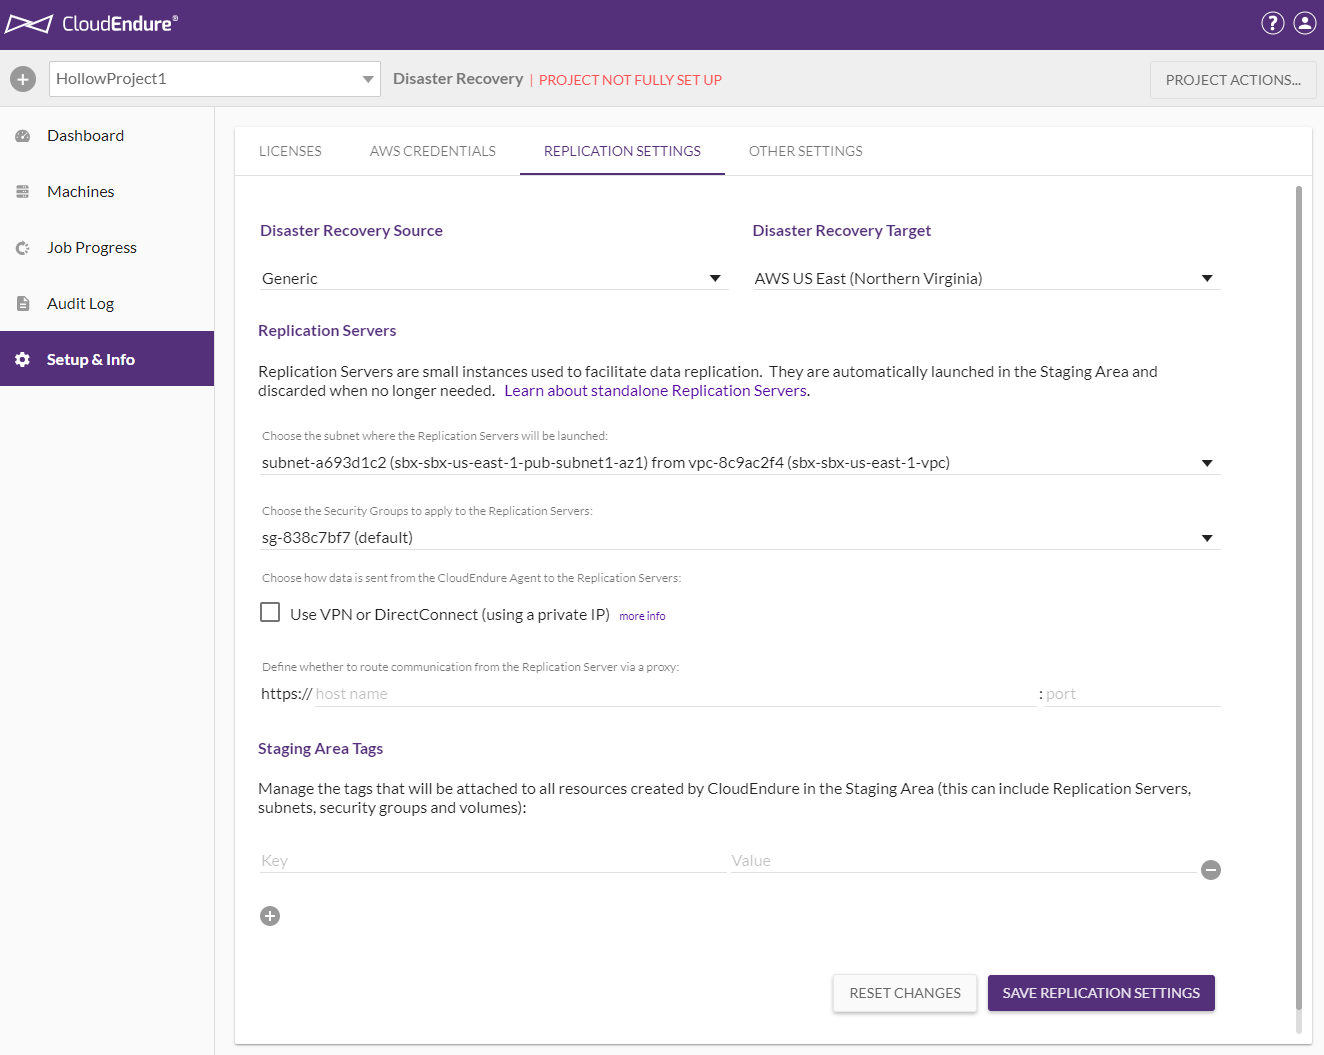
Next, you’ll need to map your replication to your environment. For instance I set my target to be the us-east-1 region of my AWS account. I also selected a subnet and a security group to apply to the instance when it fails over. You can do replication through VPN or Direct Connect, but if you’re OK with it for a test, you can use the public internet like I did. Proxy servers can also be used if you have that requirement. Once you’re done filling in some of your AWS mappings, click “Save Replication Settings” button.
You’ll see a message saying that your project is setup but you still need to install the agent on your machine. If you click the “Show Me How” button, you’ll get some more very straight forward examples of how to complete that process.
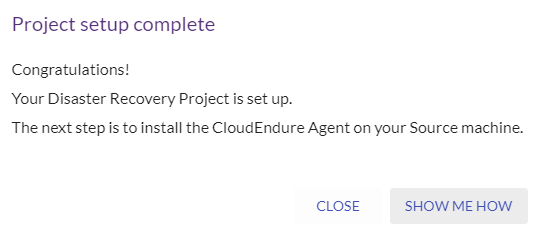
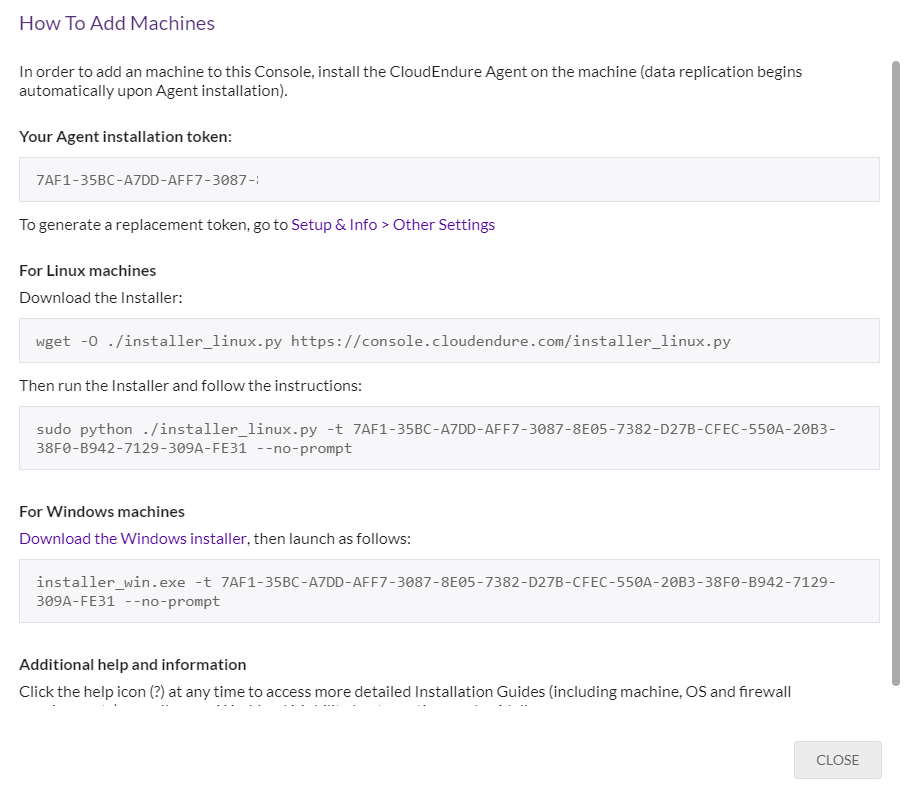
Note here the Agent Installation token and your installers for both Windows and Linux.
Replication
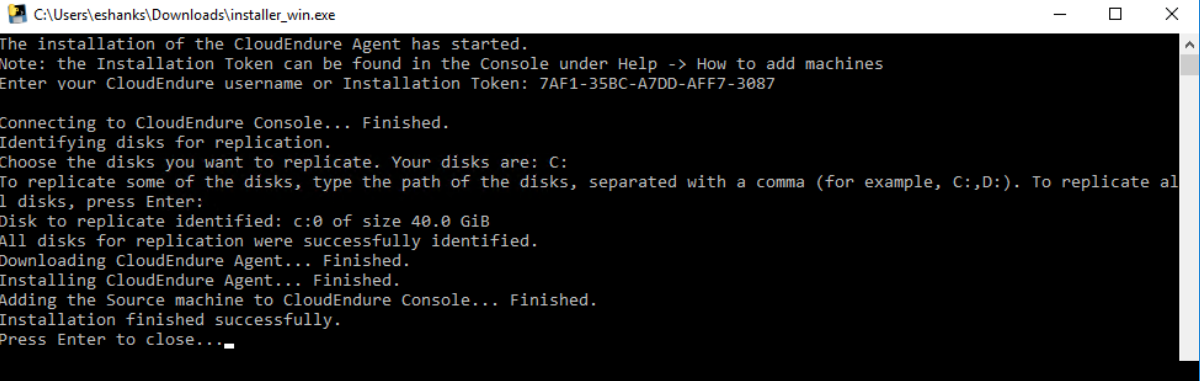
Our project is setup, and AWS is ready for us to move servers. But we need to install an agent on the machine before we start replication. This is nice because it means that it will work on physical or virtual machines migrating to the cloud. For this example, I’ve deployed a Windows Server 2016 VM in my vSphere lab. I logged into my VM and copied the installer provided in the “Show Me How” wizard.
Run the installer on your machine and you’ll be prompted with some questions. First, you’ll need to provide the CloudEndure username or token we saw before. Next you’ll need to pick with disks should be replicated. That’s it!
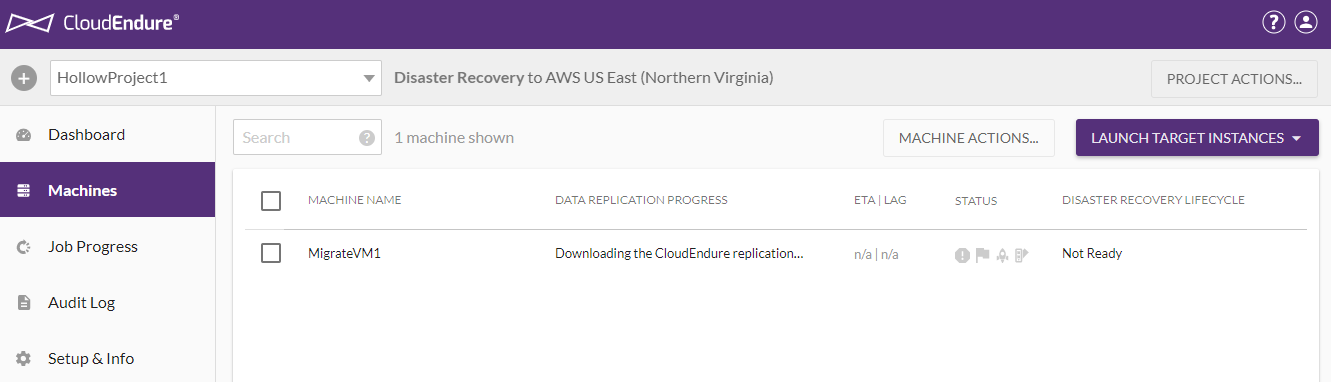
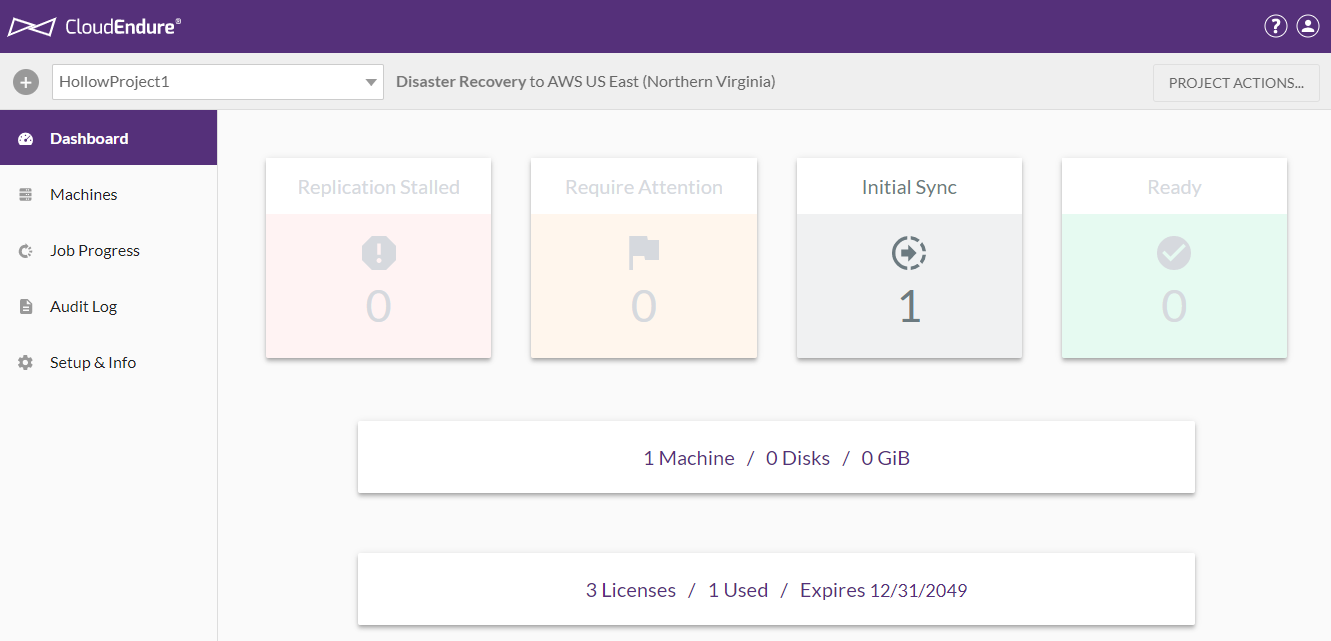
If you go back to the CloudEndure SaaS portal you’ll see your machine is now listed and that it’s replicating.
On the main dashboard, you’ll also notice the initial sync is starting on your machine and can get a glimpse of any other issues in your environment. Now you wait until the replication is complete. Depending on your WAN bandwidth, this could take some time. NOTE: At this point an EC2 instance is stood up in your AWS Account that will serve as a replication endpoint. Be aware of this because you will need to pay for this instance as part of your normal cloud costs.
Migrate
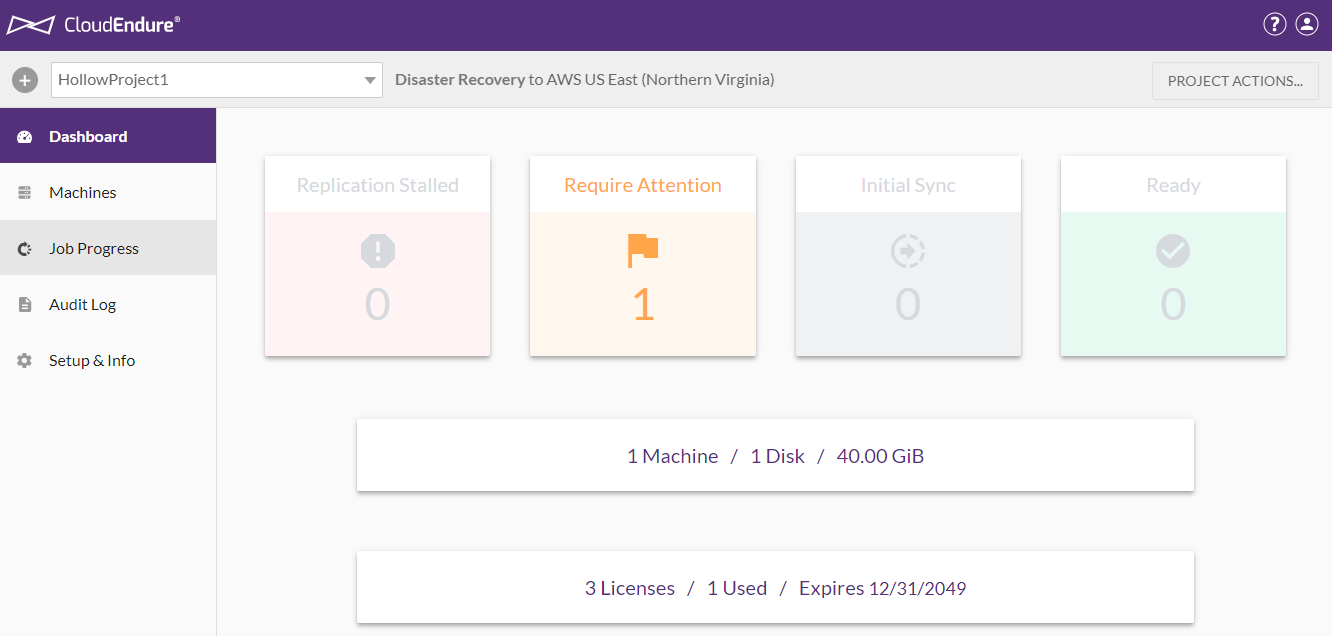
Once your machine has replicated it’s data, you should see a machine in the “Require Attention” state on the dashboard. Don’t worry, this is a good thing. Before you do an actual failover, you should test it to make sure it’ll work the way you want it to before doing the real migration.
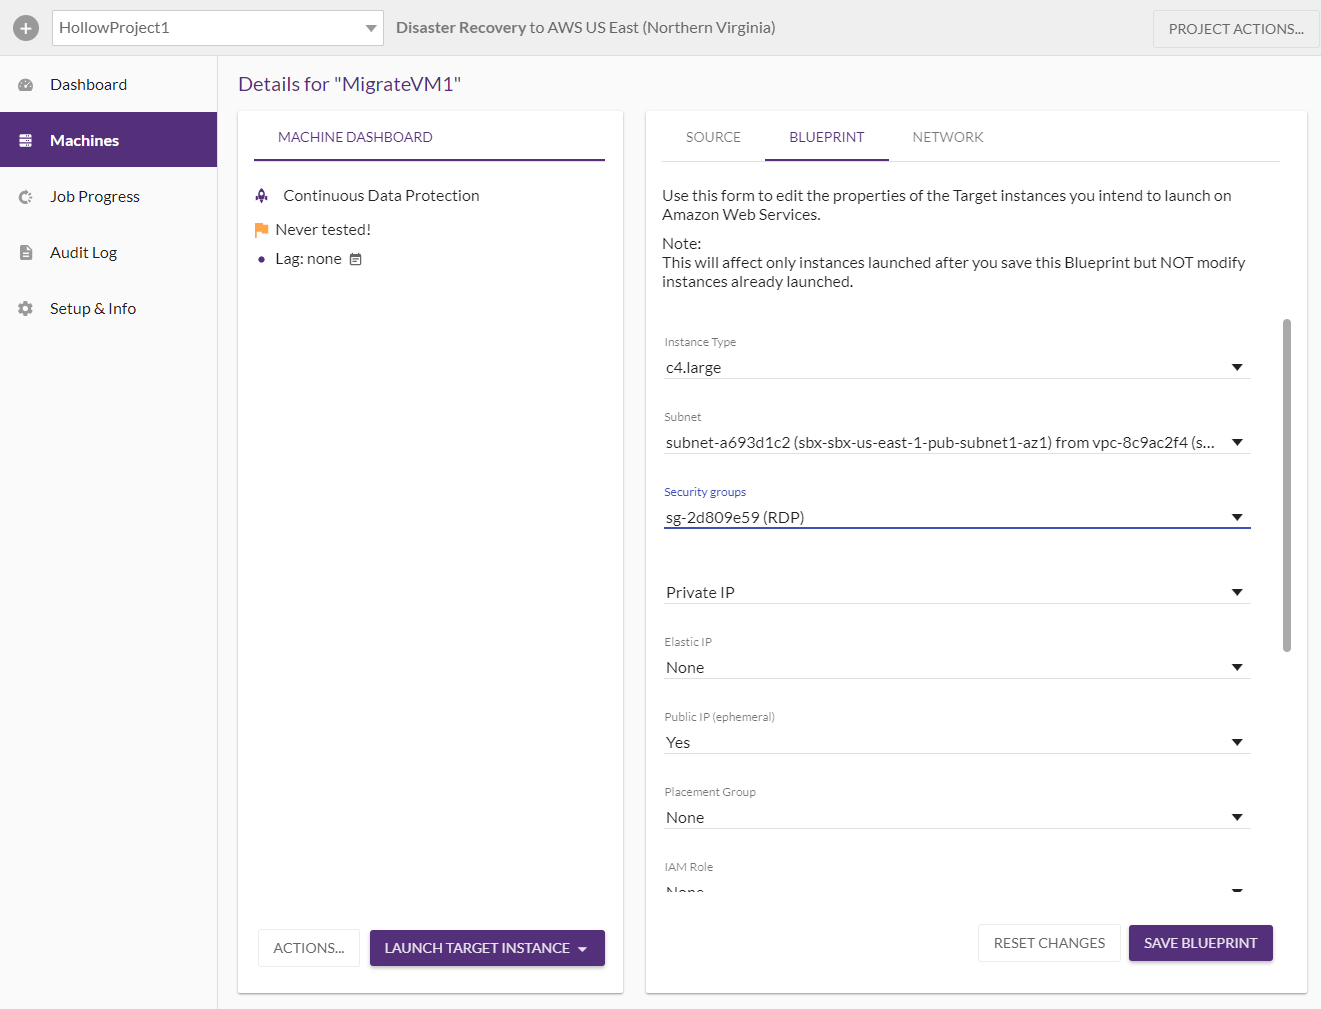
Before you migrate, it might be work looking at the Blueprint. This is where you can specify the size of the instance to use, the networks it’ll be deployed on, whether it has a public IP and so forth. You can update these settings any time as long as you do it BEFORE you do a migration of course.
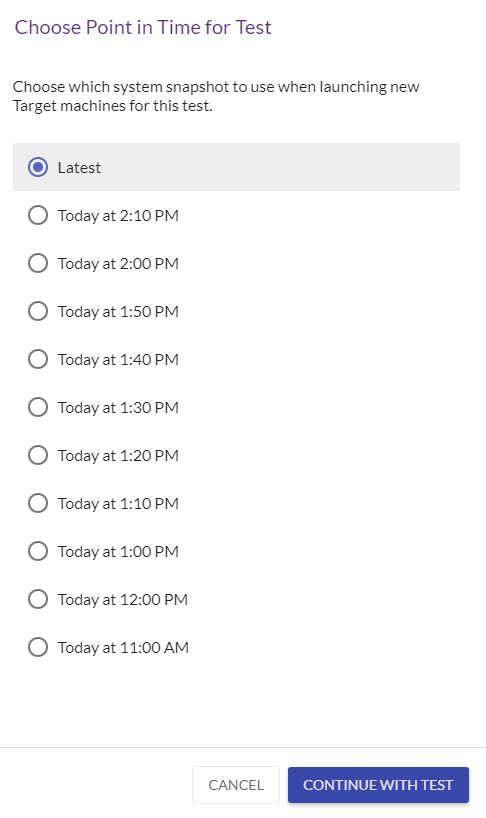
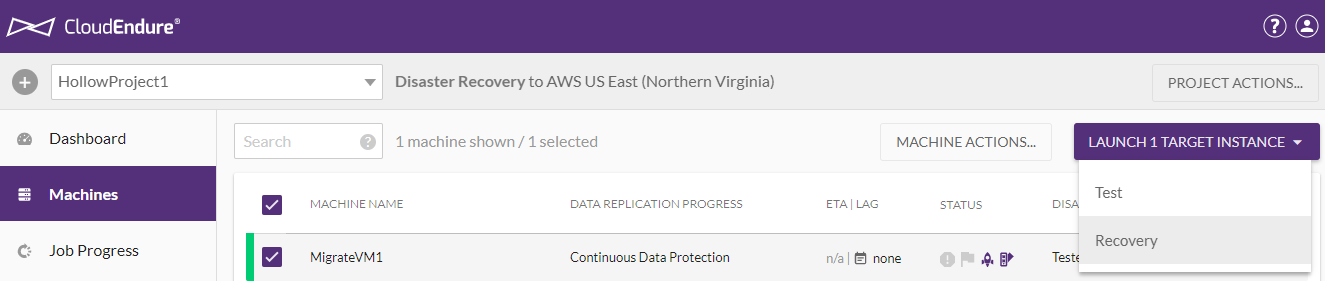
When you’re all set, it’s time to run a test failover. Go to your machines tab and click the machine you want to migrate. Click the “Launch Target Instance” button and then select “Test”. You’ll get a warning message about the process where you can click “Next”.
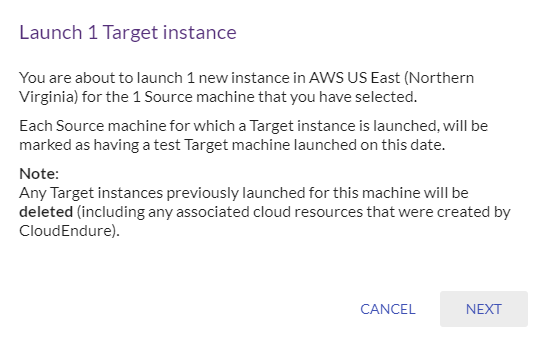
Select the point in time for your test and then select the “Continue with Test” button.
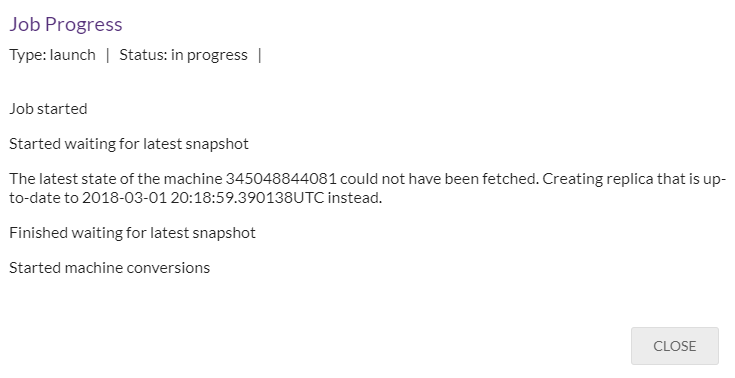
You can look at the job progress as it finishes replication and converts the data into your virtual machine. This process spins up a second EC2 instance temporarily to do the conversion.
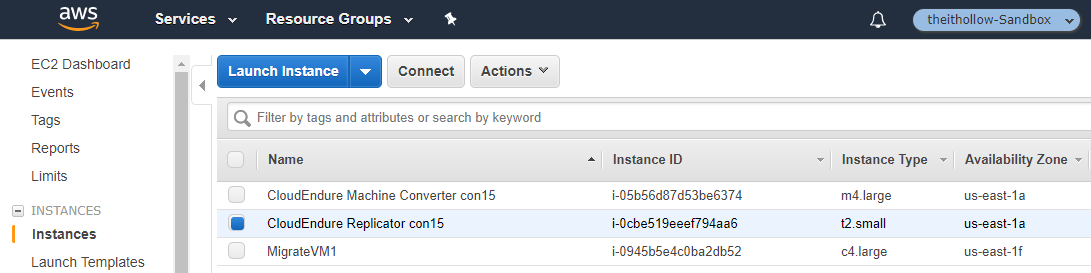
When the test is finished, you can look in your EC2 console and see 3 instances related to the process.
- Replication Instance which should still be running because it’s still handling the replication of your on prem instance.
- The converter which will terminate as the job finishes
- The migrated instance itself.
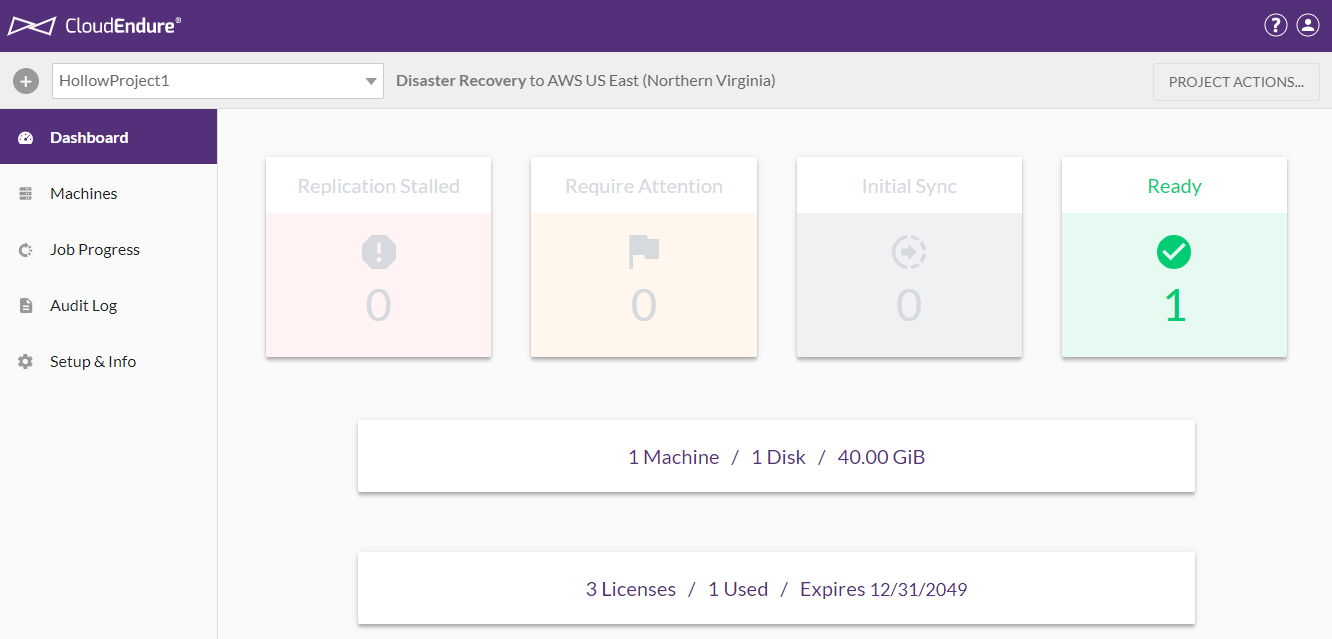
If you look back at the CloudEndure Portal, you’ll notice you have one machine ready now. It’s been tested and ready to go. During this test process, the machine is still running on-prem and undisturbed.
Now, you can destroy your test EC2 instance once you’re done with all of your testing. You’re now still replicating and ready for a failover. When you’re ready to do it, go to machines again and select the machine to failover. Select the “Launch Target Instance” button and this time select Recovery.
Repeat the same process you did for the test recovery and wait for it to complete.
Summary
Again, I’m not a big fan of migrating workloads to the cloud, simply because the architecture is different in a cloud environment. Servers built for on-premises environments might not be able to take full advantage of the cloud so it’s worth re-architecting them when possible. However, I was pretty pleased with how easy it was to setup CloudEndure’s agents and the screens really walk you through what is needed to get things up and running. It’s also nice that CloudEndure can migrate to multiple cloud providers such as Azure, AWS, GCP and even other on-premises clouds. There are a lot of things I didn’t cover about the product in this post like failing back, etc but if you’re thinking of migrating workloads, it’s worth taking a look at CloudEndure for your project.