Just because you’ve started moving workloads into the cloud, doesn’t mean you can forget about Microsoft Active Directory. Many customers simply stand up their own domain controllers on EC2 instances to provide domain services. But if you’re moving to AWS there are also some great services you can take advantage of, to provide similar functionality. This post focuses on Microsoft AD which is a Server 20012 R2 based domain that provides a pair of domain controllers across Availability Zones and also handles DNS. This service is the closest service to a full blow Active Directory that you’d host on premises. You can even create a trust between the Microsoft AD deployed in AWS and your on-prem domain. You cannot extend your on-premises domain into Microsoft AD at the time of this writing though. If you wish to extend your existing domain, you should consider building your own DCs on EC2 instances and then you have full control over your options.
Microsoft AD gives you a great way to quickly stand up new domains and cut down on the things you need to manage such as OS patches, etc but you will have to put up with some limitations for this ease of use. For example, right now it’s only Server 2012 R2 domain functional level, so if you’re already at Server 2016 in your existing domain, you’ll have to use a downgraded version in AWS if you chose this solution.
Deploy
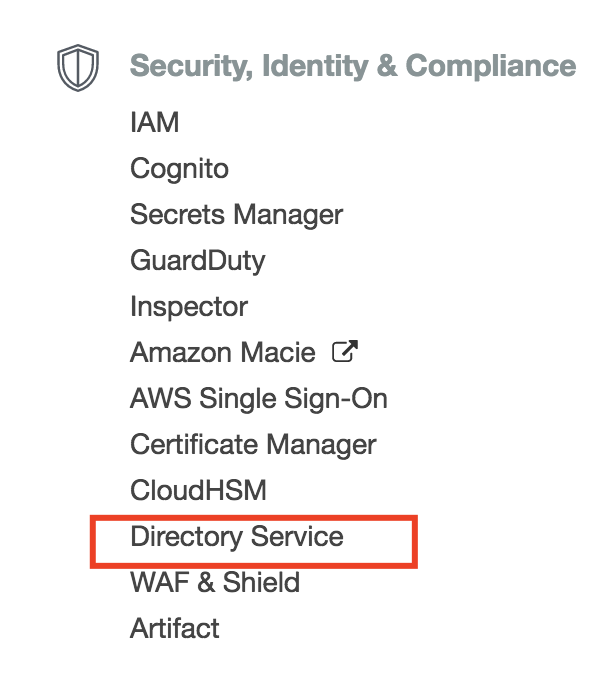
To deploy Microsoft AD within your existing AWS VPCs, go to the Directory Service from the services menu.
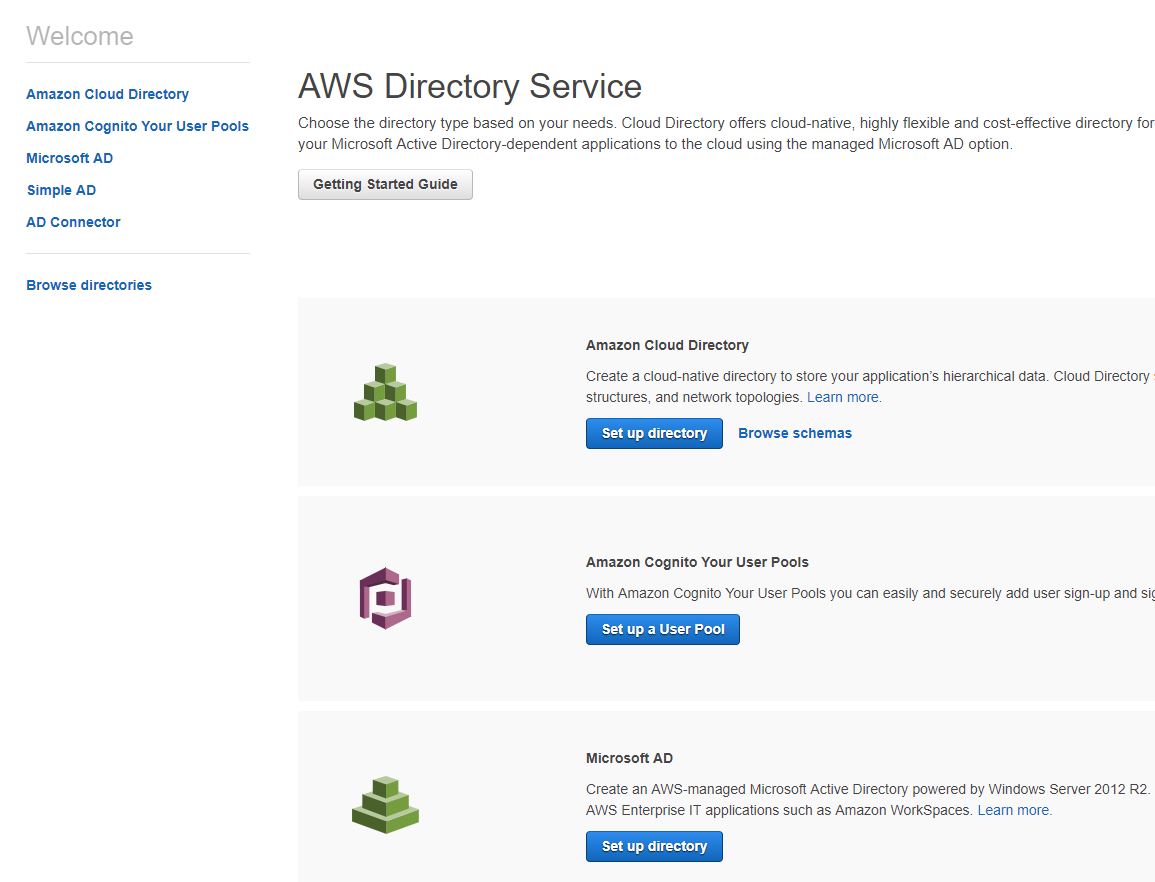
When the Directory Service page opens up you’ll see several options available to you, but here we’ll stick with Microsoft AD. Location Microsoft AD and click the “Set up directory” button.
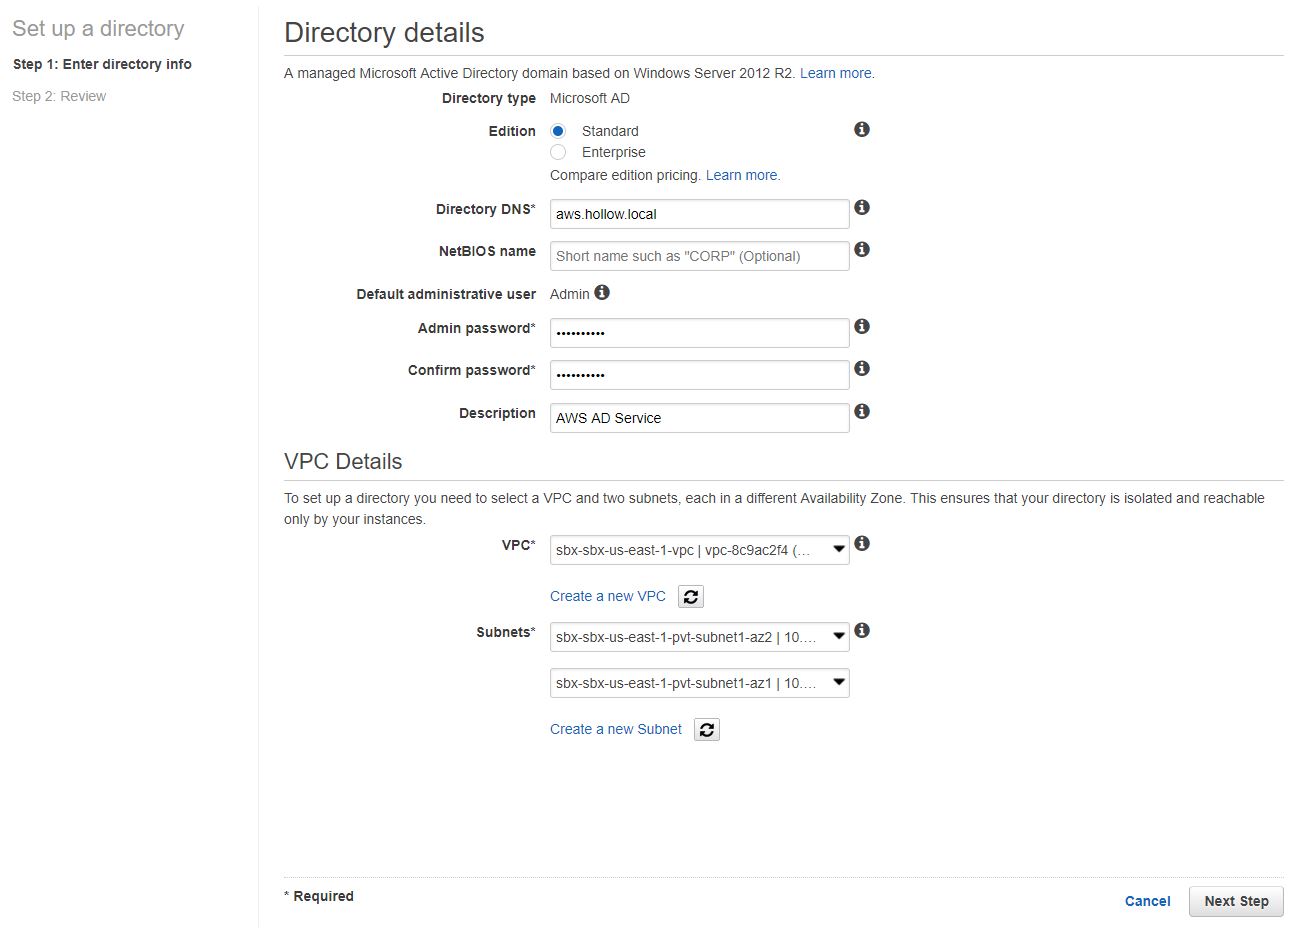
To setup a new directory, first pick an edition. This decision comes down to how big your directory will be. If you need to support more than 5,000 employees or 30,000 managed objects, then you should pick Enterprise (and you’ll pay more for it) but otherwise Standard should be sufficient.
After this, enter a Directory DNS. This is a FQDN for your environment. I use “hollow.local” for my on-prem domain so I like to use something like aws.hollow.local for my cloud environment. You can optionally provide a NetBIOS name if necessary.
Next, enter an administrator password. This will be your domain admin password and you’ll need this later to configure the infrastructure.
Lastly, select the VPC that a pair of domain controllers will be deployed in, and then select which subnets they should live in. Private subnets make a good location for this as most people I know don’t allow access to their domain controllers from over the Internet. Click the “Next” button.
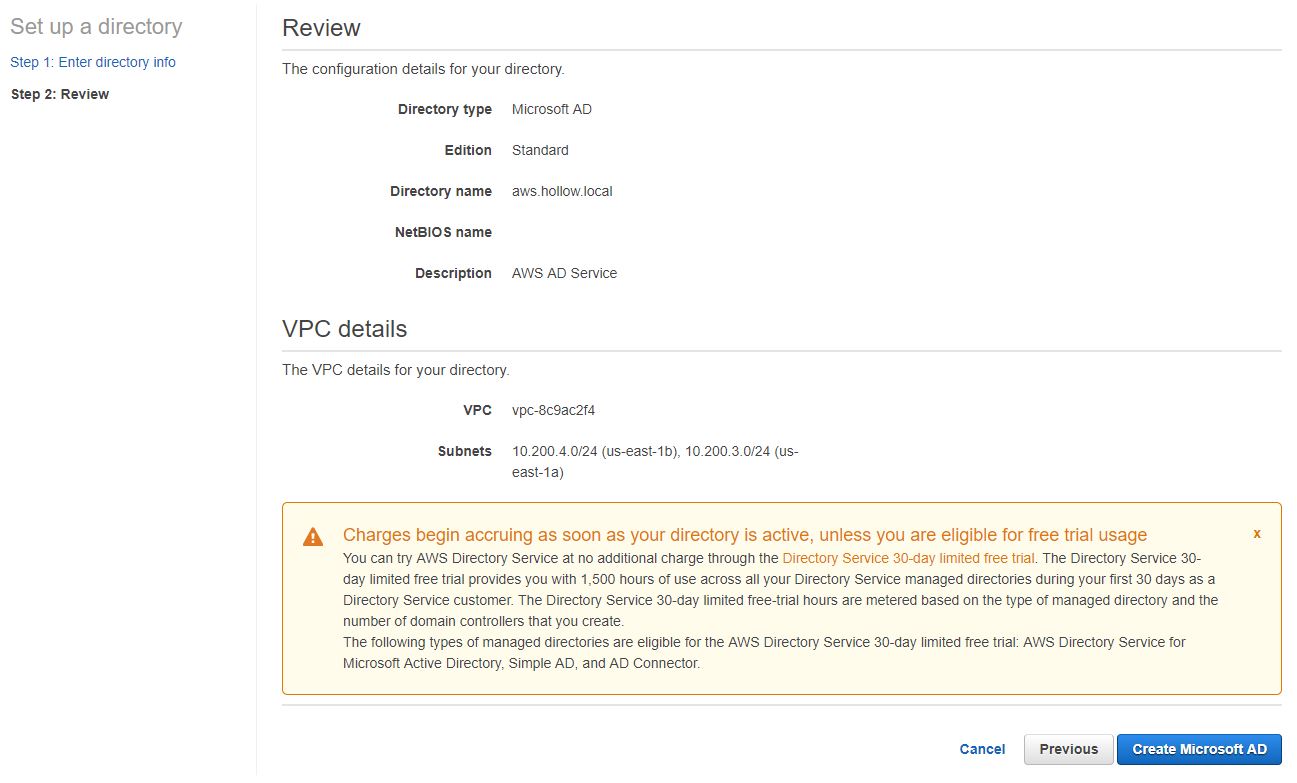
The next screen shows you a review before you deploy. If it looks good, click the “Create Microsoft AD” button for the magic to happen in the background.
If you aren’t all about deploying this through the console, Microsoft AD can be deployed through CloudFormation so you can have even more Infrastructure as Code (IaC). Here is a quick snippet for doing the steps above through a CloudFormation Template in JSON format.
{
"AWSTemplateFormatVersion" : "2010-09-09",
"Description": "Microsoft Directory Service",

    "Parameters" : {

        "MicrosoftADPW" : {
          "Type": "String"
        },

        "subnetID1": {
            "Description": "Subnet ID to provision instance in",
            "Type": "AWS::EC2::Subnet::Id",
            "Default": ""
        },

        "subnetID2": {
            "Description": "Subnet ID to provision instance in",
            "Type": "AWS::EC2::Subnet::Id",
            "Default": ""
        },

        "VPC": {
            "Description": "The VPC to deploy resources into",
            "Type": "AWS::EC2::VPC::Id",
            "Default": ""
        },

        "DirectoryName" : {
            "Description" : "Unique Name for Directory",
            "Type": "String"
        }

    },

    "Resources": {
        "myDirectory" : {
          "Type" : "AWS::DirectoryService::MicrosoftAD",
          "Properties" : {
            "Name" : { "Ref" : "DirectoryName"},
            "Password" : { "Ref" : "MicrosoftADPW" },
            "VpcSettings" : {
              "SubnetIds" : [ { "Ref" : "subnetID1" }, { "Ref" : "subnetID2" } ],
              "VpcId" : { "Ref" : "VPC" }
            }
          }
        }
    }
}
Whichever deployment method you choose, it will take a bit to deploy but when done you’ll see a new directory listed in your portal. Select the directory that was created and you’ll see some information needed for the rest of this post. Specifically, you’ll want to take note of the DNS Address listed in the details page for the following section.

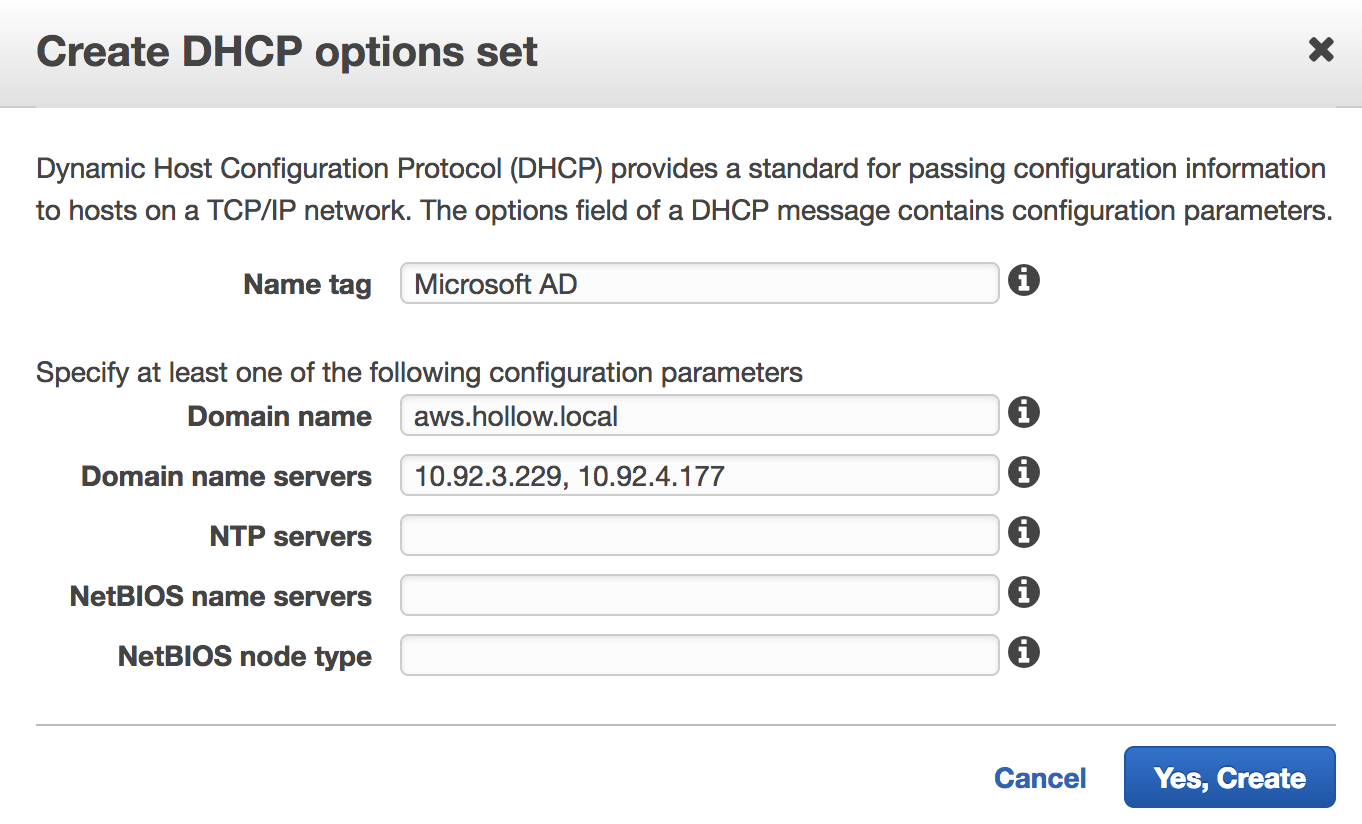
Modify DHCP Option Sets
You’ve deployed your domain controllers, but your clients will need to be reconfigured to use these two domain controllers for their DNS resolution. To provide this for the entire VPC, we’ll want to create a new DHCP Option Set and assign it to the VPC or VPCs that will use these Domain Controllers. Go to your VPC menu in the console and find the DHCP Options Set link. Create a new option set with the Domain name and DNS servers from your new Microsoft AD servers that we just created.
Once you’ve created the options set you’ll need to associate it with your VPC(s) so that new addresses are handed out with the appropriate settings. NOTE: You can only have one DHCP option set associated with at VPC at a time. To assign the new Option Set, select the VPC from the VPC mentu and click the actions button, then select the Edit DHCP Options Set link. You’ll then have a drop down to select your preferred option set.
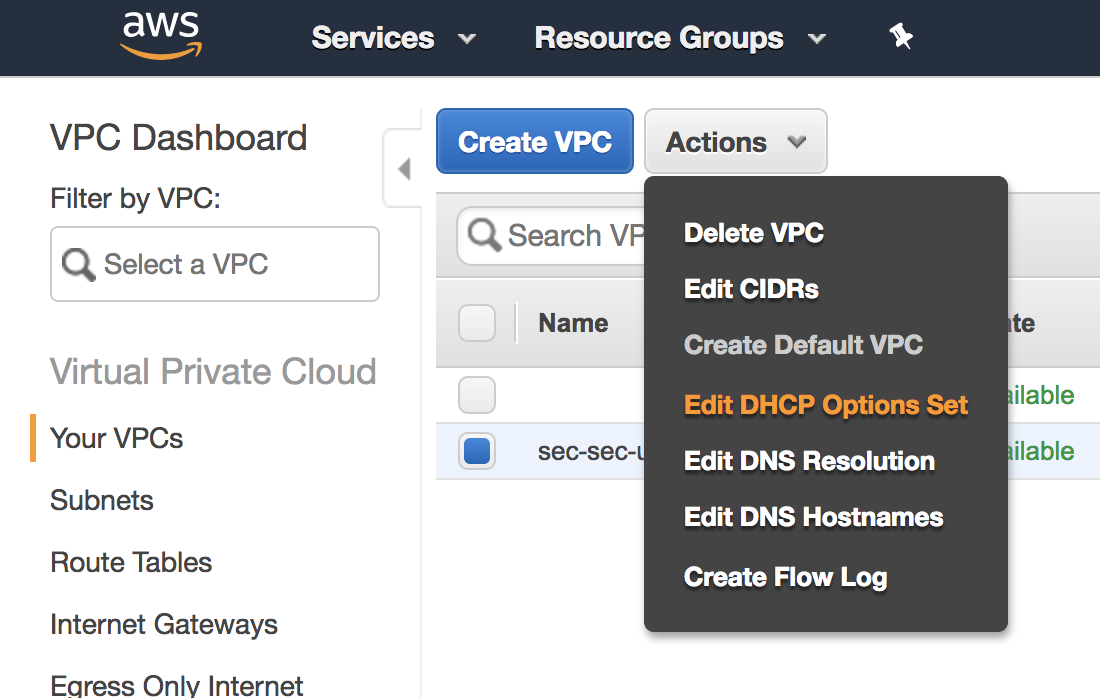
As you can see my options set is applied to my VPC now.

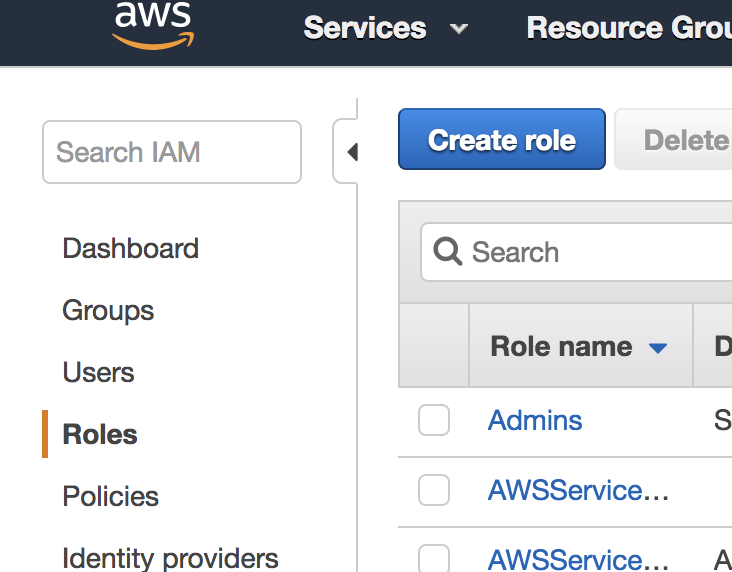
Configure Roles
Before we start deploying member servers, we’ll need to create a role in the IAM console. This role will allow Simple Systems Manager (SSM or Systems Manager for short) the permission to join new EC2 instances to the new domain. To create this role, go to the IAM console and click on Roles. Click the “Create role” button.
When the create role window opens up select “AWS service” and then select EC2 under the service that will use the role. Click the “Next:permissions” button to continue.
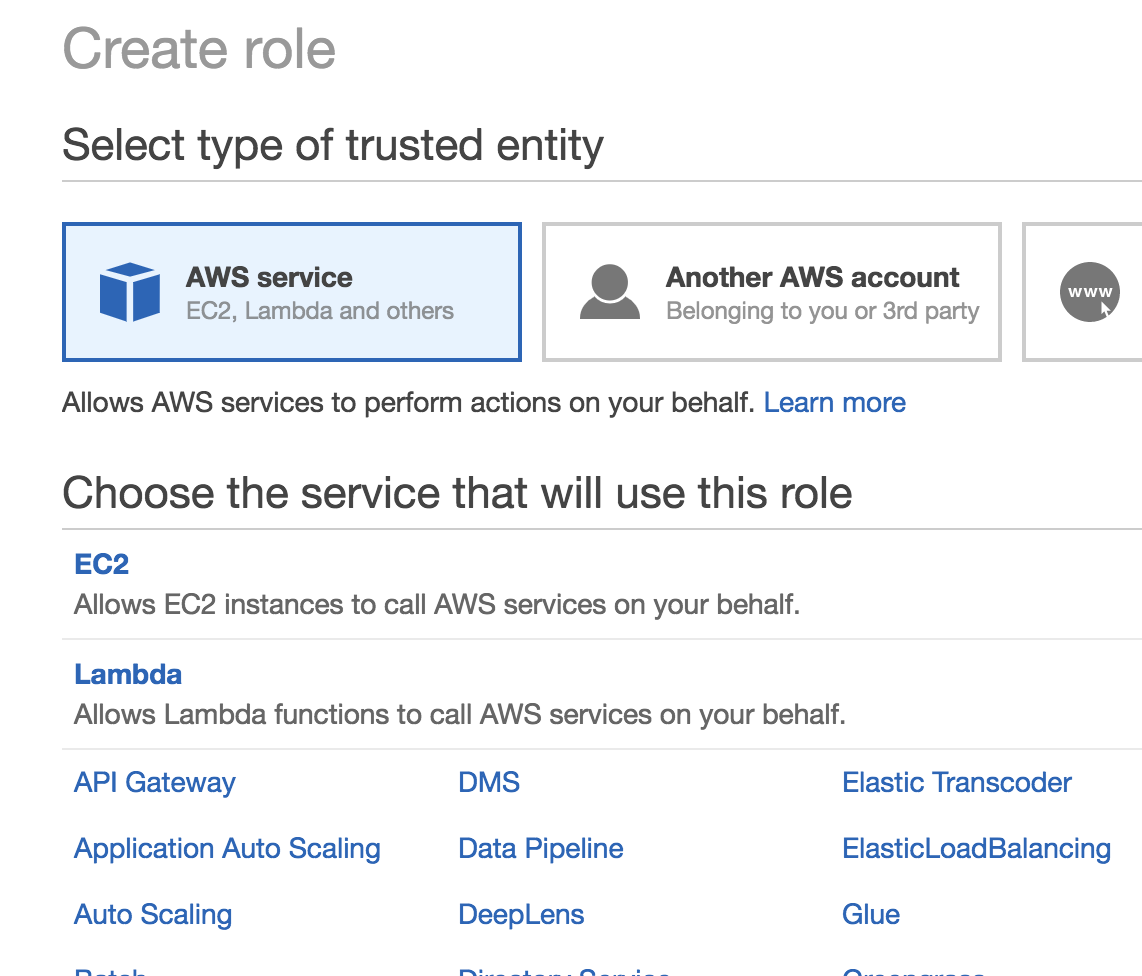
In the permissions screen search for AmazonEC2RoleforSSM and select it. Click the “Next:Review” button.
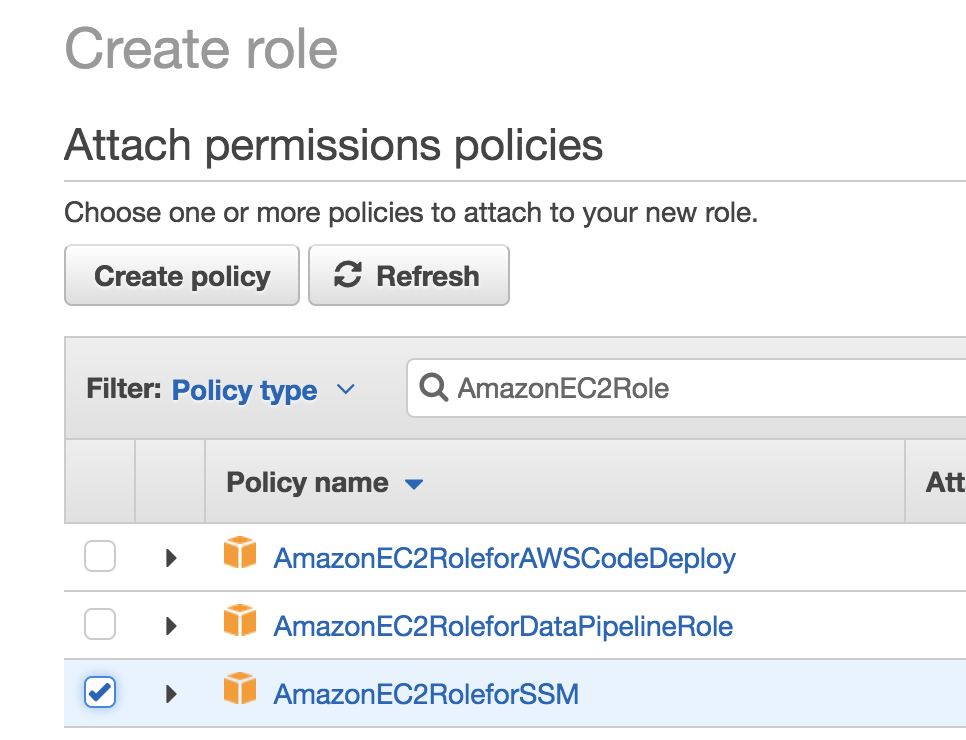
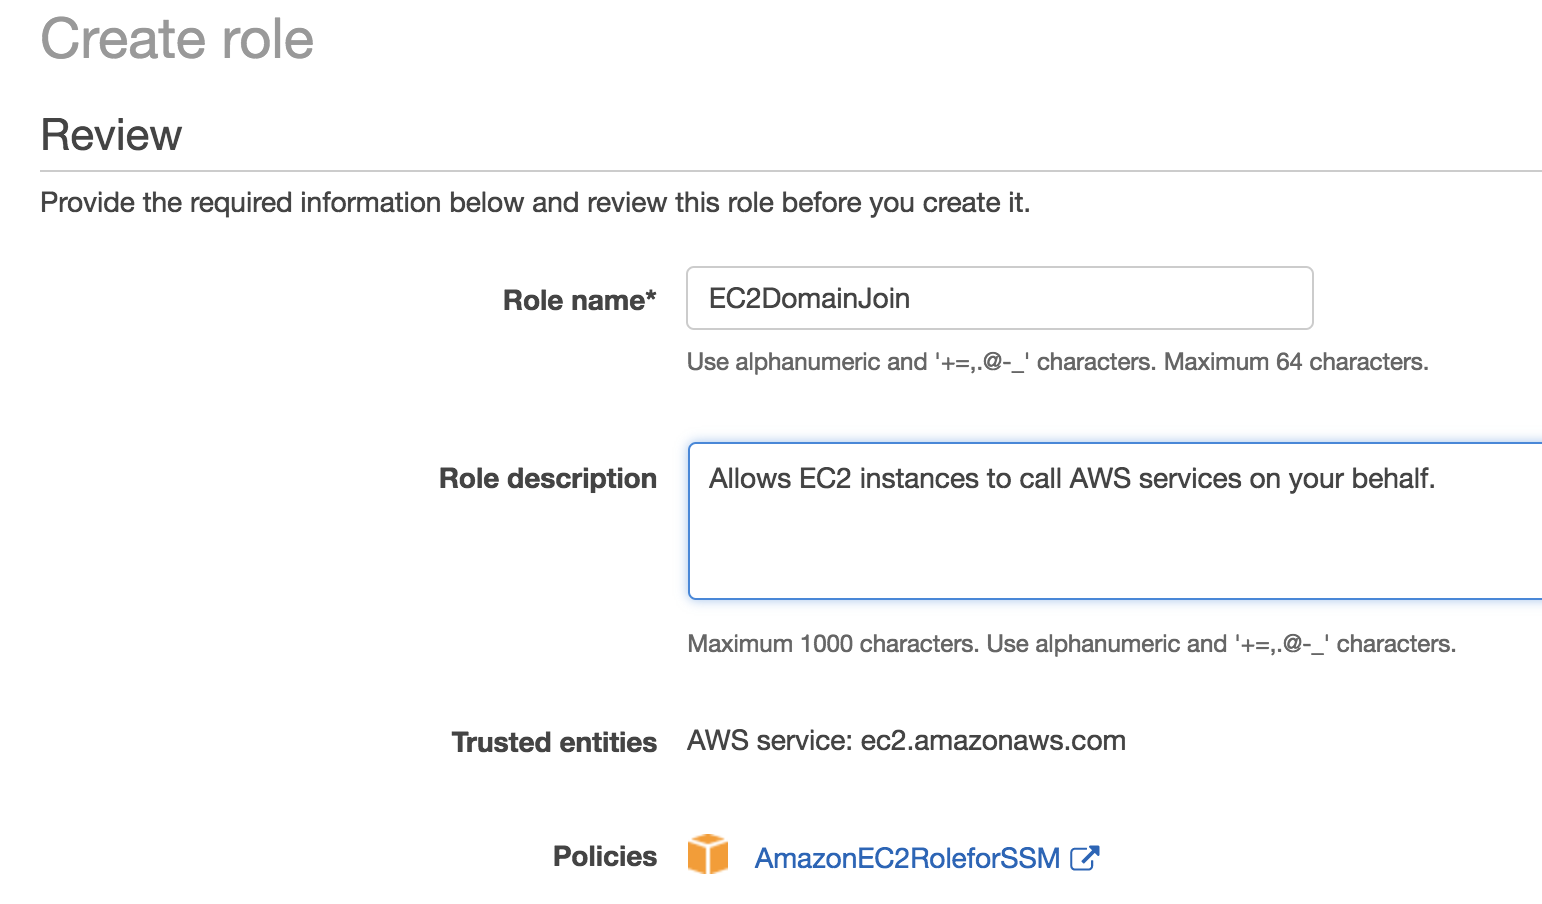
Review the screen and give the role a name before click the “Create role” button.
Configure Management Hosts
You’re ready to go, but there isn’t an interface within the AWS console for you to create new users, groups etc like you normally would with Active Directory. This is a normal AD setup though so to manage our AD infrastructure we need to deploy a member server and then install our AD tools on it. So first, lets install a new member server that is joined to our new domain.
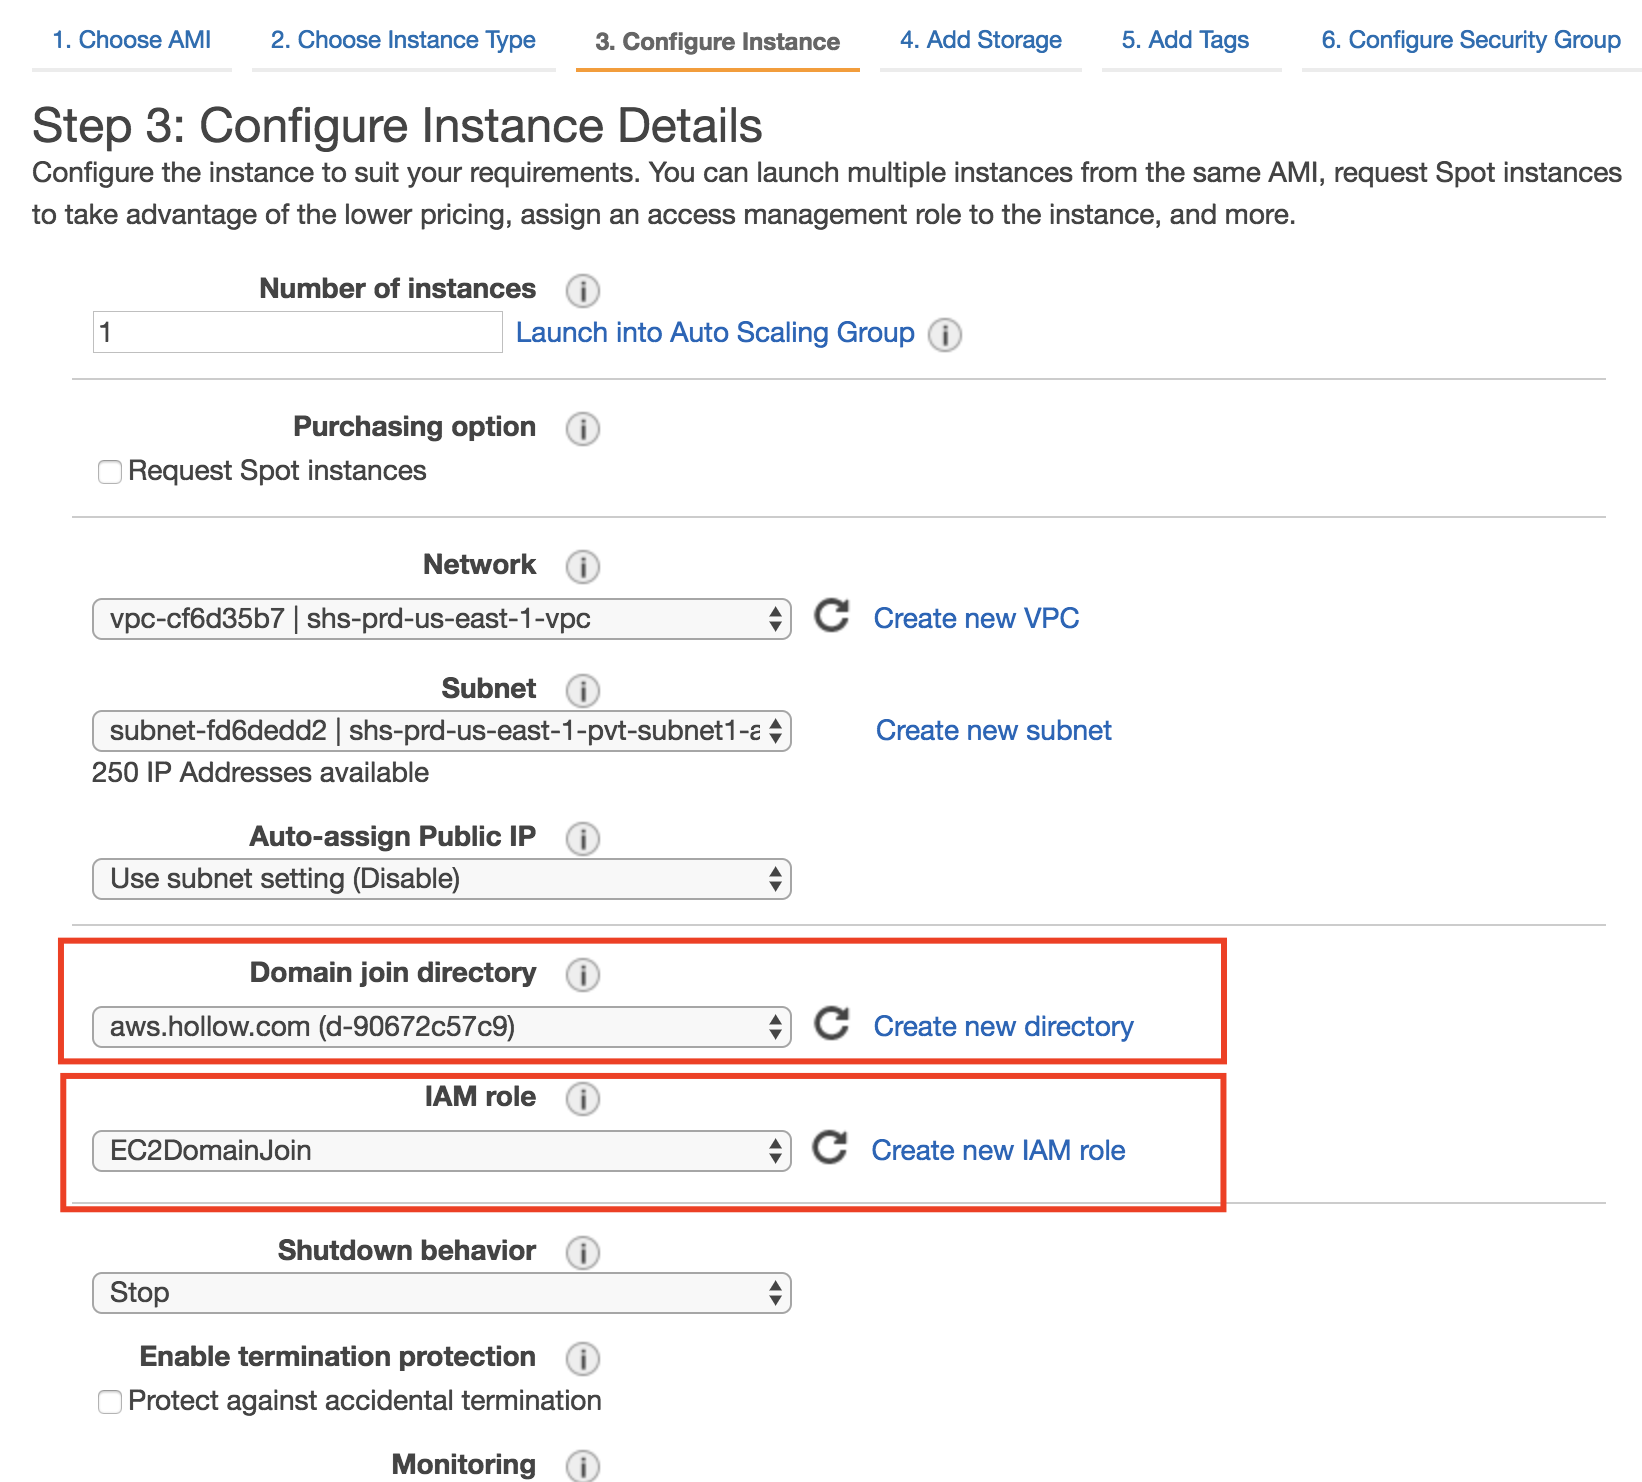
Deploy a new EC2 instance with a Windows server 2016 operating system on it as you normally would. But take notice that the console has a pair of subtle changes that need to be set as we deploy. In step 3 - Configure Instance, you’ll see that we need to select the “Domain join directory” setting which should show as our new domain. Also, in the IAM role we need to select the role we created in the previous section. This is critical so that the machine can be joined to the domain as its deployed. Finish deploying your server.
Once the server has been deployed, it will restart to join the domain so wait a bit before trying to login to it. When its finished being deployed, connect to the instance over Remote Desktop and login with a domain user account. Up to this point the only user that has been created is “Admin” and the password you specified. Login to the member server and install the domain controller tools. The command below should install everything you need if you run it from a PowerShell console.
Install-WindowsFeature -Name GPMC,RSAT-AD-PowerShell,RSAT-AD-AdminCenter,RSAT-ADDS-Tools,RSAT-DNS-Server
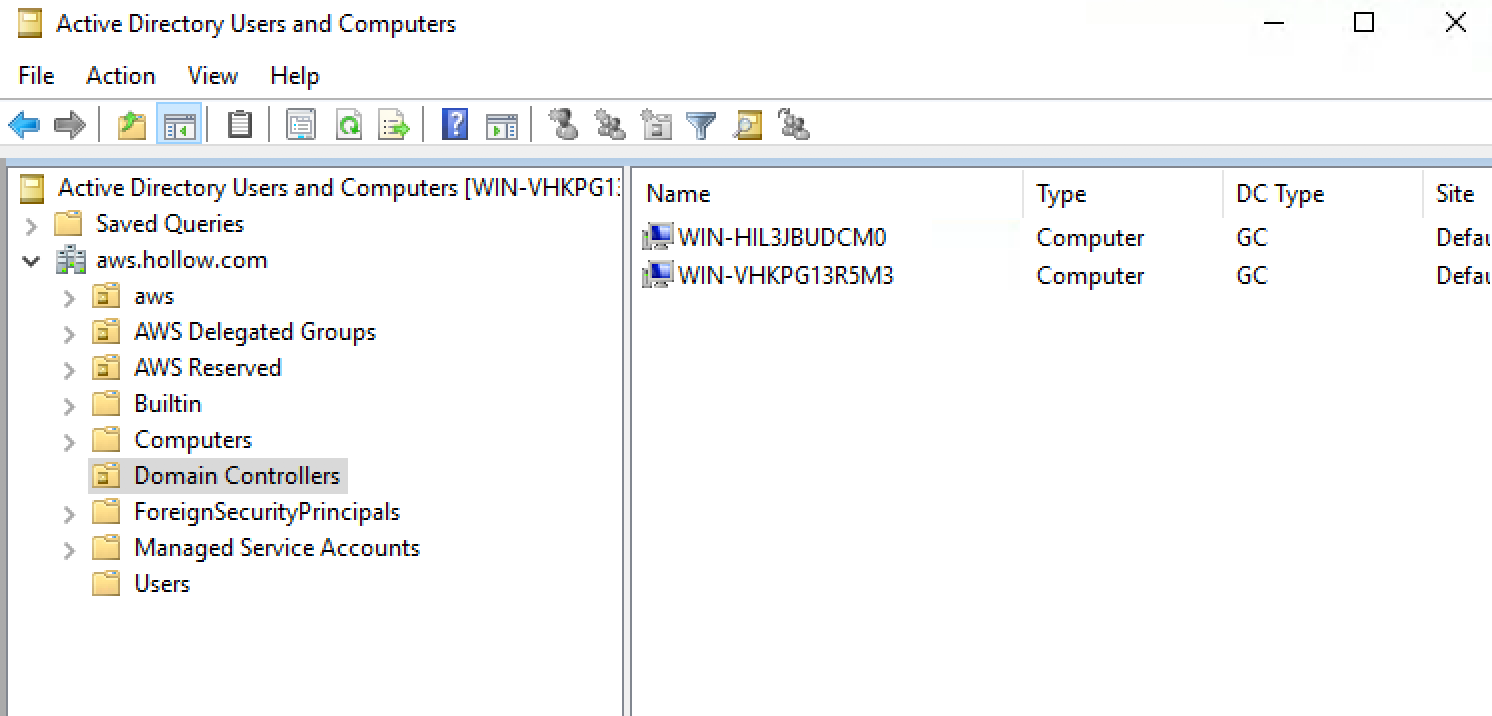
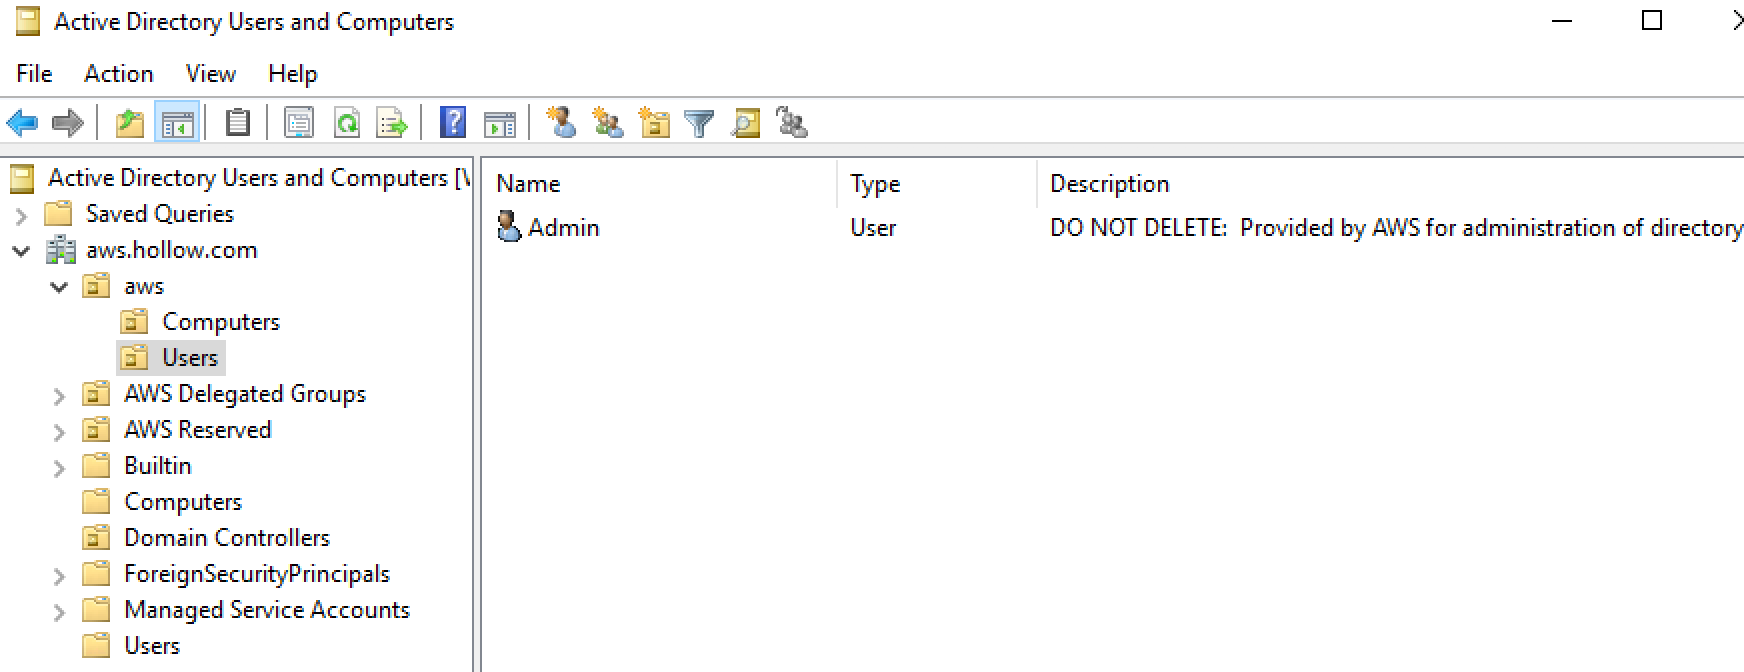
After the tools are installed, you’ll see your Active Directory tools like you’re accustomed to seeing. If you look in Active Directory Users and Computers (ADUC) you’ll notice some interesting things. Under the Domain Controllers Folder, two DCs will be listed and are Global Catalog. These are the two DCs deployed for you through the AWS service.
If you look further, you’ll see an aws folder which as Computers and Users in it. You’ll see your Admin account listed here with a note to not delete it.
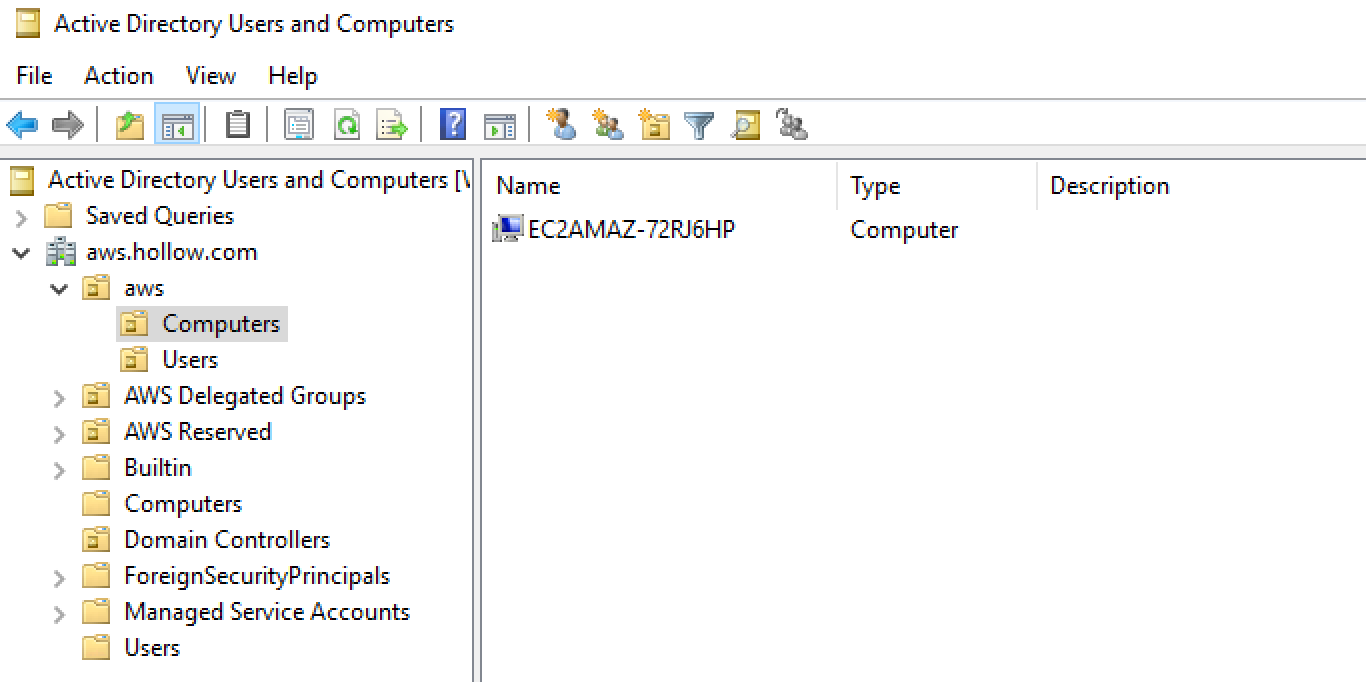
Also, if you look in your Computers folder under aws, your member server will be listed.
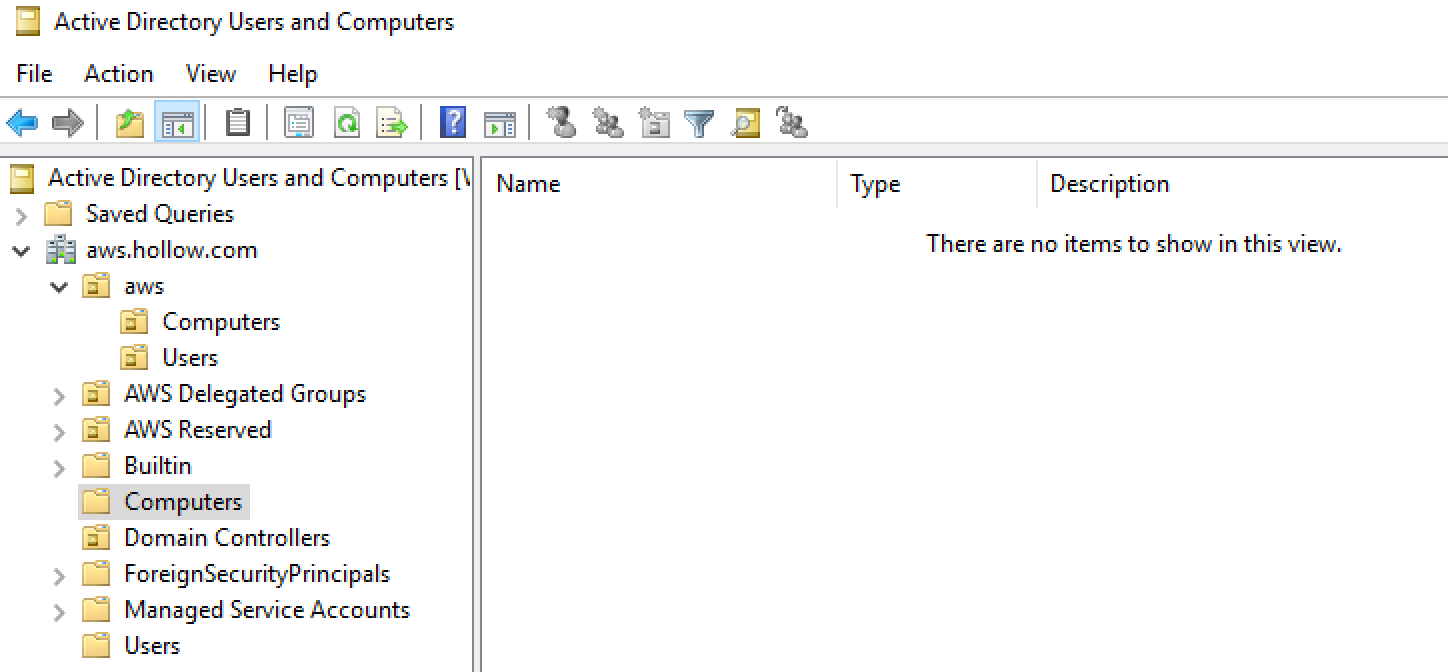
Generally, the default folder named “Computers” under the root is where member servers are listed, but this is not the case for the Microsoft AD service.
Use Microsoft AD to Authenticate to the AWS Management Console
You can use Microsoft AD to do more things in AWS such as use your new domain to authenticate to the console. This limits the number of IAM users needed to be crated in the AWS console and hopefully helps to protect the environment even further.
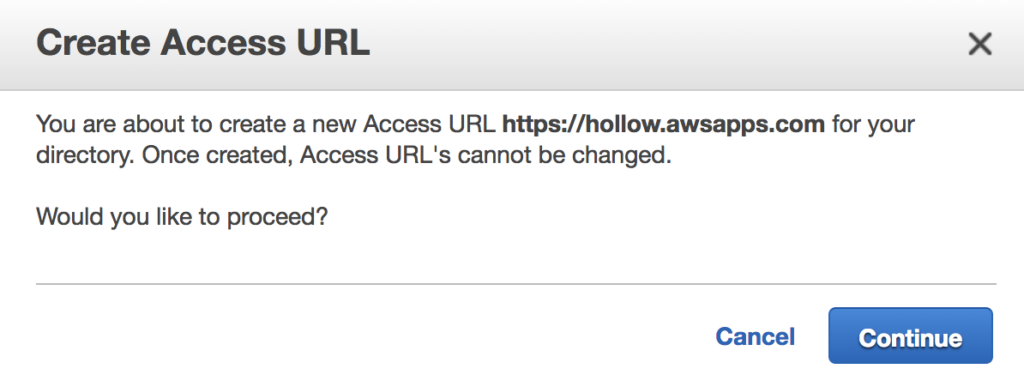
First, we create an endpoint so that the AWS services can access the new directory. Enter a name for the endpoint and click the “Create Access URL”.
Click Continue to proceed with creating an endpoint. Note that you can’t change it later. Click Continue.
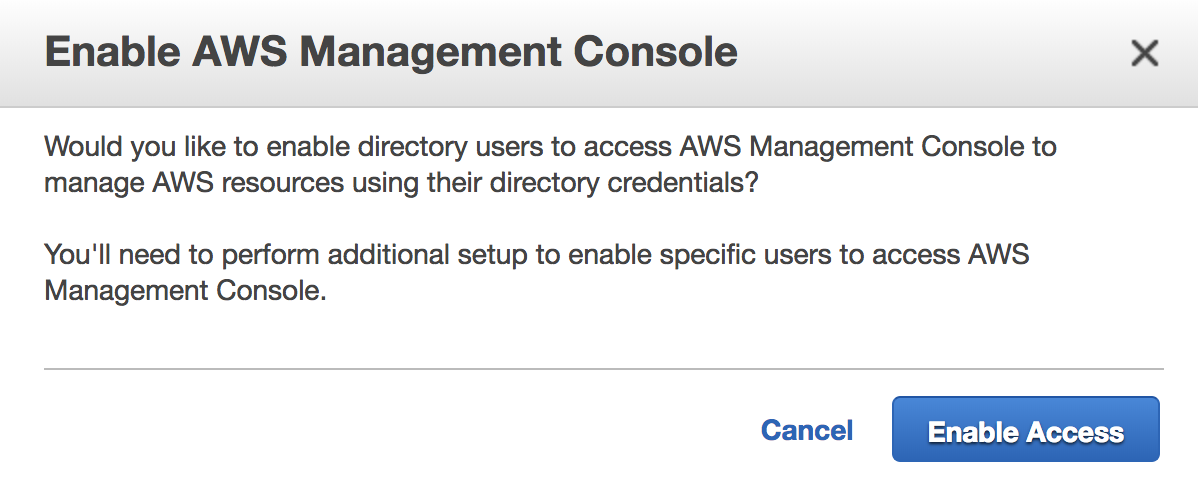
There are other services integrated with Microsoft AD but for this example, we’ll just use the Management Console. Navigate back to your directory service details and look towards the bottom of the screen under AWS apps & services. Click the AWS Management Console. When the new window opens click the “Enable Access” button.
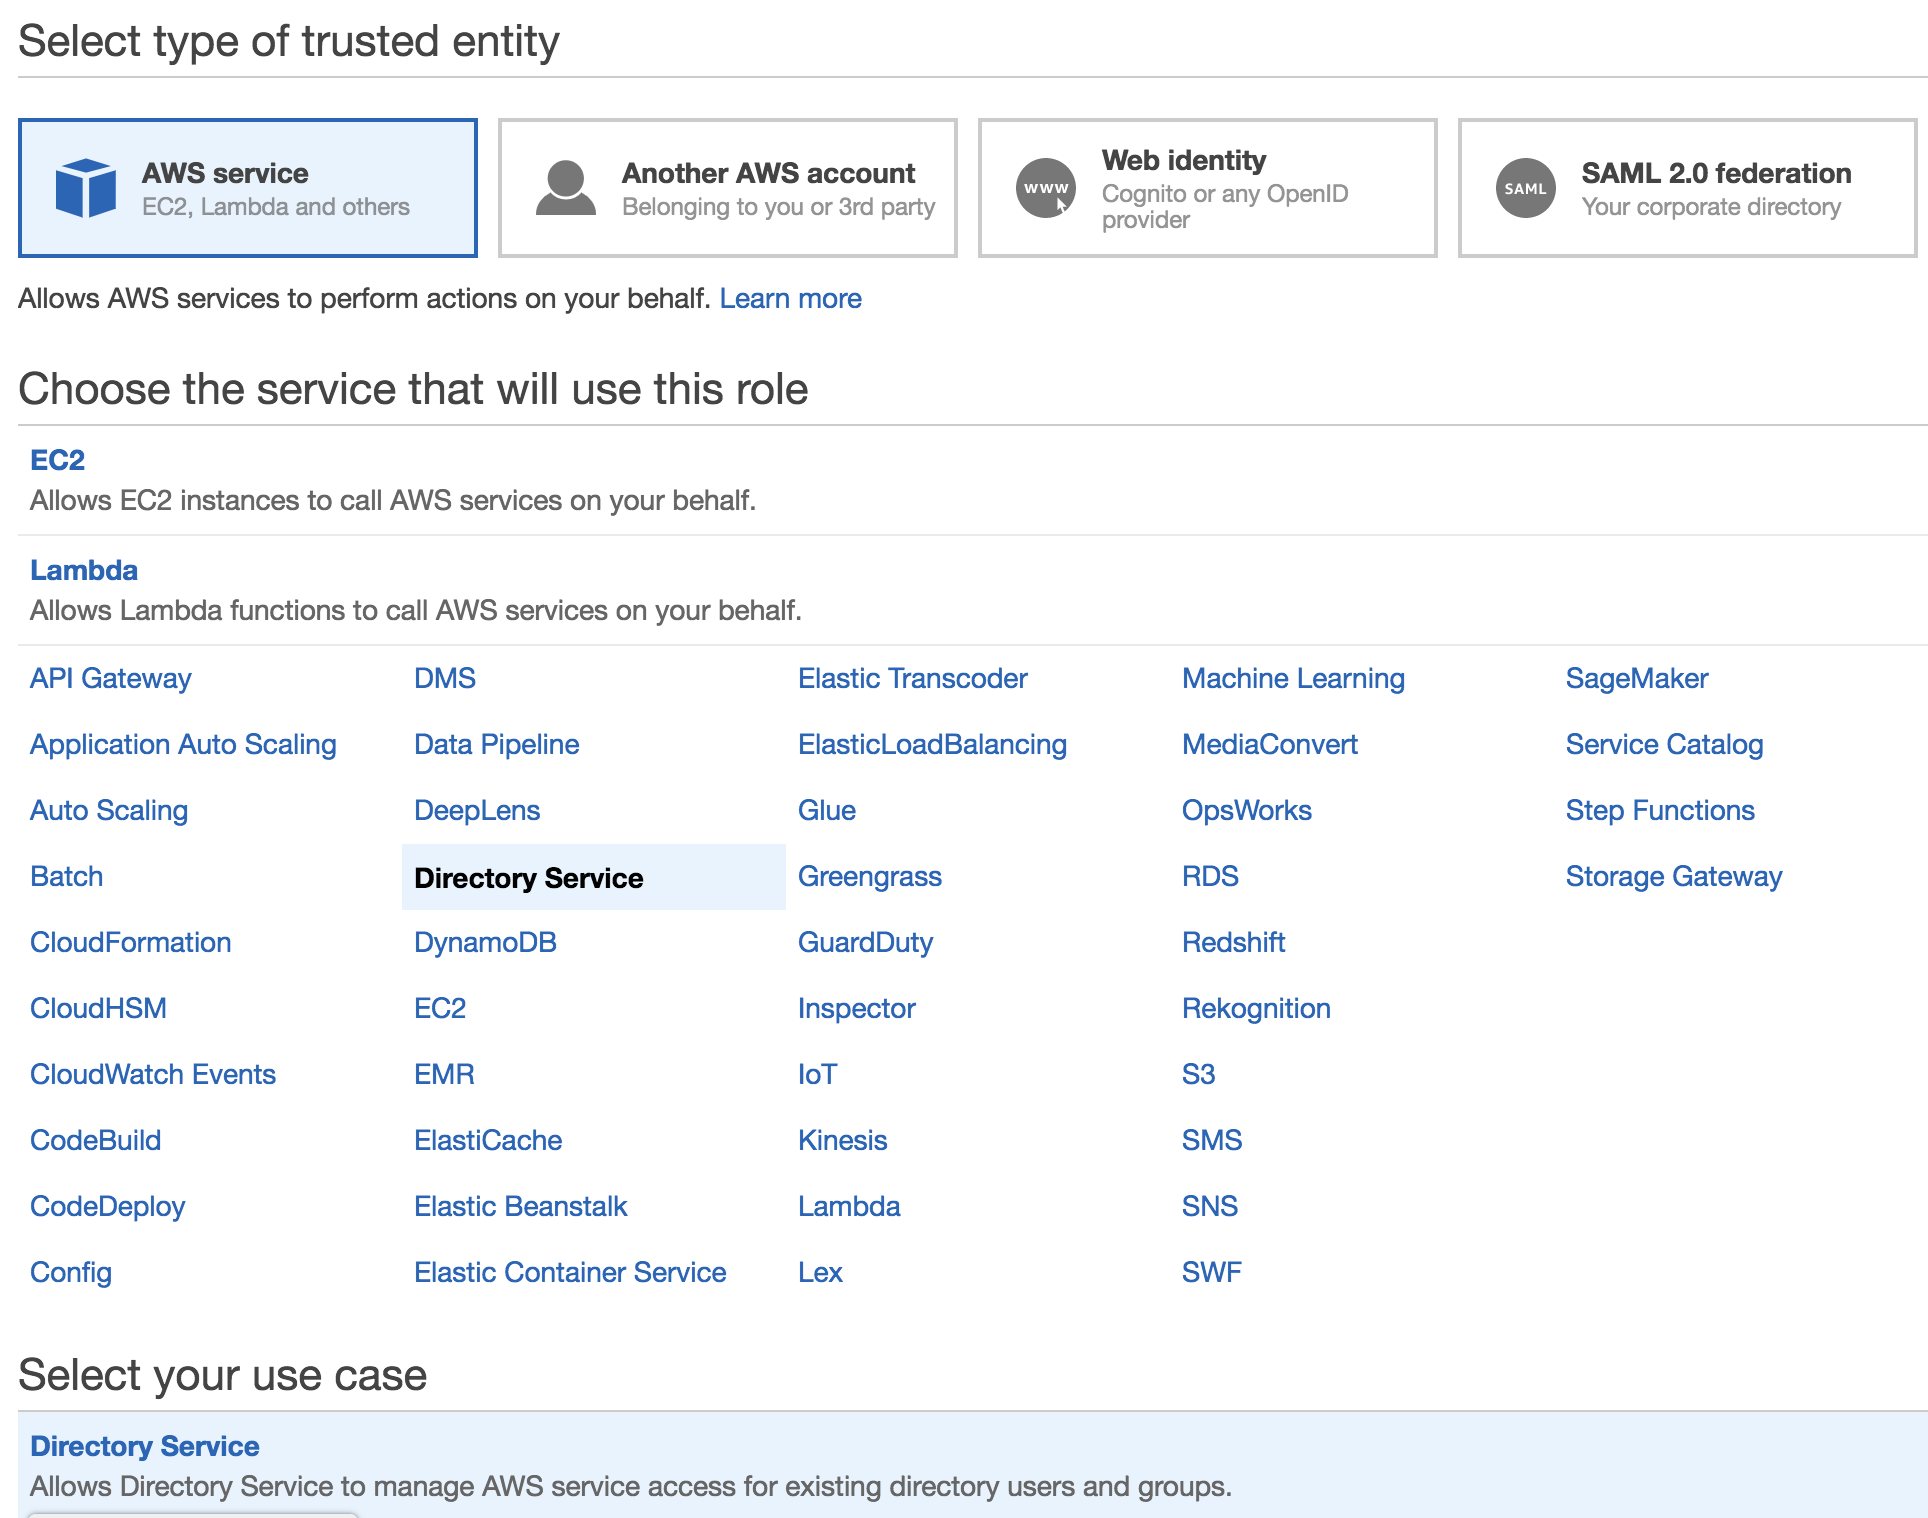
Before the users and groups within AD can login to the console with their AD credentials, another Role needs to be created to provide access to the console. Go to the IAM console again and create another role. This time when you create a new role, choose the Directory Service as the service that will use the role.
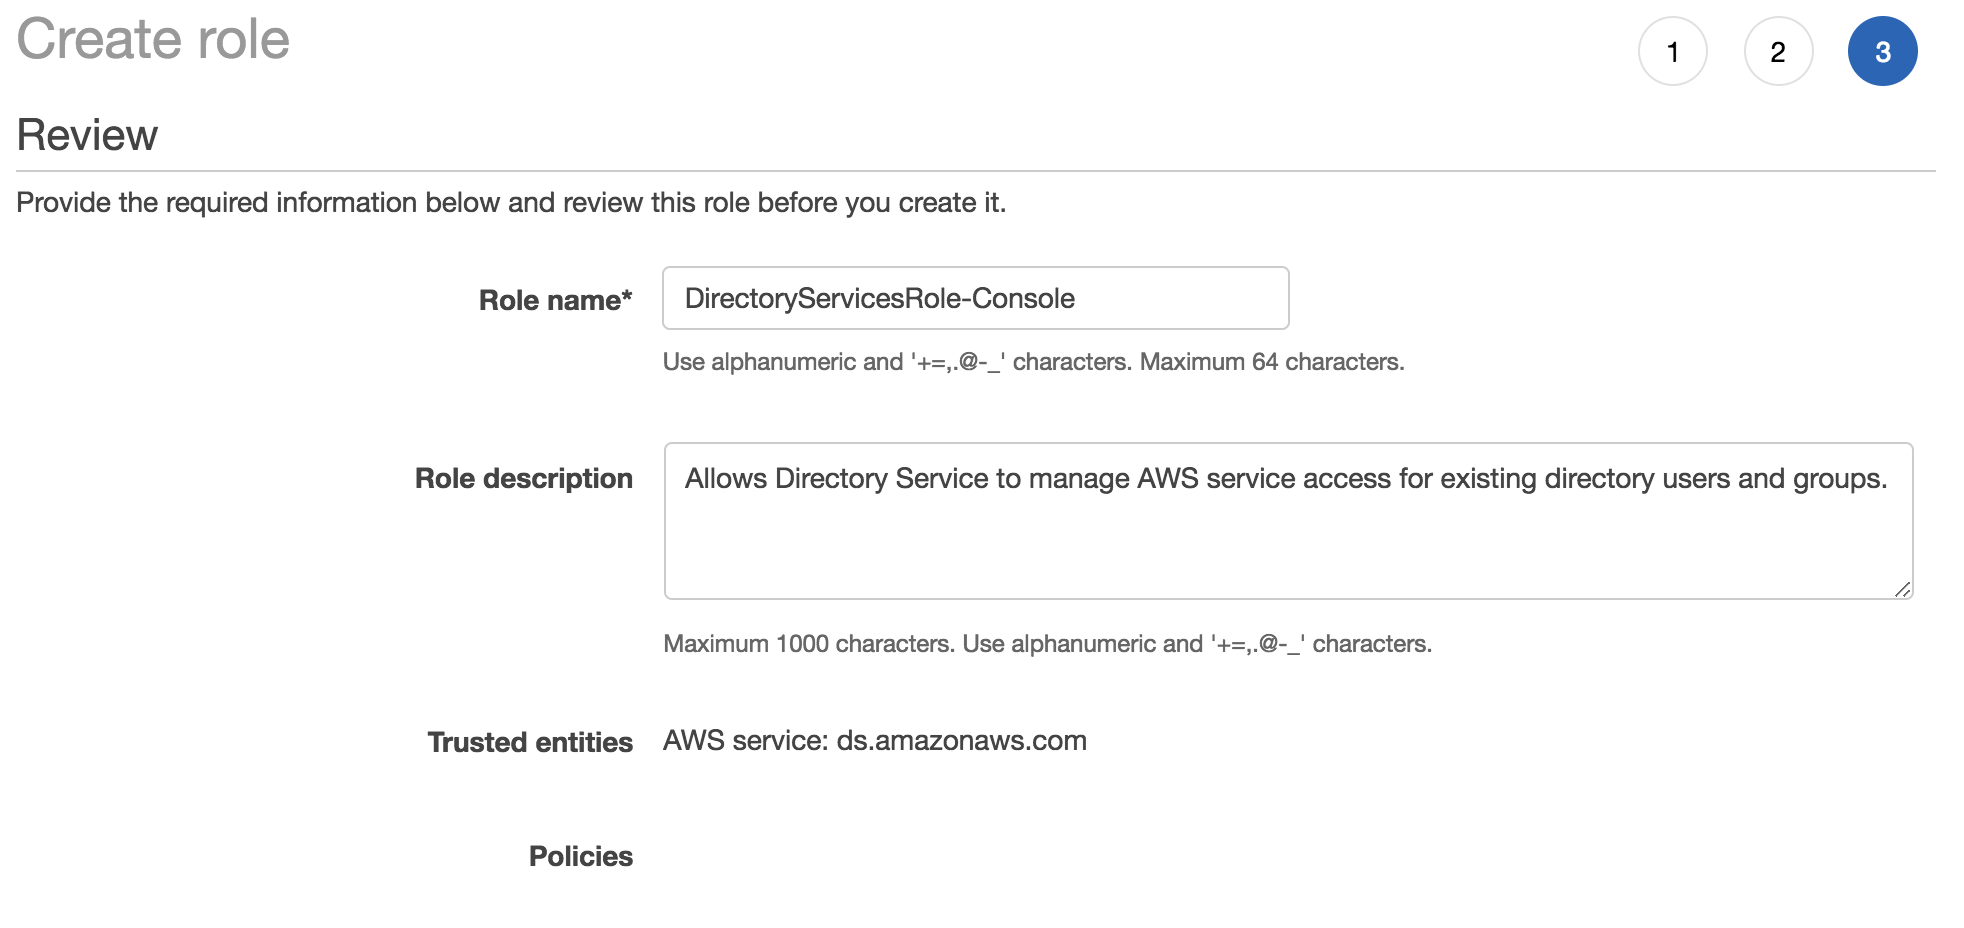
You don’t need to assign any additional permissions (at this time) since we’re only demonstrating that this role can be used to authenticate. If you plan to use this role for users to have permissions to use anything in the console, those permissions need to be added. On the last step, give the role a name.
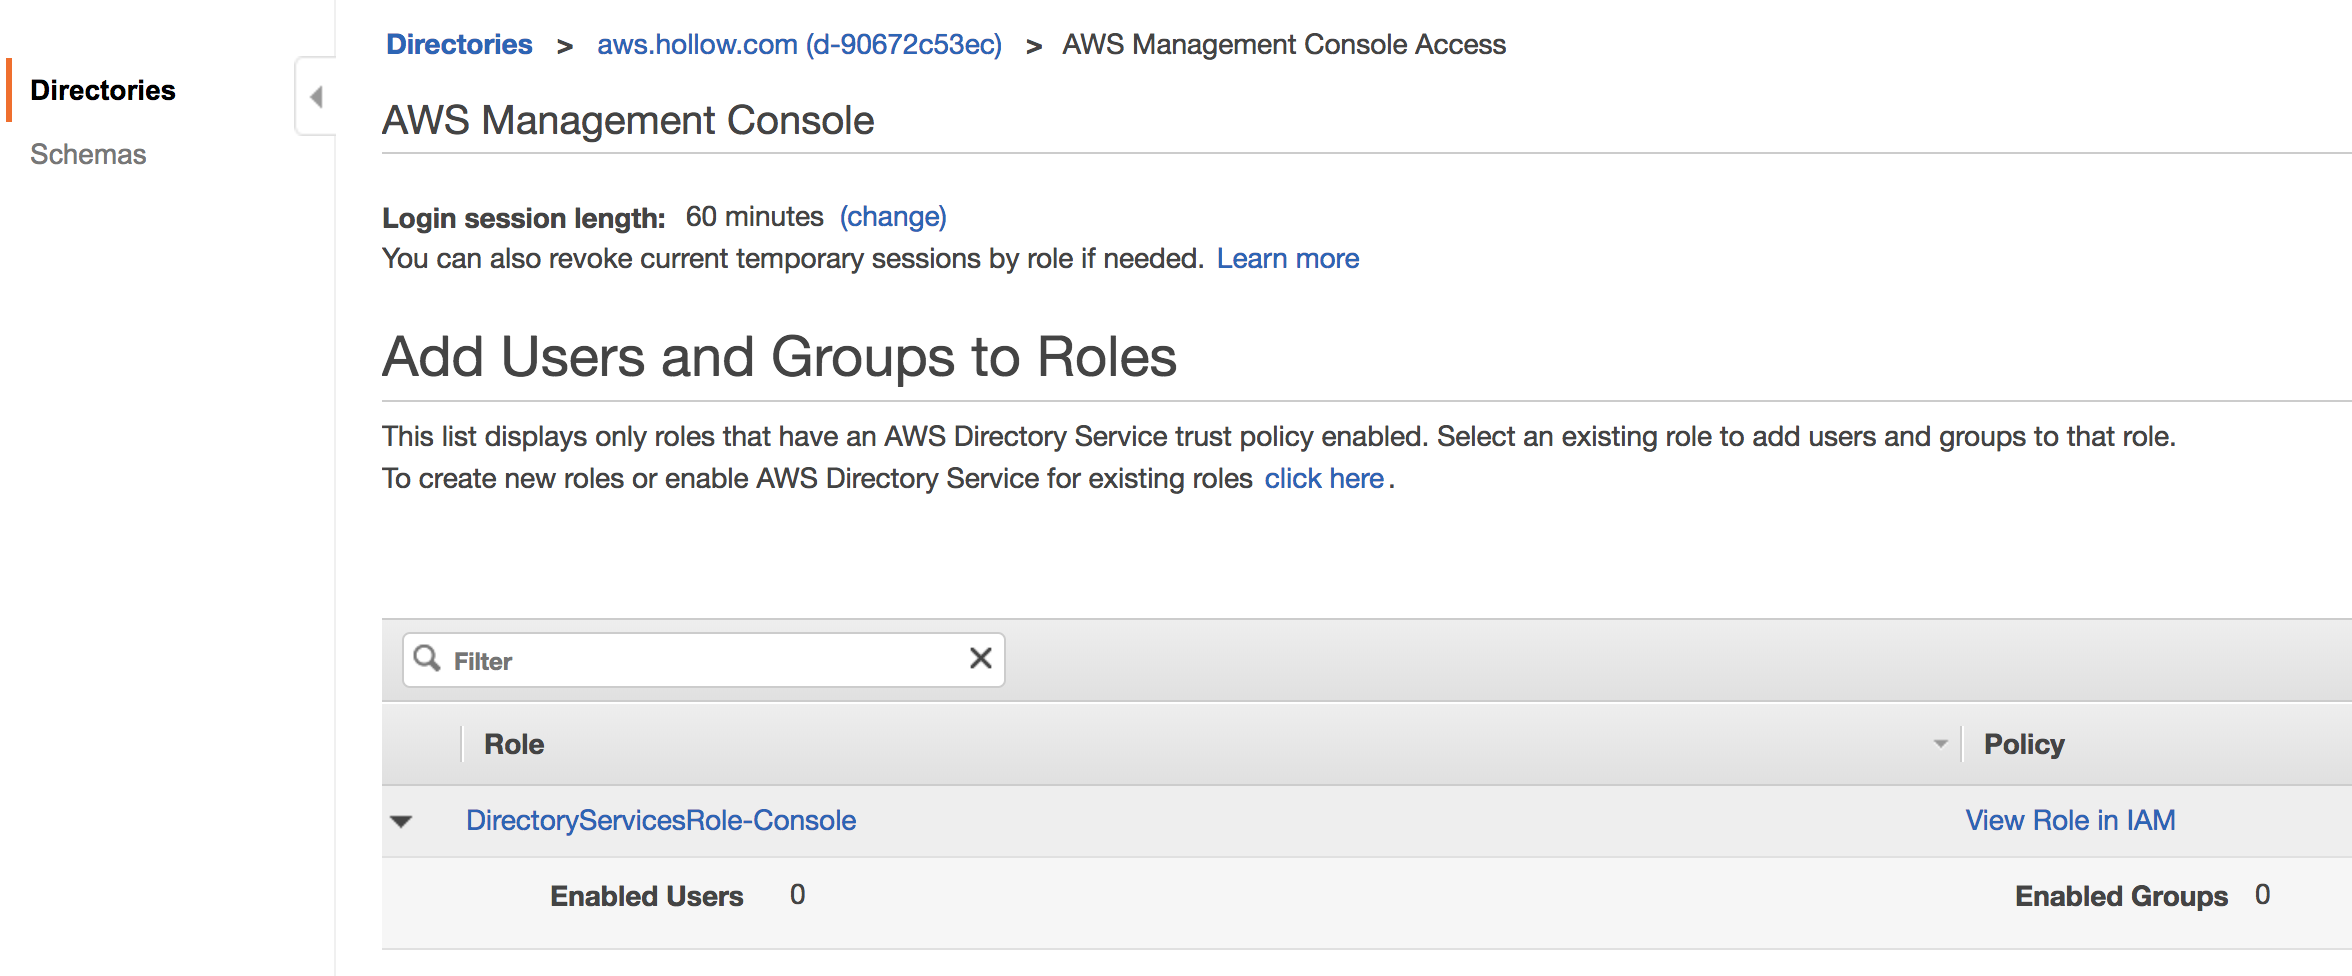
Once you’ve created the role, go back to your directory and click the Management Console Access link.
From here you’ll see a section for Users and Groups to Roles. A single Role will be listed which is what was just built in the previous few steps. Click the role to assign users from your Microsoft AD domain.
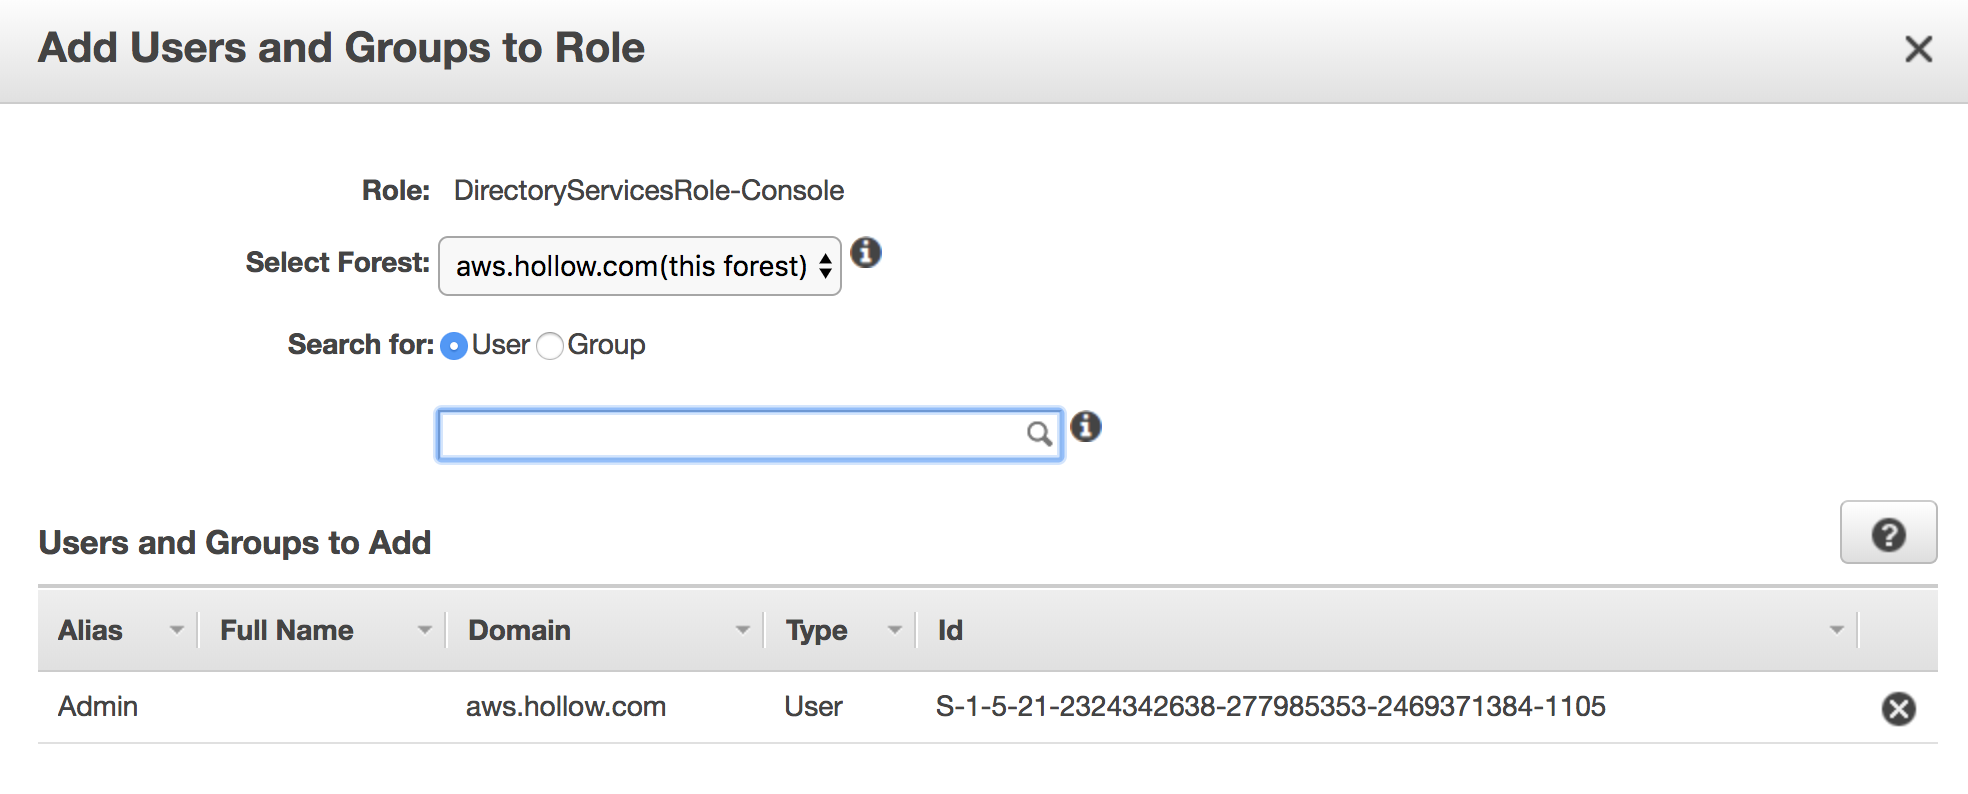
In the Add Users and Groups to Role window type a name. I chose the “Admin” account because I didn’t bother creating any new users. [This blog post is long enough already!]
When done you’ll see your user(s) added to the directory.
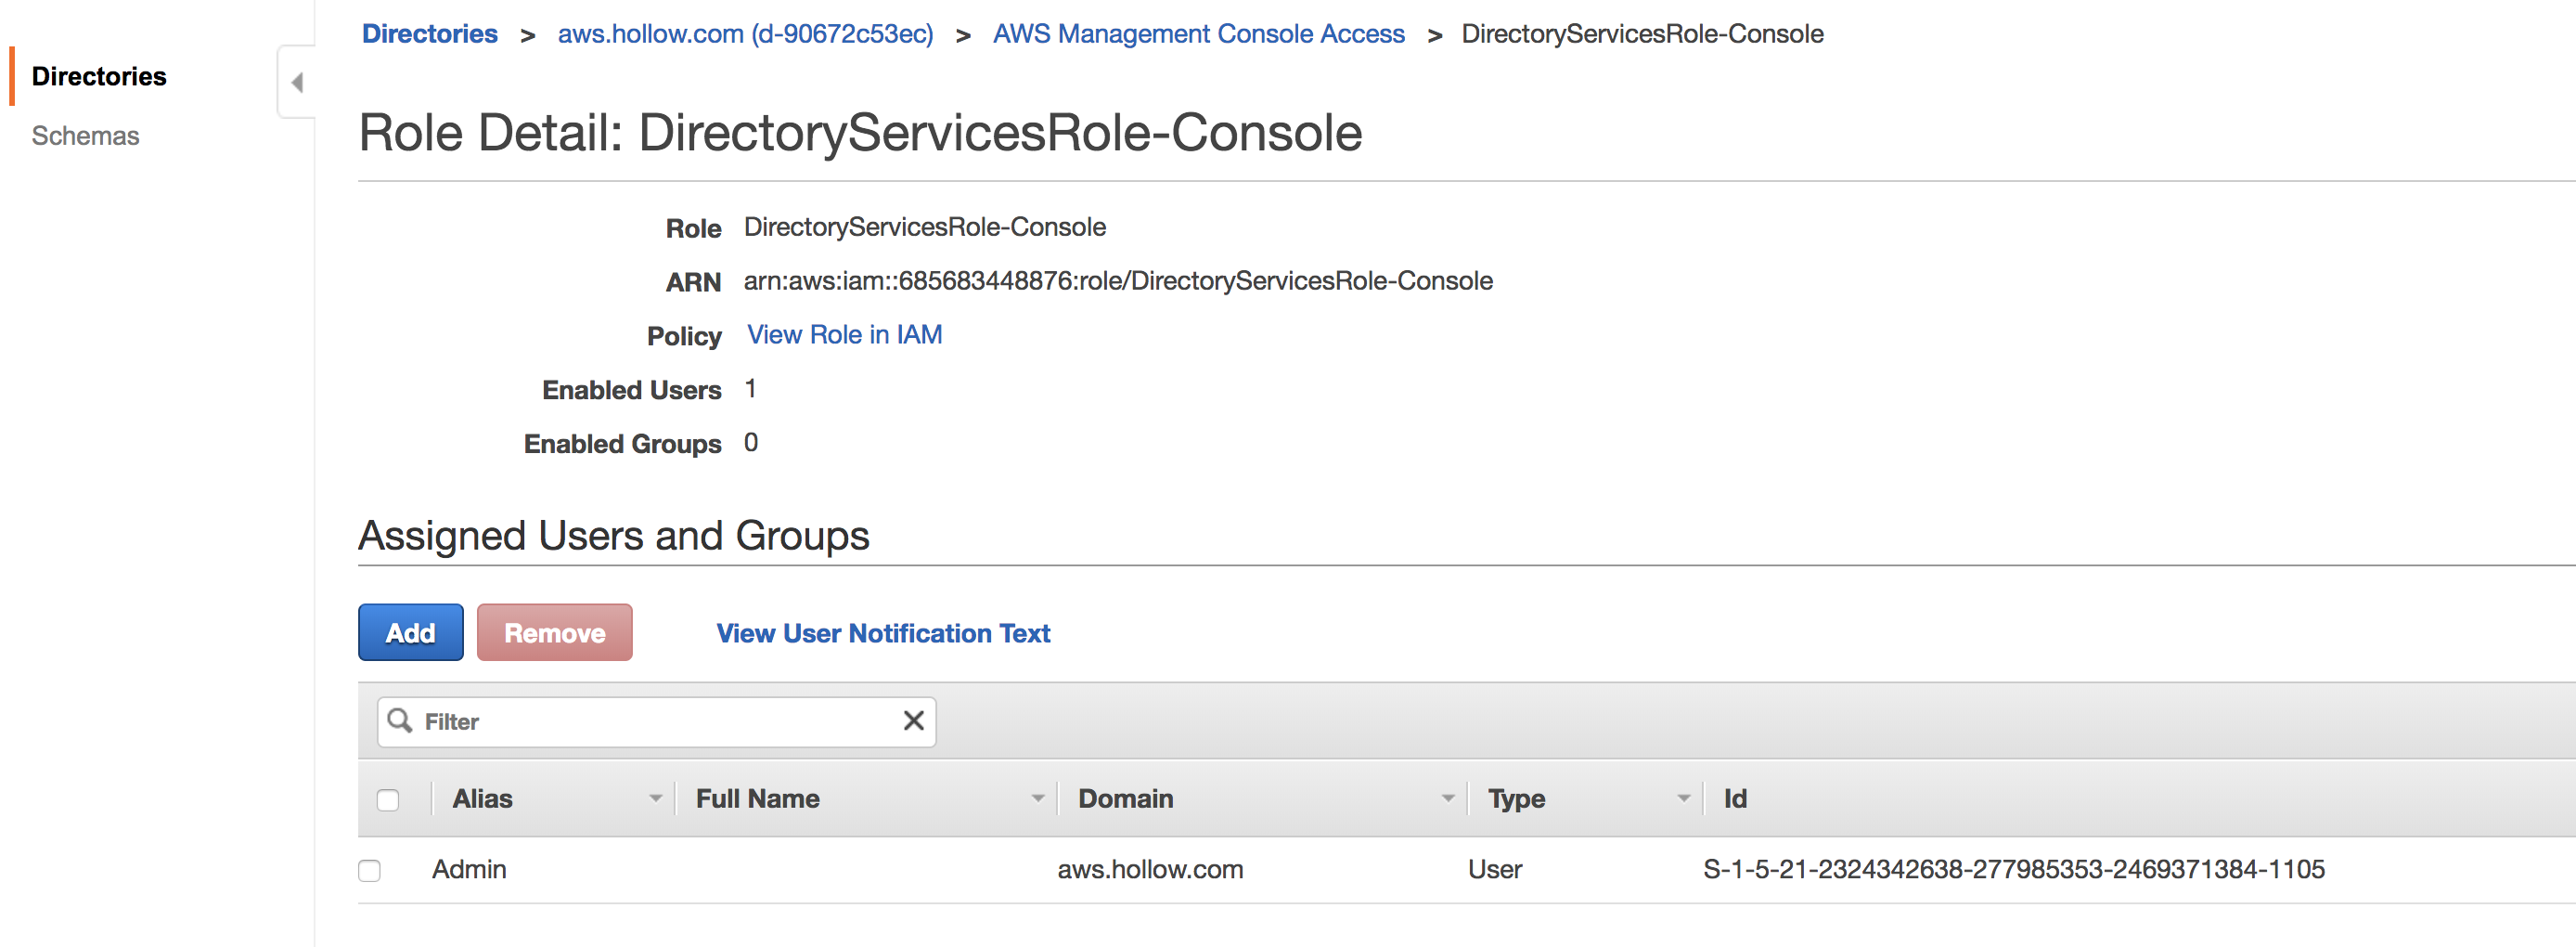
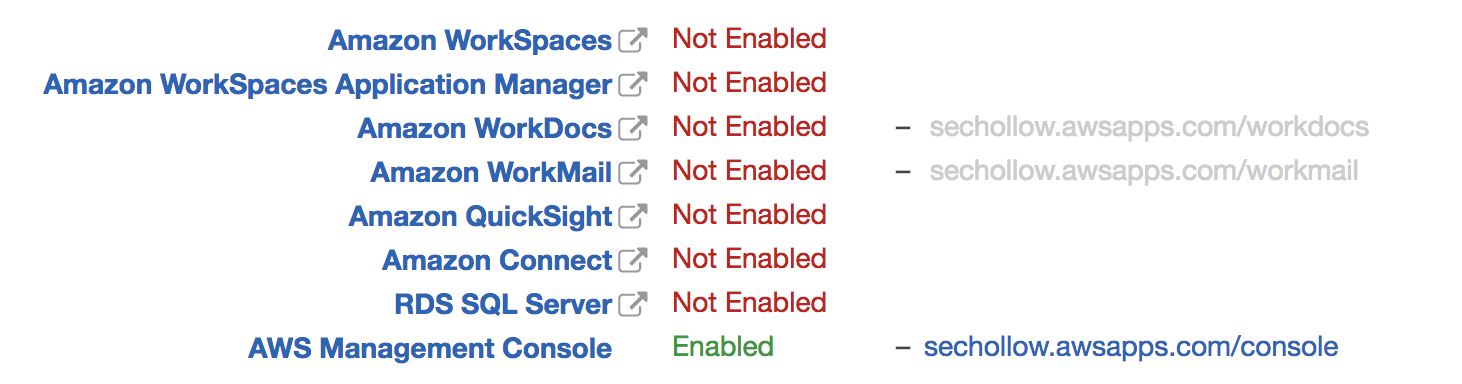
Now, if you go to your endpoint URL (hint, the link is located next to the Management Console in your directory) you’ll be taken to a login page. Enter the Username and Password of the user that you added, and you’ve used your new Microsoft AD service and your directory store for the AWS Management Console.

Summary
If you’re still reading this, I commend you but you should have a working Microsoft AD service up and running in your AWS account and can now manage users in much the same way you’ve always managed them in AD. Now that you’ve got your domain working correctly, you can go about building all those apps you’ve been dying to get to in your cloud. And now they’ll have an authentication method that is secure and familiar to you but won’t have to worry about those pesky servers being patched, and managed. Happy coding!