Just because you’ve started moving workloads into the cloud, doesn’t mean you can forget about Microsoft Active Directory. Many customers simply stand up their own domain controllers on EC2 instances to provide domain services. But if you’re moving to AWS there are also some great services you can take advantage of, to provide similar functionality. This post focuses on AD Connector which makes a connection to your on-premises or EC2 installed domain controllers. AD Connector doesn’t run your Active Directory but rather uses your existing active directory intances within AWS. As such, in order to use AD Connector you would need to have a VPN connection or Direct Connect to provide connectivity back to your data center. Also, you’ll need to be prepared to have credentials to connect to the domain. Domain Admin credentials will work, but as usual you should use as few privileges as possible so delegate access to a user with the follow permissions:
- Read users and groups
- Create computer objects
- Join computers to the domain
Deploy
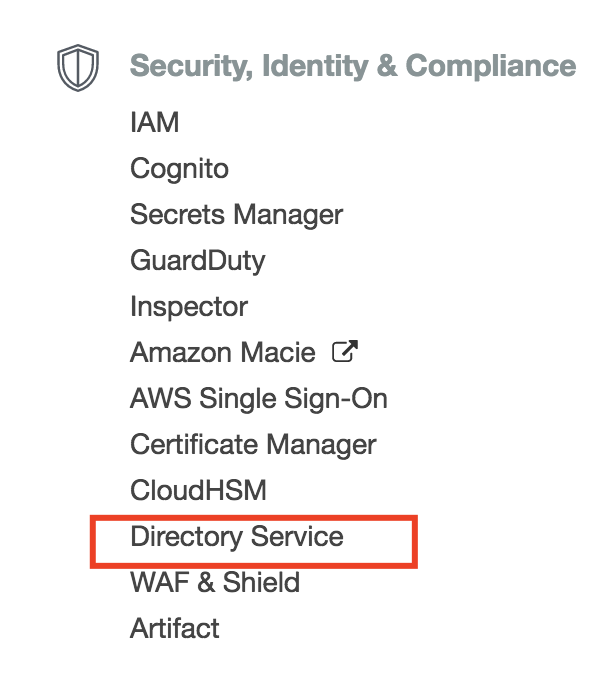
To deploy AD Connector within your existing AWS VPCs, go to the Directory Service from the services menu.
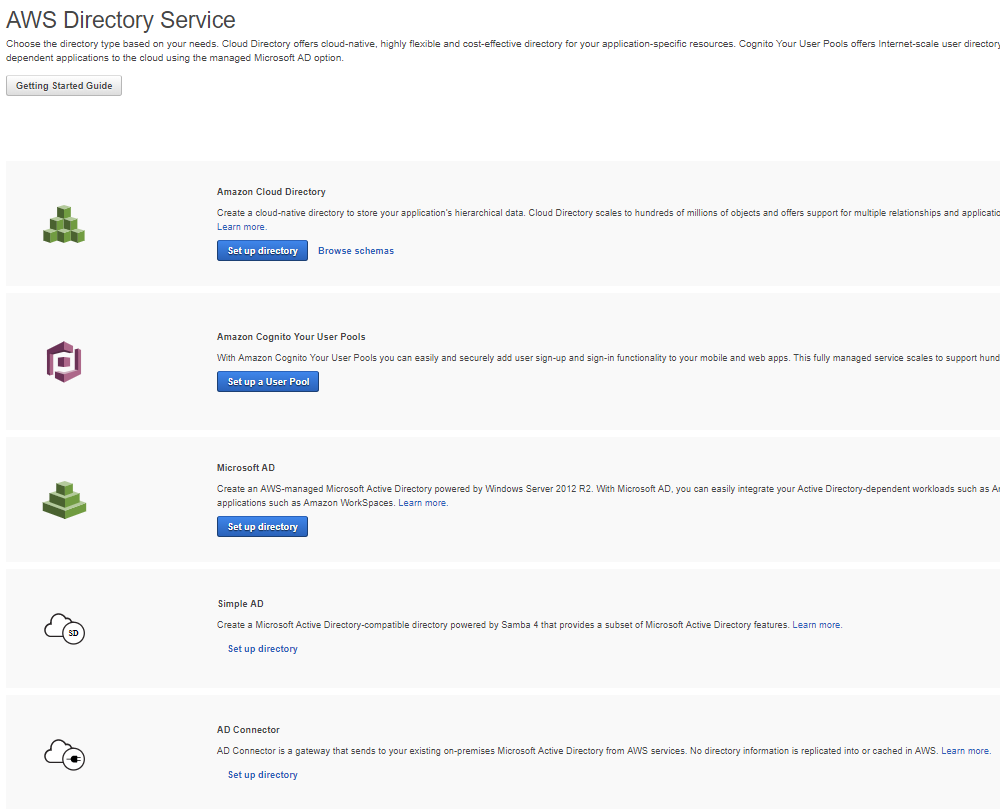
When the Directory Service page opens up you’ll see several options available to you, but for this post, choose AD Connector.
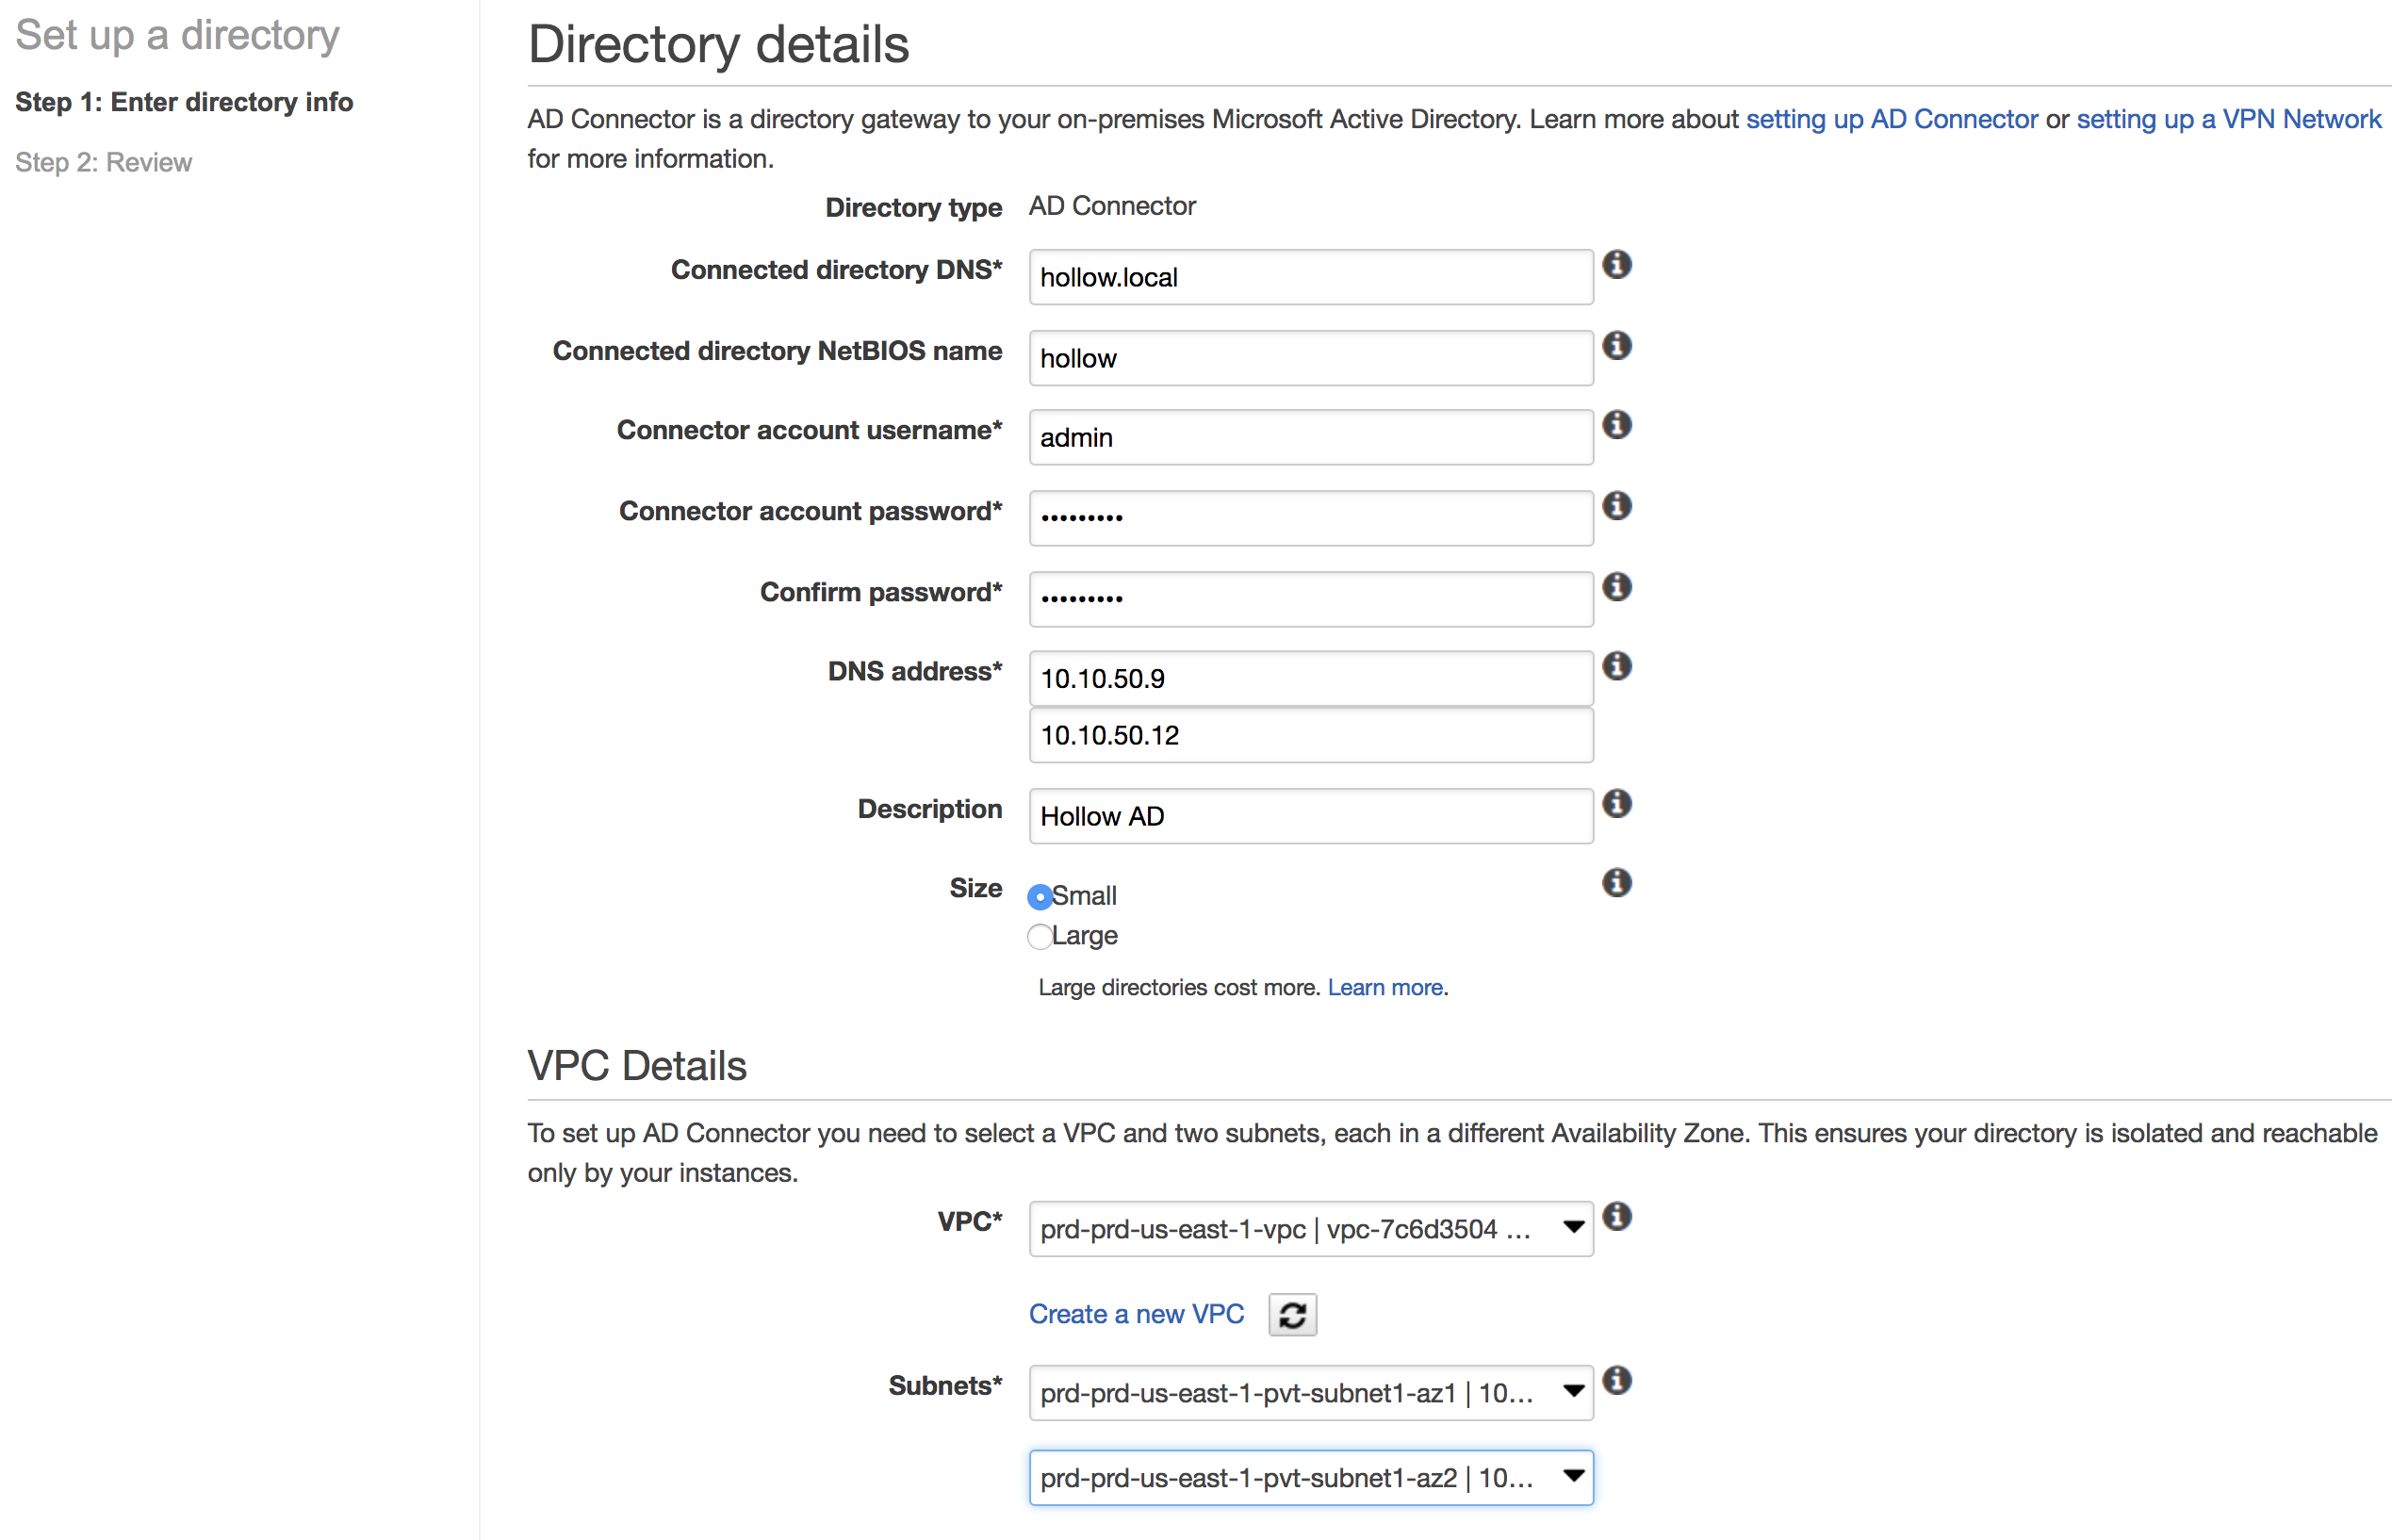
To setup a new directory, first enter the AD DNS Name for the AD Domain you’ll be connecting with. You can optionally provide a NetBIOS name if necessary. Next, enter a username and a password for a user that has permissions that we discussed above. After this, you’ll need to specify the DNS address for your domain. This should be the IP Address of your DNS Servers which in my case are also my domain controllers. You’ll also need to decide which VPC your AD Connectors will live in, and which subnets. Rememeber that these subnets need to be able to communicate with your existing AD instances so if they are on-premises you’ll need a VPN or Direct Connect. If they live within your AWS environment, make sure that those subnets can communicate with the ones specified in this window.
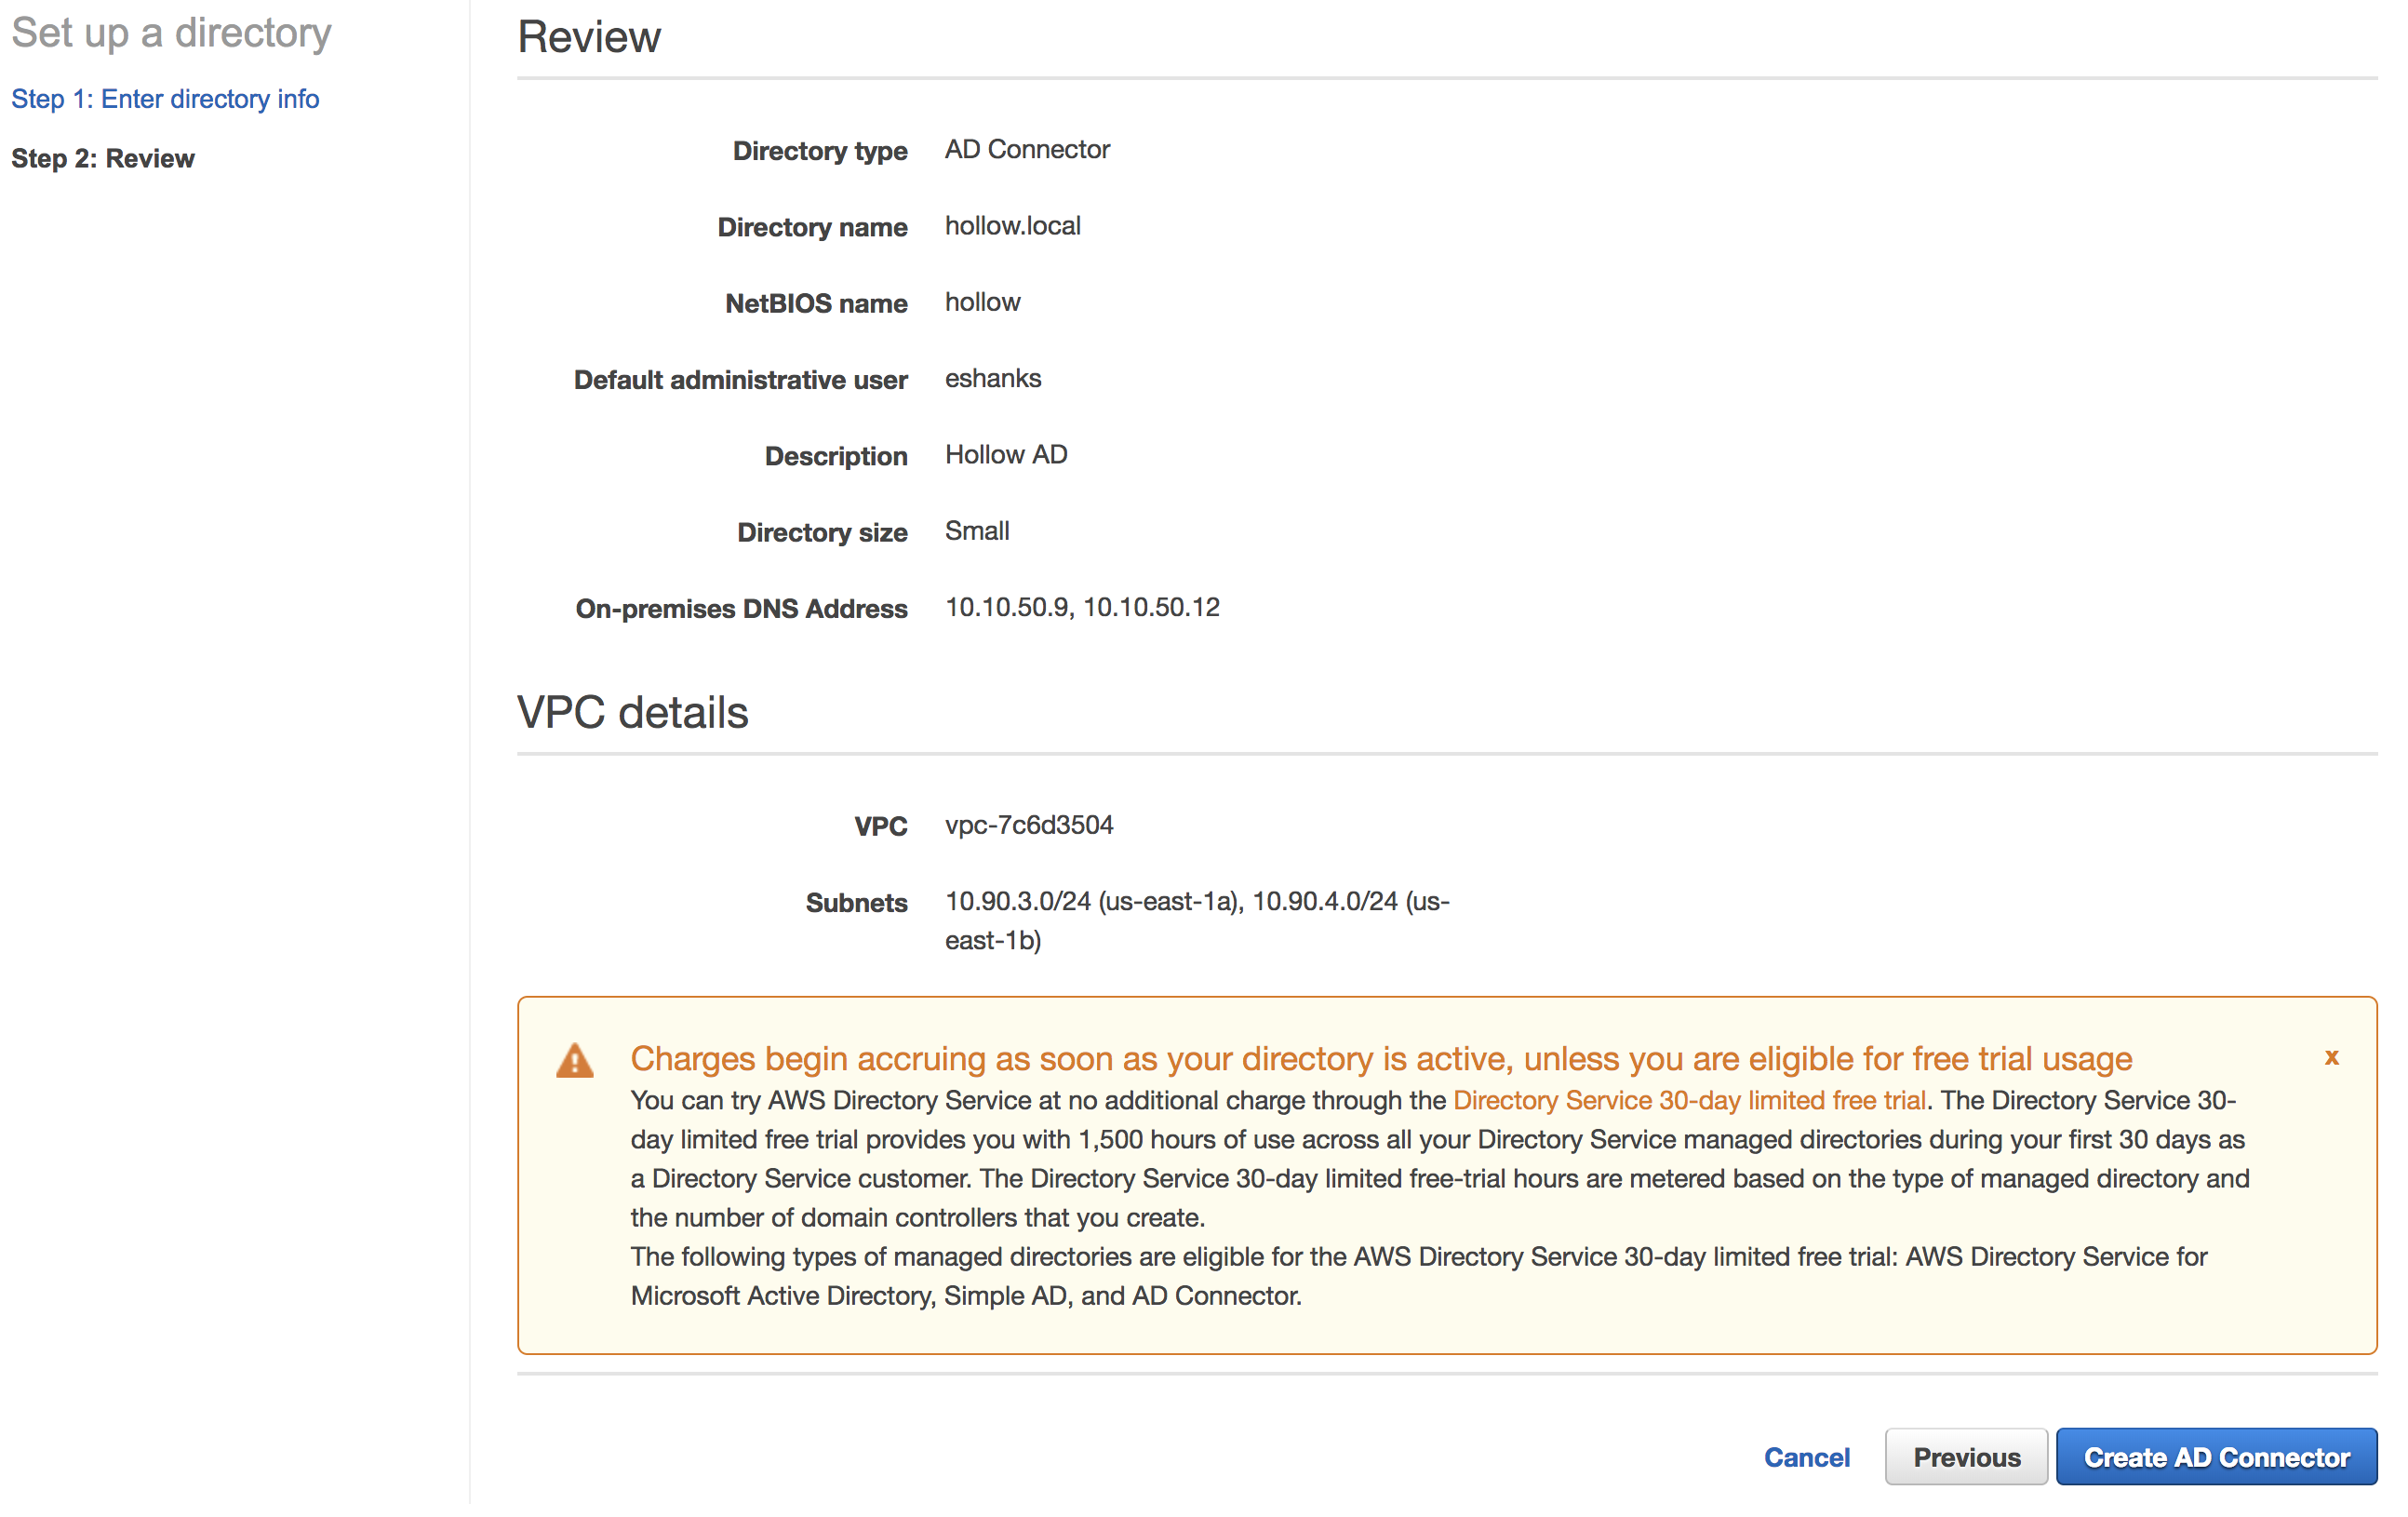
The next screen shows you a review before you deploy. If it looks good, click the “Create AD Connector” button for the magic to happen in the background.
You should see a green status message stating that the magic is happening.
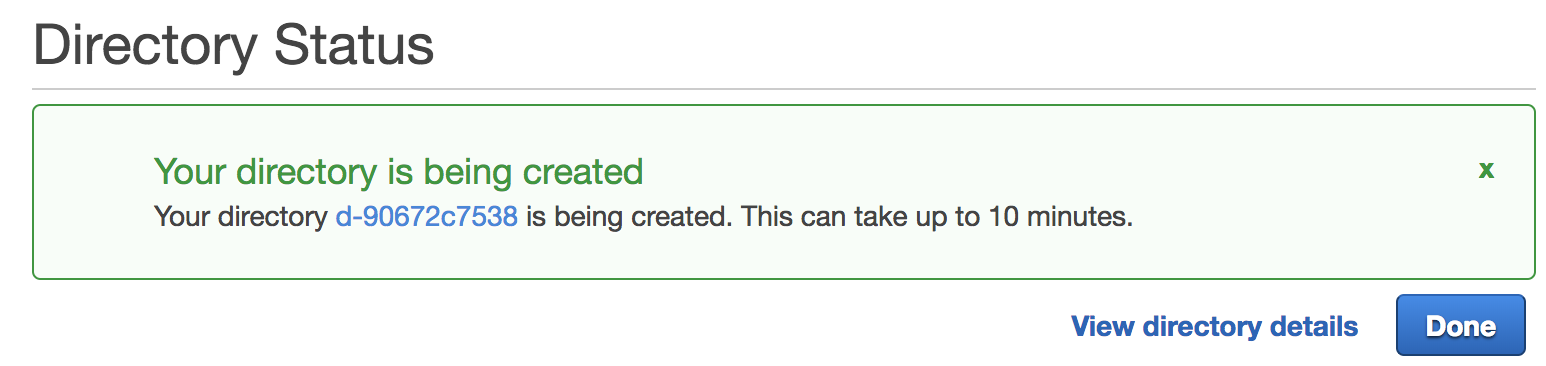
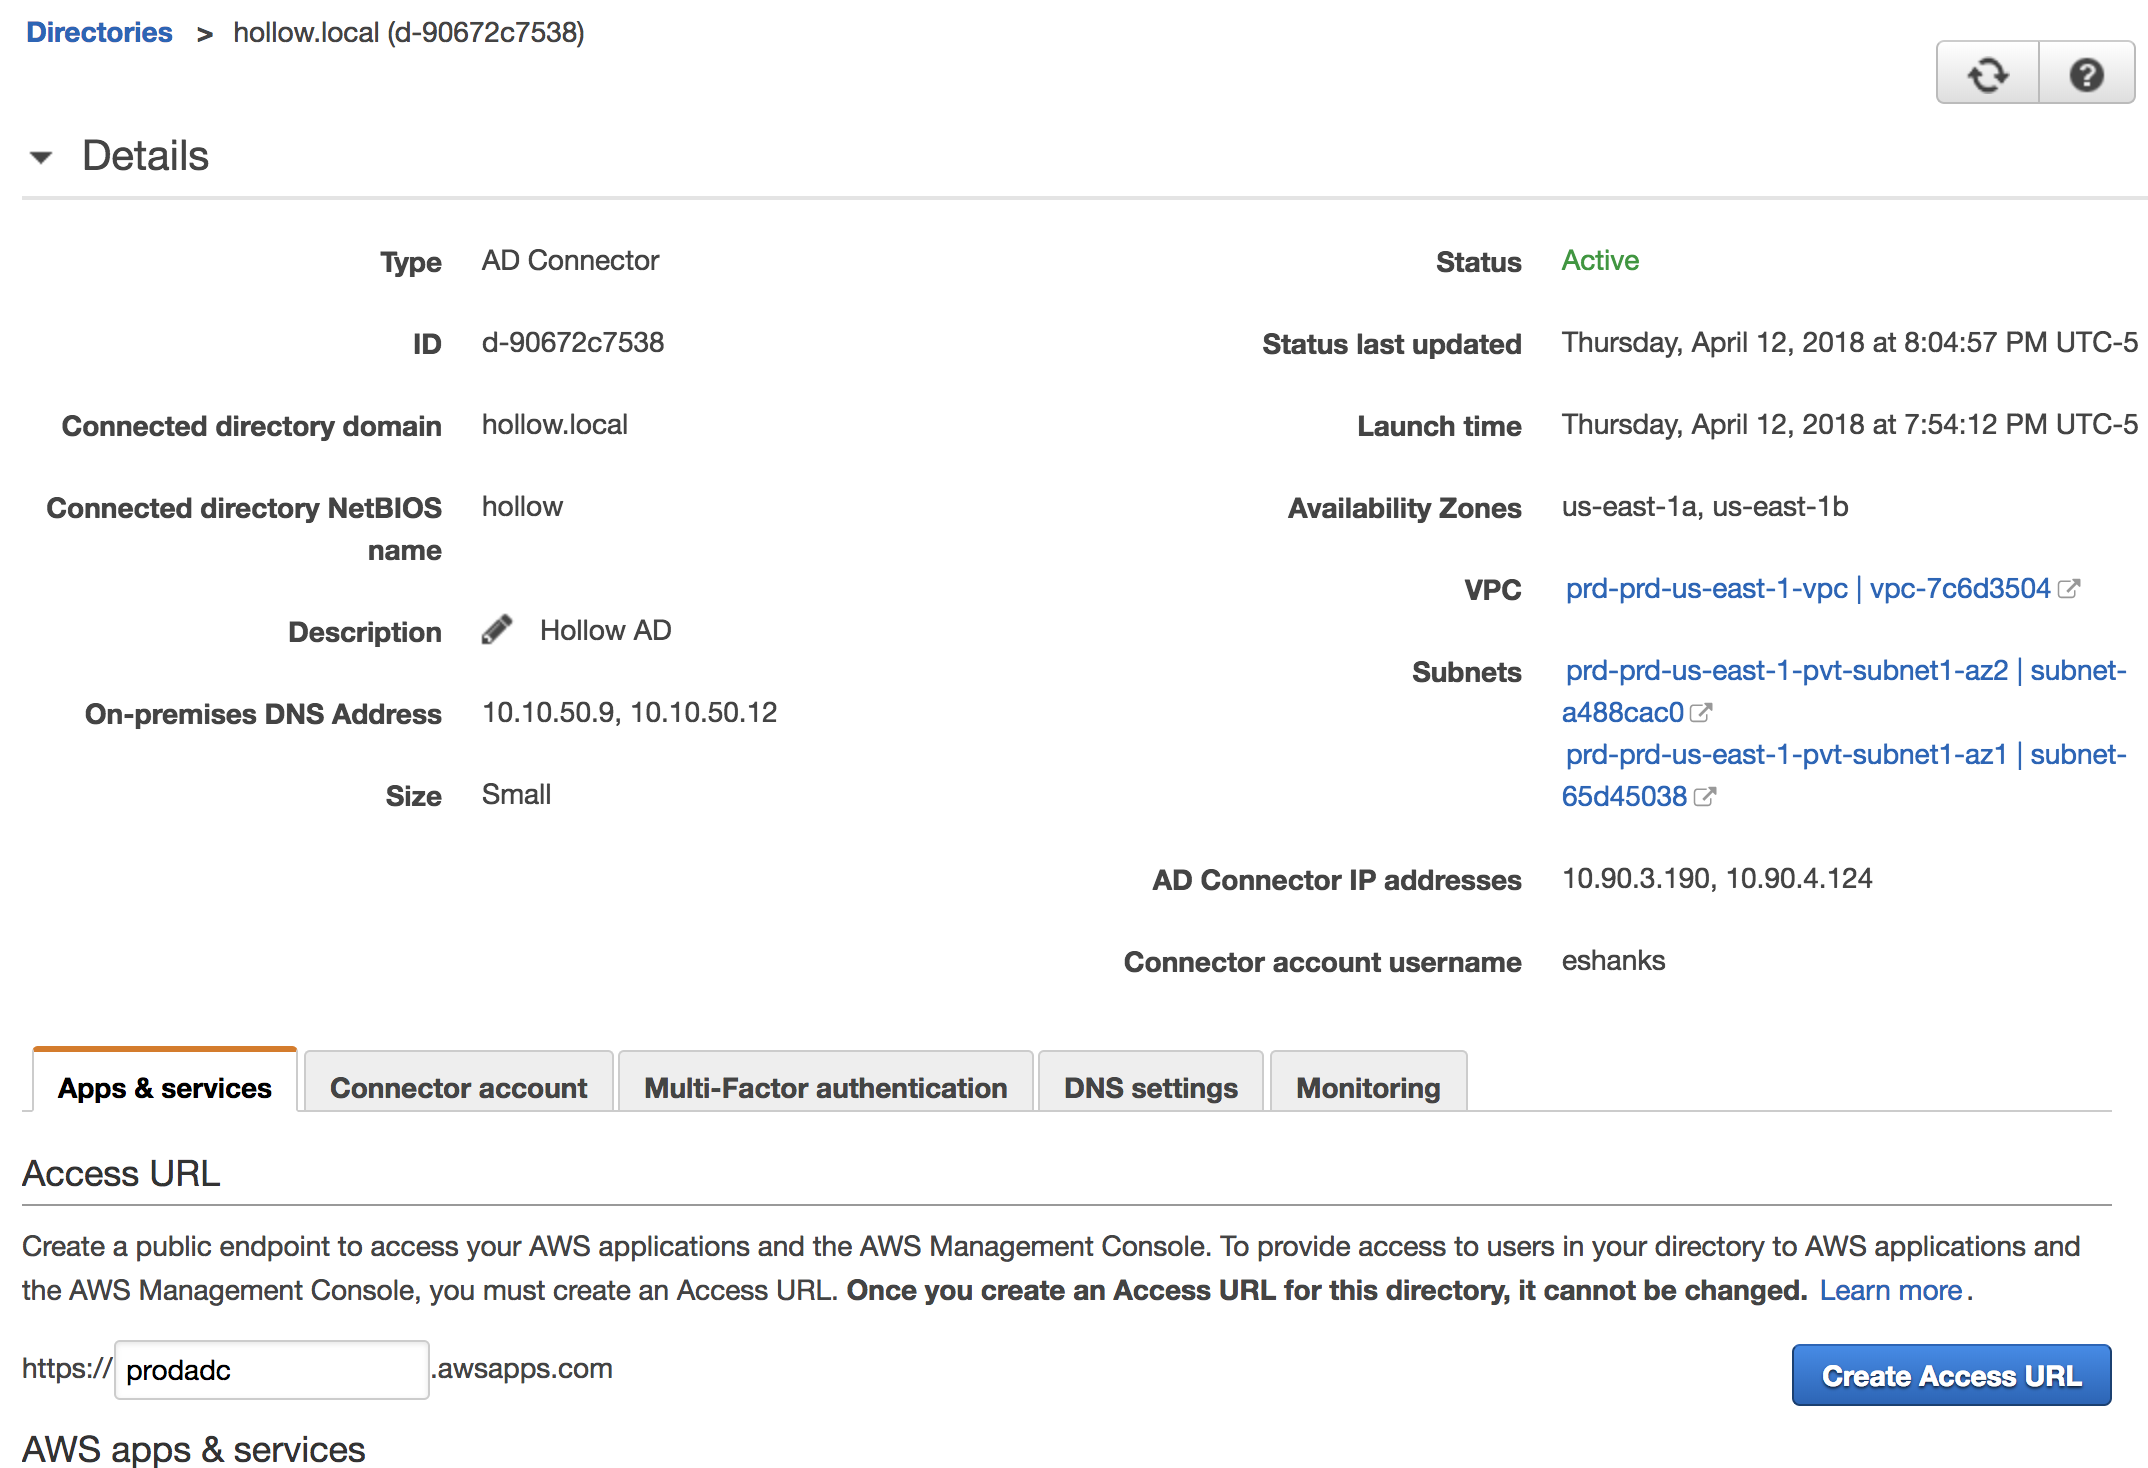
It will take a bit to deploy but when done you’ll see a new directory listed in your portal. Select the directory that was created and you’ll see some information needed for the rest of this post. Specifically, you’ll want to take note of the “On-premises DNS Address” listed in the details page for the following section.

If you were looking for how to do this through CloudFormation, then this post isn’t your friend. I also prefer to do everything through CloudFormation when possible, but found no documentation for completing this task through CFn. If you find the answers please post in the comments and I’ll update the post.
Modify DHCP Option Sets
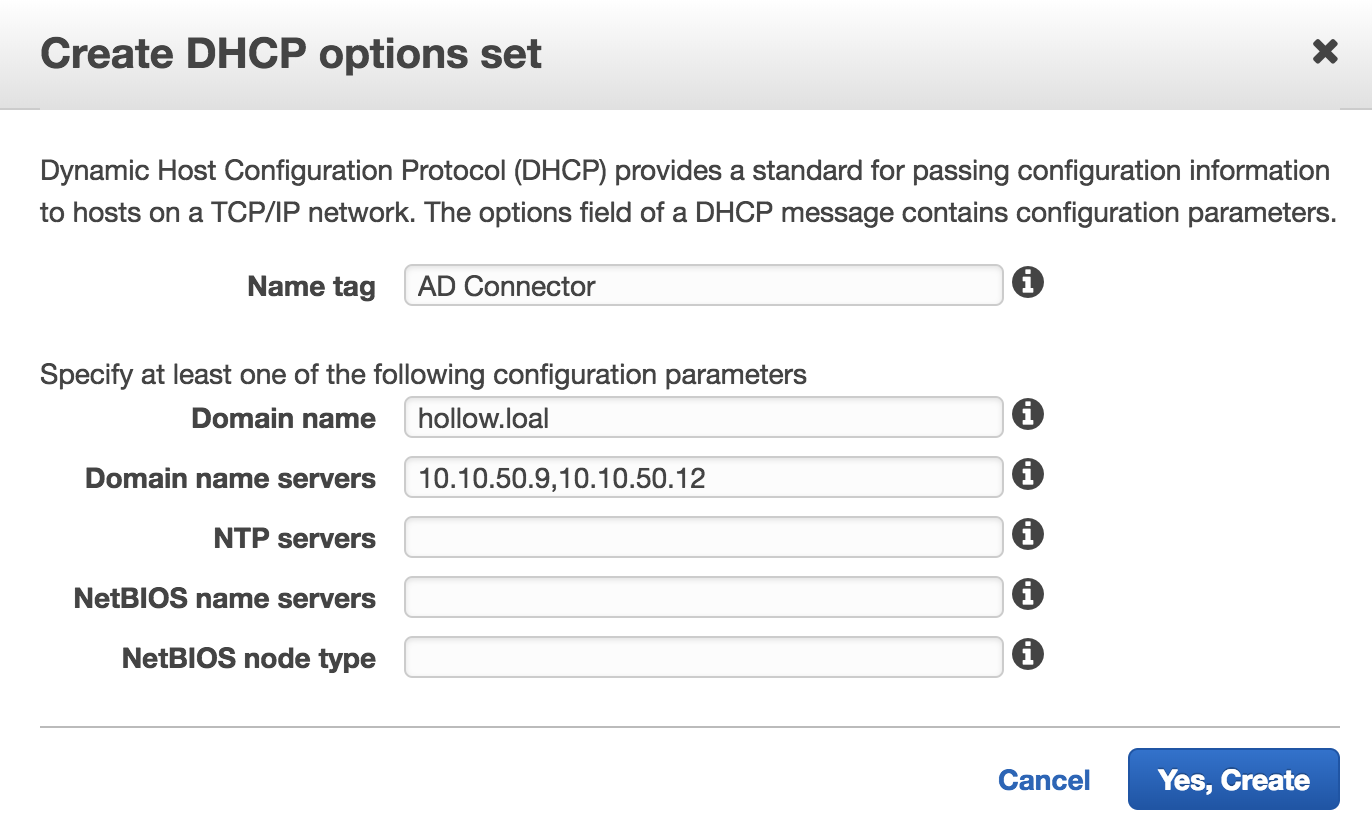
You’ve connected your domain controllers with AWS now, but your clients will need to be reconfigured to use these two domain controllers for their DNS resolution. To provide this for the entire VPC, we’ll want to create a new DHCP Option Set and assign it to the VPC that will use these Domain Controllers. Go to your VPC menu in the console and find the DHCP Options Set link. Create a new option set with the Domain name and DNS servers from your new on-premises AD servers that we just connected.
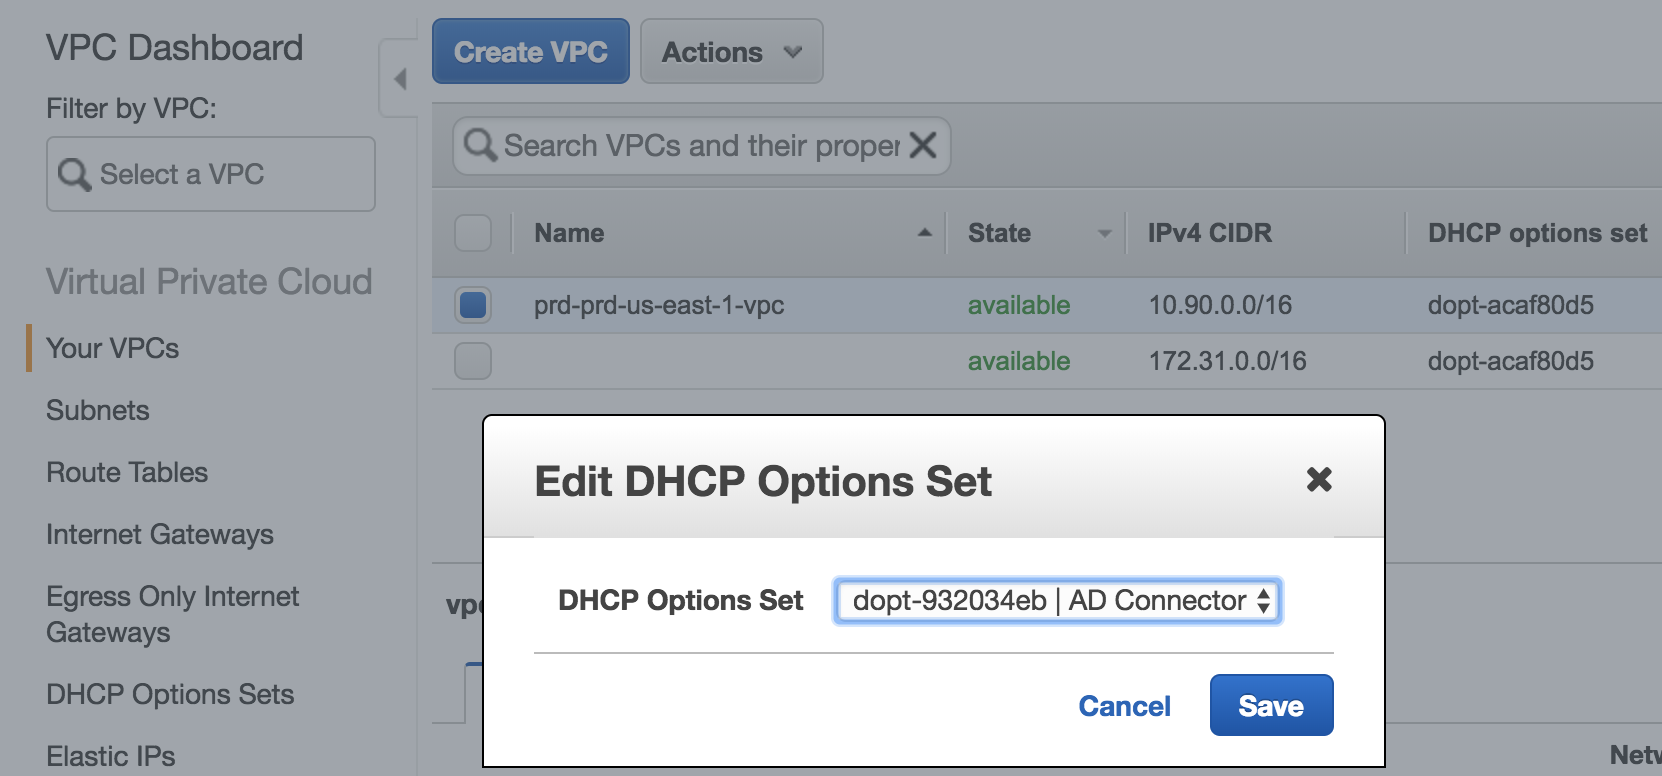
Once you’ve created the options set you’ll need to associate it with your VPC(s) so that new addresses are handed out with the appropriate settings. NOTE: You can only have one DHCP option set associated with at VPC at a time. To assign the new Option Set, select the VPC from the VPC menu and click the actions button, then select the Edit DHCP Options Set link. You’ll then have a drop down to select your preferred option set.
Configure Roles
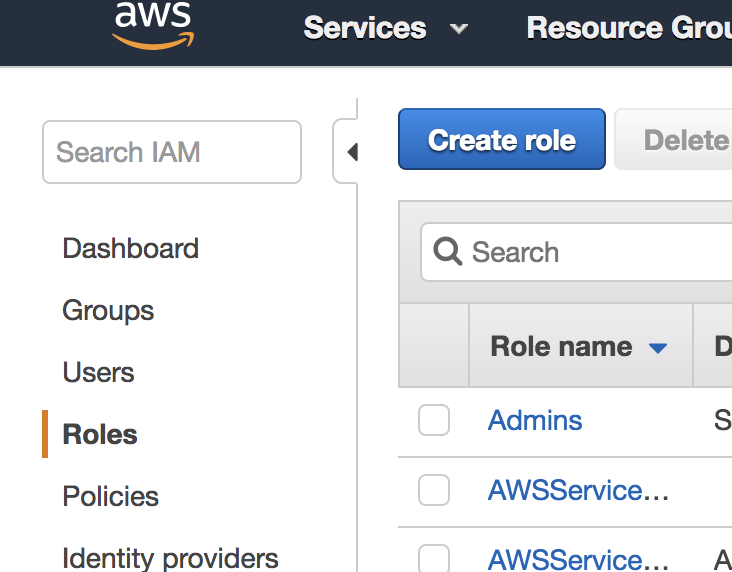
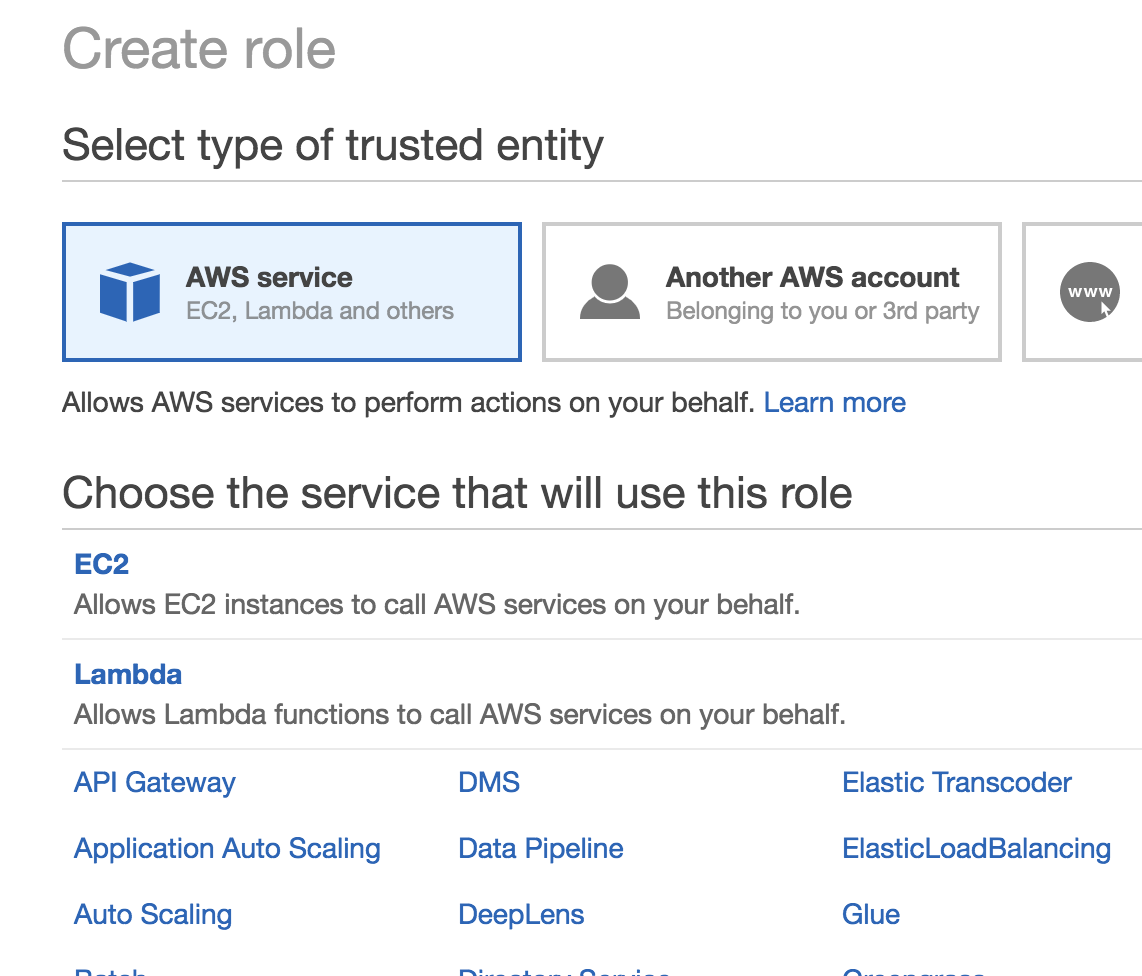
Before we start deploying member servers, we’ll need to create a role in the IAM console. This role will allow Simple Systems Manager (SSM or Systems Manager for short) the permission to join new EC2 instances to the new domain. To create this role, go to the IAM console and click on Roles. Click the “Create role” button.
When the create role window opens up select “AWS service” and then select EC2 under the service that will use the role. Click the “Next:permissions” button to continue.
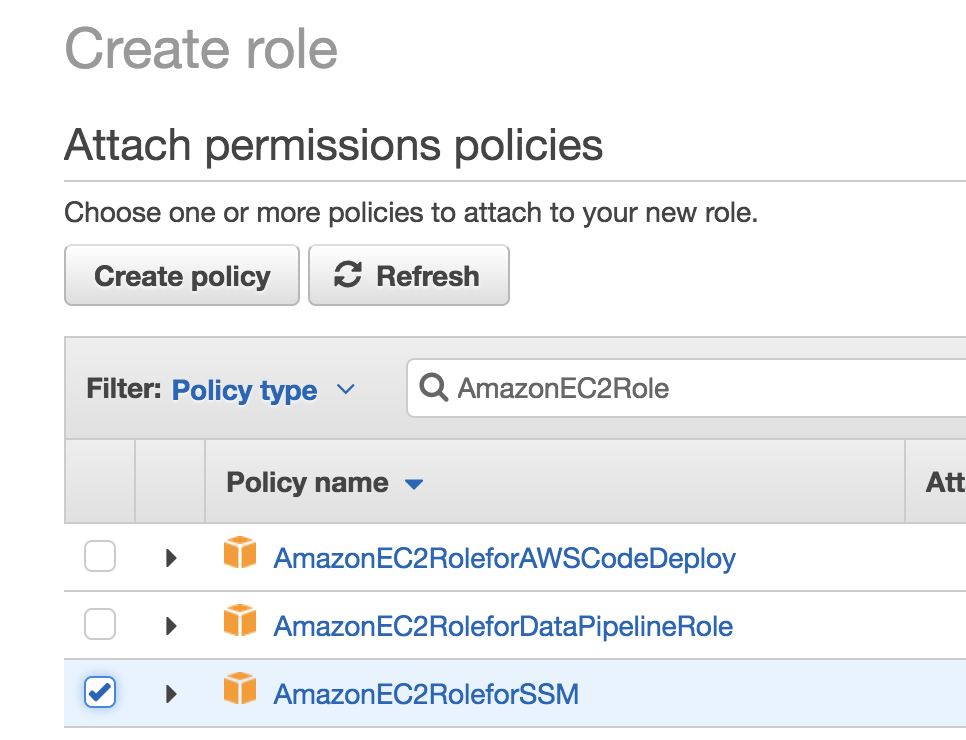
In the permissions screen search for AmazonEC2RoleforSSM and select it. Click the “Next:Review” button.
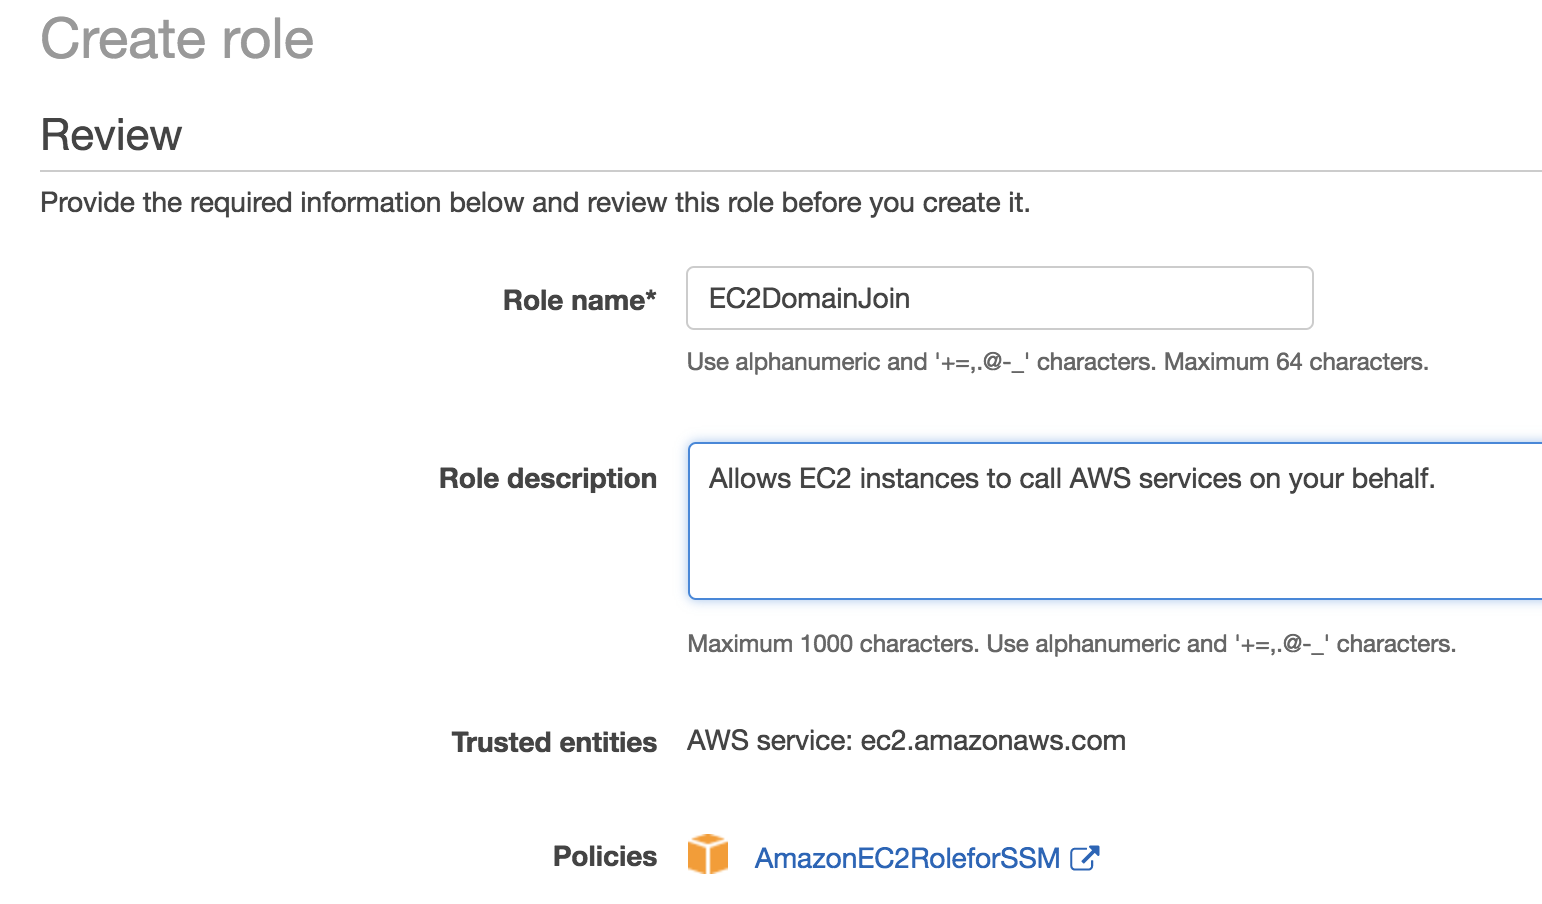
Review the screen and give the role a name before click the “Create role” button.
Auto-Join to the Domain
Now that your directory is setup, you can have new Windows only EC2 instances automatically join your domain when they are created. To do this it uses the EC2DomainJoin role we created earlier. To test this deploy a new EC2 instance into the VPC you used with the AD Connector. When you get to the “Configure Instance” stage of deployment, you’ll need to ensure that a few new settings are configured. Ensure that the “Domain join directory” is your new directory service and you assign the EC2DomainJoin role to the instance at creation.

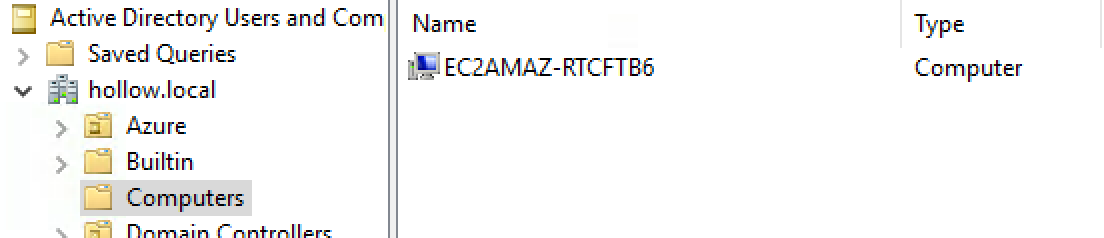
After your done deploying you should see your computer object in your on-premises Active Directory console.
Use AD Connector to Authenticate to the AWS Management Console
You can use the AD Connector to do more things in AWS such as use your on-premises domain to authenticate to the console. This limits the number of IAM users needed to be crated in the AWS console and hopefully helps to protect the environment even further.
First, we create an endpoint so that the AWS services can access the directory. Enter a name for the endpoint and click the “Create Access URL”.
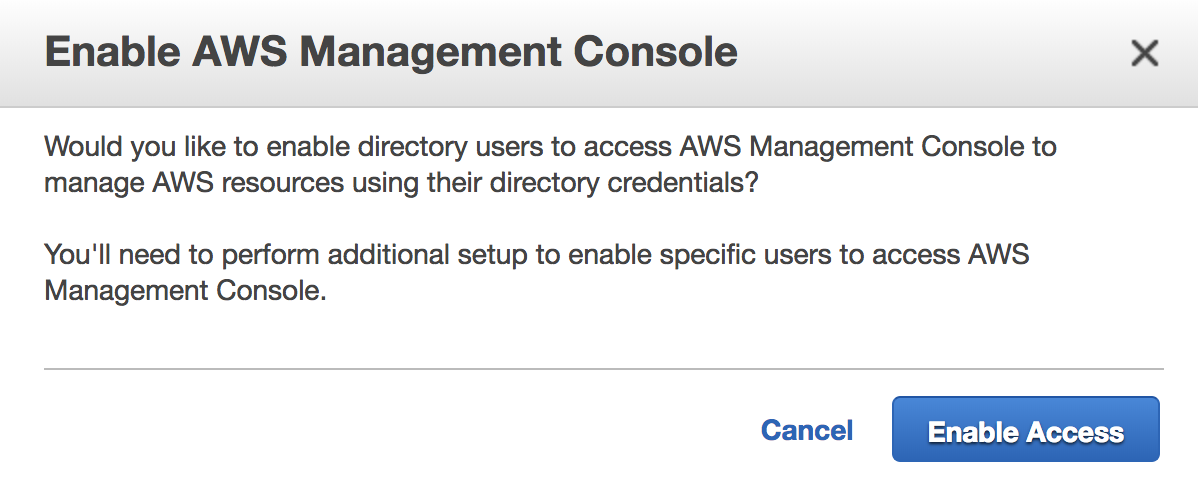
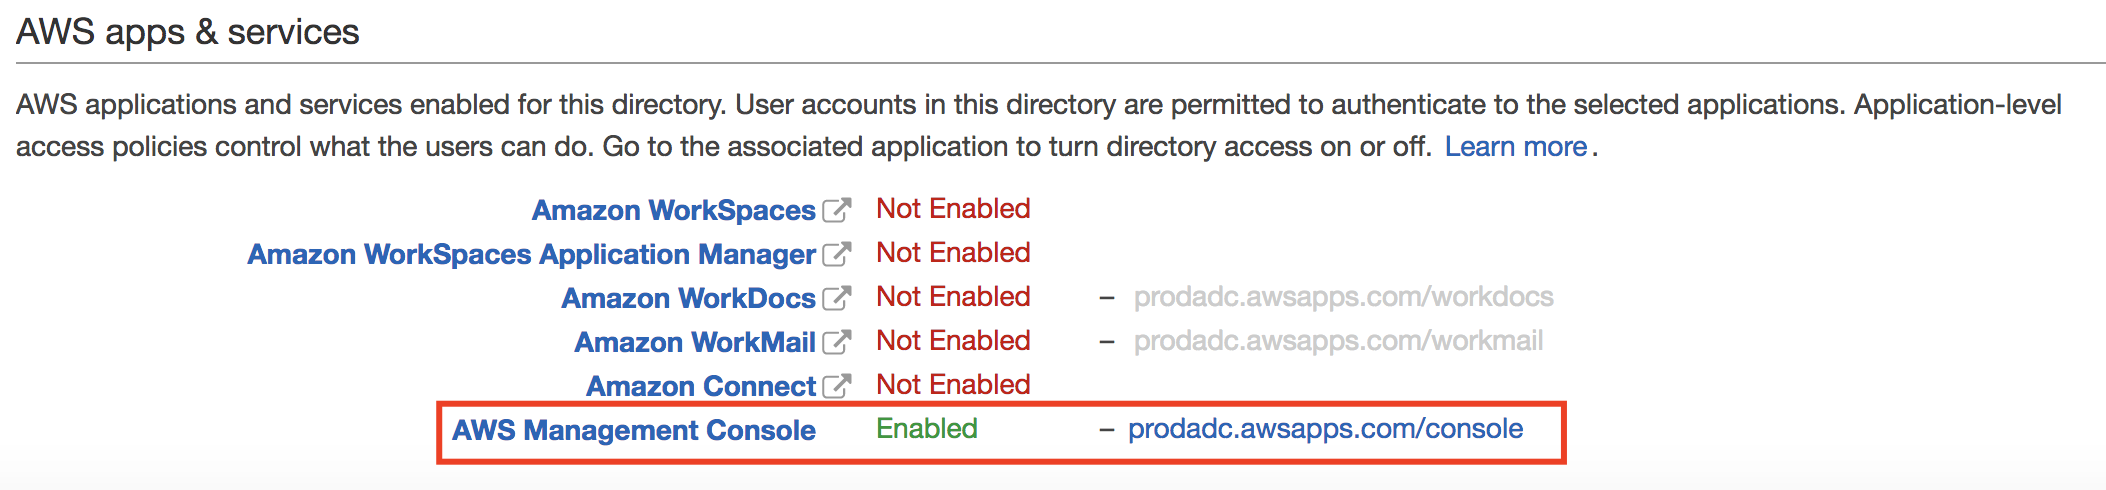
Click “Continue” to proceed with creating an endpoint. Notice that you can’t change it later. Click Continue. There are other services integrated with AWS Directory Services but for this example, we’ll just use the Management Console. Navigate back to your directory service details and look towards the bottom of the screen under AWS apps & services. Click the AWS Management Console. When the new window opens click the “Enable Access” button.
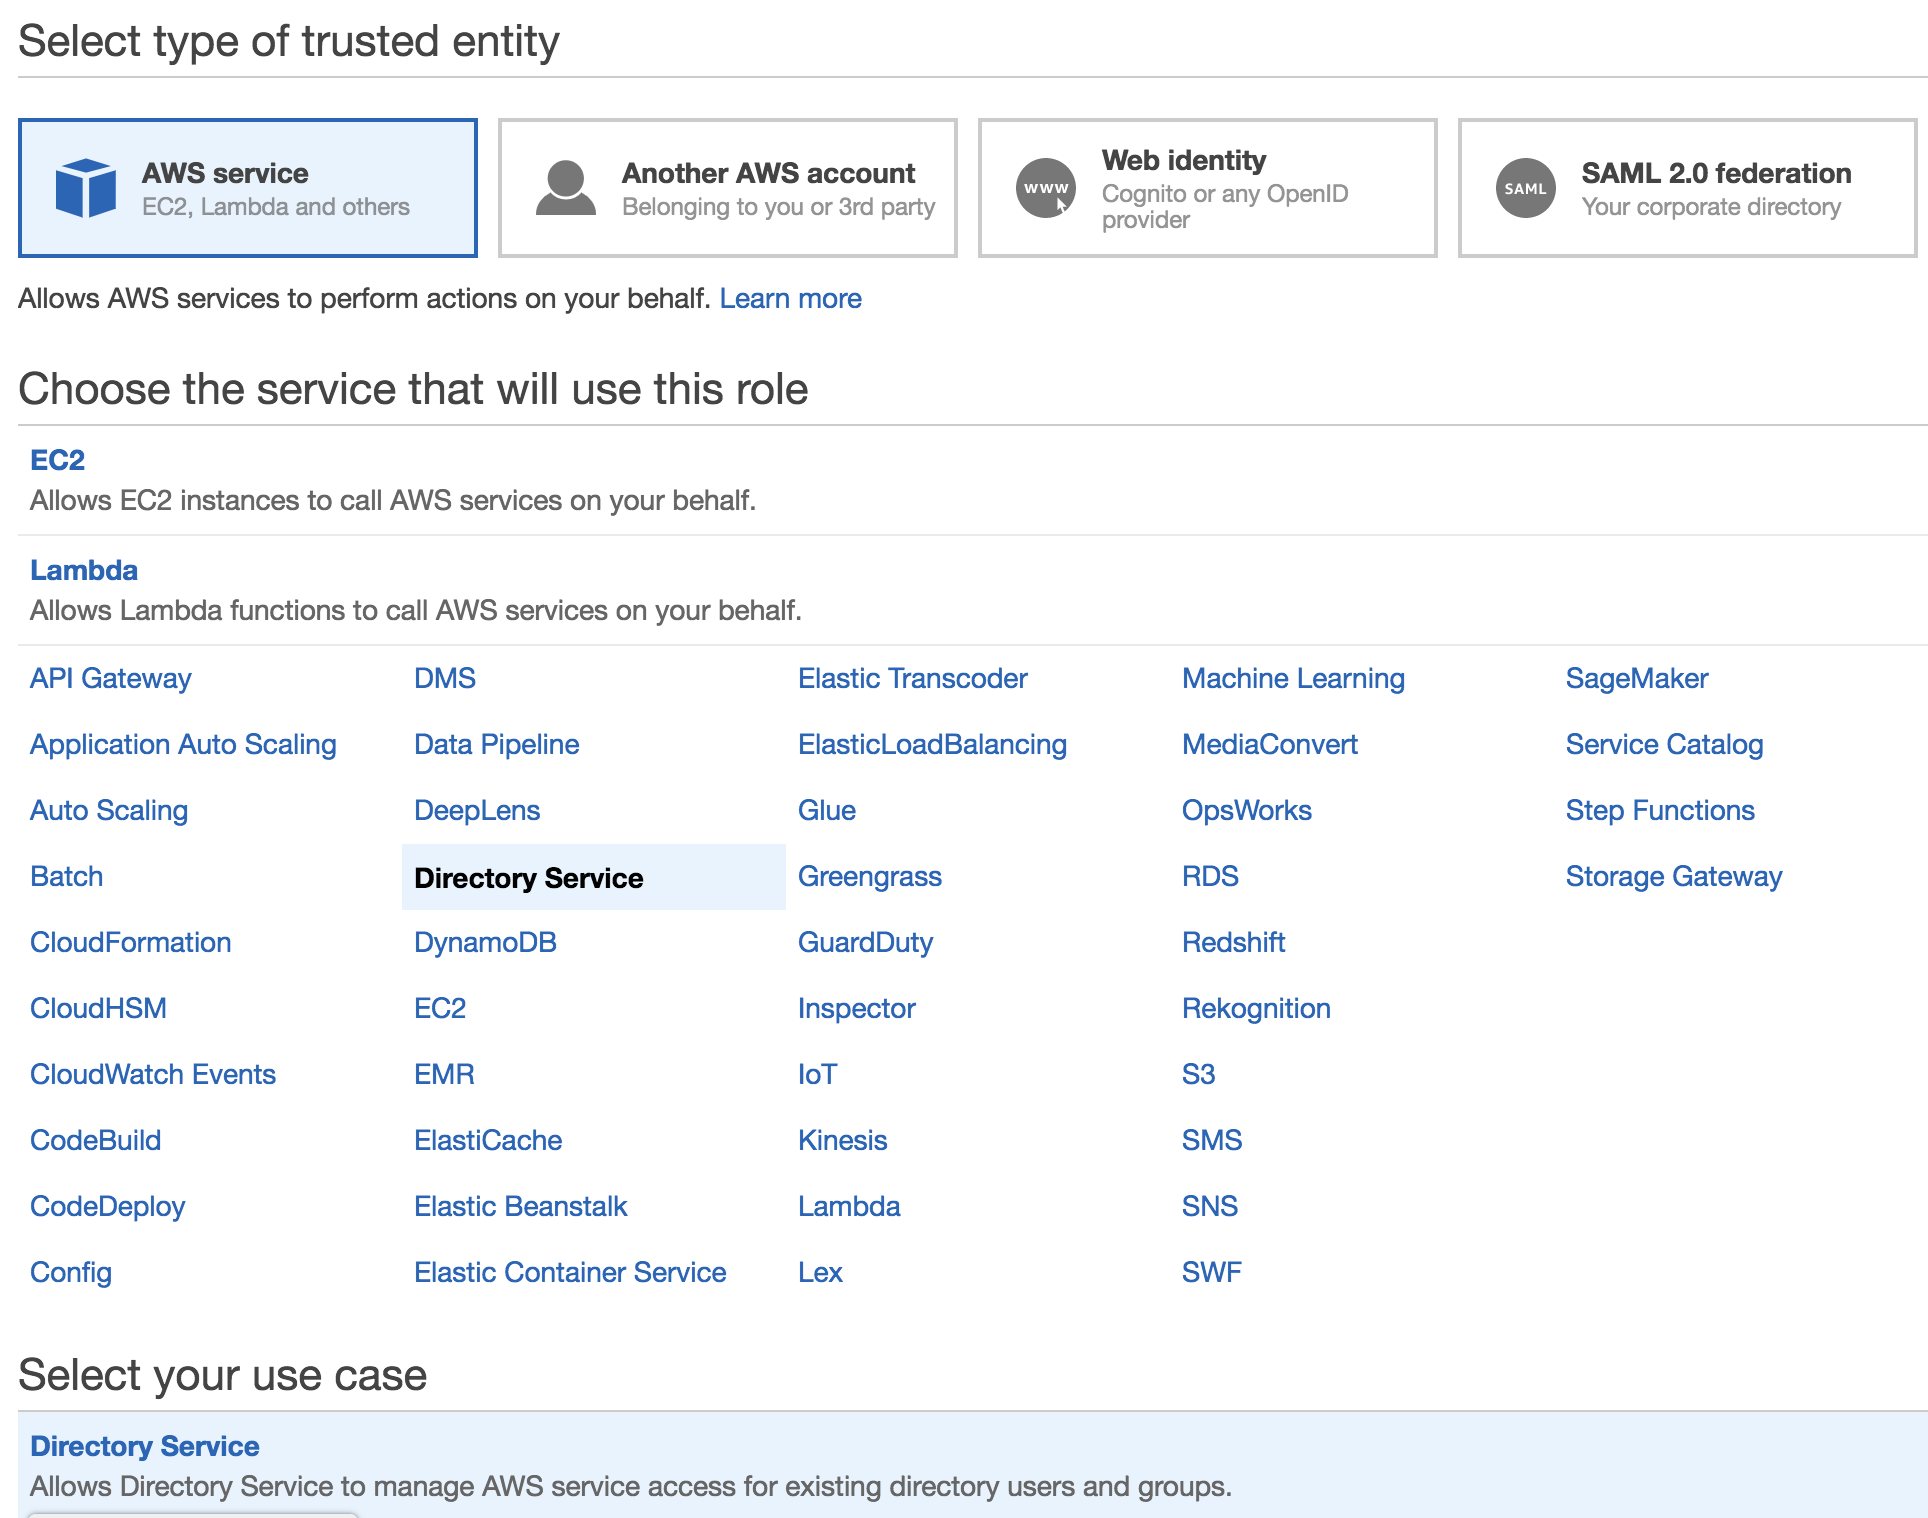
Before the users and groups within AD can login to the console with their AD credentials, another Role needs to be created to provide access to the console. Go to the IAM console again and create another role. This time when you create a new role, choose the Directory Service as the service that will use the role.
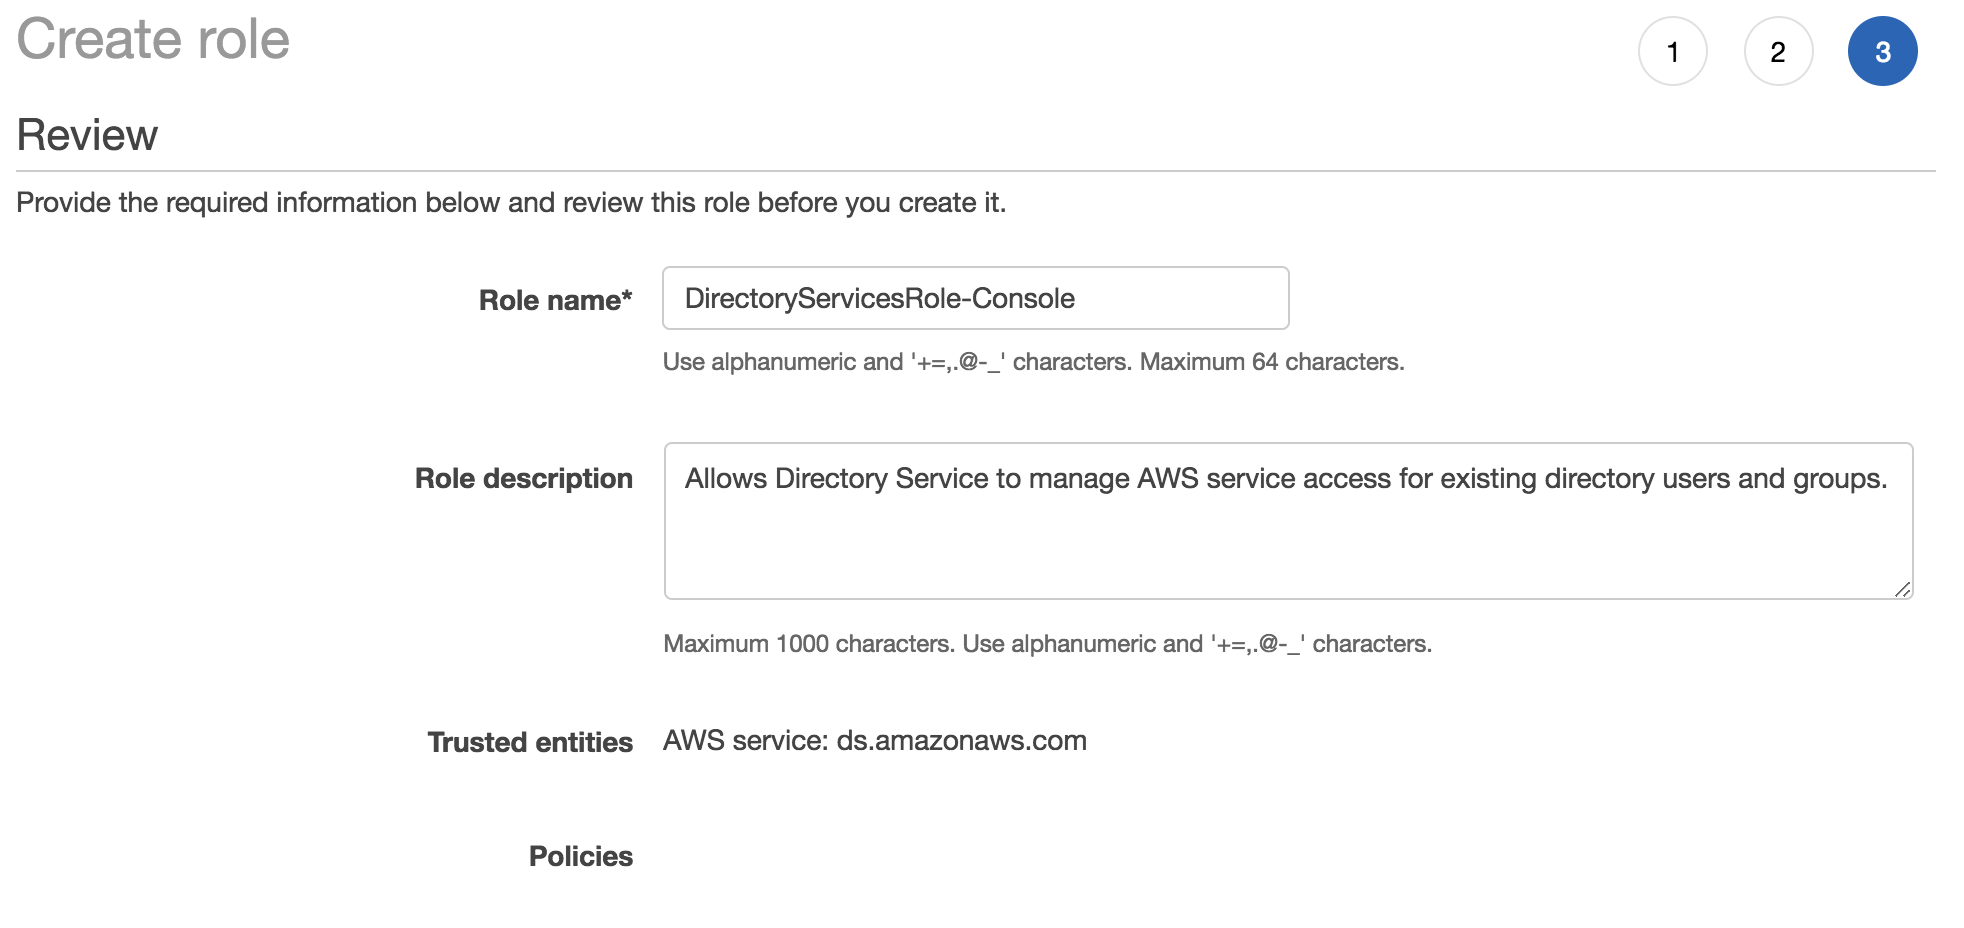
You don’t need to assign any additional permissions (at this time) since we’re only demonstrating that this role can be used to authenticate. If you plan to use this role for users to have permissions to use anything in the console, those permissions need to be added. On the last step, give the role a name.
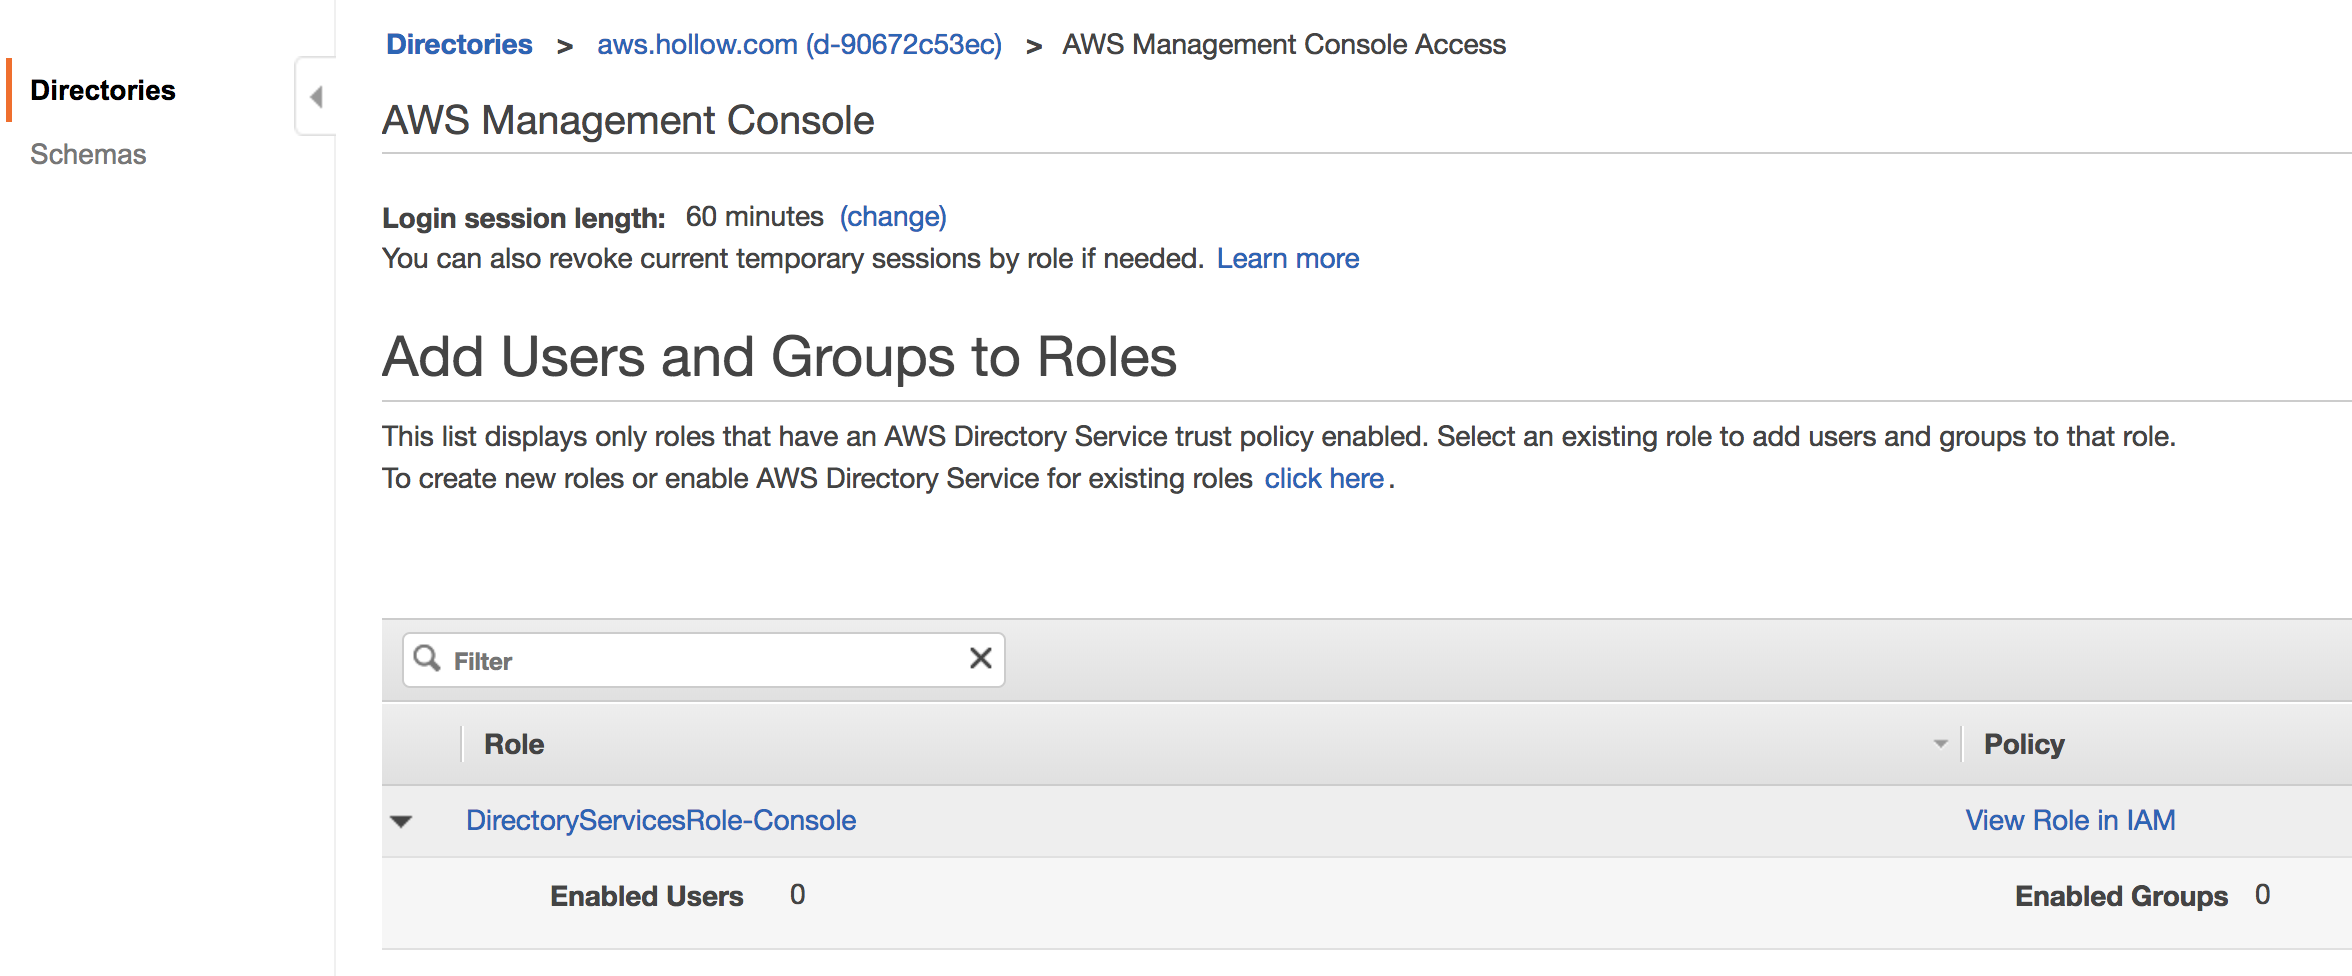
Once you’ve created the role, go back to your directory and click the Management Console Access link.
From here you’ll see a section for Users and Groups to Roles. A single Role will be listed which is what was just built in the previous few steps. Click the role to assign users from your on-premises domain.
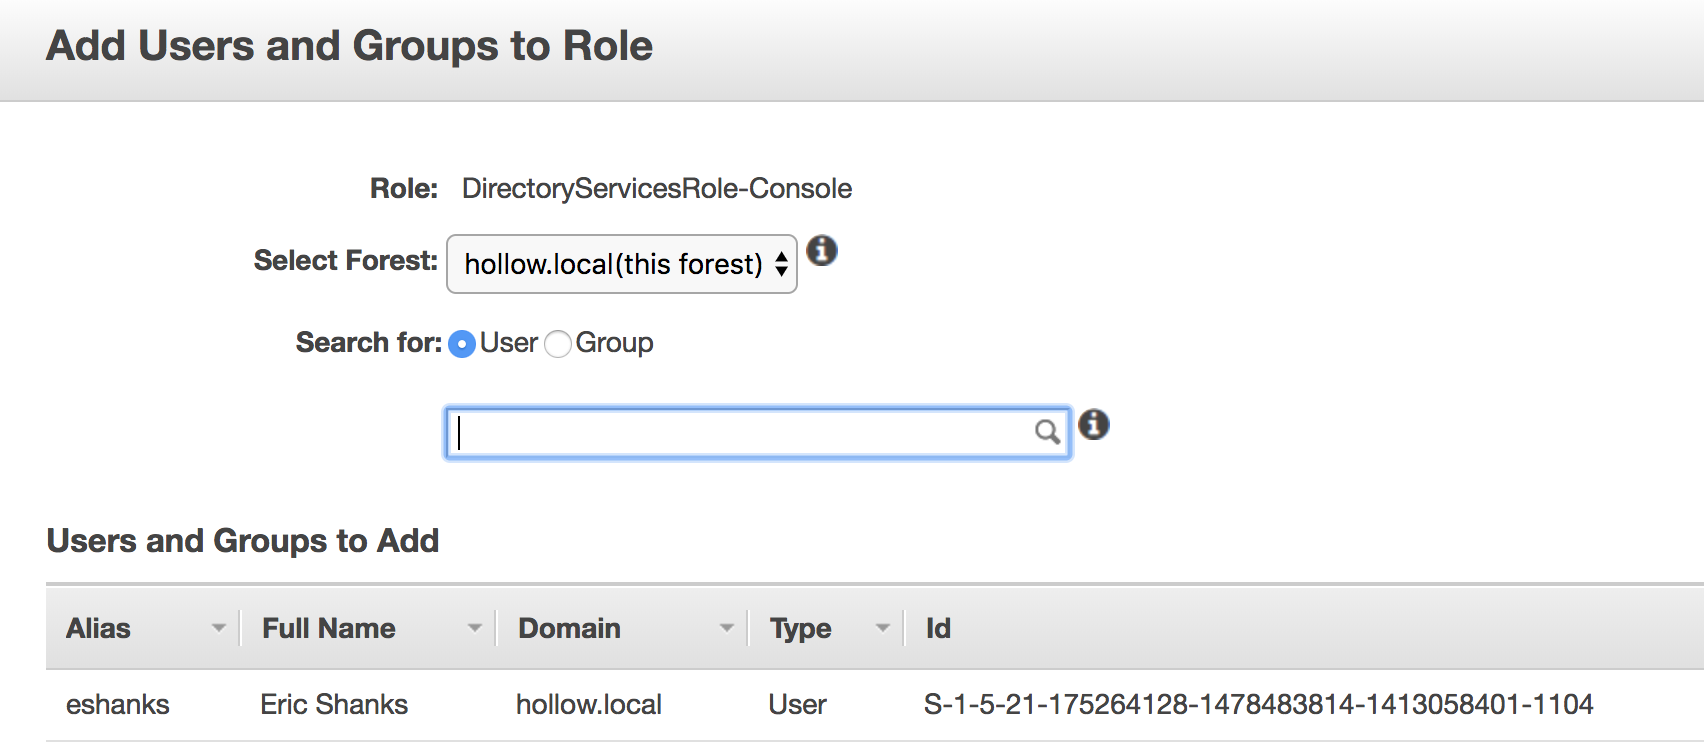
In the Add Users and Groups to Role window type a name. I chose the my own AD user account.
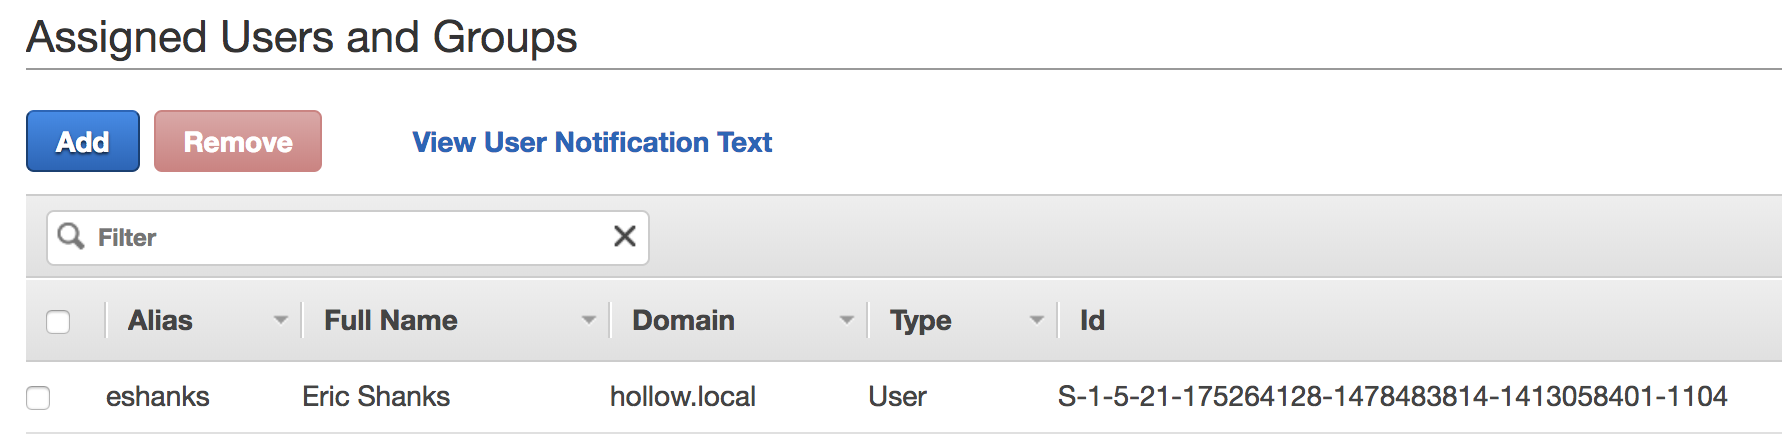
When done you’ll see your user(s) added to the directory.
Now, if you go to your endpoint URL (hint, the link is located next to the Management Console in your directory) you’ll be taken to a login page. Enter the Username and Password of the user that you added, and you’ve used your new Microsoft AD service and your directory store for the AWS Management Console.

Summary
Congratulations on setting up AD Connector. You can how use your existing Active Directory environment to login to the AWS Console, and automatically have new Windows instances joined to the domain for you.