One of the most basic tasks that happens on a network is assigning IP Addresses. Once a VMware vCNS Edge appliance has been deployed, you can now hand out IP address through Dynamic Host Control Protocol (DHCP).
In previous posts, I’ve walked through installing vCNS Manager and installing vCNS Edge appliances. These are prerequisites to setting up DHCP on the VMware vCloud Network and Security appliance.
vCNS Edge DHCP Setup
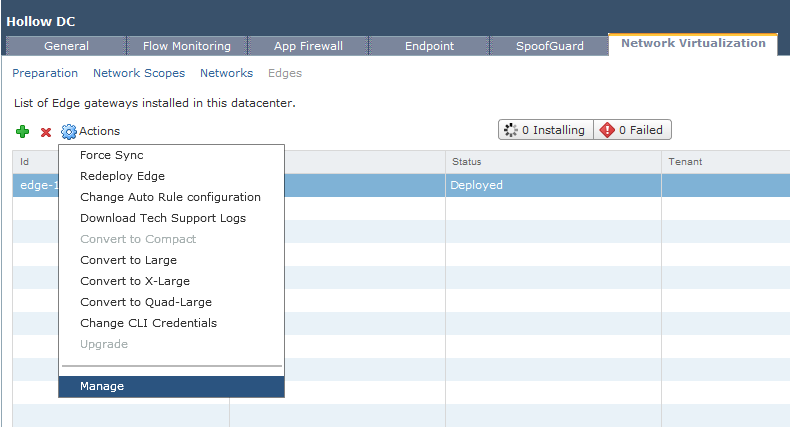
Log into your vShield Manager and click on the Datacenter. Click the “Network Virtualization” Tab where you’ll find the Edge appliance you’ve already deployed. Go to Actions and click “Manage”.
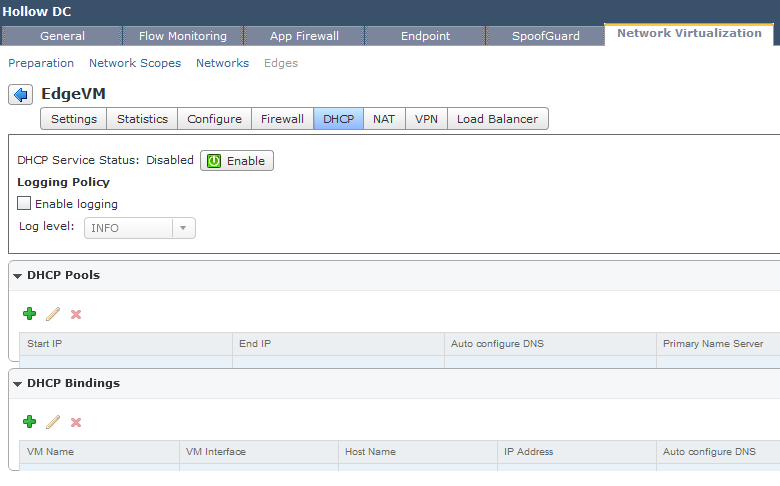
Go to the DHCP Tab of the edge appliance. Click the “+” sign under DHCP Pools.
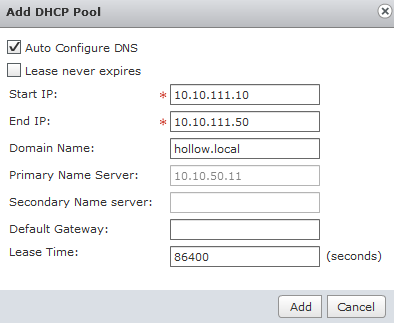
Configure your DHCP Pool here. This is synonymous with a DHCP Scope in Windows. Enter the IP Address to start handing out addresses at, and the ending IP. If you’re going to use static IP’s in this range, be sure to leave yourself some unassigned IP addresses.
Also, enter the domain name, wins servers and a default gateway if you need to have a next hop router.
When you’re done adding your DHCP Pools, you will want to enable the DHCP Service. Lastly, be sure to click the “Publish Changes” so that these configuration options are activated.

When you’re done, the DHCP Screen should look similar to the screenshot below. Keep in mind that you can have more than one DHCP Pool, especially if you have multiple networks attached to the Edge device.

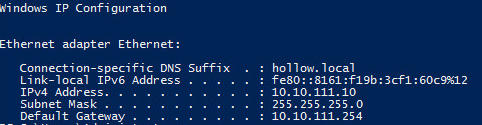
When I log into my test VM, and run IPConfig, I can see that I’ve received the first IP address in the pool - 10.10.111.10 as we expect.
Summary
Assigning IP Addresses is a first step in utilizing your shiny new vCNS Edge appliance, but totally necessary if you want to have an easy to use network. In future posts, we’ll look at other things you can do with your vCNS Edge deployment.