We love Kubernetes. It’s becoming a critical platform for us to manage our containers, but deploying Kubernetes clusters is pretty tedious. Luckily for us, cloud providers such as AWS are helping to take care of these tedious tasks so we can focus on what is more important to us, like building apps. This post shows how you can go from a basic AWS account to a Kubernetes cluster for you to deploy your applications.
EKS Environment Setup
To get started, we’ll need to deploy an IAM Role in our AWS account that has permissions to manage Kubernetes clusters on our behalf. Once that’s done, we’ll deploy a new VPC in our account to house our EKS cluster. To speed things up, I’ve created a CloudFormation template to deploy the IAM role for us, and to call the sample Amazon VPC template. You’ll need to fill in the parameters for your environment.
NOTE: Be sure you’re in a region that supports EKS. Not all regions currently support EKS as of the time of this writing.
AWSTemplateFormatVersion: 2010-09-09
Description: 'EKS Setup - IAM Roles and Control Plane Cluster'

Metadata:

  "AWS::CloudFormation::Interface":
    ParameterGroups:
      - Label:
          default: VPC
        Parameters:
          - VPCCIDR
      - Label:
          default: Subnets
        Parameters:
          - Subnet01Block
          - Subnet02Block
          - Subnet03Block

Parameters:

  VPCCIDR:
    Type: String
    Description: VPC CIDR Address
    AllowedPattern: "(\\d{1,3})\\.(\\d{1,3})\\.(\\d{1,3})\\.(\\d{1,3})/(\\d{1,2})"
    ConstraintDescription: "Must be a valid IP CIDR range of the form x.x.x.x/x."

  Subnet01Block:
    Type: String
    Description: Subnet01
    AllowedPattern: "(\\d{1,3})\\.(\\d{1,3})\\.(\\d{1,3})\\.(\\d{1,3})/(\\d{1,2})"
    ConstraintDescription: "Must be a valid IP CIDR range of the form x.x.x.x/x."

  Subnet02Block:
    Type: String
    Description: Subnet02
    AllowedPattern: "(\\d{1,3})\\.(\\d{1,3})\\.(\\d{1,3})\\.(\\d{1,3})/(\\d{1,2})"
    ConstraintDescription: "Must be a valid IP CIDR range of the form x.x.x.x/x."

  Subnet03Block:
    Type: String
    Description: Subnet03
    AllowedPattern: "(\\d{1,3})\\.(\\d{1,3})\\.(\\d{1,3})\\.(\\d{1,3})/(\\d{1,2})"
    ConstraintDescription: "Must be a valid IP CIDR range of the form x.x.x.x/x."

Resources:

  EKSRole:
    Type: "AWS::IAM::Role"
    Properties:
      AssumeRolePolicyDocument:
        Version: "2012-10-17"
        Statement:
          -
            Effect: "Allow"
            Principal:
              Service:
                - "eks.amazonaws.com"
            Action:
              - "sts:AssumeRole"
      ManagedPolicyArns:
        - arn:aws:iam::aws:policy/AmazonEKSClusterPolicy
        - arn:aws:iam::aws:policy/AmazonEKSServicePolicy
      Path: "/"
      RoleName: "EKSRole"

  EKSVPC:
    Type: "AWS::CloudFormation::Stack"
    Properties:
      Parameters:
        VpcBlock: !Ref VPCCIDR
        Subnet01Block: !Ref Subnet01Block
        Subnet02Block: !Ref Subnet02Block
        Subnet03Block: !Ref Subnet03Block
      TemplateURL: https://amazon-eks.s3-us-west-2.amazonaws.com/1.10.3/2018-06-05/amazon-eks-vpc-sample.yaml
      TimeoutInMinutes: 10

Outputs:

  EKSRole:
    Value: !Ref EKSRole

  StackRef:
    Value: !Ref EKSVPC

  EKSSecurityGroup:
    Value: !GetAtt EKSVPC.Outputs.SecurityGroups

  EKSVPC:
    Value: !GetAtt EKSVPC.Outputs.VpcId

  EKSSubnets:
    Value: !GetAtt EKSVPC.Outputs.SubnetIds
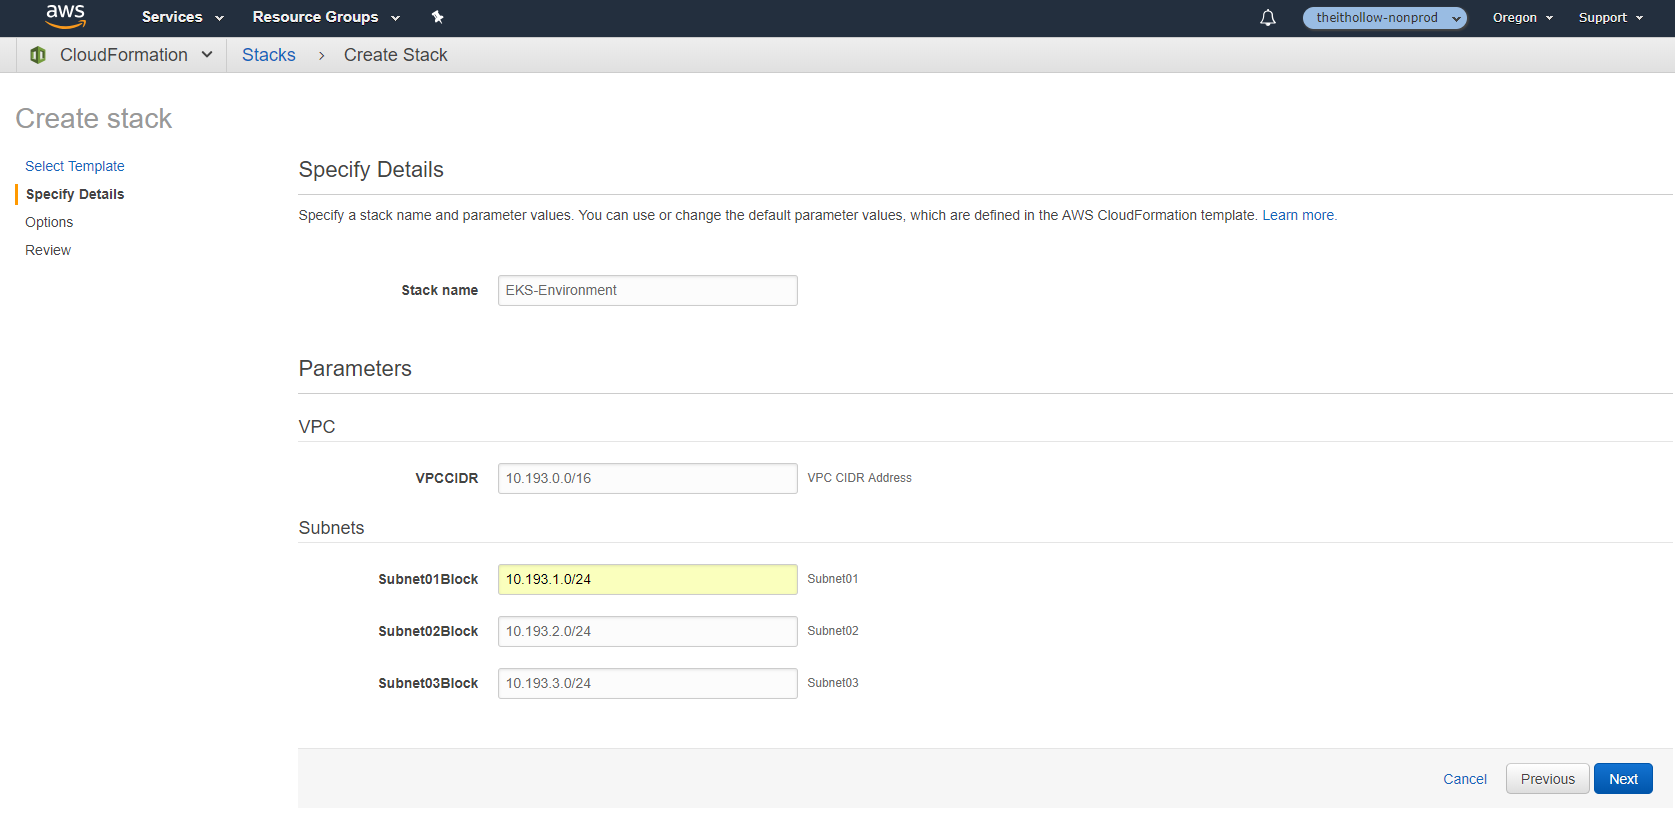
Use the template above and go to the AWS CloudFormation console within your account. Deploy the template and fill in your VPC addressing for a new VPC and subnets.
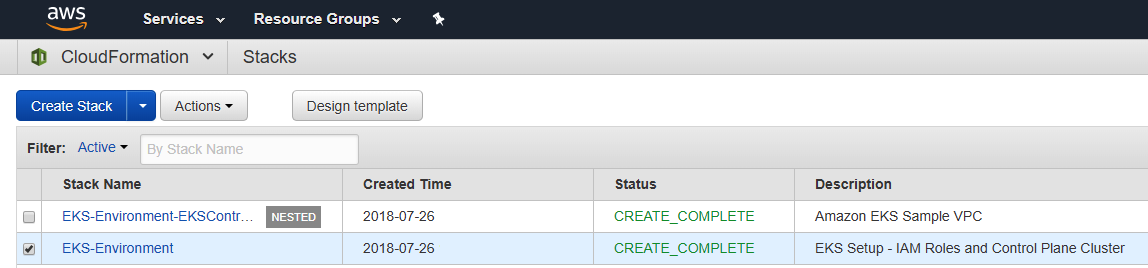
After you’ve deployed the template, you’ll see two stacks that have been created. An IAM role and the EKS VPC/subnets.
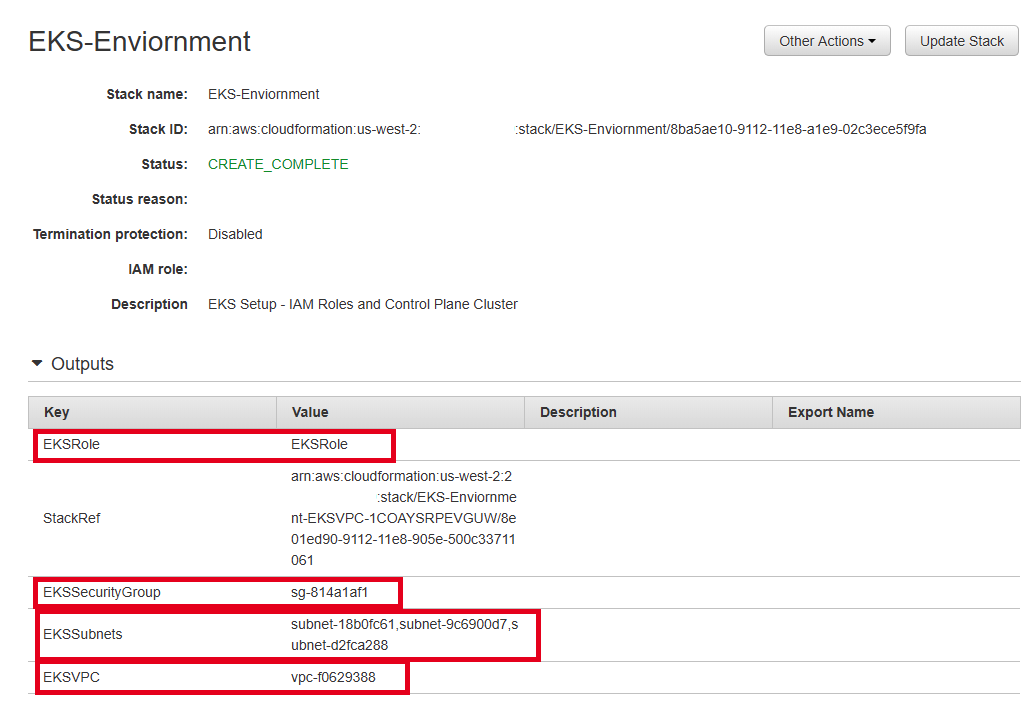
Once the stack has been completed take note of the outputs which will be used for creating the cluster.
Create the Amazon EKS Control Cluster
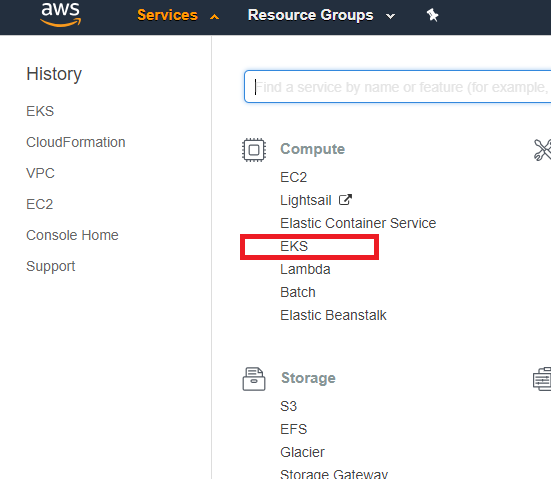
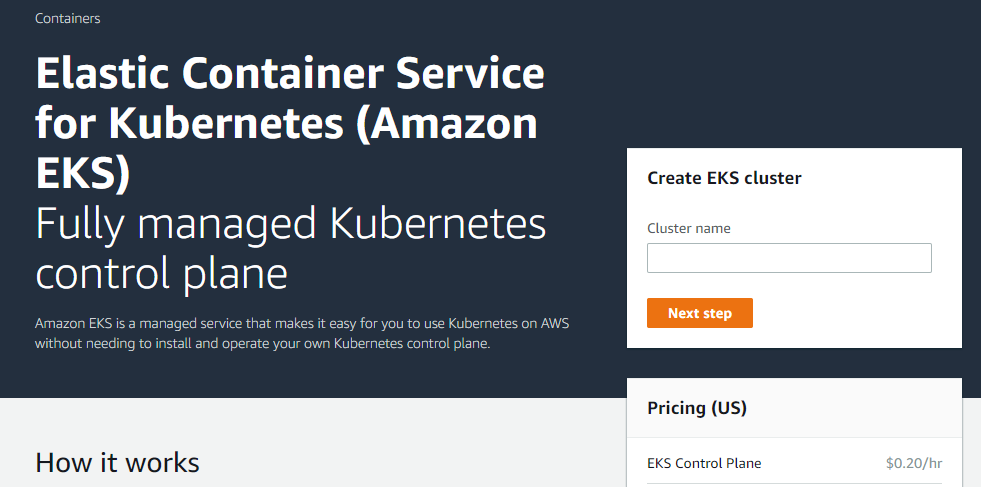
Now that we’ve got an environment to work with, its time to deploy the Amazon EKS control cluster. To do this go to the AWS Console and open the EKS Service.
When you open the EKS console, you’ll notice that you don’t have any clusters created yet. We’re about to change that. Click the “Create Cluster” button.
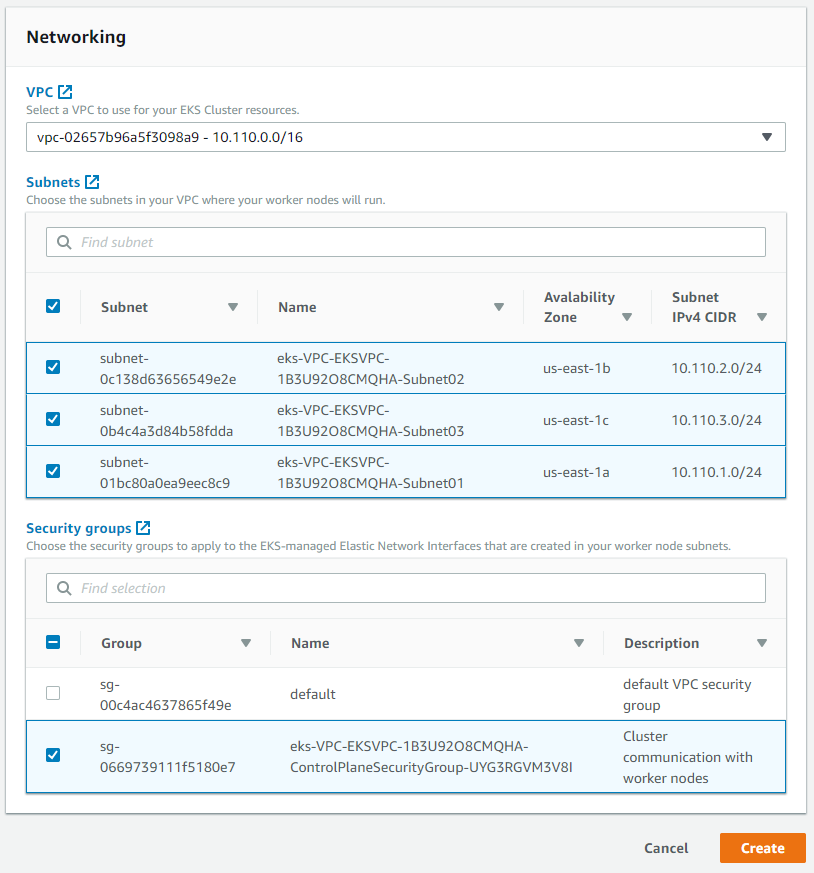
Fill out the information about your new cluster. Give it a name and select the version. Next select the IAM Role, VPC, Subnets and Security Groups for your Kubernetes Control Plane cluster. This info can be found in the outputs from your CloudFormation Template used to create the environment.

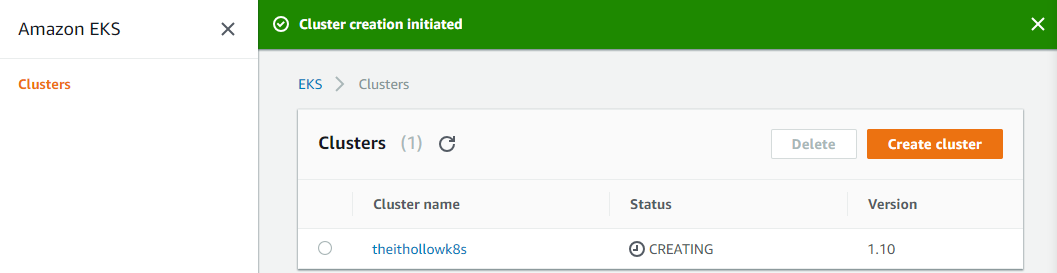
You will see that your cluster is being created. This may take some time, so you can continue with this post to make sure you’ve installed some of the other tools that you’ll need to manage the cluster.
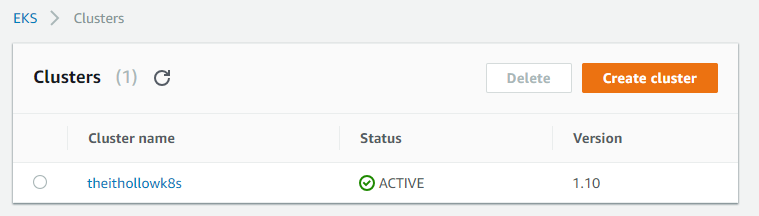
Eventually your cluster will be created and you’ll see a screen like this:
Setup the Tools
You’ll need a few client tools installed in order to manage the Kubernetes cluster on EKS. You’ll need to have the following tools installed:
- AWS CLI v1.15.32 or higher
- Kubectl
- aws-iam-authenticator
The instructions below are to install the tools on a Mac OS client.
- AWS CLI - The easiest way to install the AWS CLI on a mac is to use homebrew. If you’ve already got homebrew installed on your Mac, then skip over this. Otherwise run the following from a terminal in order to install homebrew.
/usr/bin/ruby -e "$(curl -fsSL https://raw.githubusercontent.com/Homebrew/install/master/install)"
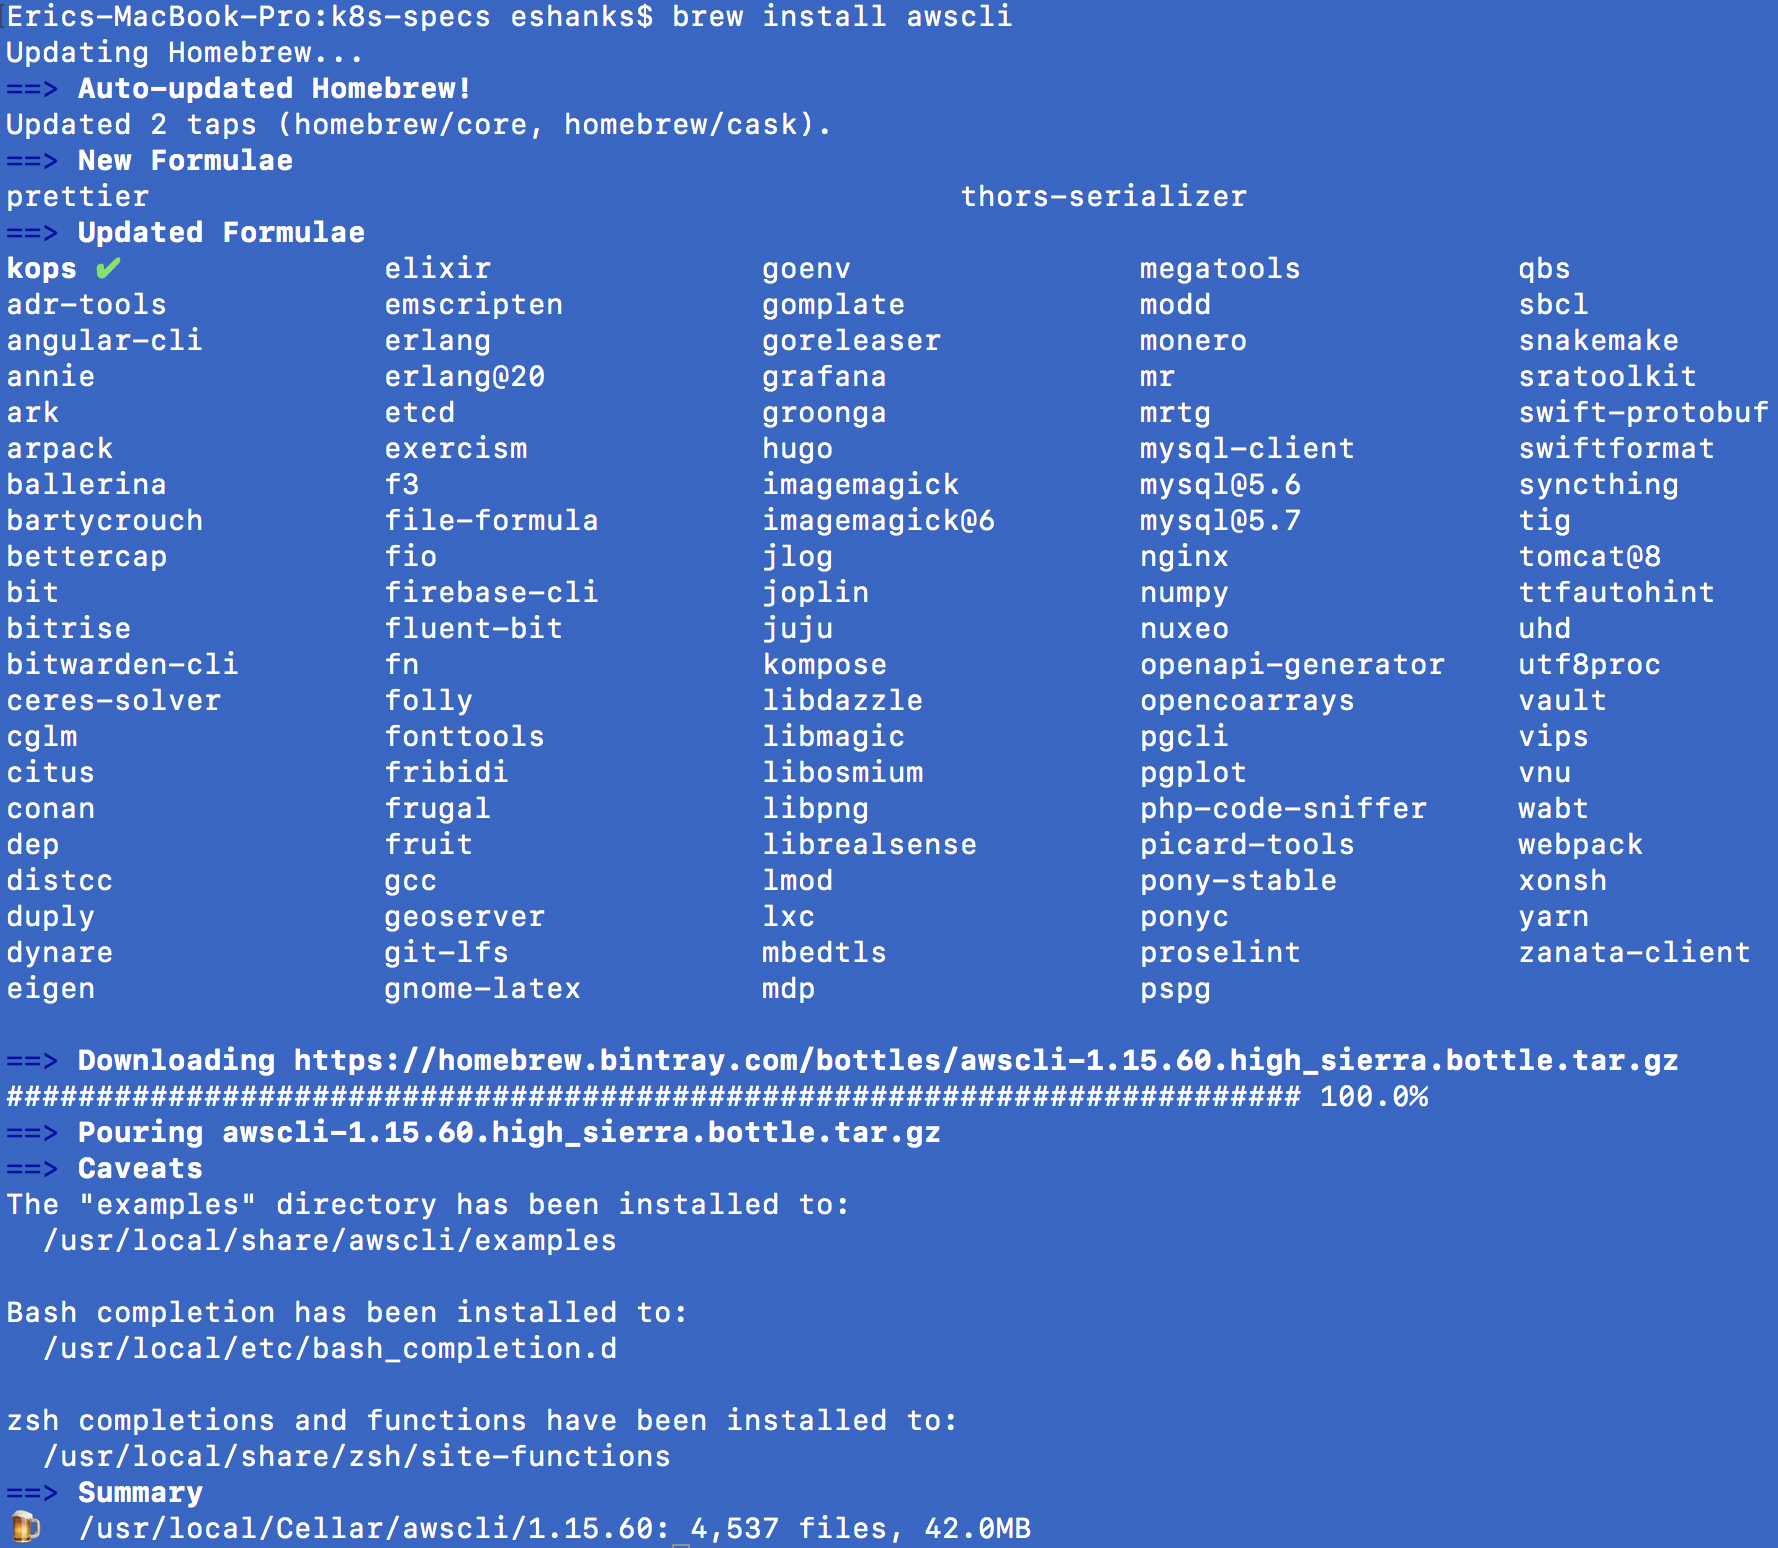
Once homebrew is installed, you can use it to install the aws cli by running:
brew install awscli
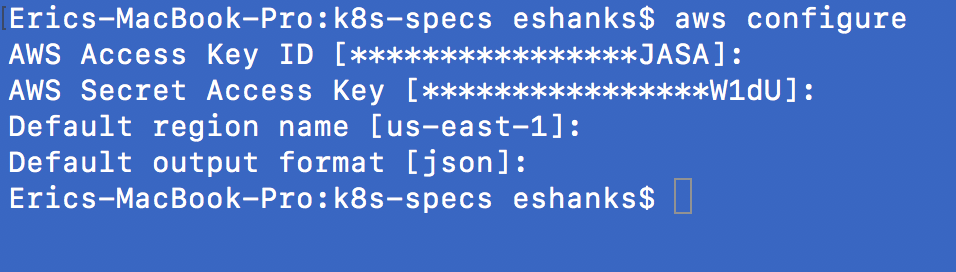
After the AWS CLI has been installed, you’ll need to configure it with your Access Keys, Secrete Keys, regions and outputs. You can start this process by running AWS Configure.
- kubectl - Installing the Amazon EKS-vended kubectl binary, download the kubectl executable for Mac through your terminal.
curl -o kubectl https://amazon-eks.s3-us-west-2.amazonaws.com/1.10.3/2018-06-05/bin/darwin/amd64/kubectl
chmod +x ./kubectl
cp ./kubectl $HOME/bin/kubectl && export PATH=$HOME/bin:$PATH
echo 'export PATH=$HOME/bin:$PATH' >> ~/.bash_profile

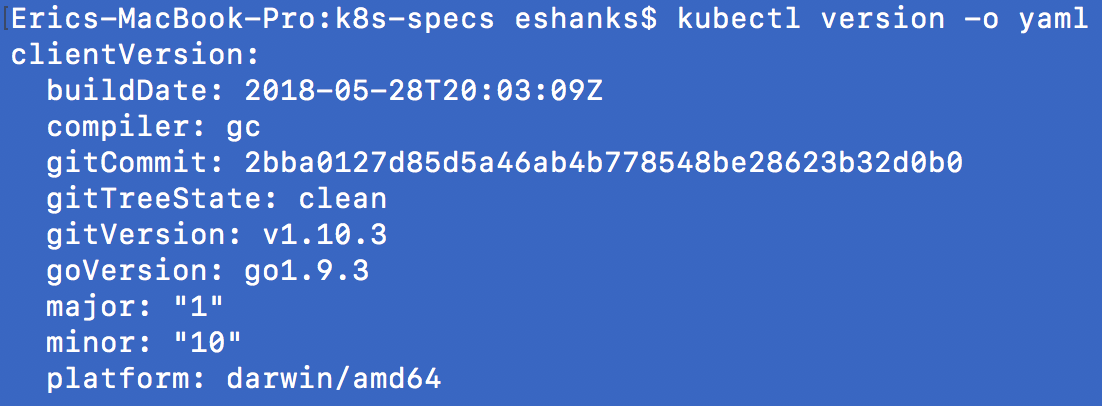
We should be able to check to make sure kubectl is working properly by checking the version from the terminal
kubectl version -o yaml
The result should look something like this:
- Heptio-authenticator-aws - The Heptio Authenticator is used to integrate your AWS IAM settings with your Kubernetes RBAC permissions. To install this, run the following from your terminal
curl -o aws-iam-authenticator https://amazon-eks.s3-us-west-2.amazonaws.com/1.11.5/2018-12-06/bin/darwin/amd64/aws-iam-authenticator
chmod +x ./aws-iam-authenticator && export PATH=$HOME/bin:$PATH
echo 'export PATH=$HOME/bin:$PATH' >> ~/.bash_profile

Configure kubectl for EKS
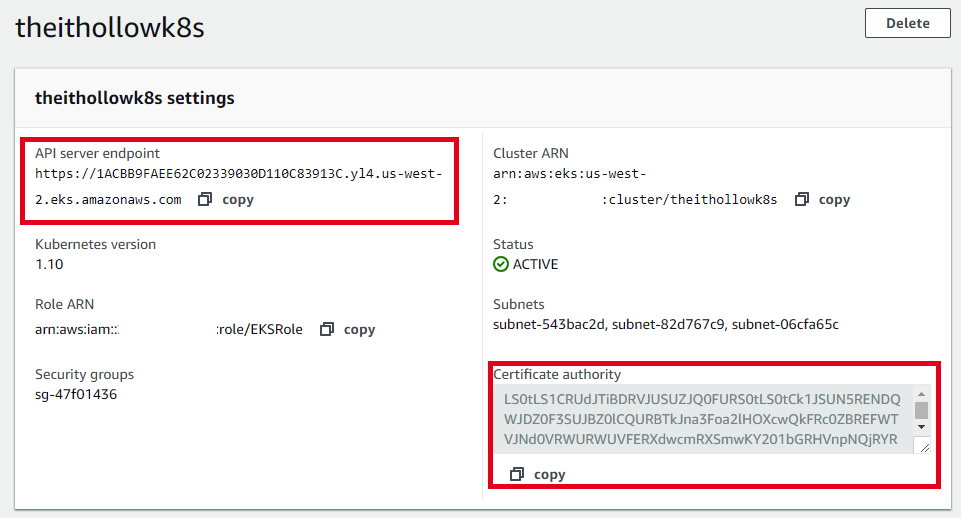
Now that the tools are setup and the control cluster is deployed, we need to configure our kubeconfig file to use with EKS. To do this, the first thing to do is determine the cluster endpoint. You can do this by clicking on your cluster in the GUI and noting the server endpoint and the certificate information.
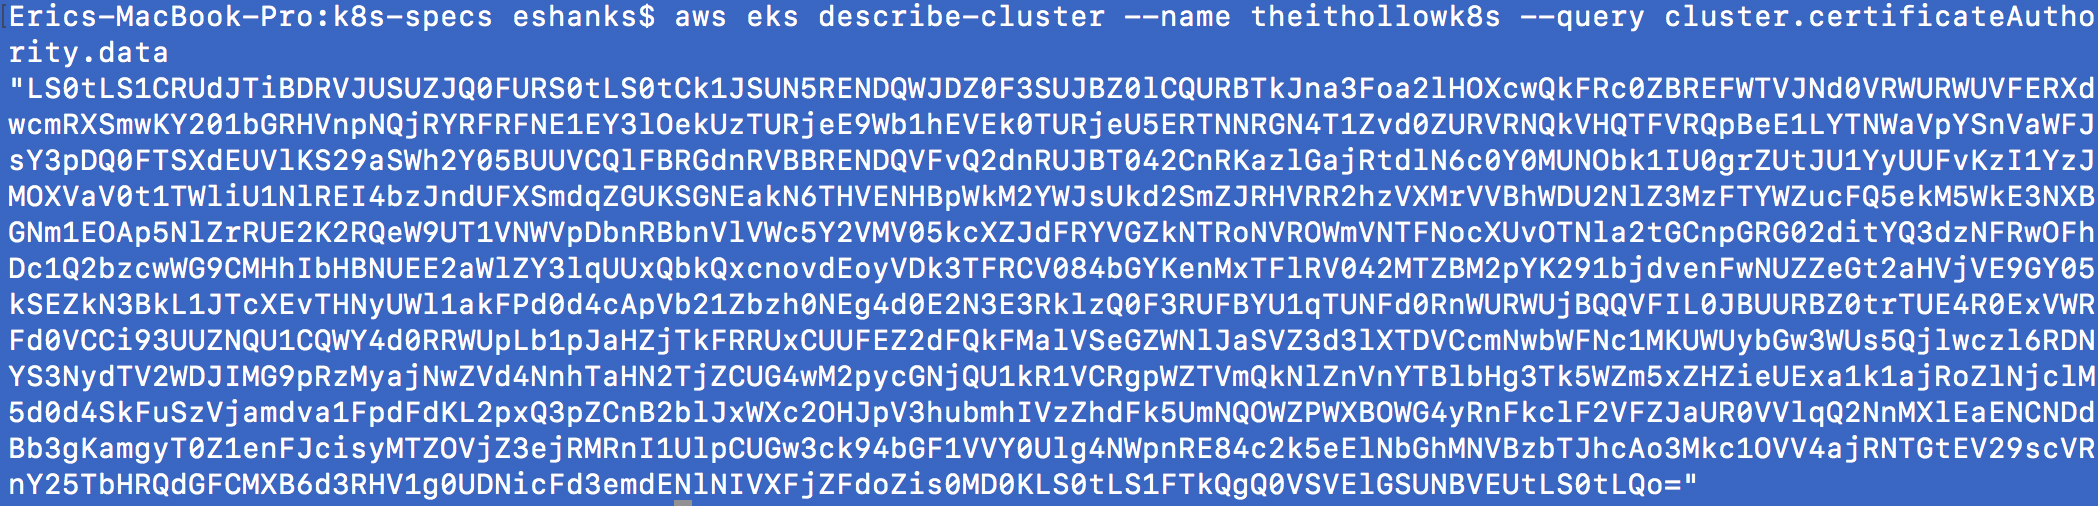
Note: you could also find this through the aws cli by:
aws eks describe-cluster --name [clustername] --query cluster.endpoint

aws eks describe-cluster --name [clustername] --query cluster.certificateAuthority.data
Next, create a new directory called .kube, if it doesn’t already exist. Once that’s done you’ll need to create a new file in that directory with the configuration info. After this, we can use the AWS cli to create a new kubeconfig file by running:
aws eks update-kubeconfig --name [cluster_name]
After you’ve created the config file, you’ll want to add an environment variable to the kubectl will know where to find the cluster configuration. On windows this can be done by running the command below. Substitute your own file paths for the config file that you created.
export KUBECONFIG=$KUBECONFIG:~/.kube/admin.conf
If things are working correctly, we can run kubectl config get-contexts so we can see the AWS authentication is working. I’ve also run kubectl get svc to show that we can read from the EKS cluster.

Deploy EKS Worker Nodes
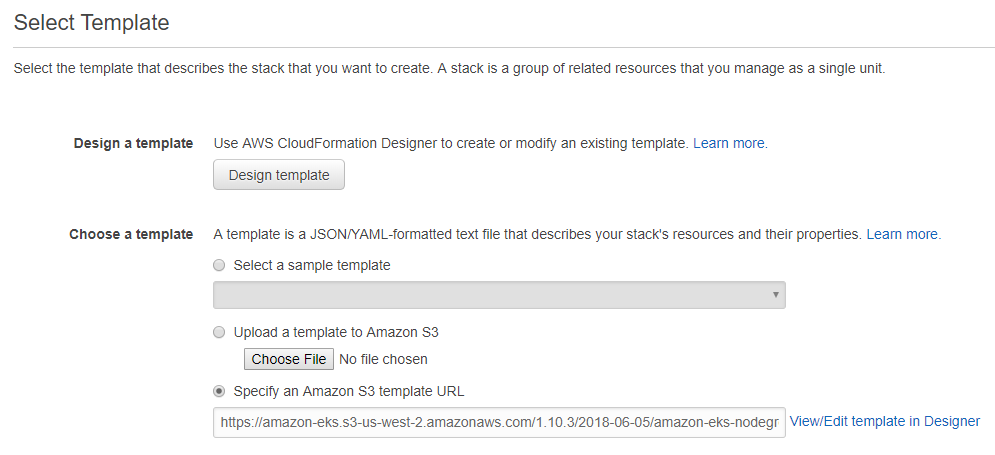
Your control cluster is up and running, and we’ve got our clients connected through the Heptio-authenticator. Now its time to deploy some worker nodes for our containers to run on. To do this, go back to your cloudformation console and deploy the following CFn tempalate that is provided by AWS.
https://amazon-eks.s3-us-west-2.amazonaws.com/cloudformation/2019-01-09/amazon-eks-nodegroup.yaml
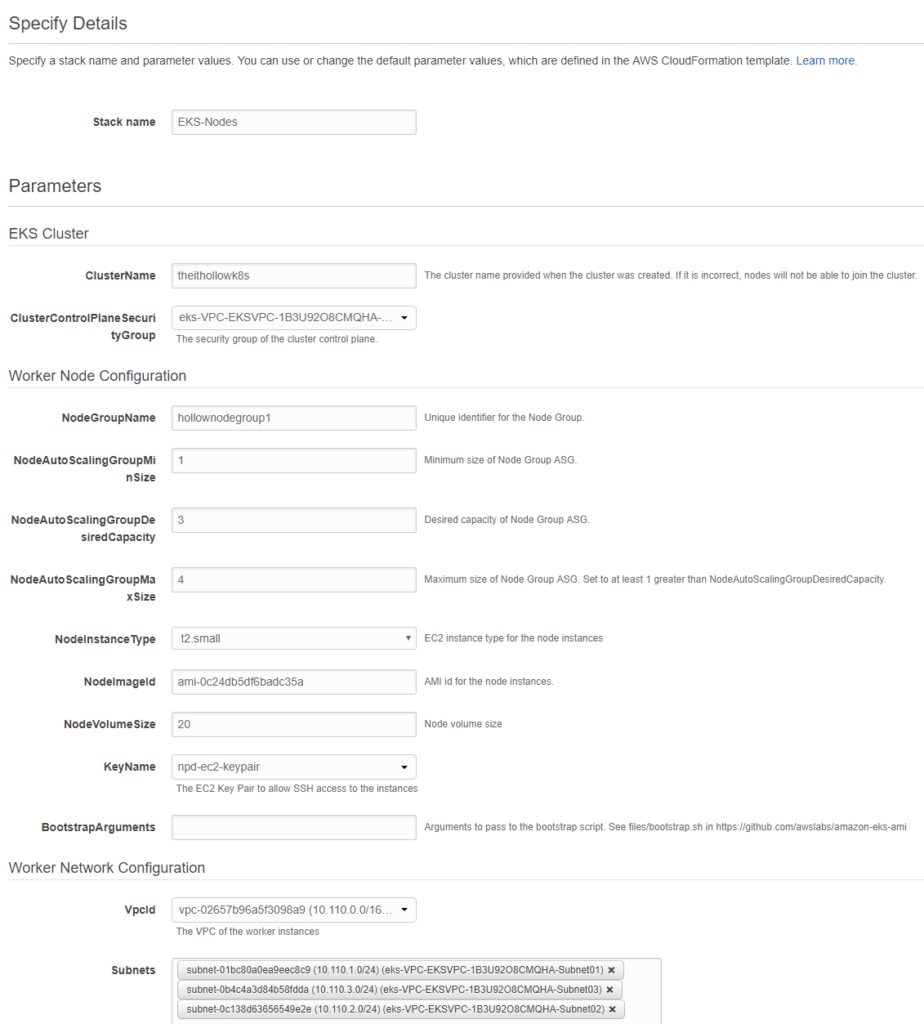
Fill out the deployment information. You’ll need to enter a stack name, number of min/max nodes to scale within, an SSH Key to use, the VPC we deployed earlier, and the subnets. You will also need to enter a ClusterName which must be exactly the same as our control plane cluster we deployed earlier. Also, the NodeImageID must be one of the following, depending on your region:
- US-East-1 (N. Virginia) –
ami-0c24db5df6badc35a - US-West-2 (Oregon) – ami-0a2abab4107669c1b
- US-East-2 (Ohio) – ami-0c2e8d28b1f854c68
Deploy your CloudFormation template and wait for it to complete. Once the stack completes, you’ll need to look at the outputs to get the NodeInstanceRole.

The last step is to ensure that our nodes have permissions and can join the cluster. Use the file format below and save it as aws-auth-cm.yaml.
apiVersion: v1
kind: ConfigMap
metadata:
  name: aws-auth
  namespace: kube-system
data:
  mapRoles: |
    - rolearn: <ARN of instance role (not instance profile)>
      username: system:node:{{EC2PrivateDNSName}}
      groups:
        - system:bootstrappers
        - system:nodes
Replace ONLY the <ARN of instance role (not instance profile)> section with the NodeInstanceRole we got from the outputs of our CloudFormation Stack. Save the file and then apply the configmap to your EKS cluster by running:
kubectl apply -f aws-auth-cm.yaml
After we run the command our cluster should be fully working. We can run “get nodes” to see the worker nodes listed in the cluster.
NOTE: the status of the cluster will initially show “NotReady” re-running the command or using the –watch switch will let you see when the nodes are fully provisioned.

Deploy Your Apps
Congratulations, you’ve build your Kubernetes cluster on Amazon EKS. Its time to deploy your apps which is outside of this blog post. If you want to try out an app to prove that its working, try one of the deployments from the kubernetes.io tutorials such as their guestbook app.
kubectl apply -f https://k8s.io/examples/application/guestbook/redis-master-deployment.yaml
From here on out, it’s up to you. Start deploying your replication controllers, pods, services, etc as you’d like.