Getting new code onto our servers can be done in a myriad of ways these days. Configuration management tools can pull down new code, pipelines can run scripts across our fleets, or we could run around with a USB stick for the rest of our lives. With container based apps, serverless functions, and immutable infrastructure, we’ve changed this conversation quite a bit as well. But what about a plain old server that needs a new version of code deployed on it? AWS CodeDeploy can help us to manage our software versions and rollbacks so that we have a consistent method to update our apps across multiple instances. This post will demonstrate how to get started with AWS CodeDeploy so that you can manage the deployment of new versions of your apps.
Setup IAM Roles
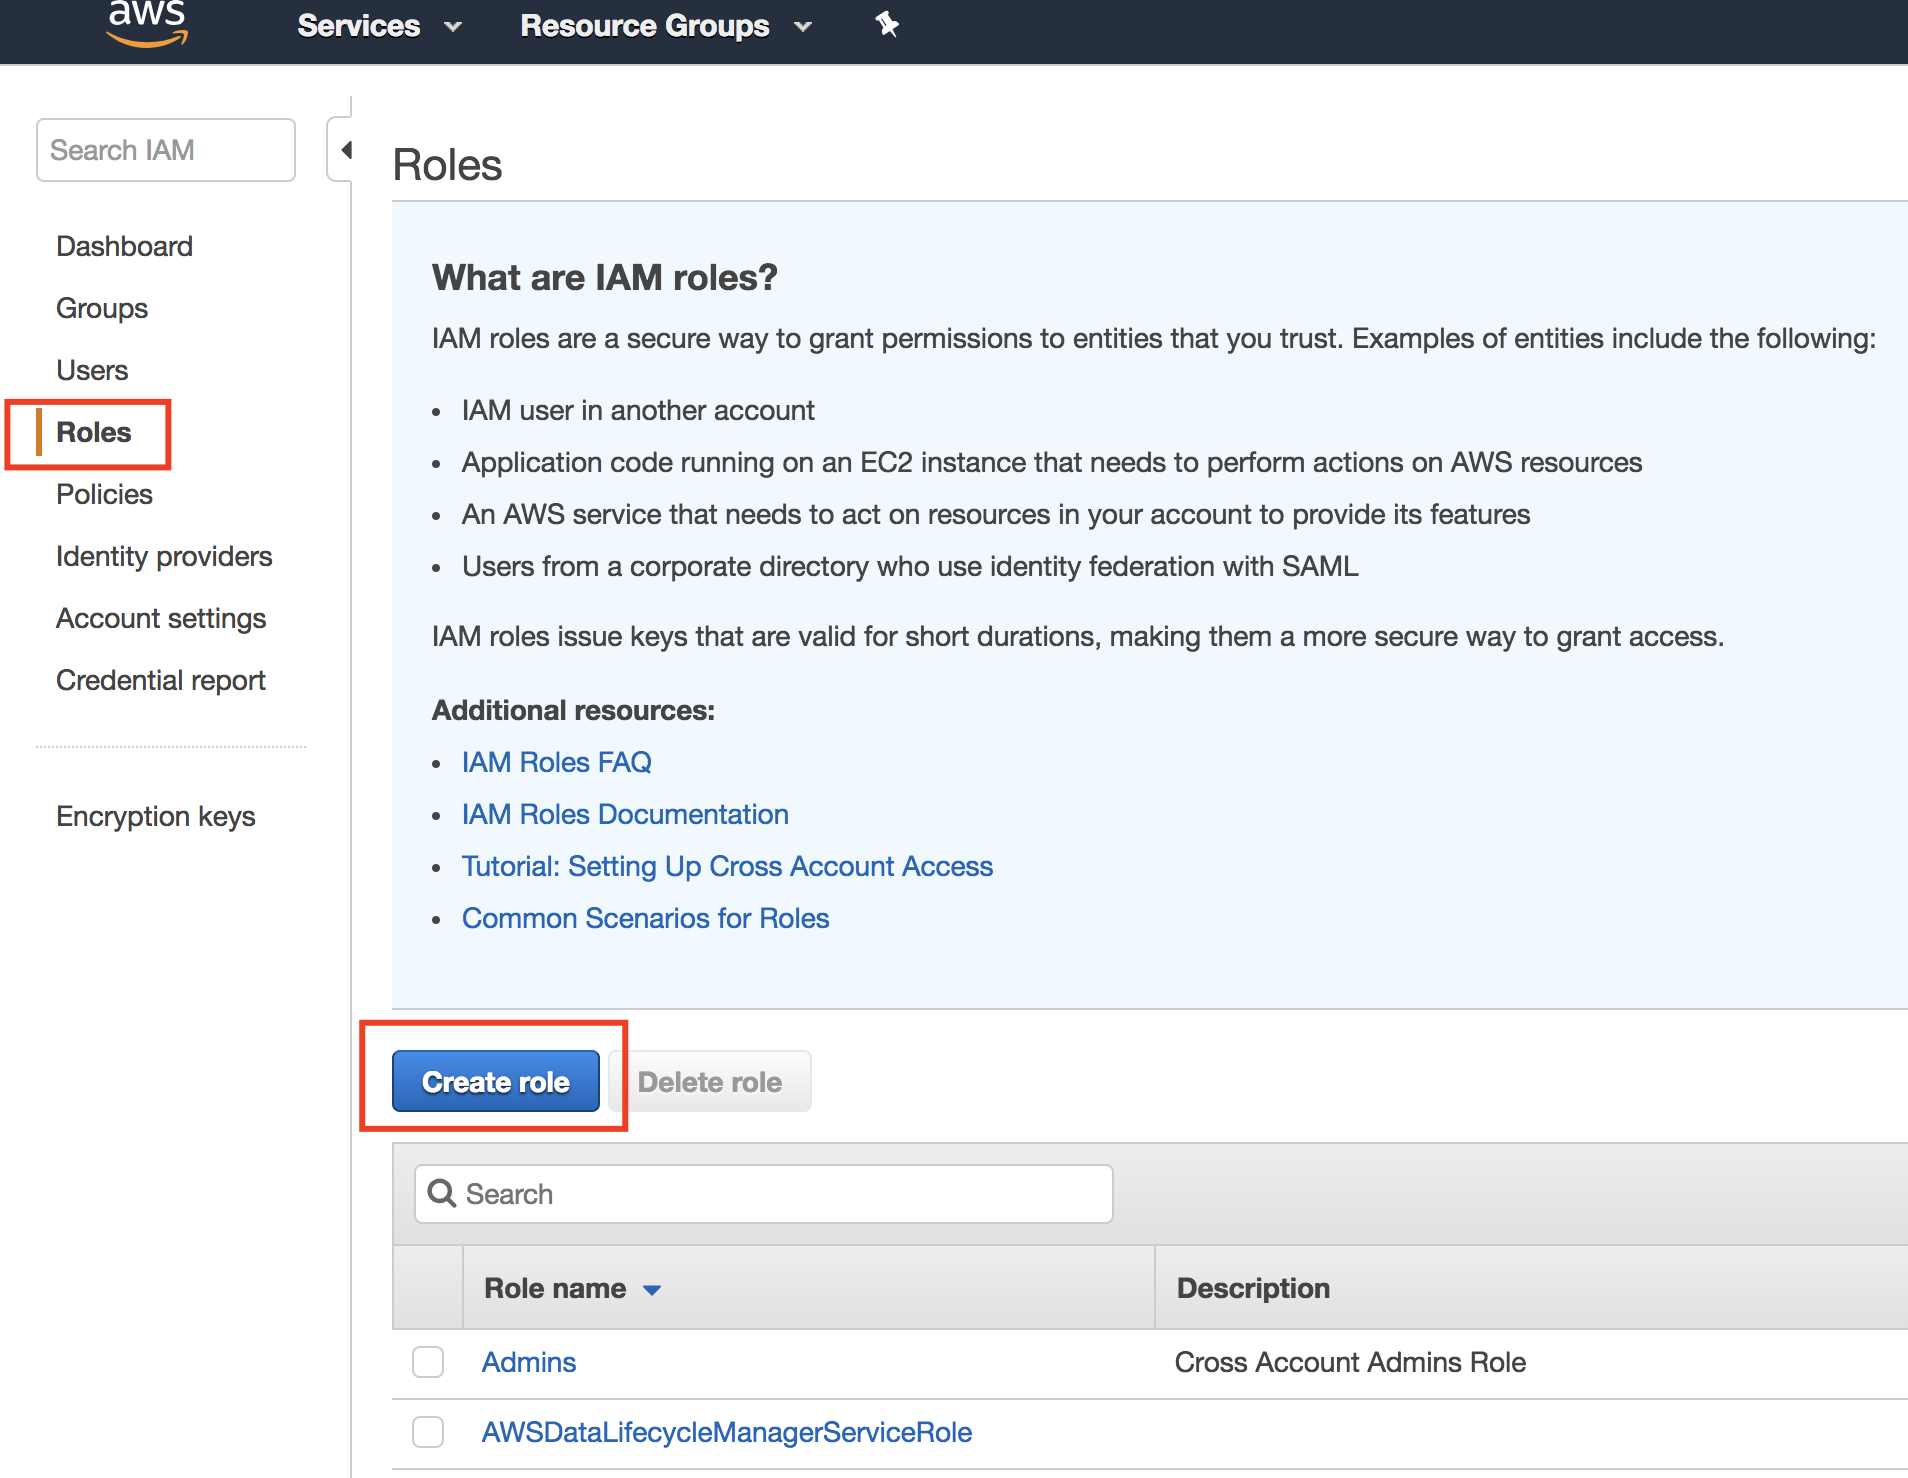
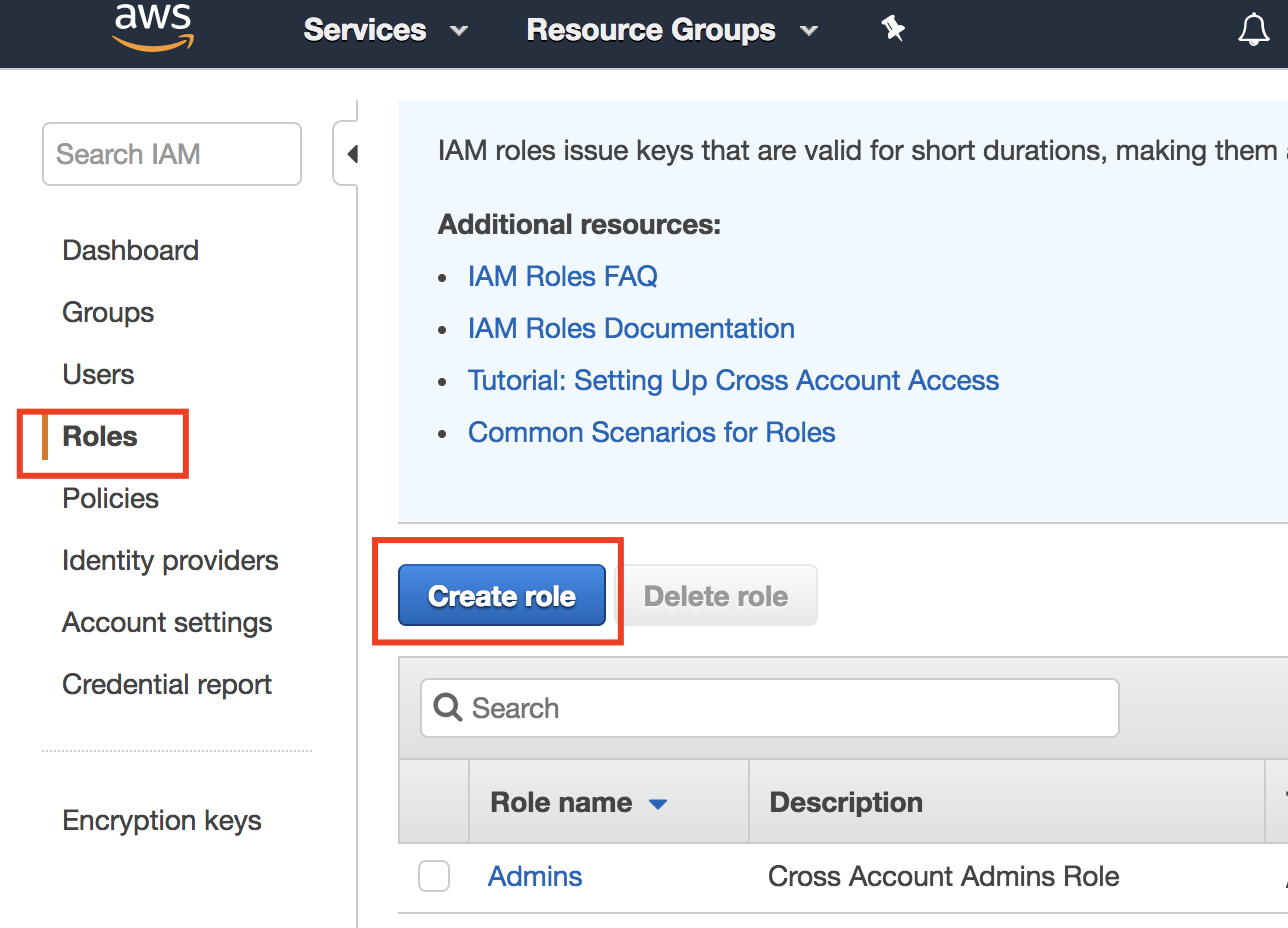
Before we start, I’ll assume that you’ve got a user account with administrator permissions so that you can deploy the necessary roles, servers and tools. After this, we need to start by setting up some permissions for CodeDeploy. First, we need to create a service role for CodeDeploy so that it can read tags applied to instances and take some actions for us. Go to the IAM console and click on the Roles tab. Then click “Create role”.
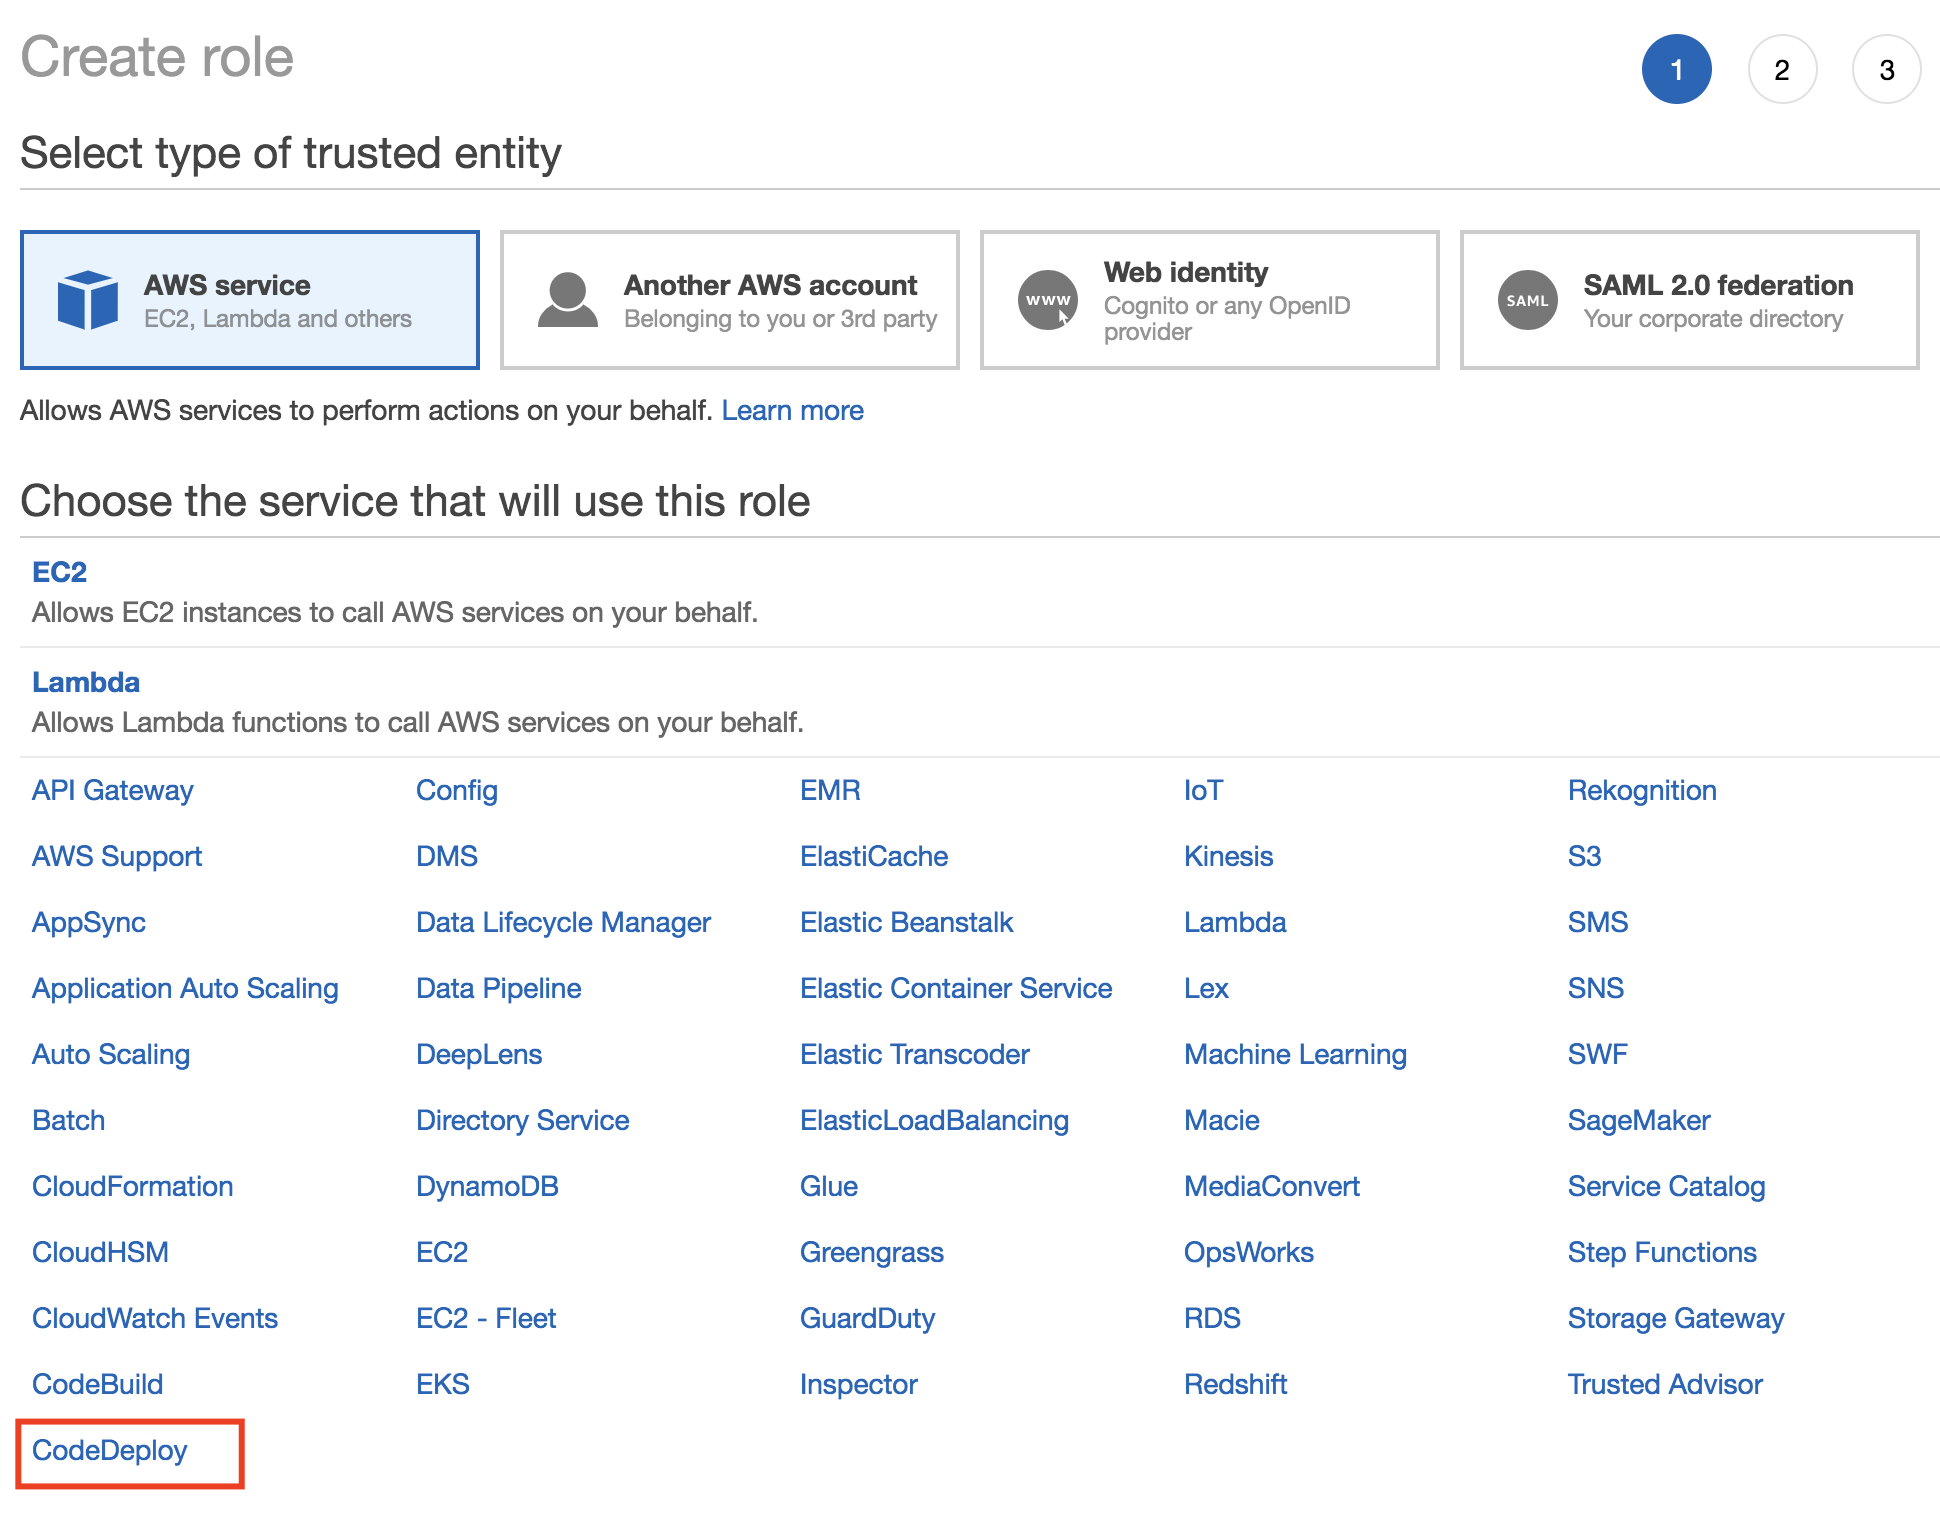
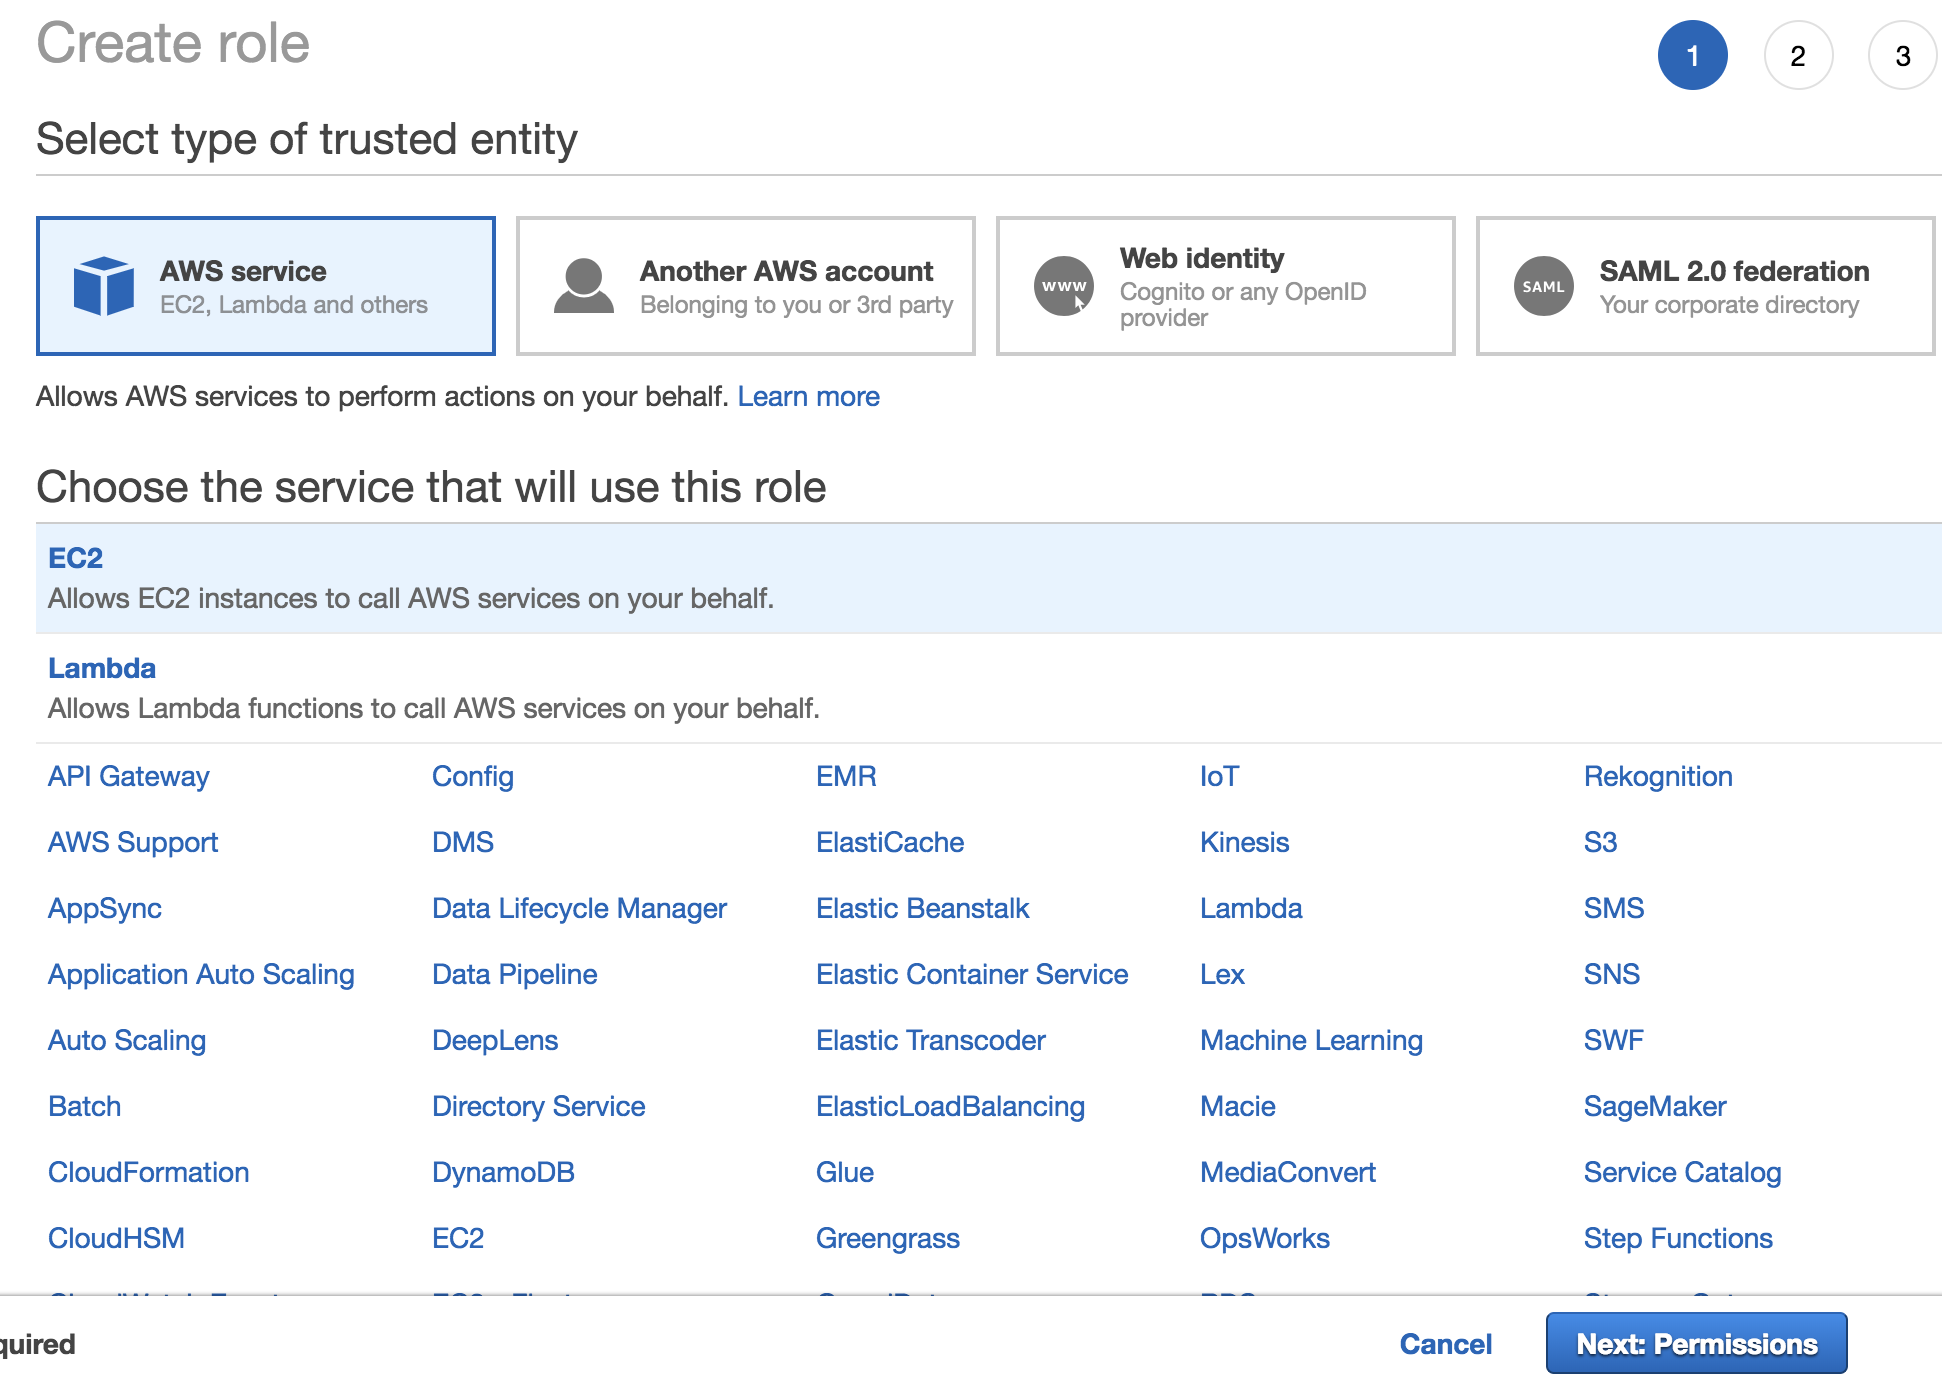
Choose AWS service for the trusted entity and then choose CodeDeploy.
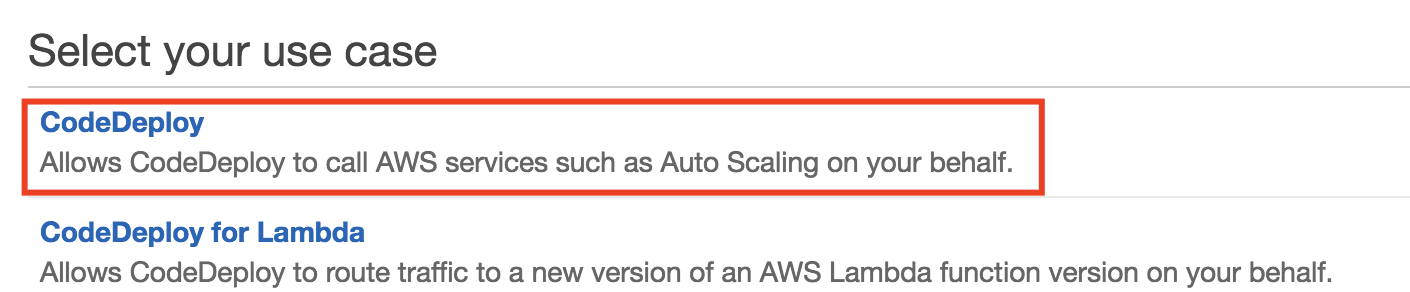
After this, select the use case. For this post we’re deploying code on EC2 instances and not Lambda code, so select the “CodeDeploy” use case.
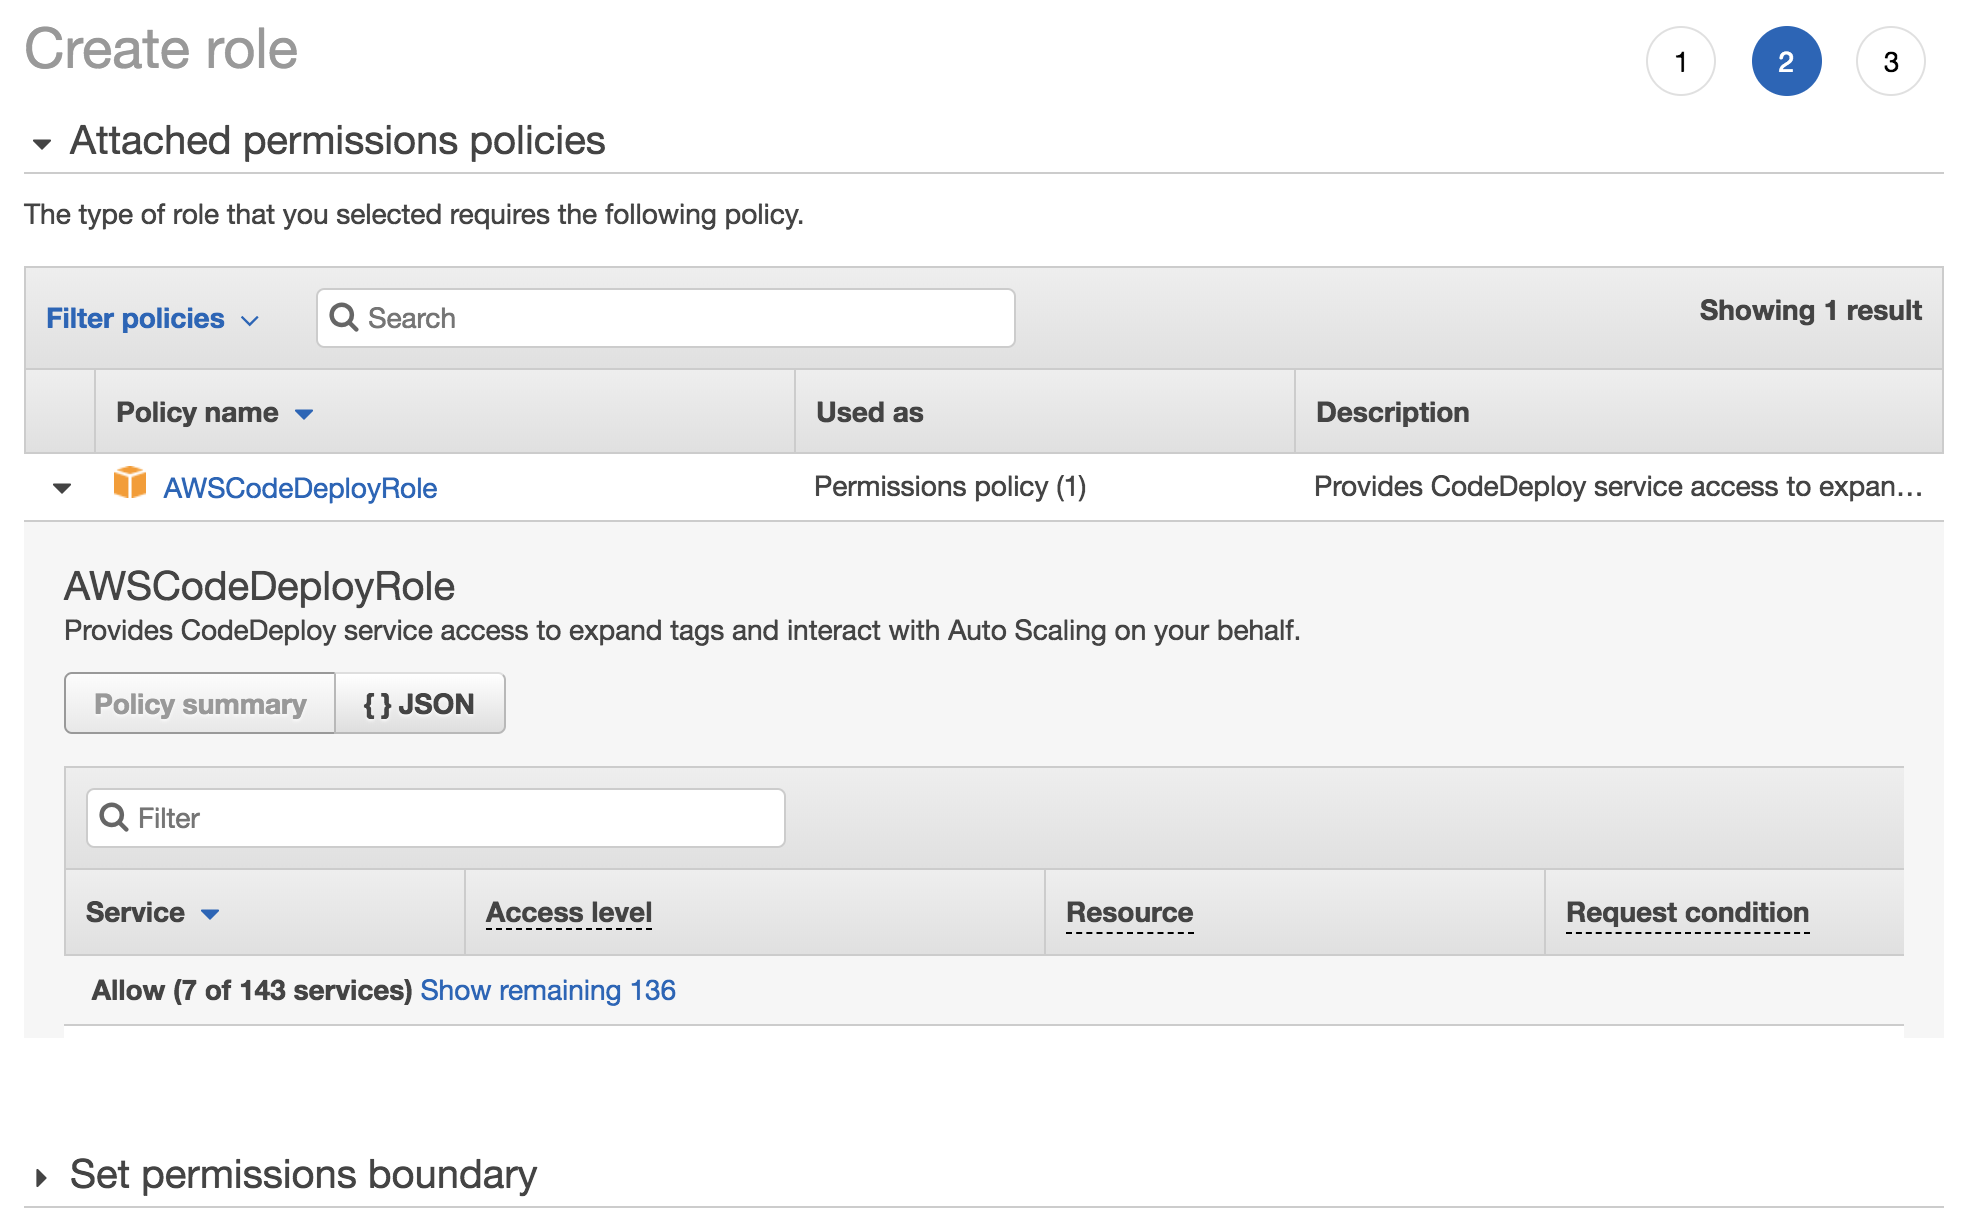
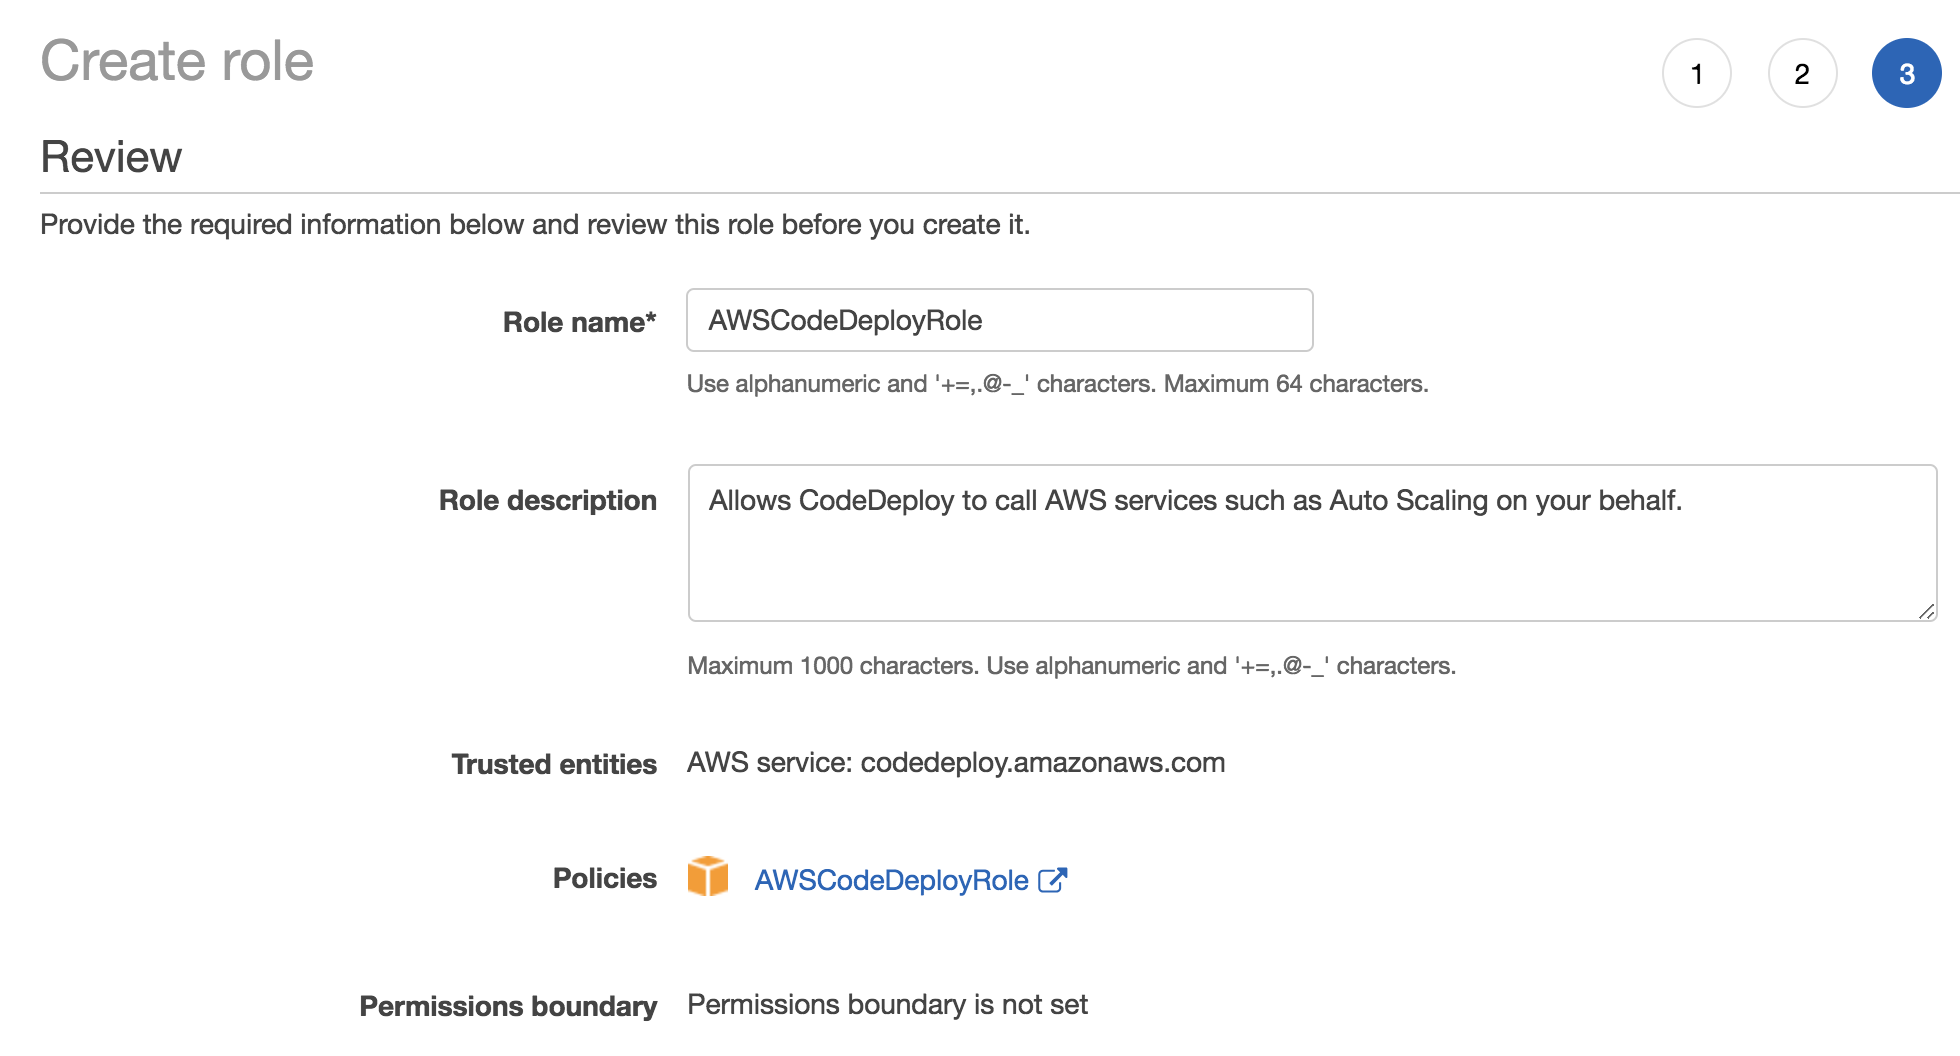
On the next screen choose the AWSCodeDeployRole policy.
On the last screen give it a descriptive name.
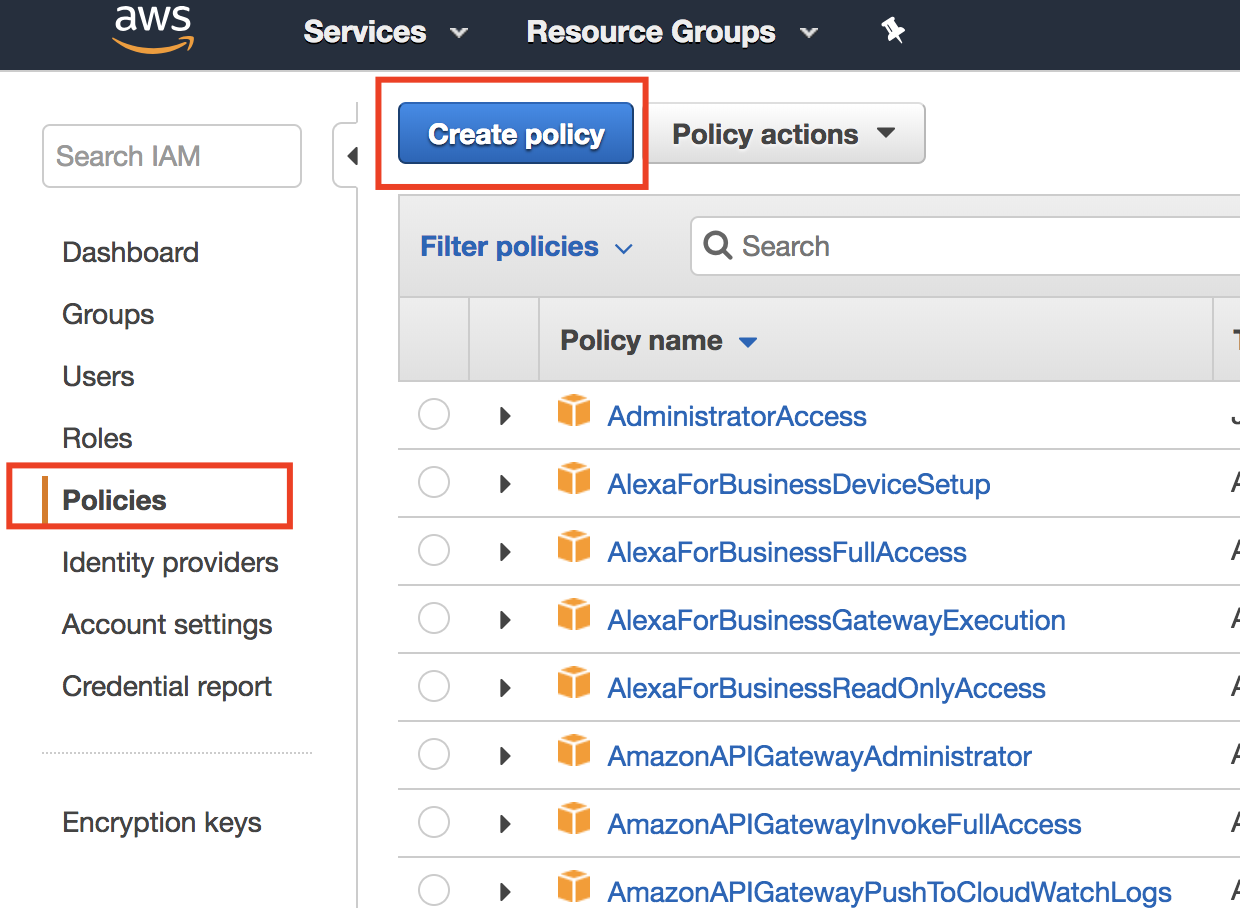
Now that we have a role, we need to add a new policy. While still in the IAM console, choose the policies tab and then click the “Create policy” button.
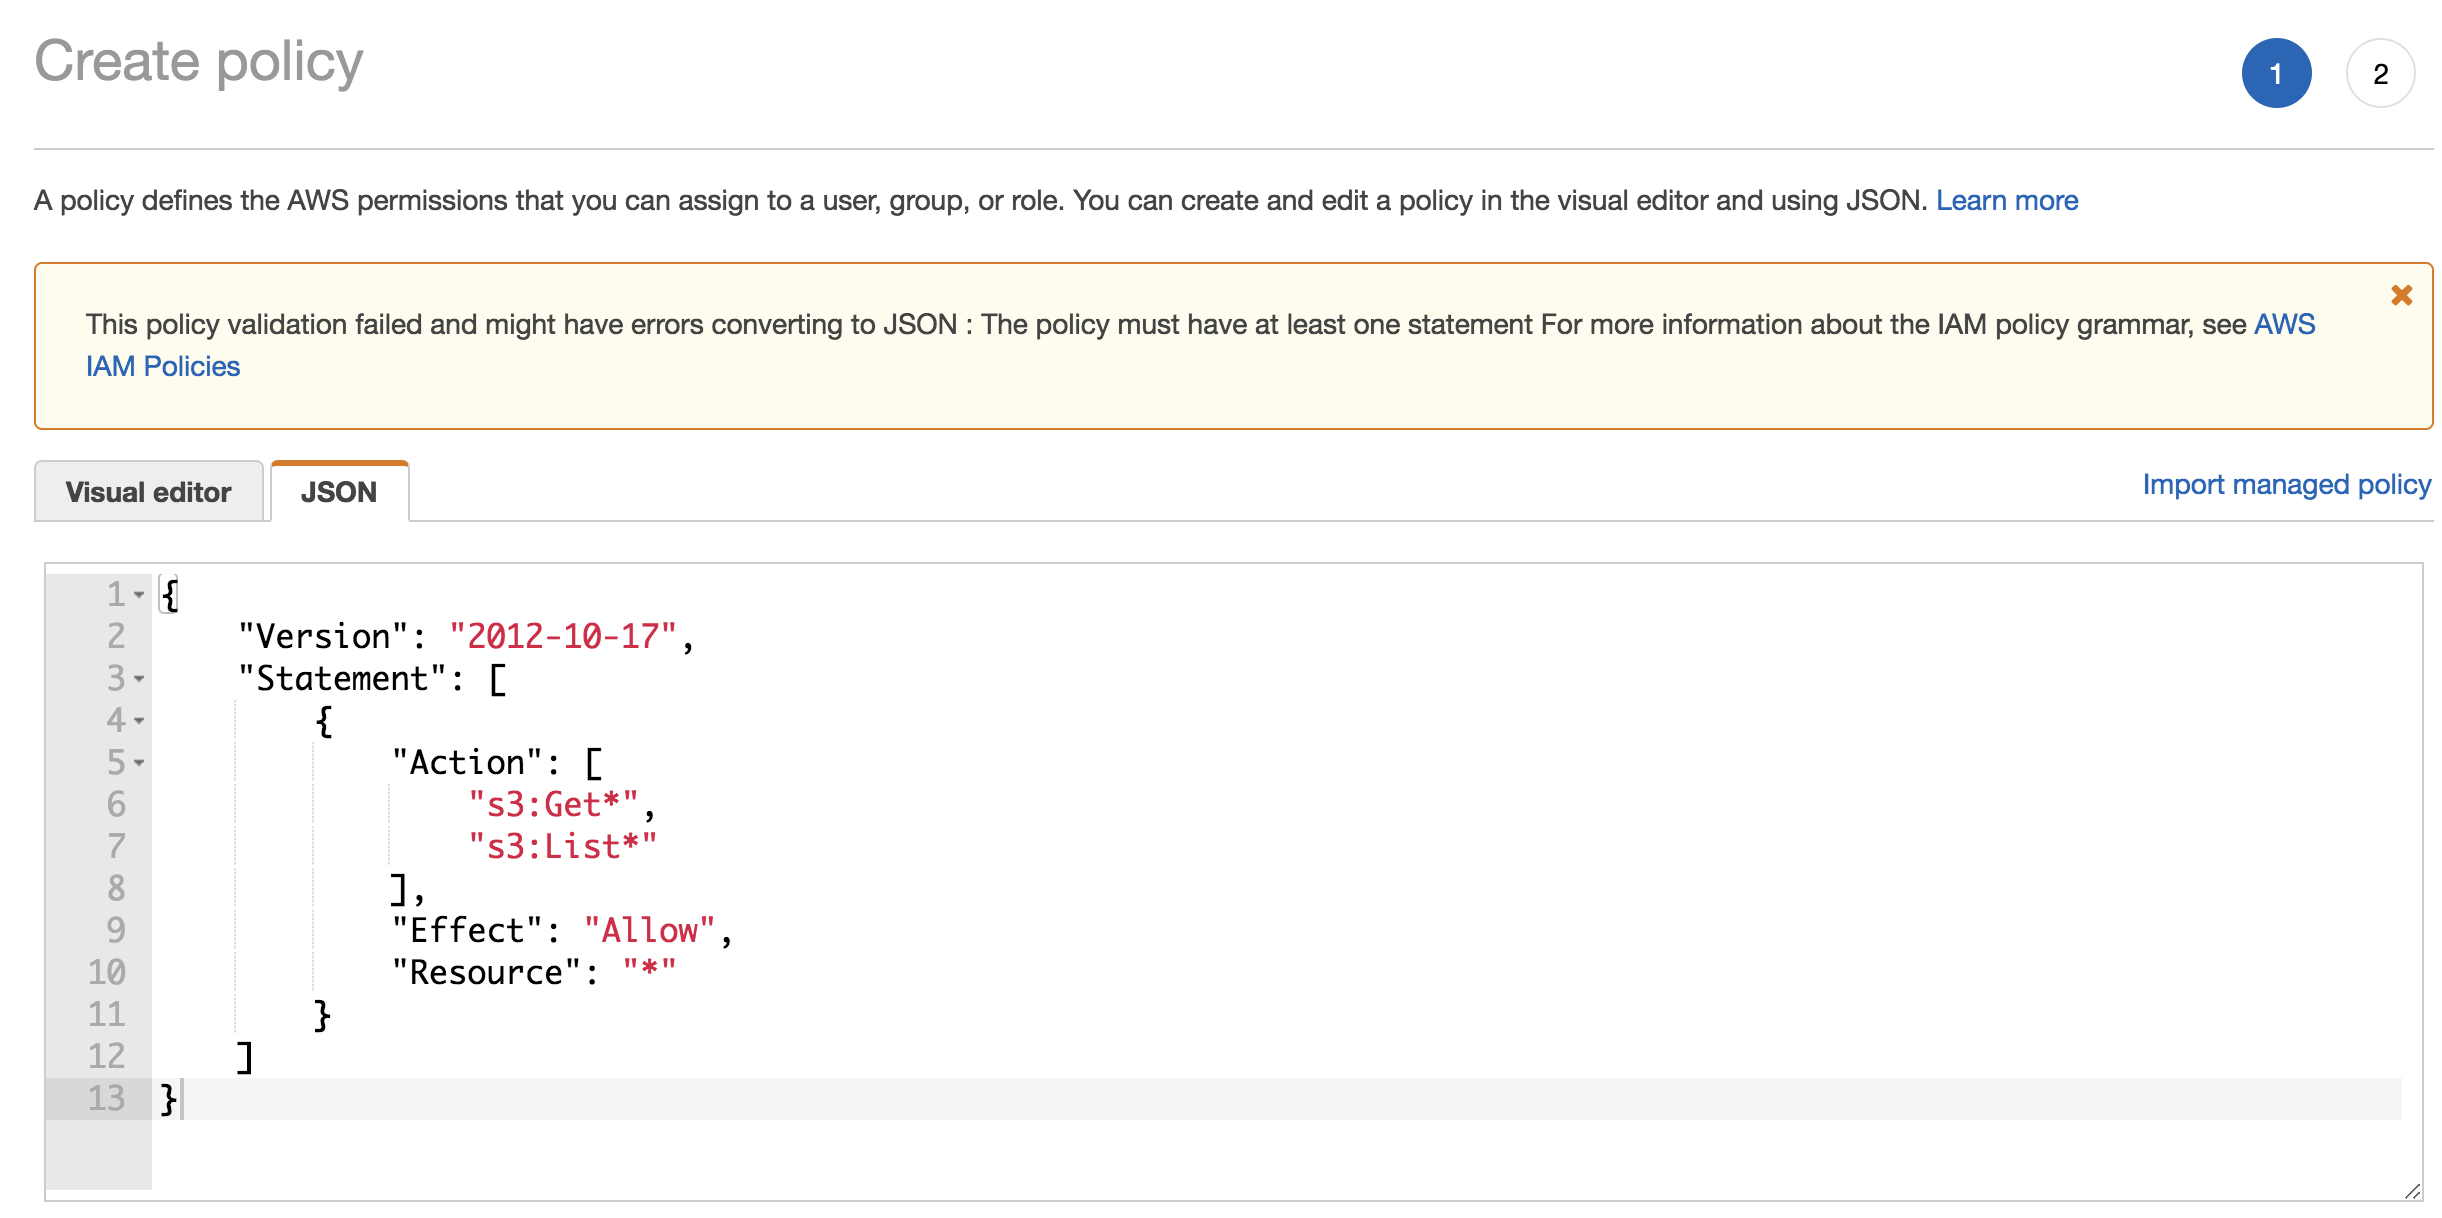
In the create policy screen, choose the JSON tab and enter the JSON seen below. This policy allows the assumed role to read from all S3 buckets. We’ll be attaching this policy to an instance profile and eventually our servers.
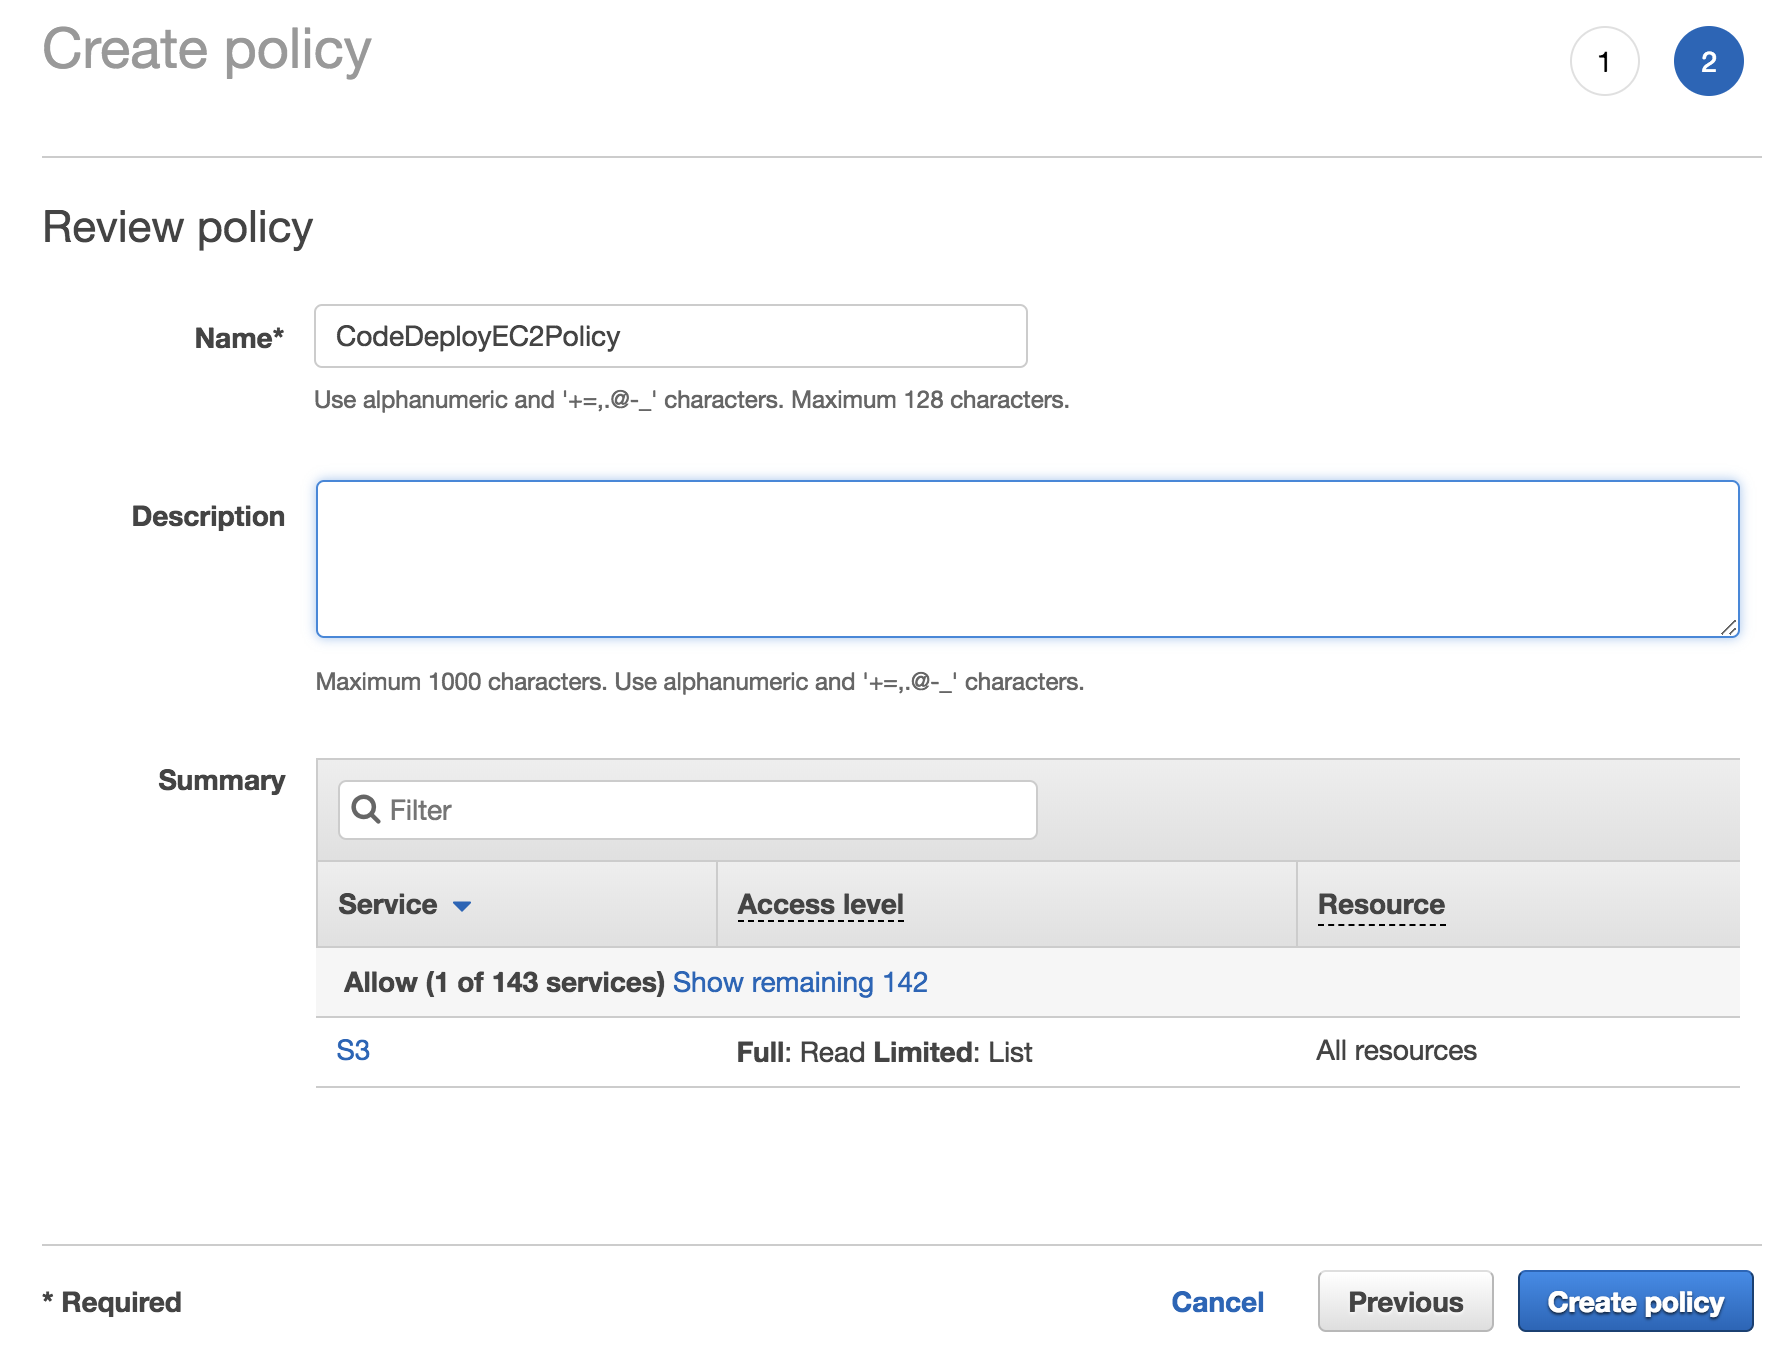
On the last screen, enter a name for the policy and then click the “Create policy” button.
Let’s create a second role now for this new policy.
This time select the “EC2” service so that our servers can access the S3 buckets.
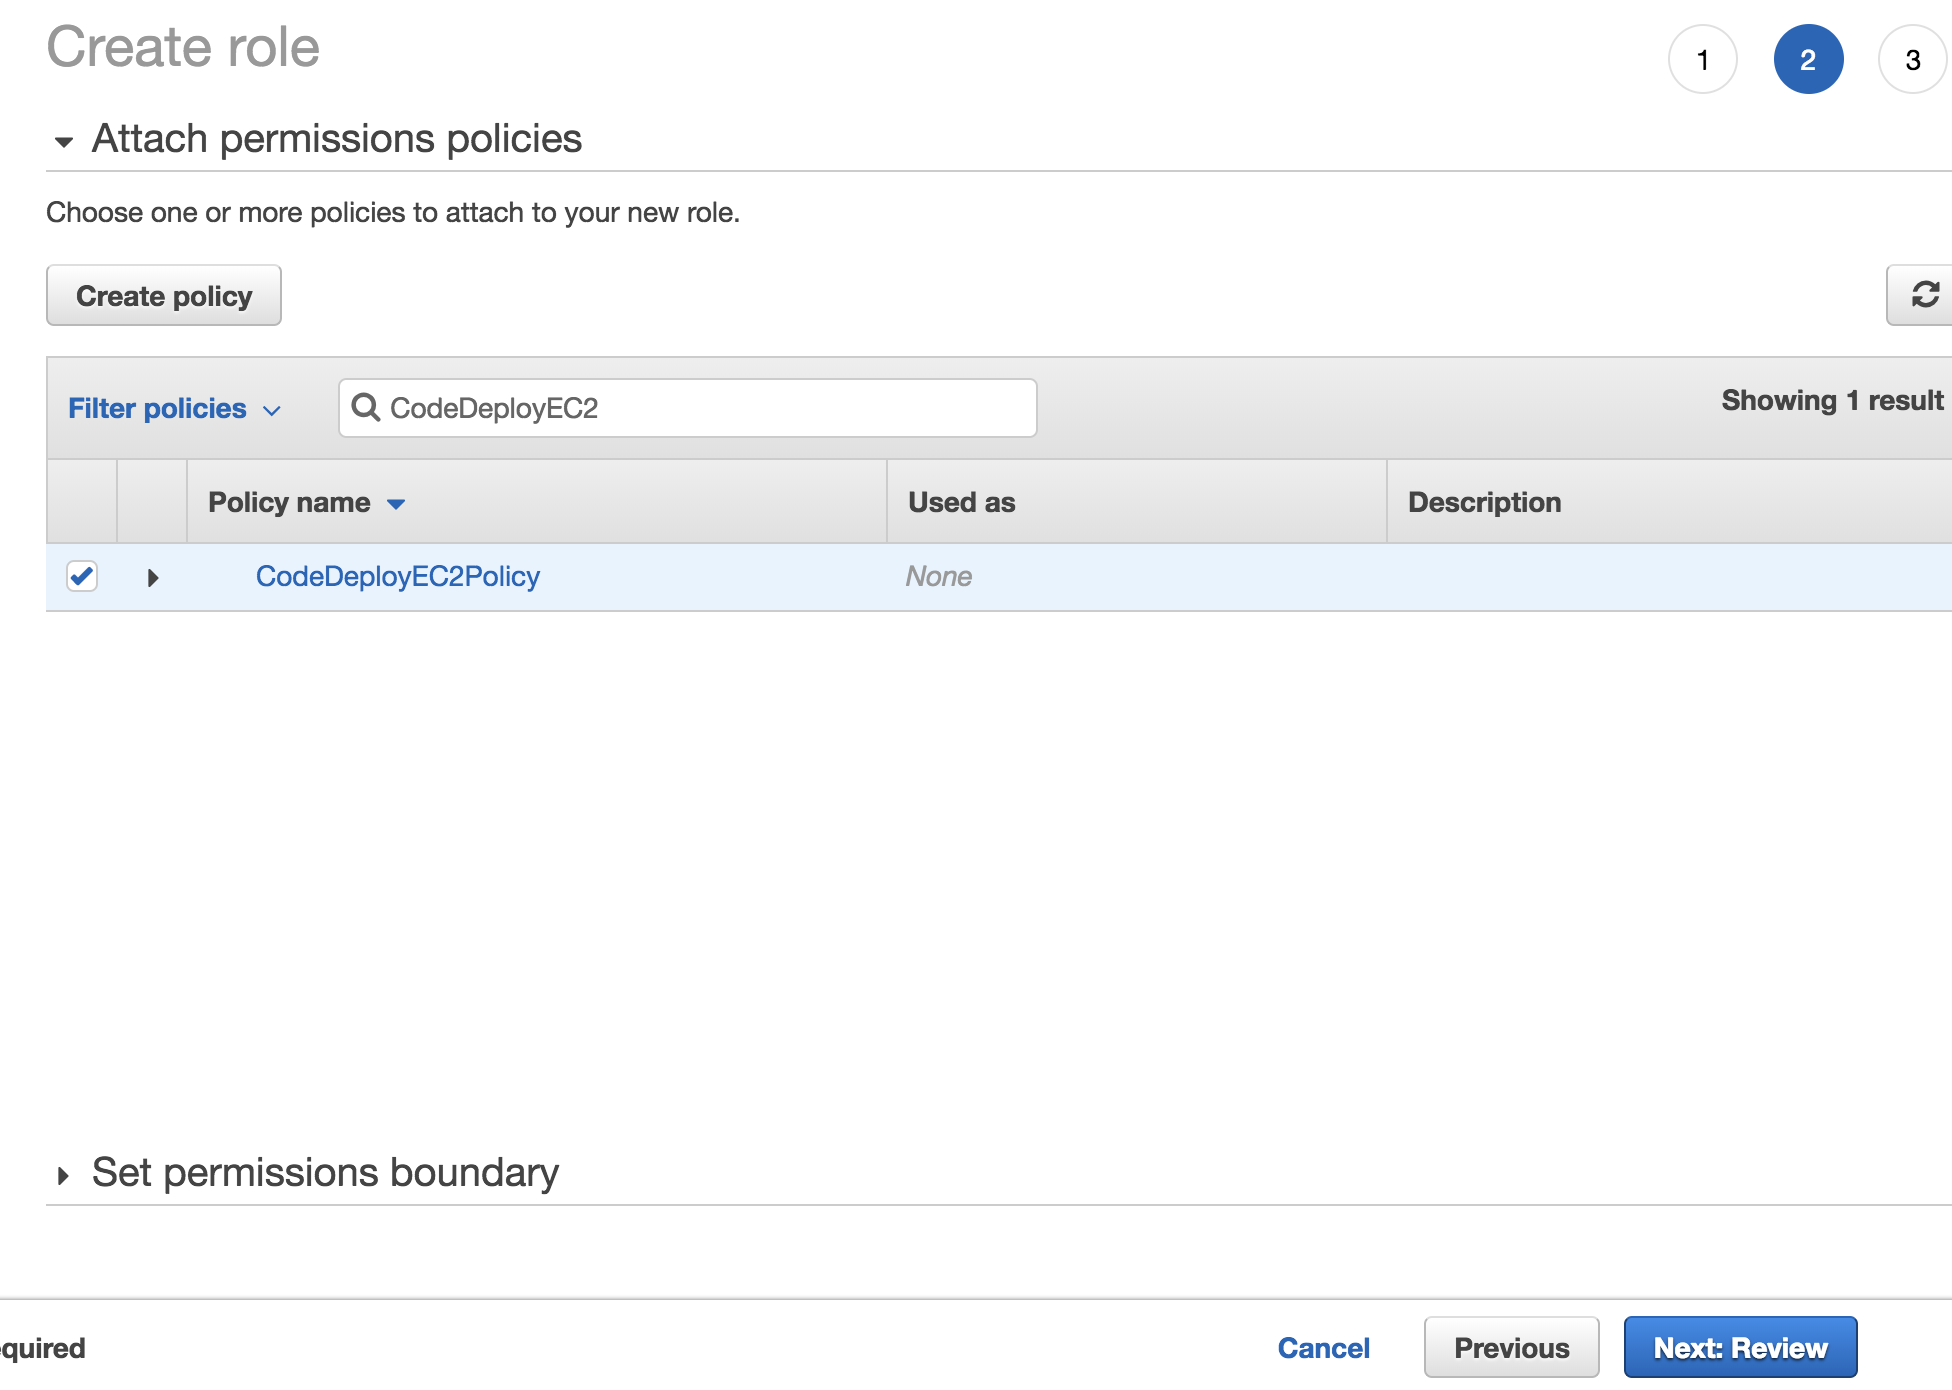
On the attach permissions policies screen, select the policy we just created.
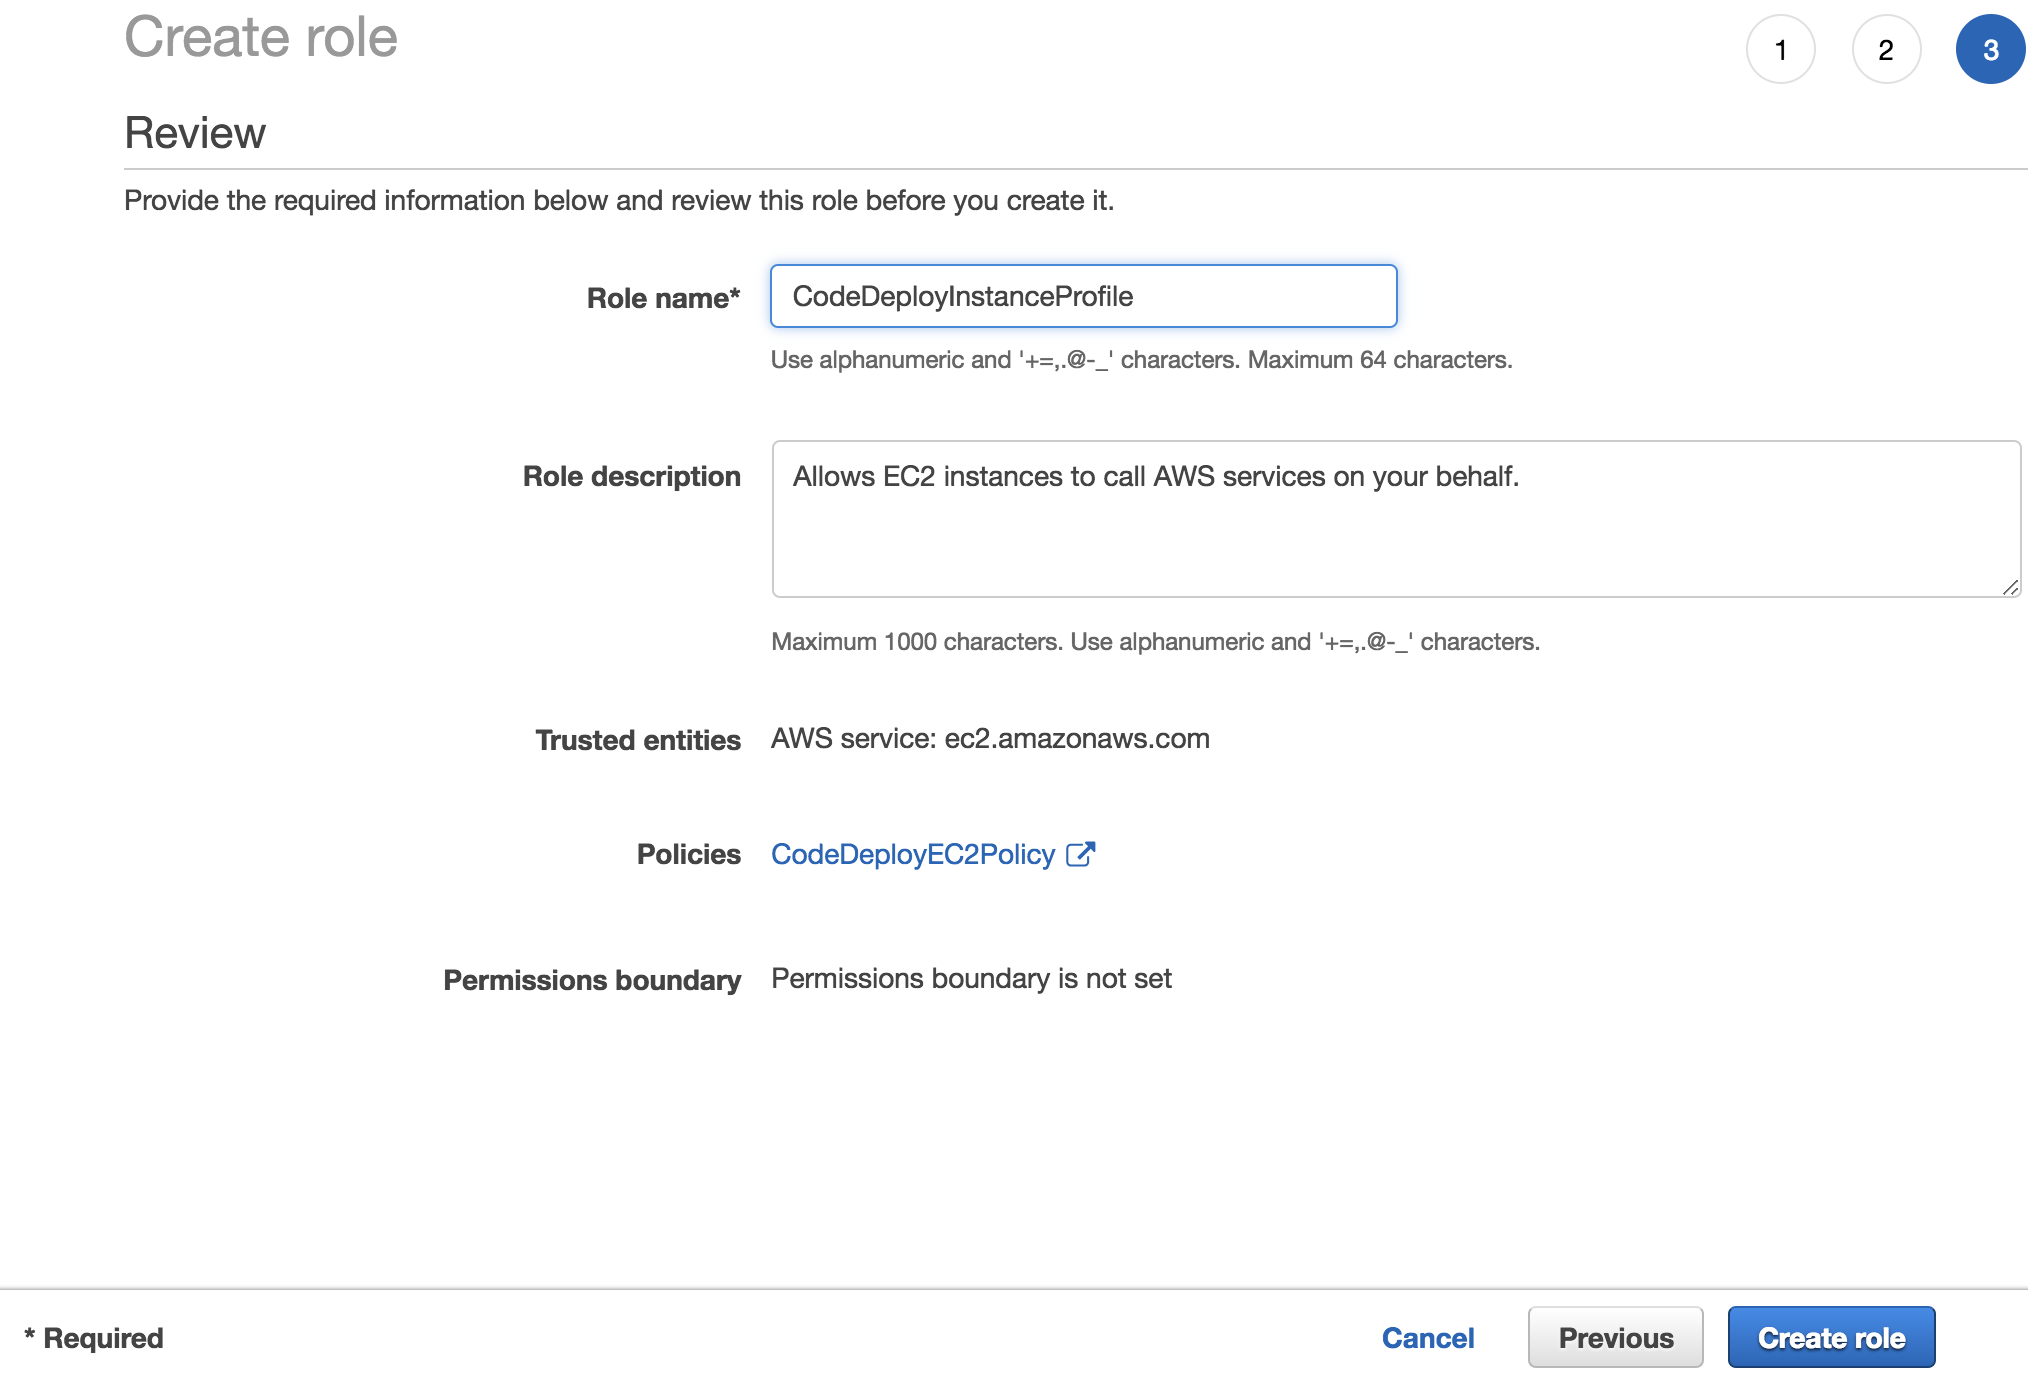
On the last screen give the role a name and click the “Create role” button.
Deploy Application Servers
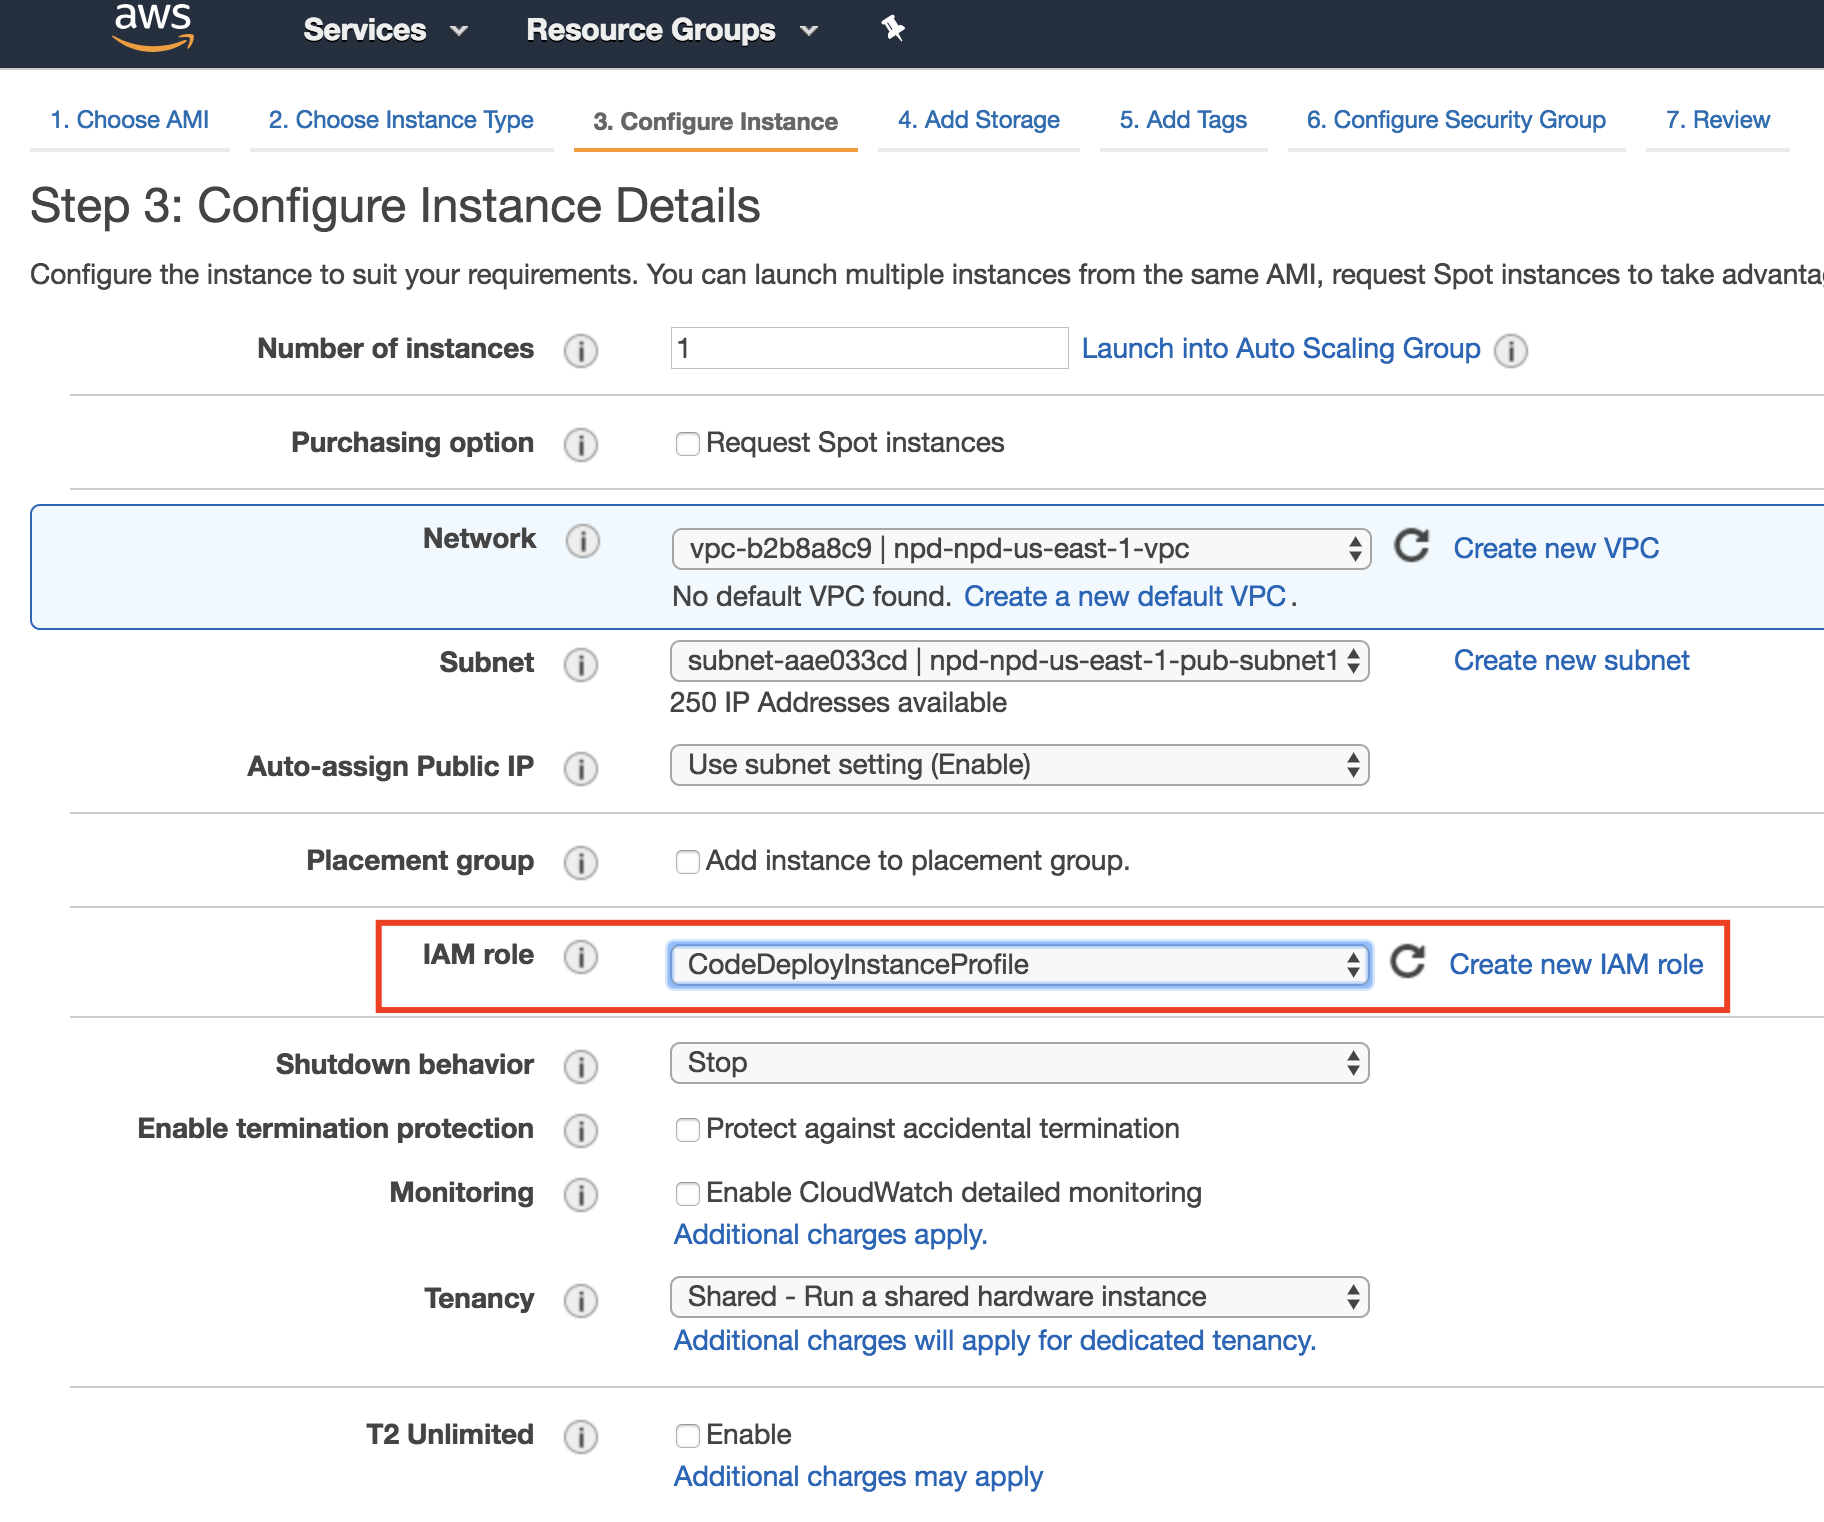
Now that we’ve got that pesky permissions thing taken care of, it’s time to deploy our servers. You can deploy some EC2 instances any way you want, (I prefer CloudFormation personally) but for this post I’ll show you the important pieces in the AWS Console. Be sure to deploy your resources with the IAM role we created in the section prior to this. This instance profile gives the EC2 instance permissions to read from your S3 bucket where your code is stored.
As part of your server build, you’ll need to install the CodeDeploy agent. You can do this manually, or a better way might be to add the code below to the EC2 UserData field during deployment. NOTE: the [bucket-name] field comes from a pre-set list of buckets from AWS and is based on your region. See the list from here: https://docs.aws.amazon.com/codedeploy/latest/userguide/resource-kit.html#resource-kit-bucket-names
#!/bin/bash
yum -y update
yum install -y ruby
cd /home/ec2-user
curl -O https://bucket-name.s3.amazonaws.com/latest/install
chmod +x ./install
./install auto

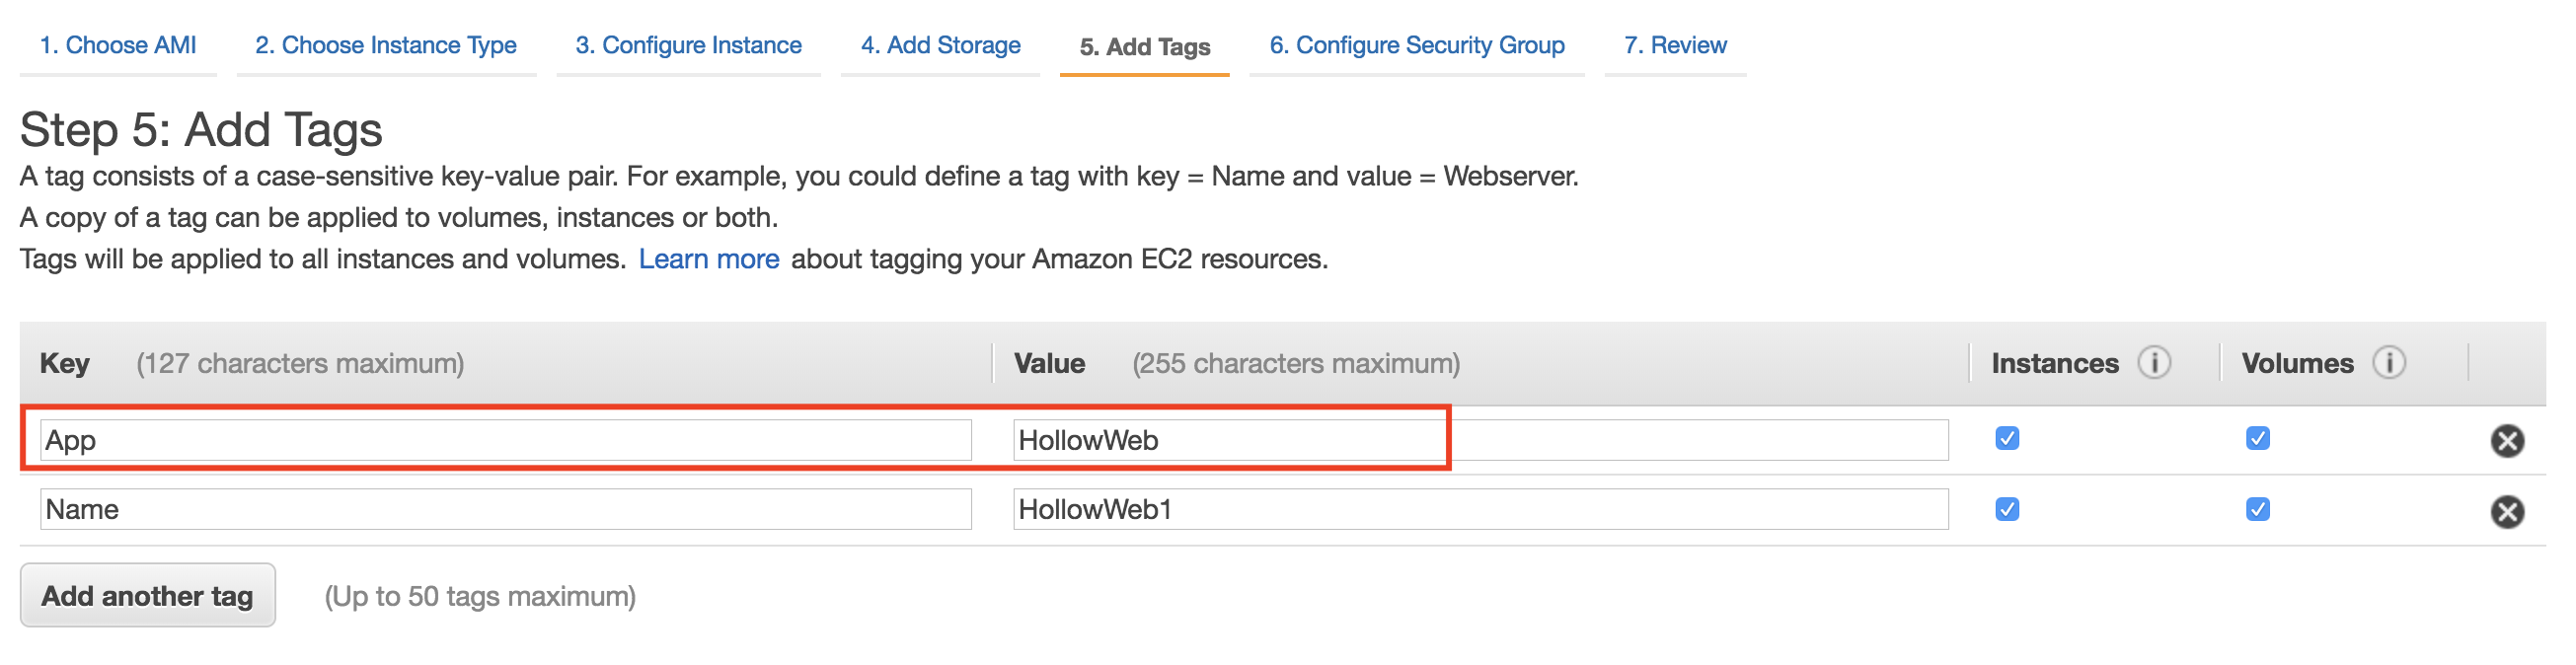
Also when you’re deploying your servers, you’ll want to have a tag that can be referenced by the CodeDeploy service. This tag will be useful to identify which servers should receive the updates that we’ll push later. For this example, I’m using a tag named “App” and a value of “HollowWeb”. I’m deploying a pair of servers in different AZs behind a load balancer to ensure that I’ve got excellent availability. Each of the servers will have this tag.
Once, the servers are deployed, you’ll want to deploy an app to make sure its all up and running correctly. NOTE: you could deploy the app for the first time through CodeDeploy if you’d like. I’m purposefully not doing this so that I can show how updates work and the first deployment isn’t as interesting so I’ve omitted it to keep this blog post to a reasonable length.
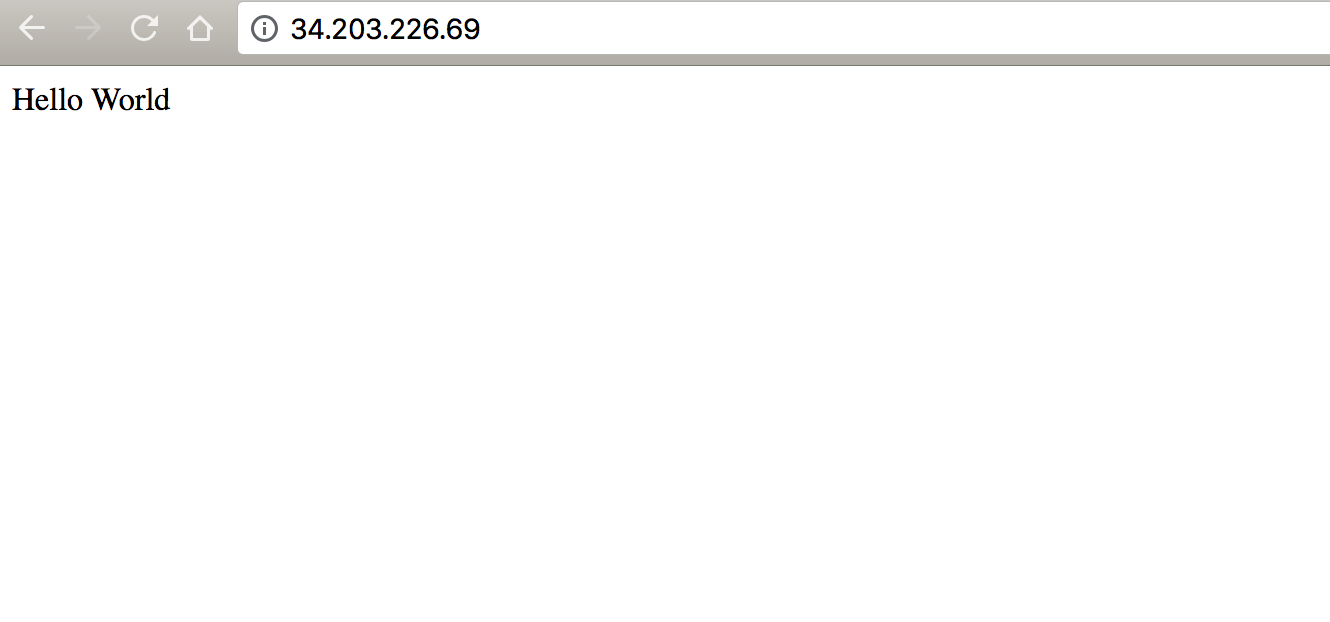
You can see my application is deployed by hitting the instance from a web browser. (Try not to be too impressed by version 0 here)
You can see from the EC2 console that I’ve created a target group for my load balancer and my two EC2 instances are associated with it and in a health state.

Create the App in CodeDeploy
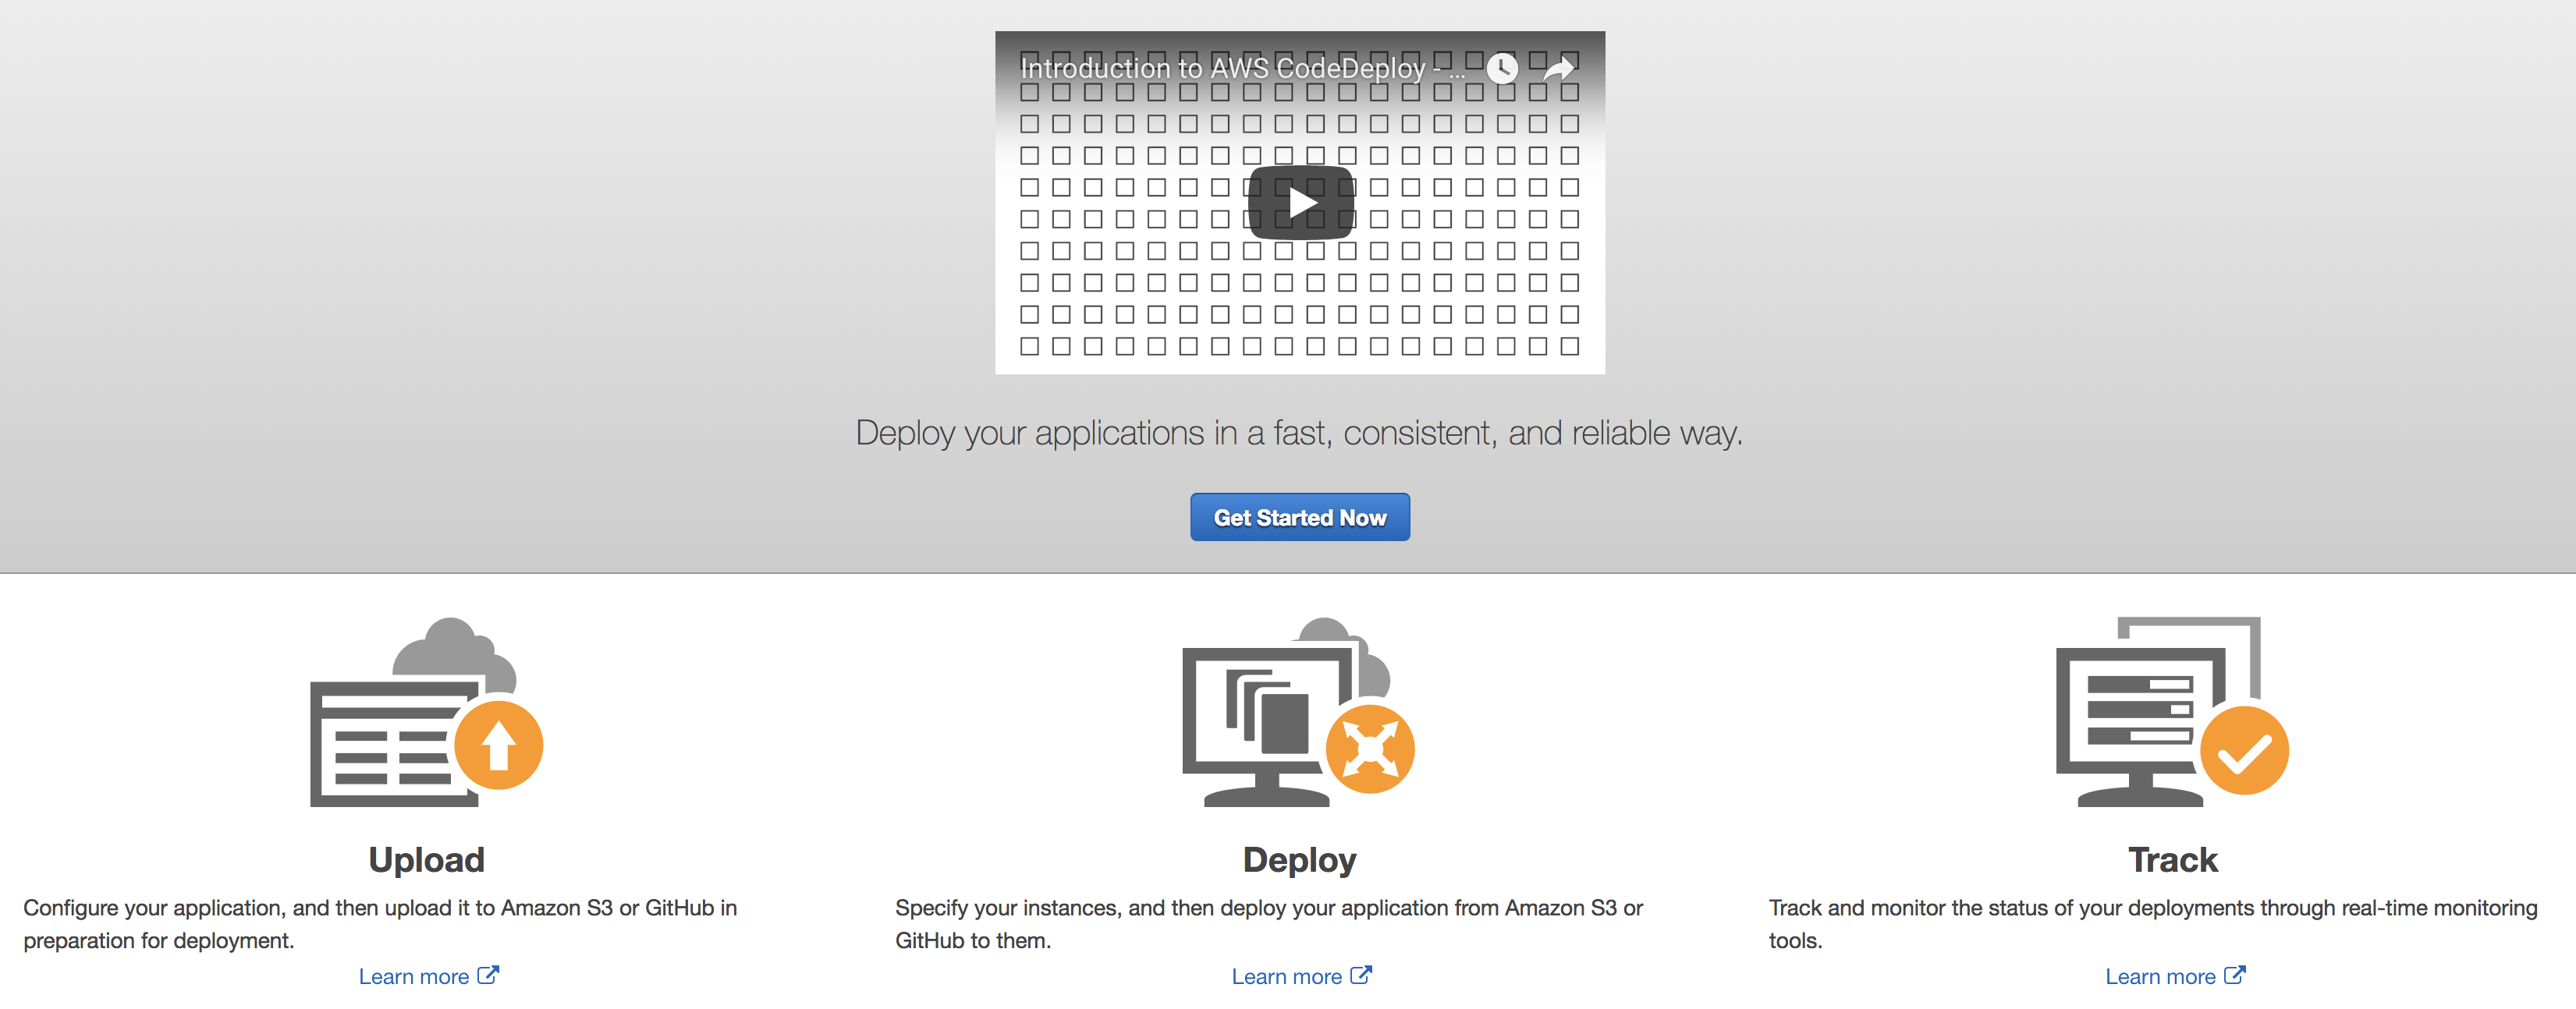
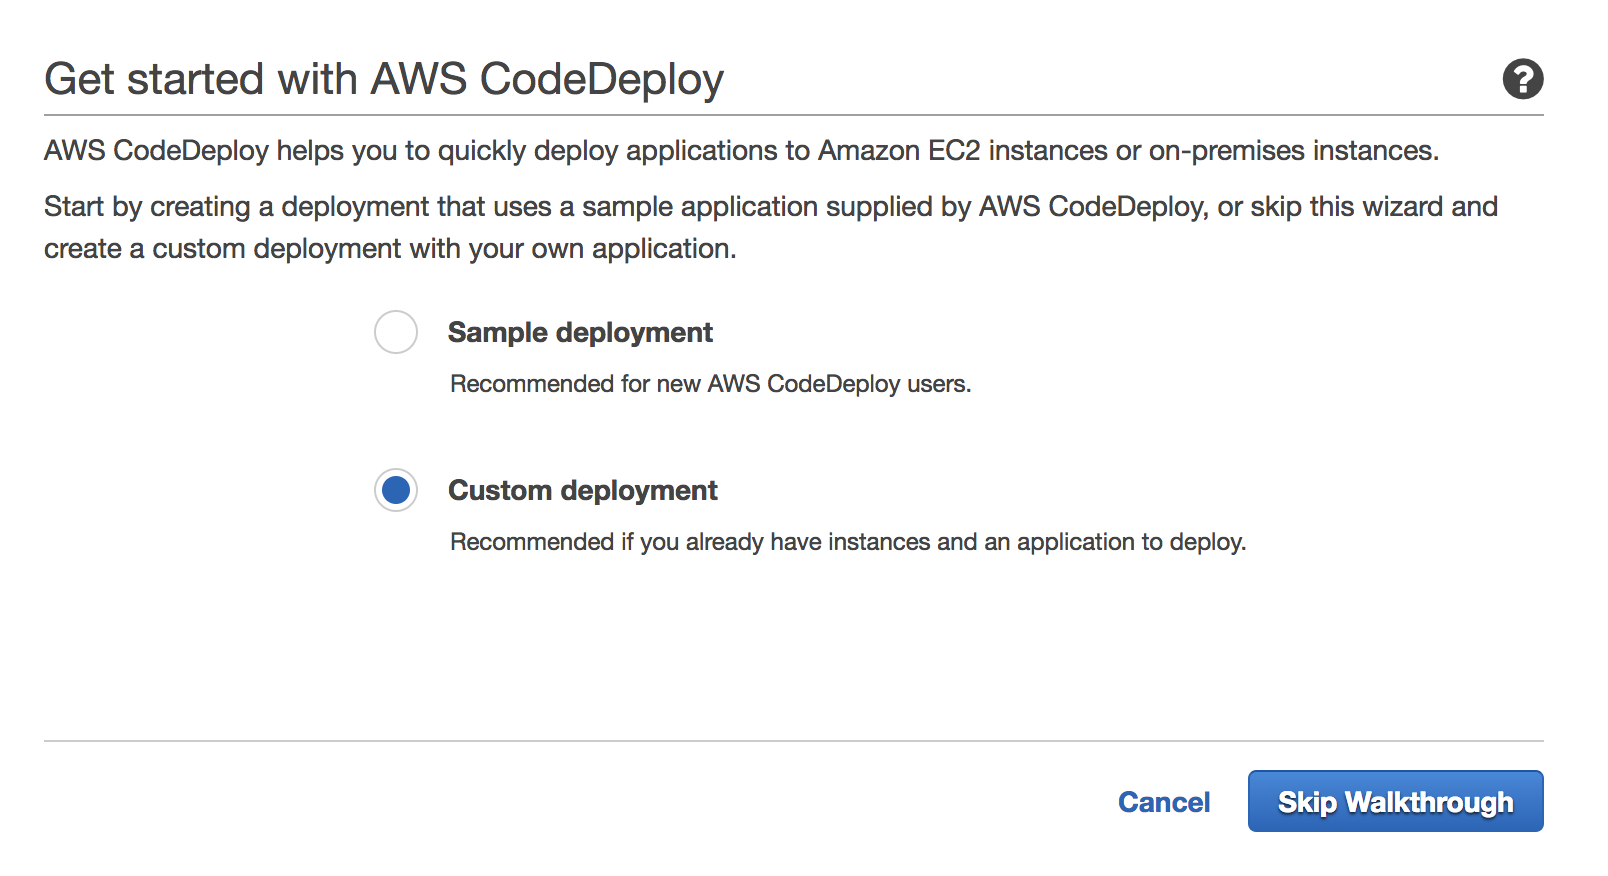
Now it’s finally time to get to the meat of this post and talk through CodeDeploy. The first thing we’ll do is create an application within the CodeDeploy console. When you first open the CodeDeploy console from the AWS portal, you’ll probably see the familiar getting started page. Click that get started button and let’s get down to business.
You can do a sample deployment if you want to, but that’d hide some of the good bits, so we’ll choose a custom deployment instead. Click the “Skip Walkthrough” button.
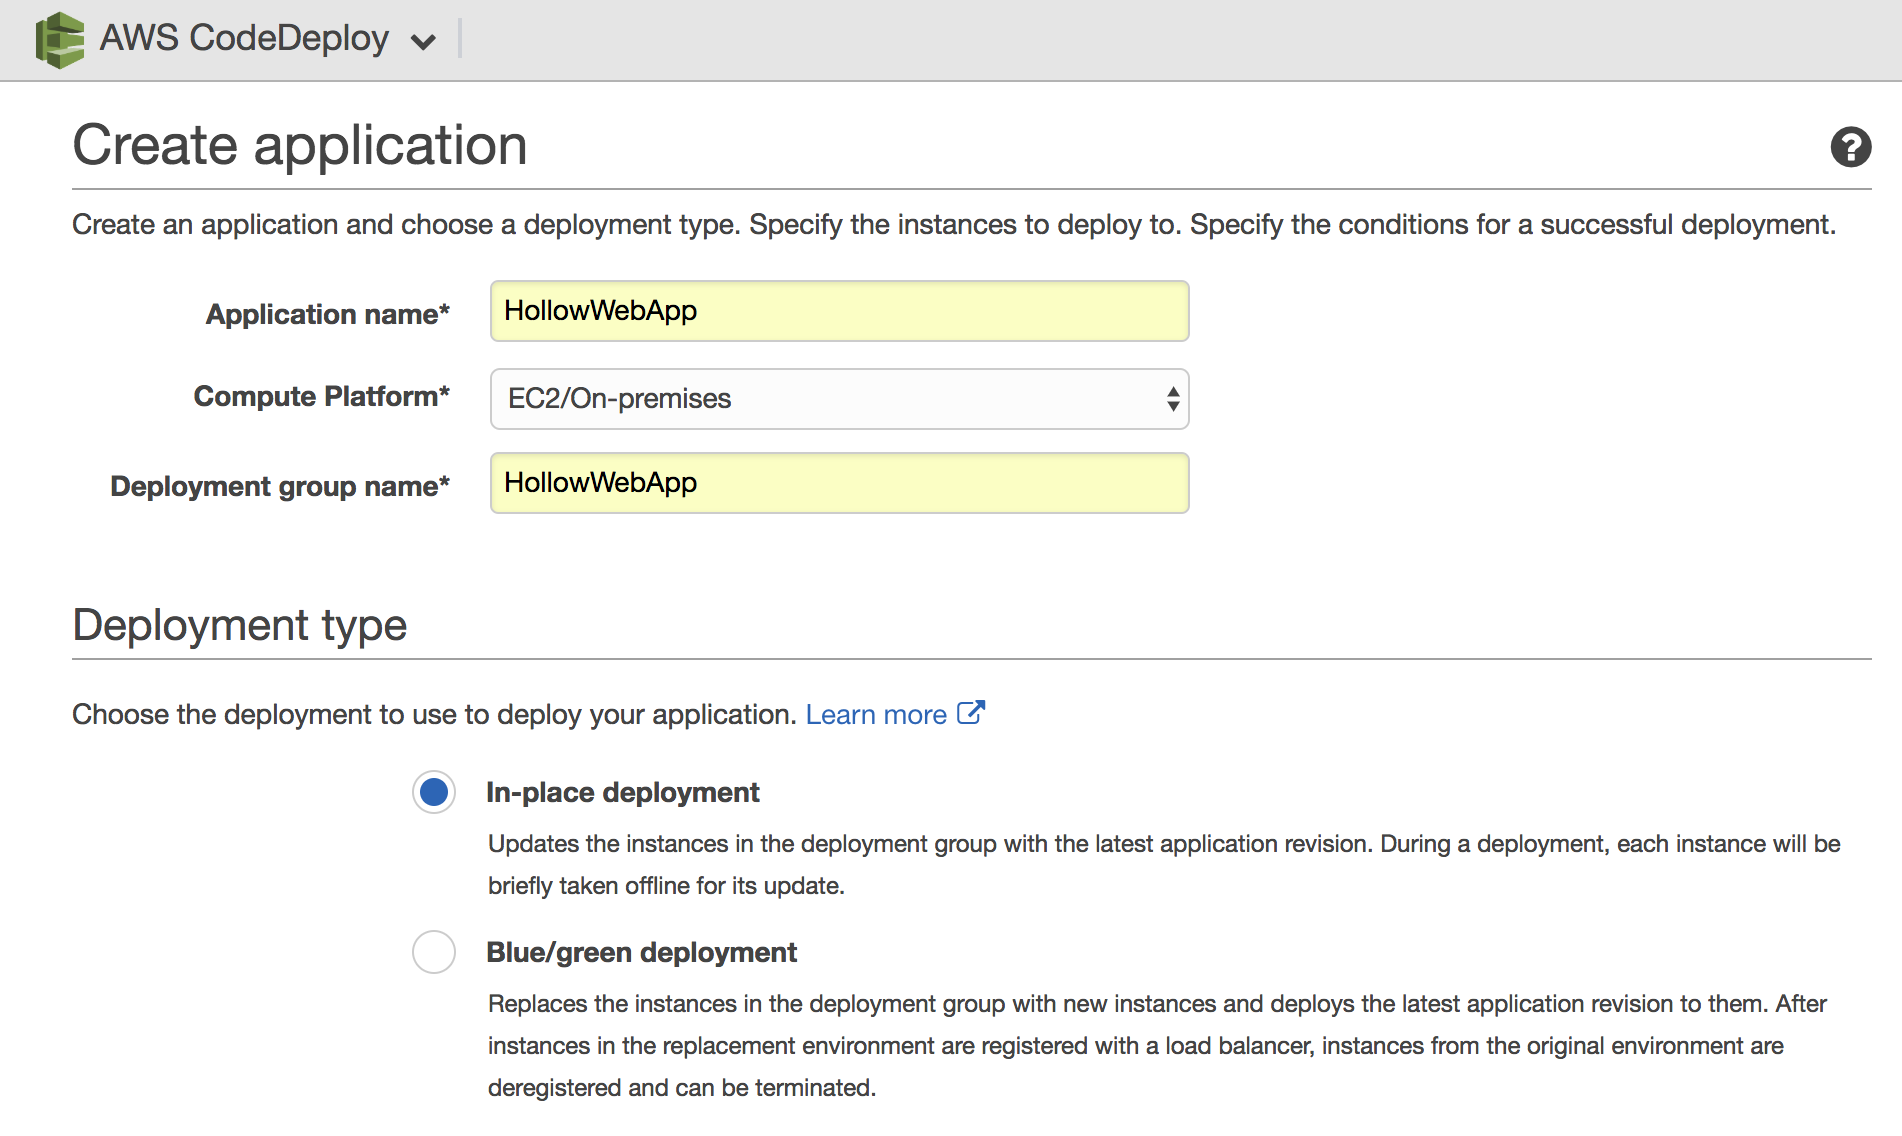
Give your application a name that you’ll recognize. Then in the dropdown, select EC2/On-premises. This tells CodeDeploy that we’ll be updating servers, but we could also use this for Lambda functions if we wished. Then give the deployment group a name. This field will identify the group of servers that are part of the deployment.
Next up, you’ll select your deployment type. I’ve chosen an in-place deployment meaning that my servers will stay put, but my code will be copied on top of the existing server. Blue/green deployments are also available and would redeploy new instances during the deployment.
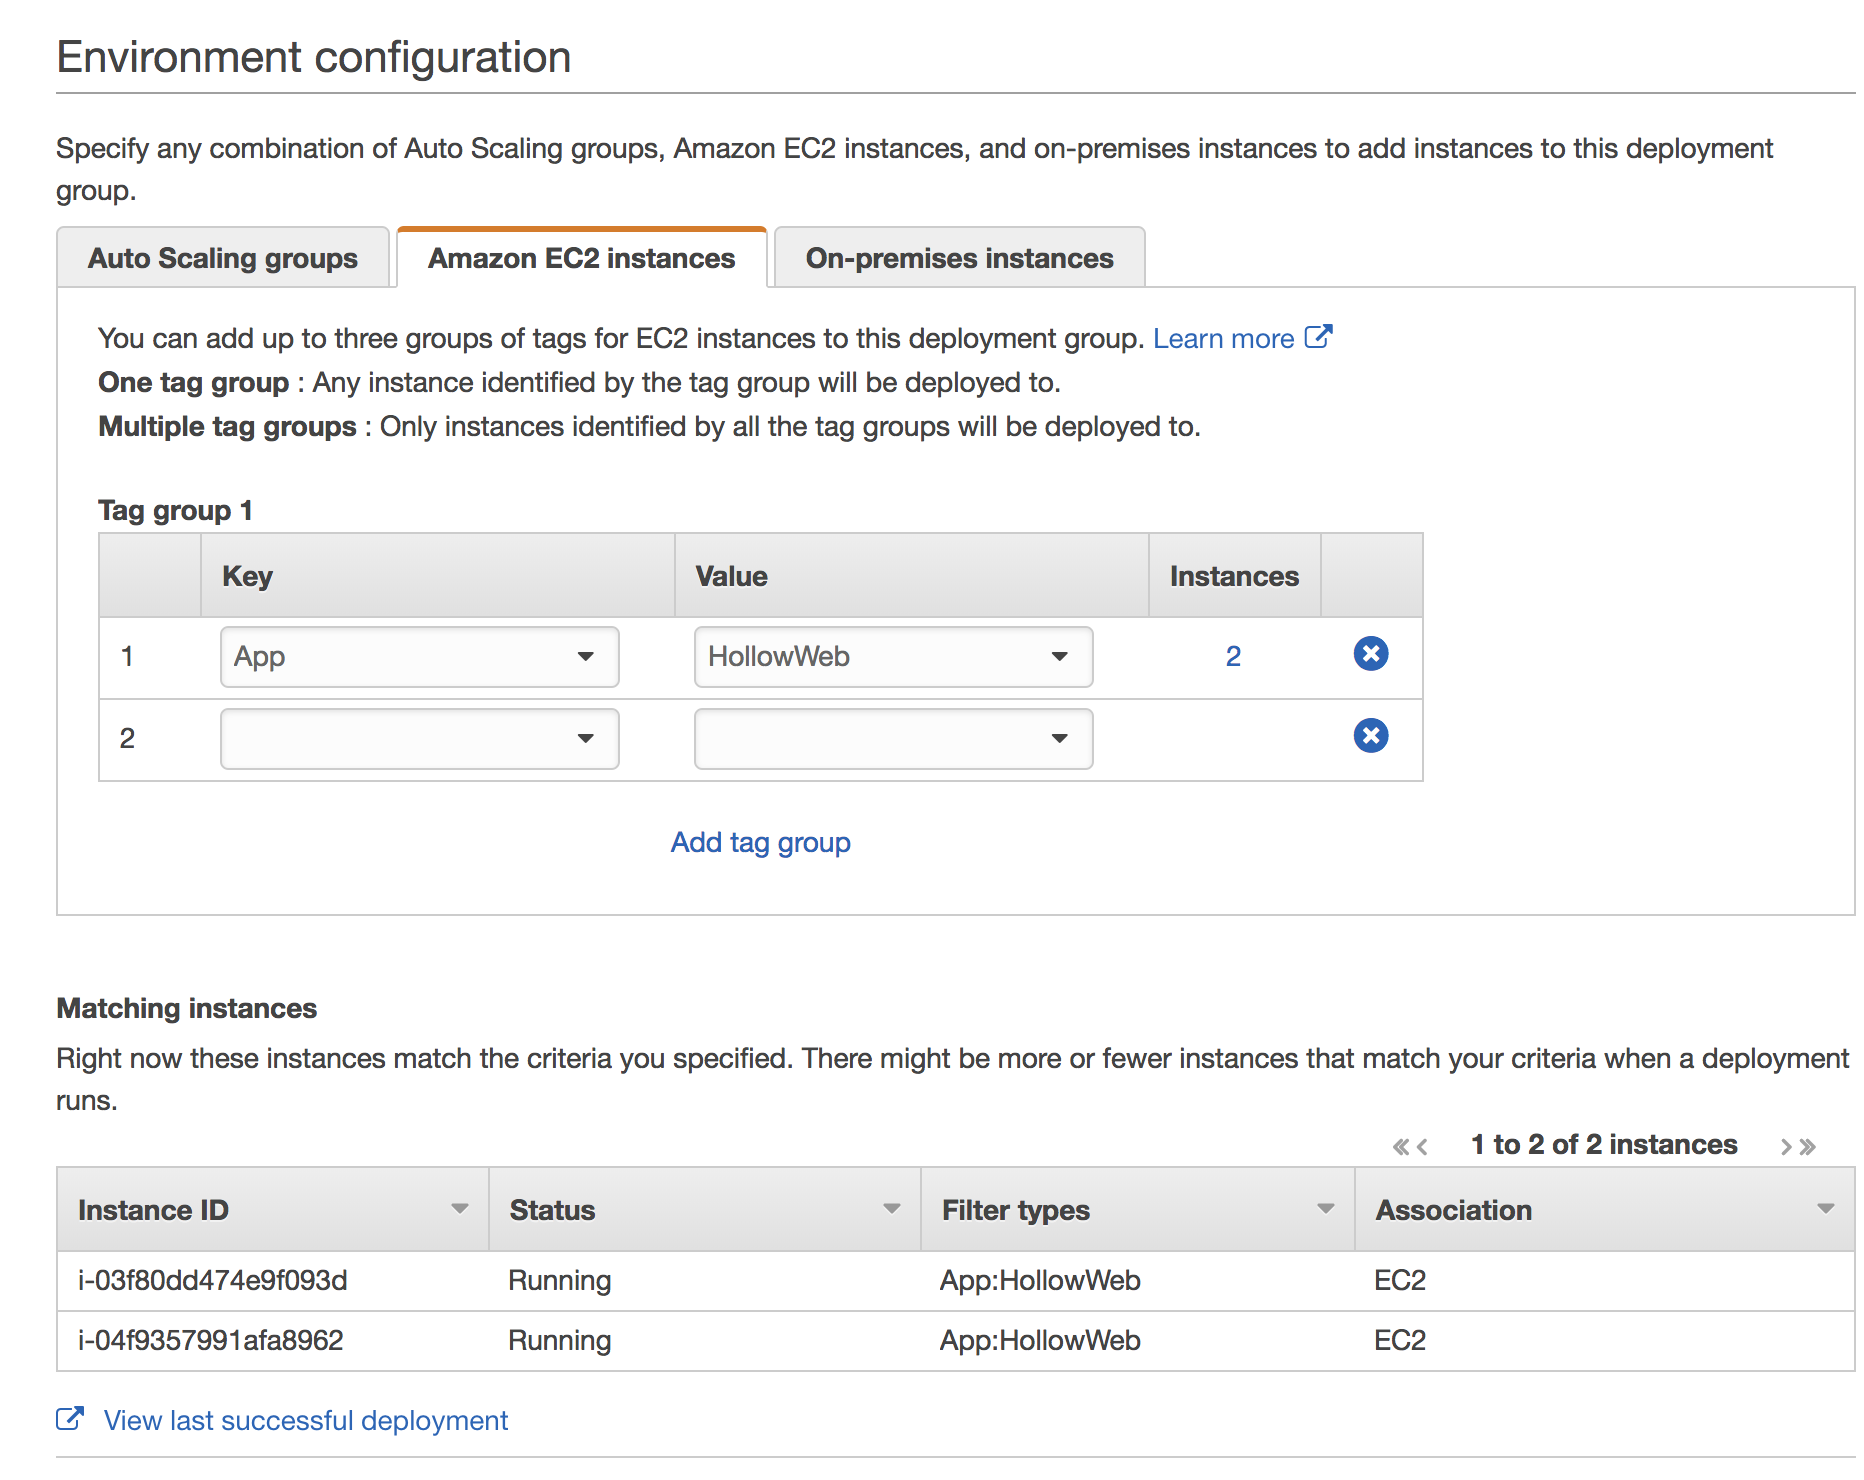
Next, we configure our environment. I’ve selected the Amazon EC2 instances tab and then entered that key/value pair from earlier in this post that identifies my apps. Remember the “App:HollowWeb” tag from earlier? Once you enter this, the console should show you the instances associated with this tag.
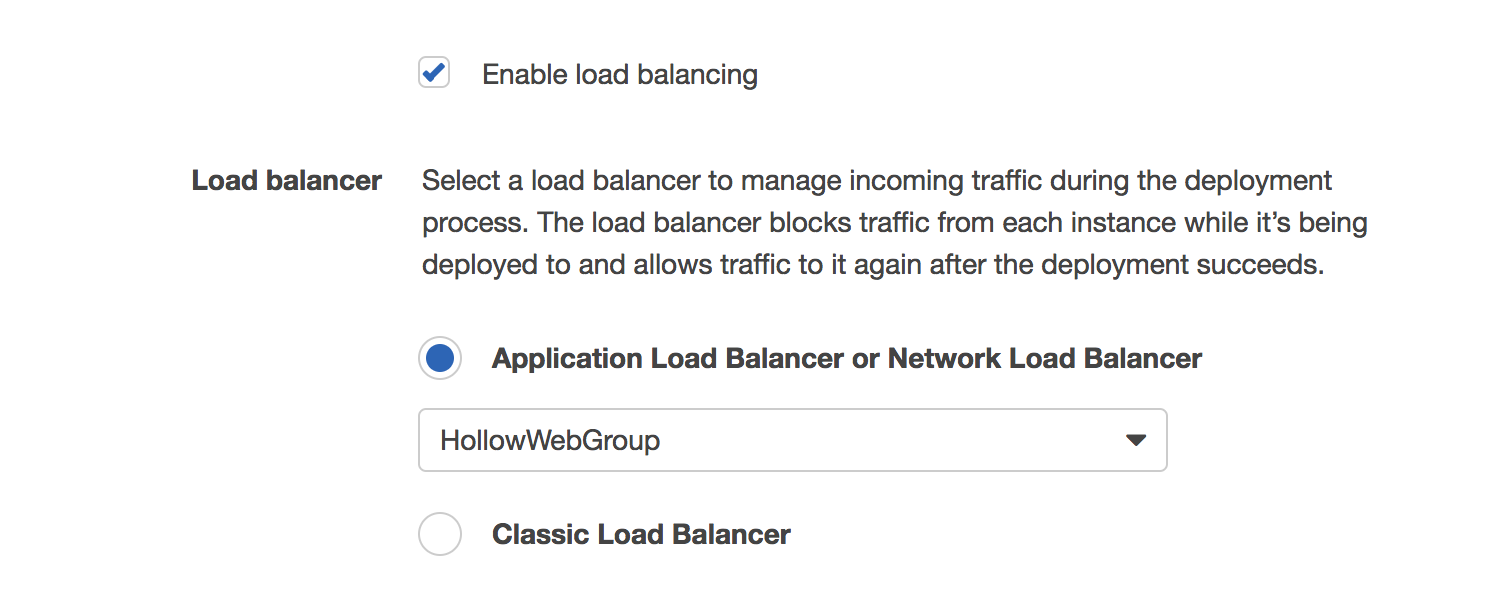
I’ve also checked the box to “Enable load balancing.” This is an optional setting for In-Place upgrades but mandatory for Blue/Green deployments. With this checked, CodeDeploy will block traffic to the instances currently being deployed until they are done updating and then they’ll be re-added to the load balancer.
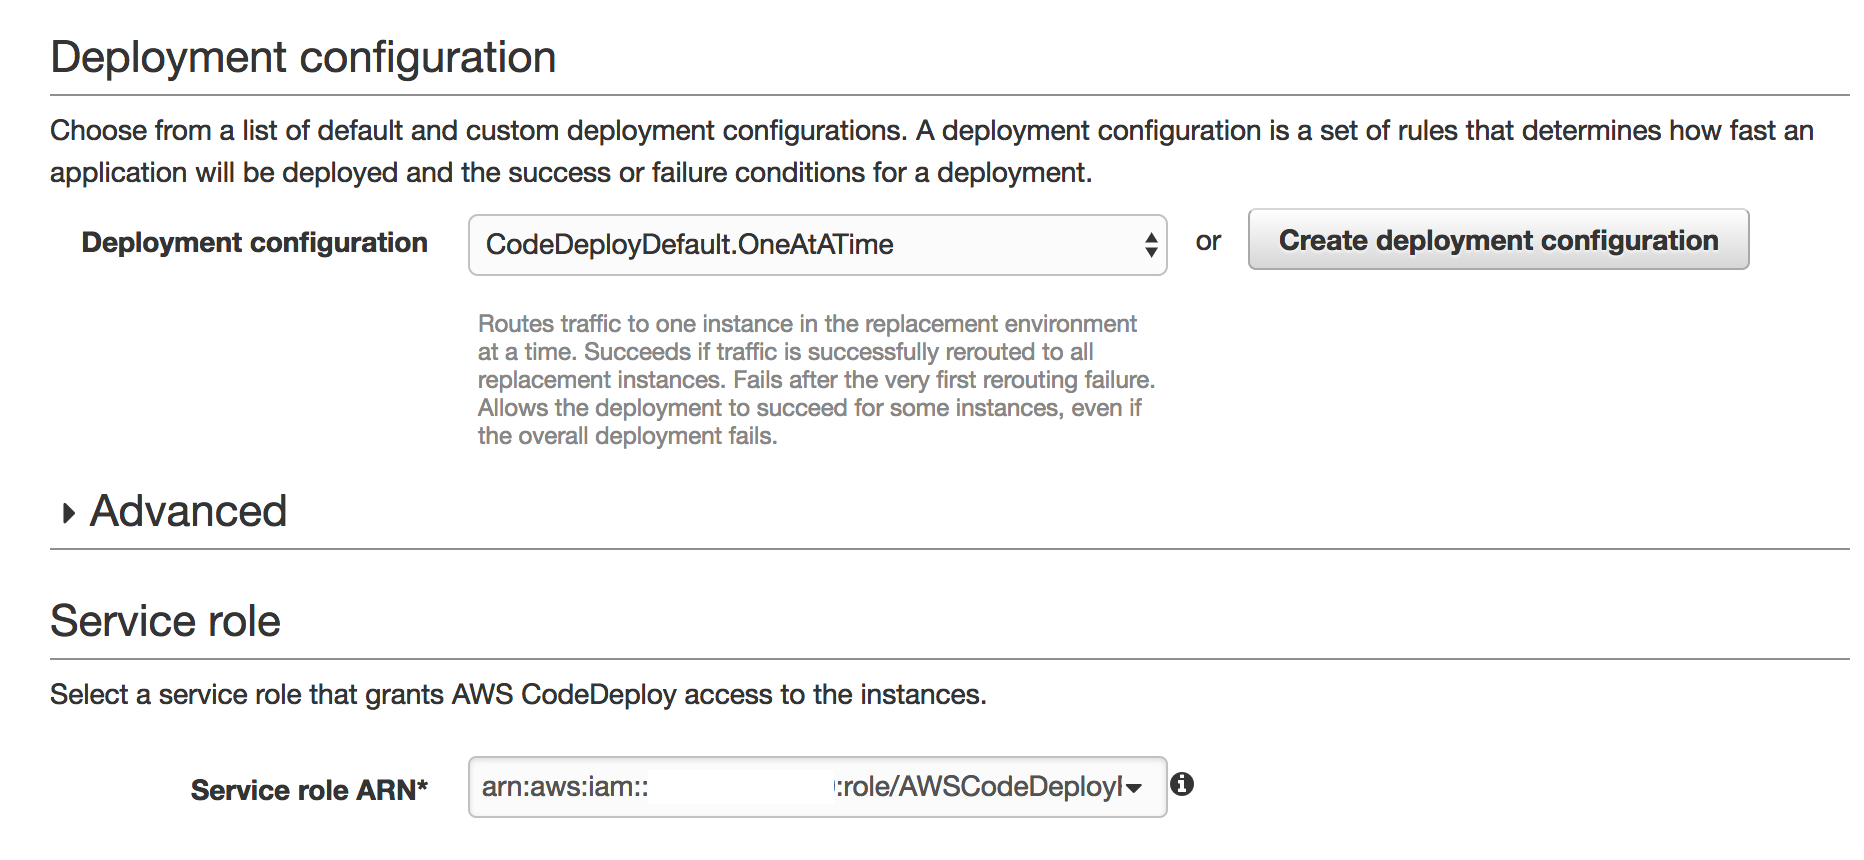
Now you must select a deployment configuration. This tells CodeDeploy how to update your servers. Out of the box you can have it do:
- One at a time
- Half at a time
- All at once
You can also create your own configuration if you have custom requirements not met by the defaults. For this example, I’m doing one at a time. You’ll then need to select a service role that has access to the instances, which we created early on during this blog post. Click the “Create Application” button to move on.
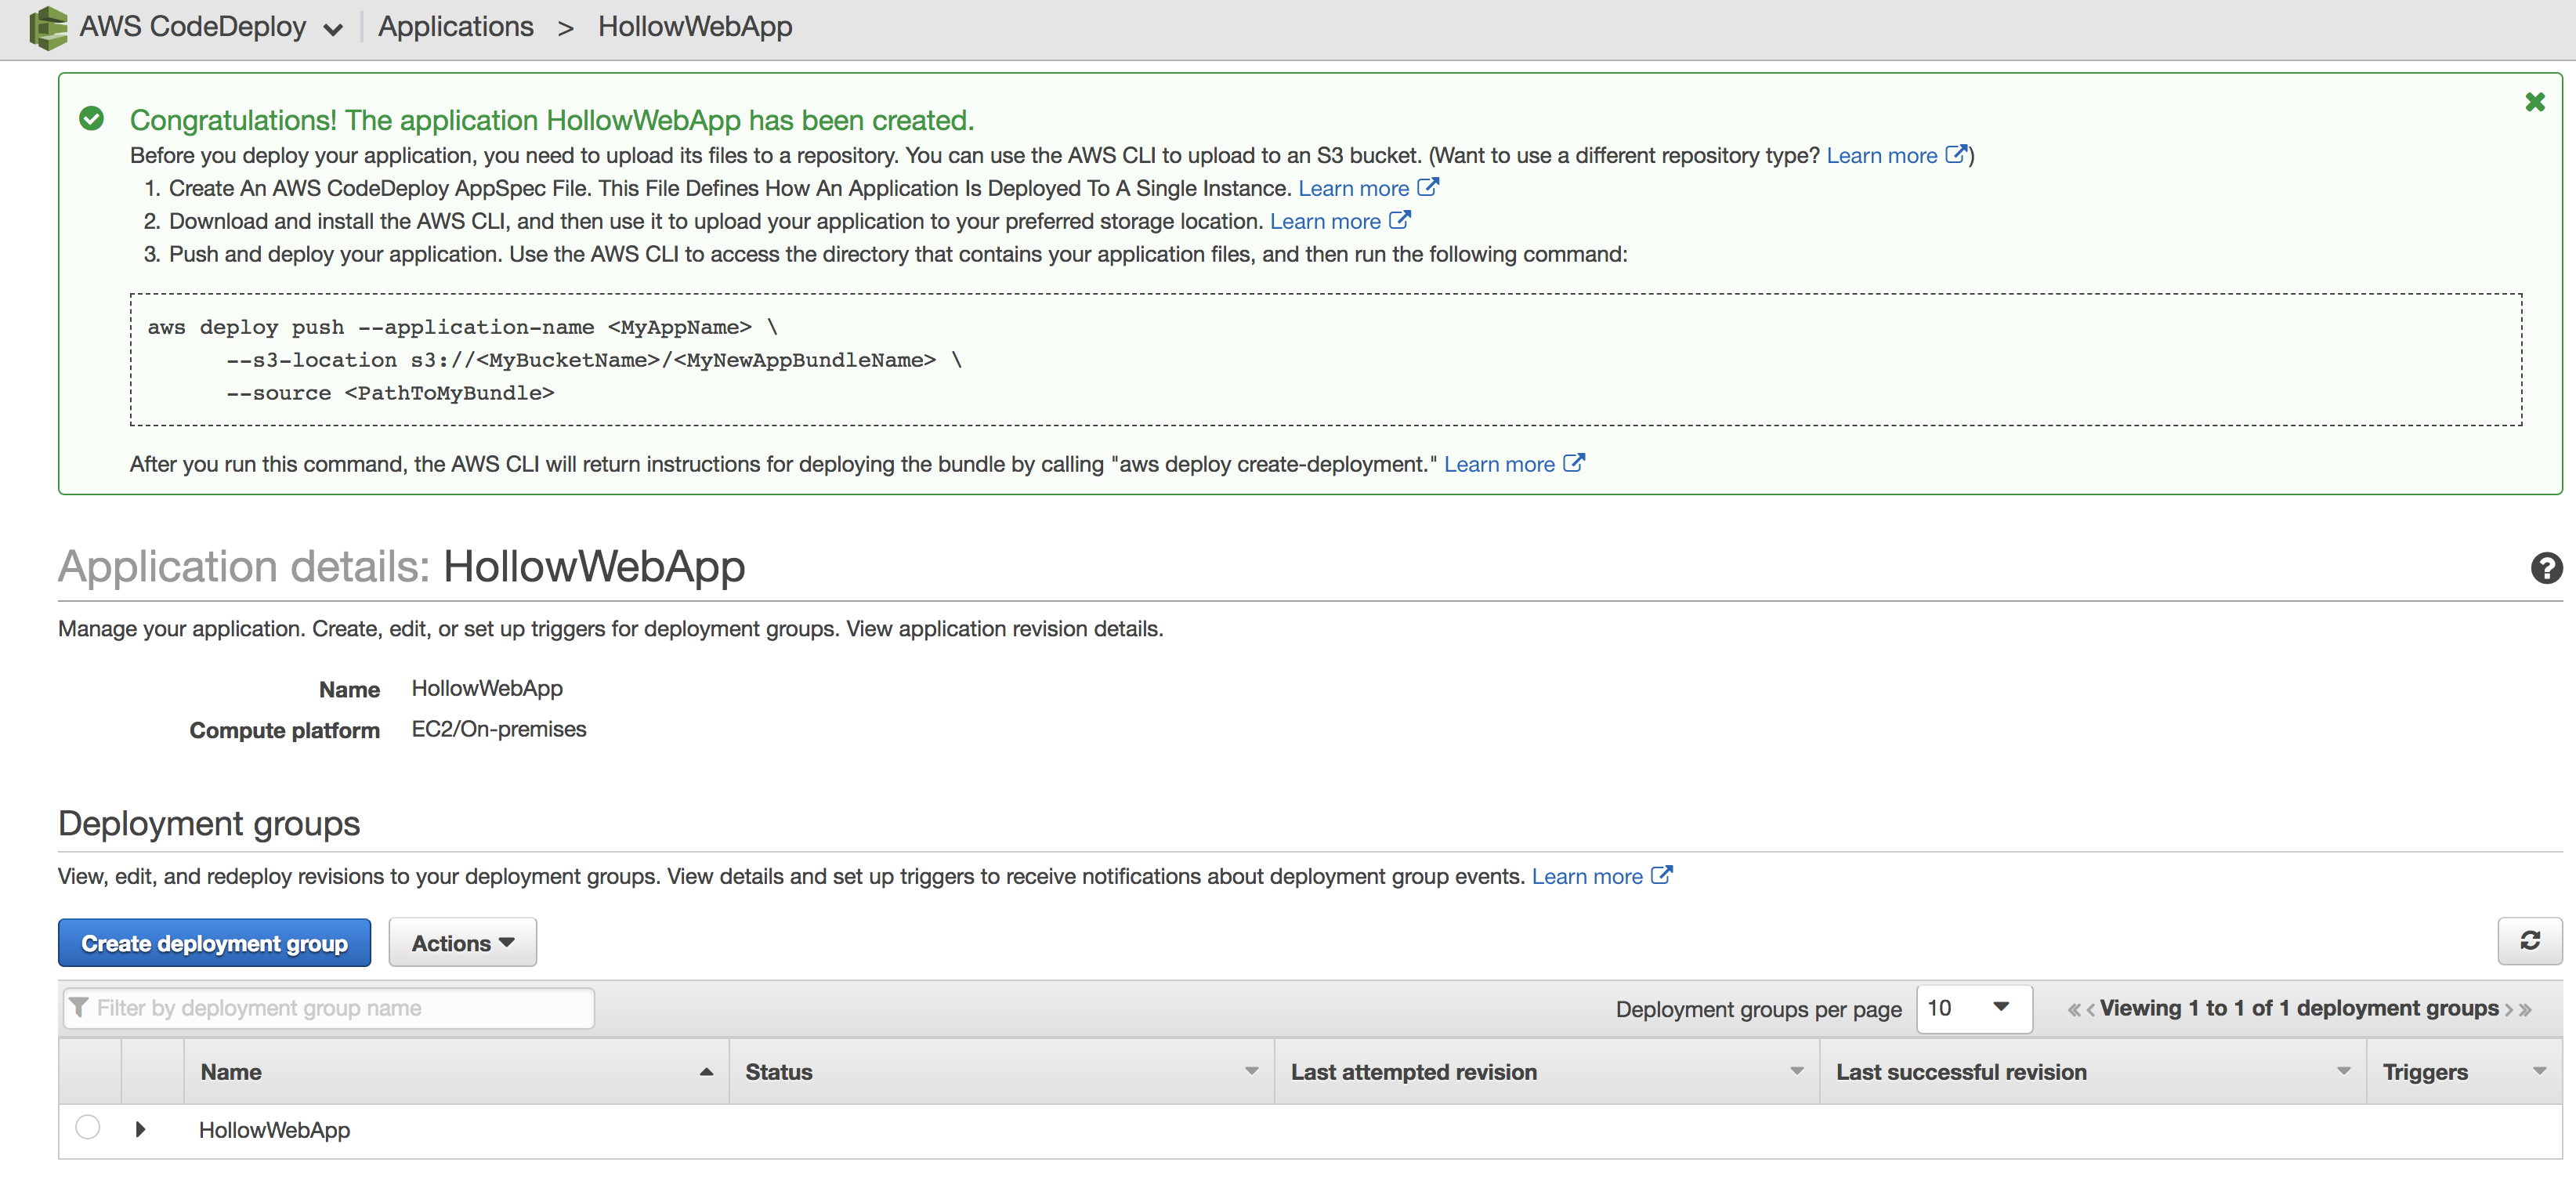
You should get a nice green “Congratulations!” message when you’re done. This message is pretty helpful and shows you the next steps to pushing your application.
Push your Code to S3
OK, now I’m going to push my code to S3 so that I can store it in a ready to go package. To do this, I’m opening up my development machine (my Mac laptop) and I’m updating my code. I’ve got a few changes to my website that I’m making including a new graphic and new index.html page. Also, within this repo, I’m going to create an appspec.yml file which is how we tell CodeDeploy what we want to do with our new code. Take a look at the repo with my files, and the appspec.yml file.
On my mac, I’ve got a directory with my appspec.yml in the root and two folders, content and scripts. I’ve placed my images and html files in the content directory, and I’ve put two bash scripts in the scripts directory. The scripts are very simple and tell the apache server to start or stop, depending on which script is called.

Now take a look at the appspec.yml details. This file is broken down into sections. There is a “files” section that describes where the files should be placed on our web servers. For example, you an see that the content/image001.png file from my repo should be placed within the /var/www/html directory on the web server.
version: 0.0
os: linux
files:
  - source: content/image001.png
    destination: /var/www/html/
  - source: content/index.html
    destination: /var/www/html/
hooks:
  ApplicationStop:
    - location: scripts/stop_server.sh
      timeout: 30
      runas: root
  ApplicationStart:
    - location: scripts/start_server.sh
      timeout: 30
      runas: root
Below this, you’ll see a “hooks” section. The hooks tell CodeDeploy what to do during each of the lifecycle events that occur during an update. There are a bunch of them as shown below.
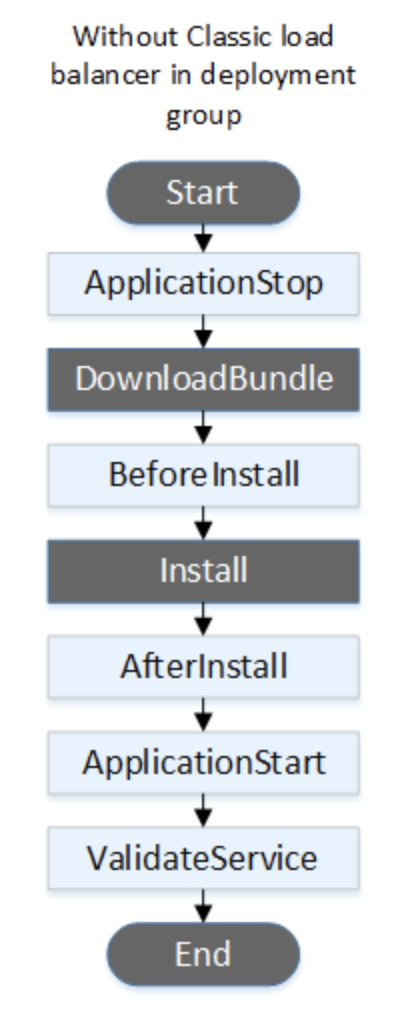
I don’t need to use each of the lifecycle events for this demonstration, so I’m only using ApplicationStop and ApplicationStart. In the appspec.yml file I’ve defined the user who should execute the scripts and the location of the script to run.
TIP: You may find that the very first time you deploy your code, the ApplicationStop script won’t run. This is because the code has never been downloaded before so it can’t run yet. Subsequent runs use the previously downloaded script so if you change this code, it may take one run before it actually works again.
Since our new application looks tip top, it’s time to push it to our S3 bucket in AWS. We’ll run the command shown to us in the console earlier and specify the source location of our files and a destination for our archive file.
aws deploy push \
  --application-name HollowWebApp \
  --description "Version1" \
  --ignore-hidden-files \
  --s3-location s3://mybucketnamehere/AppDeploy1.zip \
  --source .
My exact command is show below, along with the return information. The information returned, tells you how you can push the deployment to your servers, and I recommend using this information to do this. However, in this post, we’ll show what happens when pushing code from the console so we can easily see what happens.

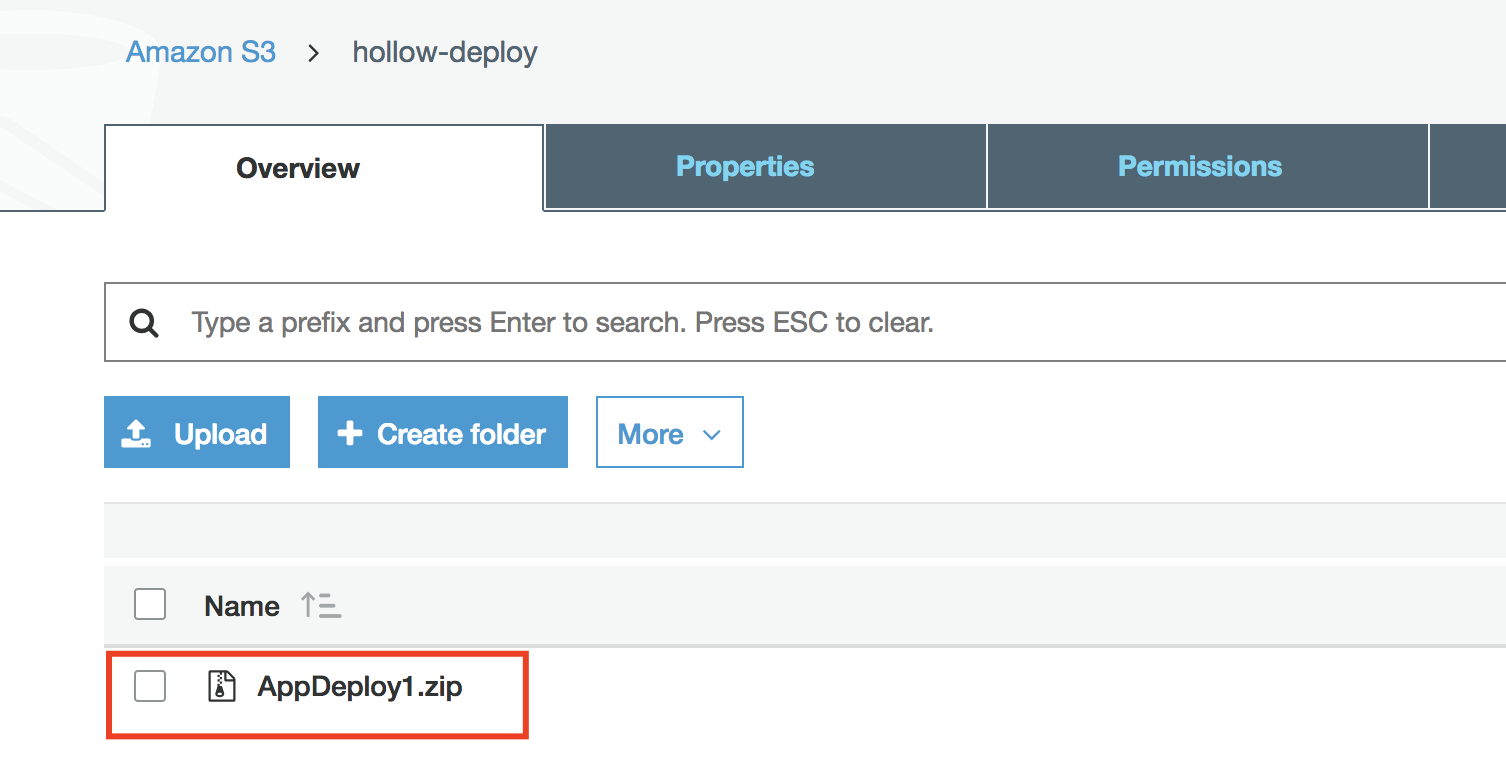
Once the code has been successfully pushed we’ll do a quick check to show that the zip file is in our S3 bucket, and it is!
Deploy the New Version
As mentioned, you can now deploy your code to your servers from the command line response you got from pushing your code to S3. To make it more obvious about what happened, lets take a look at the CodeDeploy console now though. You’ll notice that if you open up your application that there is a “Revision” listed in your list. As you push more versions to your S3 bucket, the list will grow here.
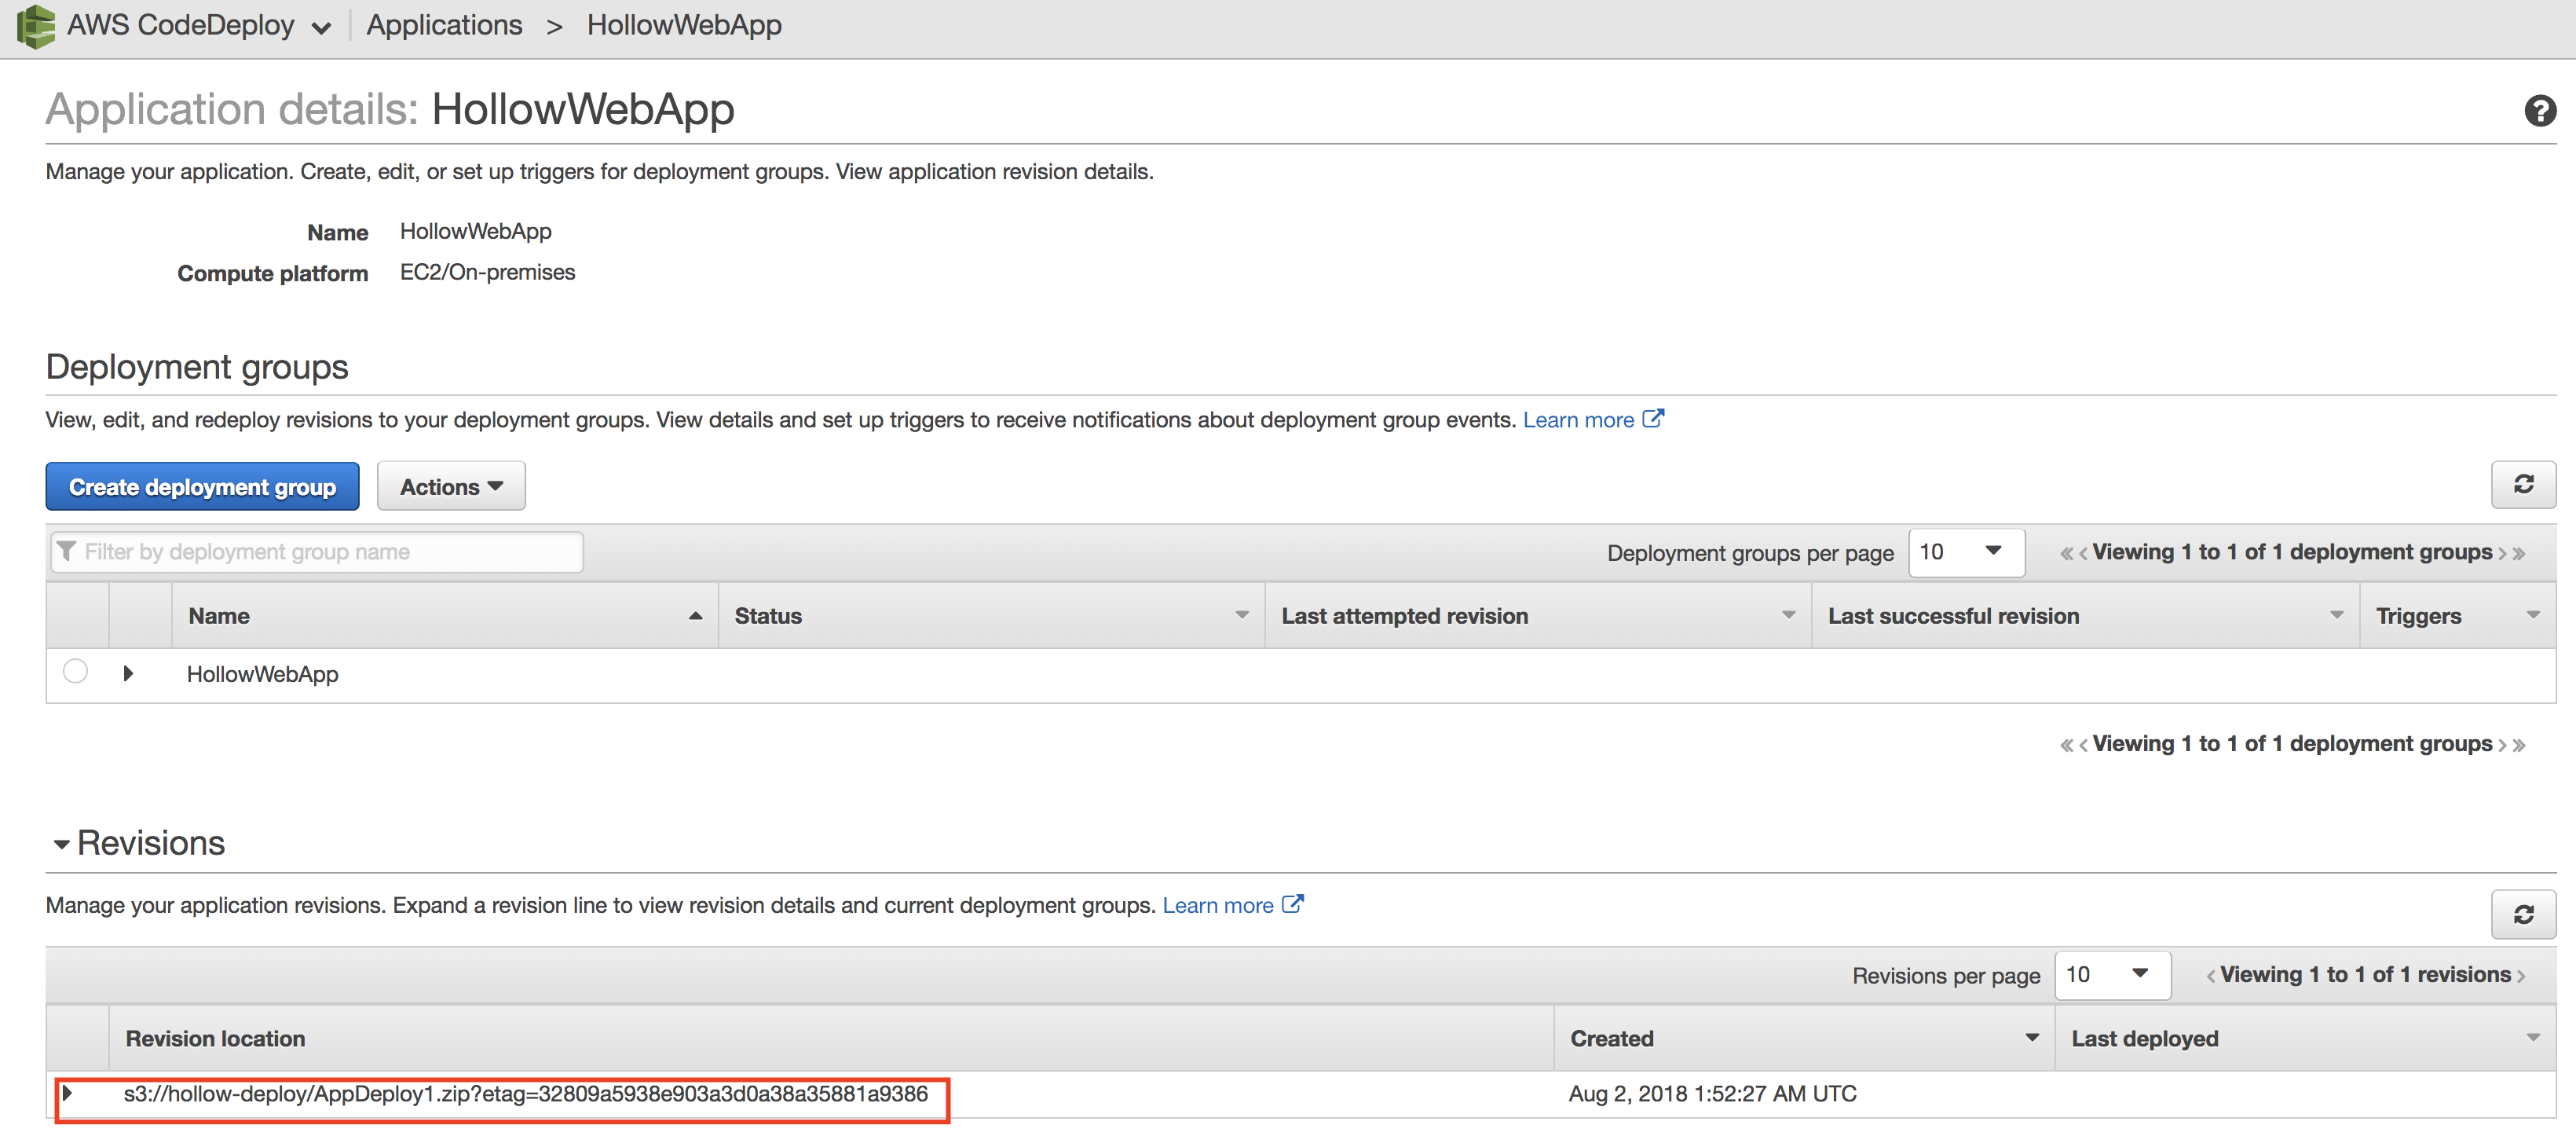
We’re ready to deploy, so click the arrow next to your revision to expand the properties. Click the “Deploy revision” button to kick things off.

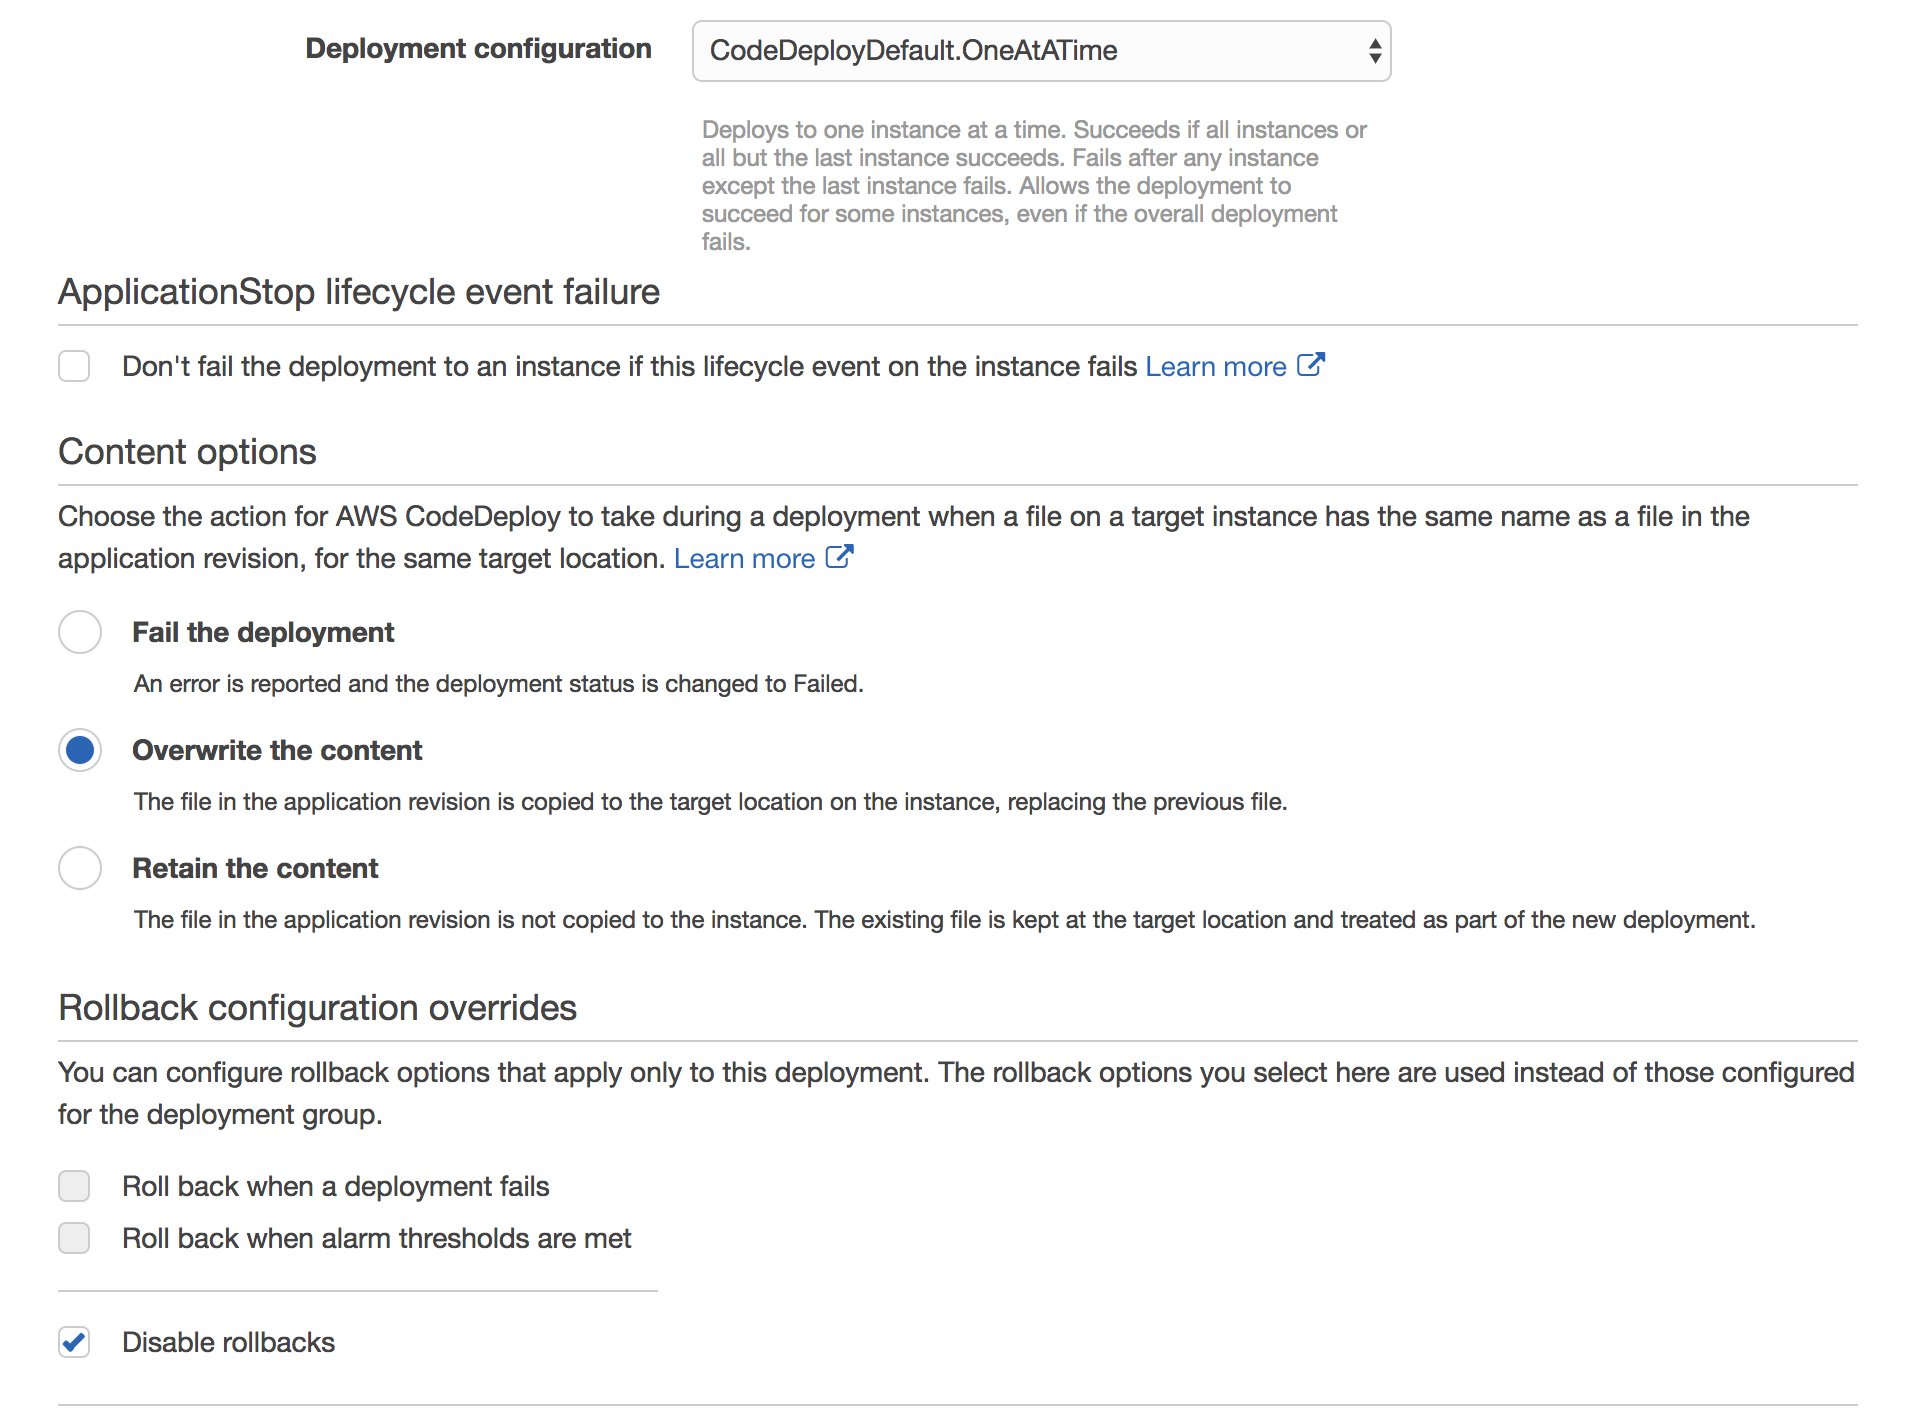
Most of the information should be filled out for you on the next page, but it does give you a nice opportunity to tweak something before the code gets pushed. I for example selected the “Overwrite Files” option so that when I push out a new index.html, it will overwrite the existing file and not fail the deployment because of an error.

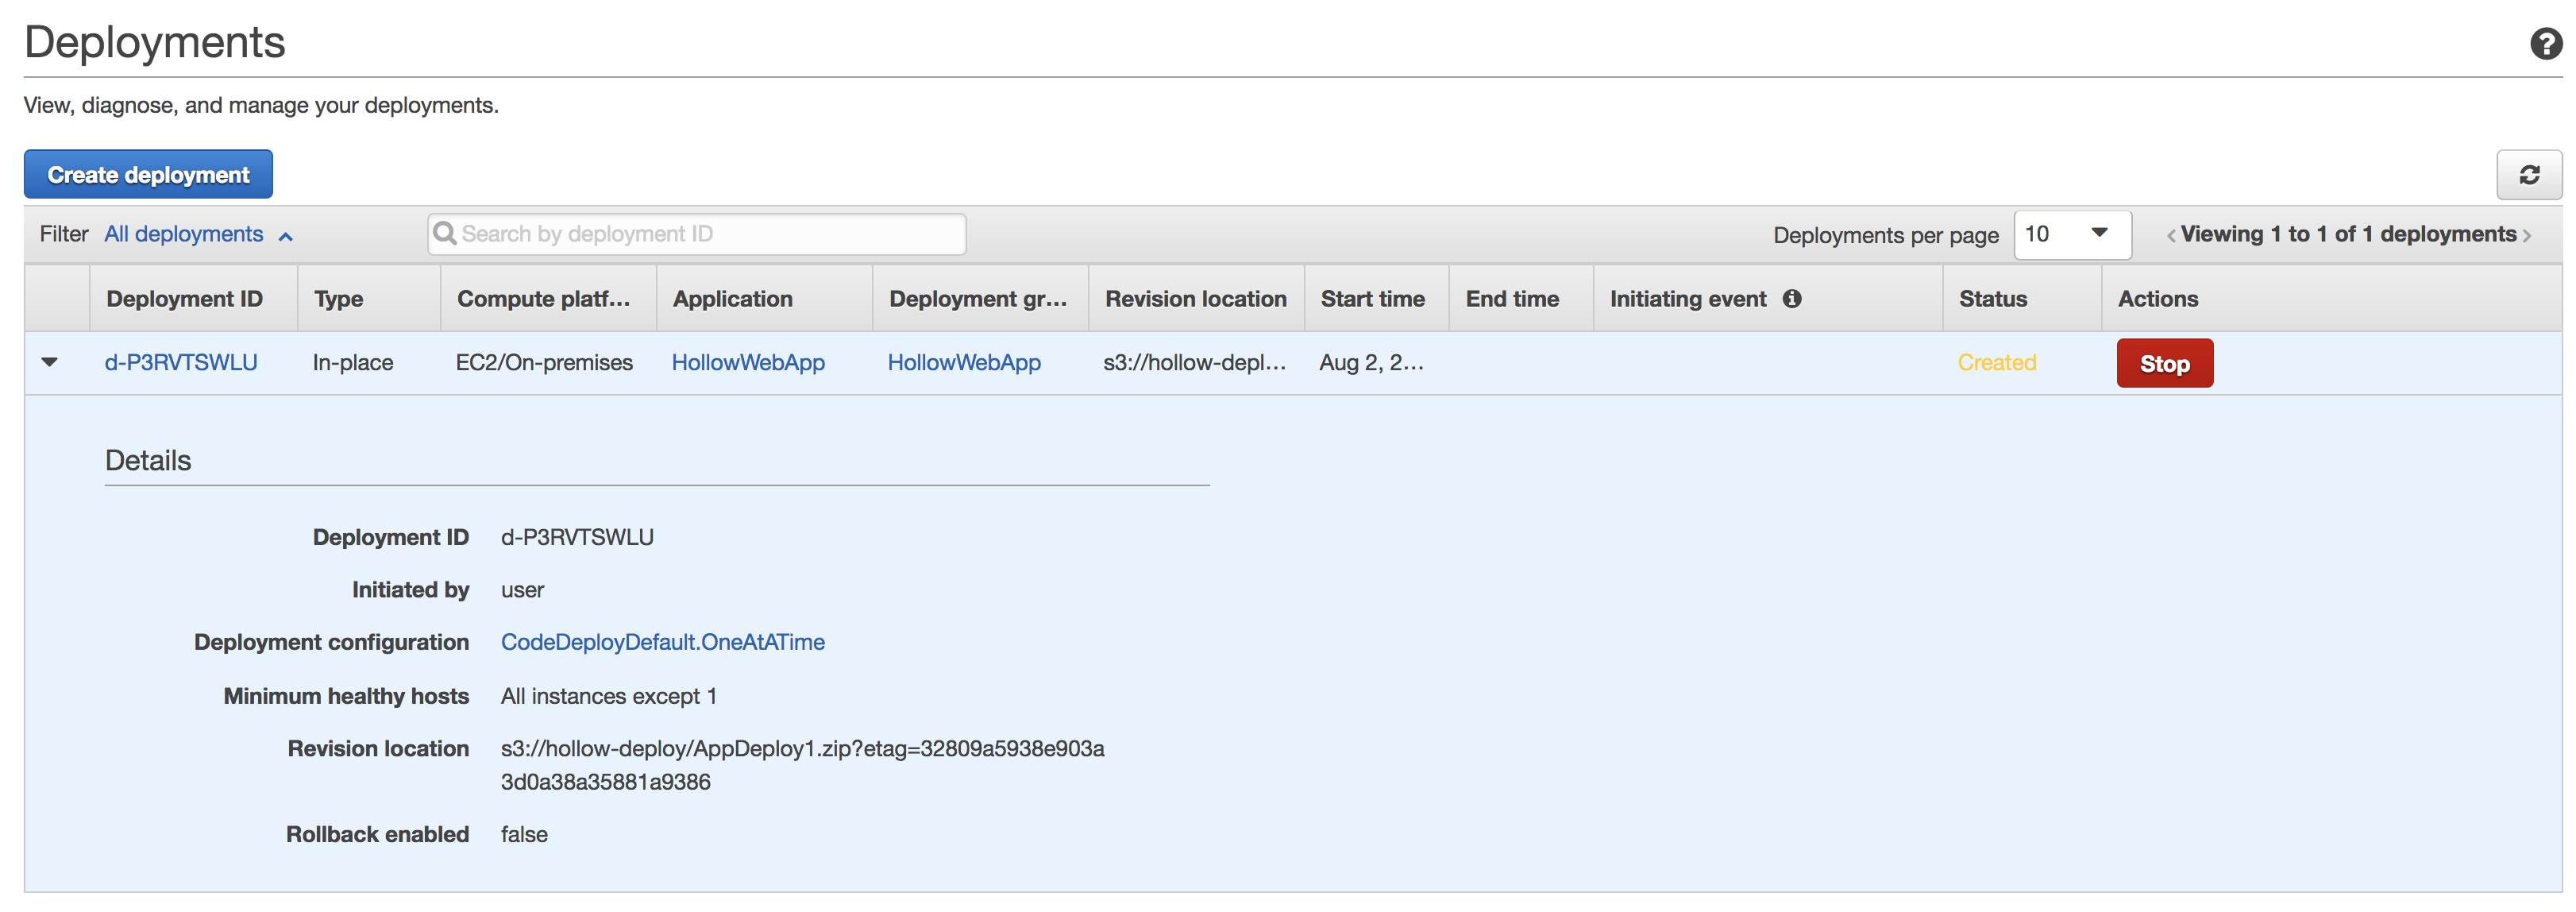
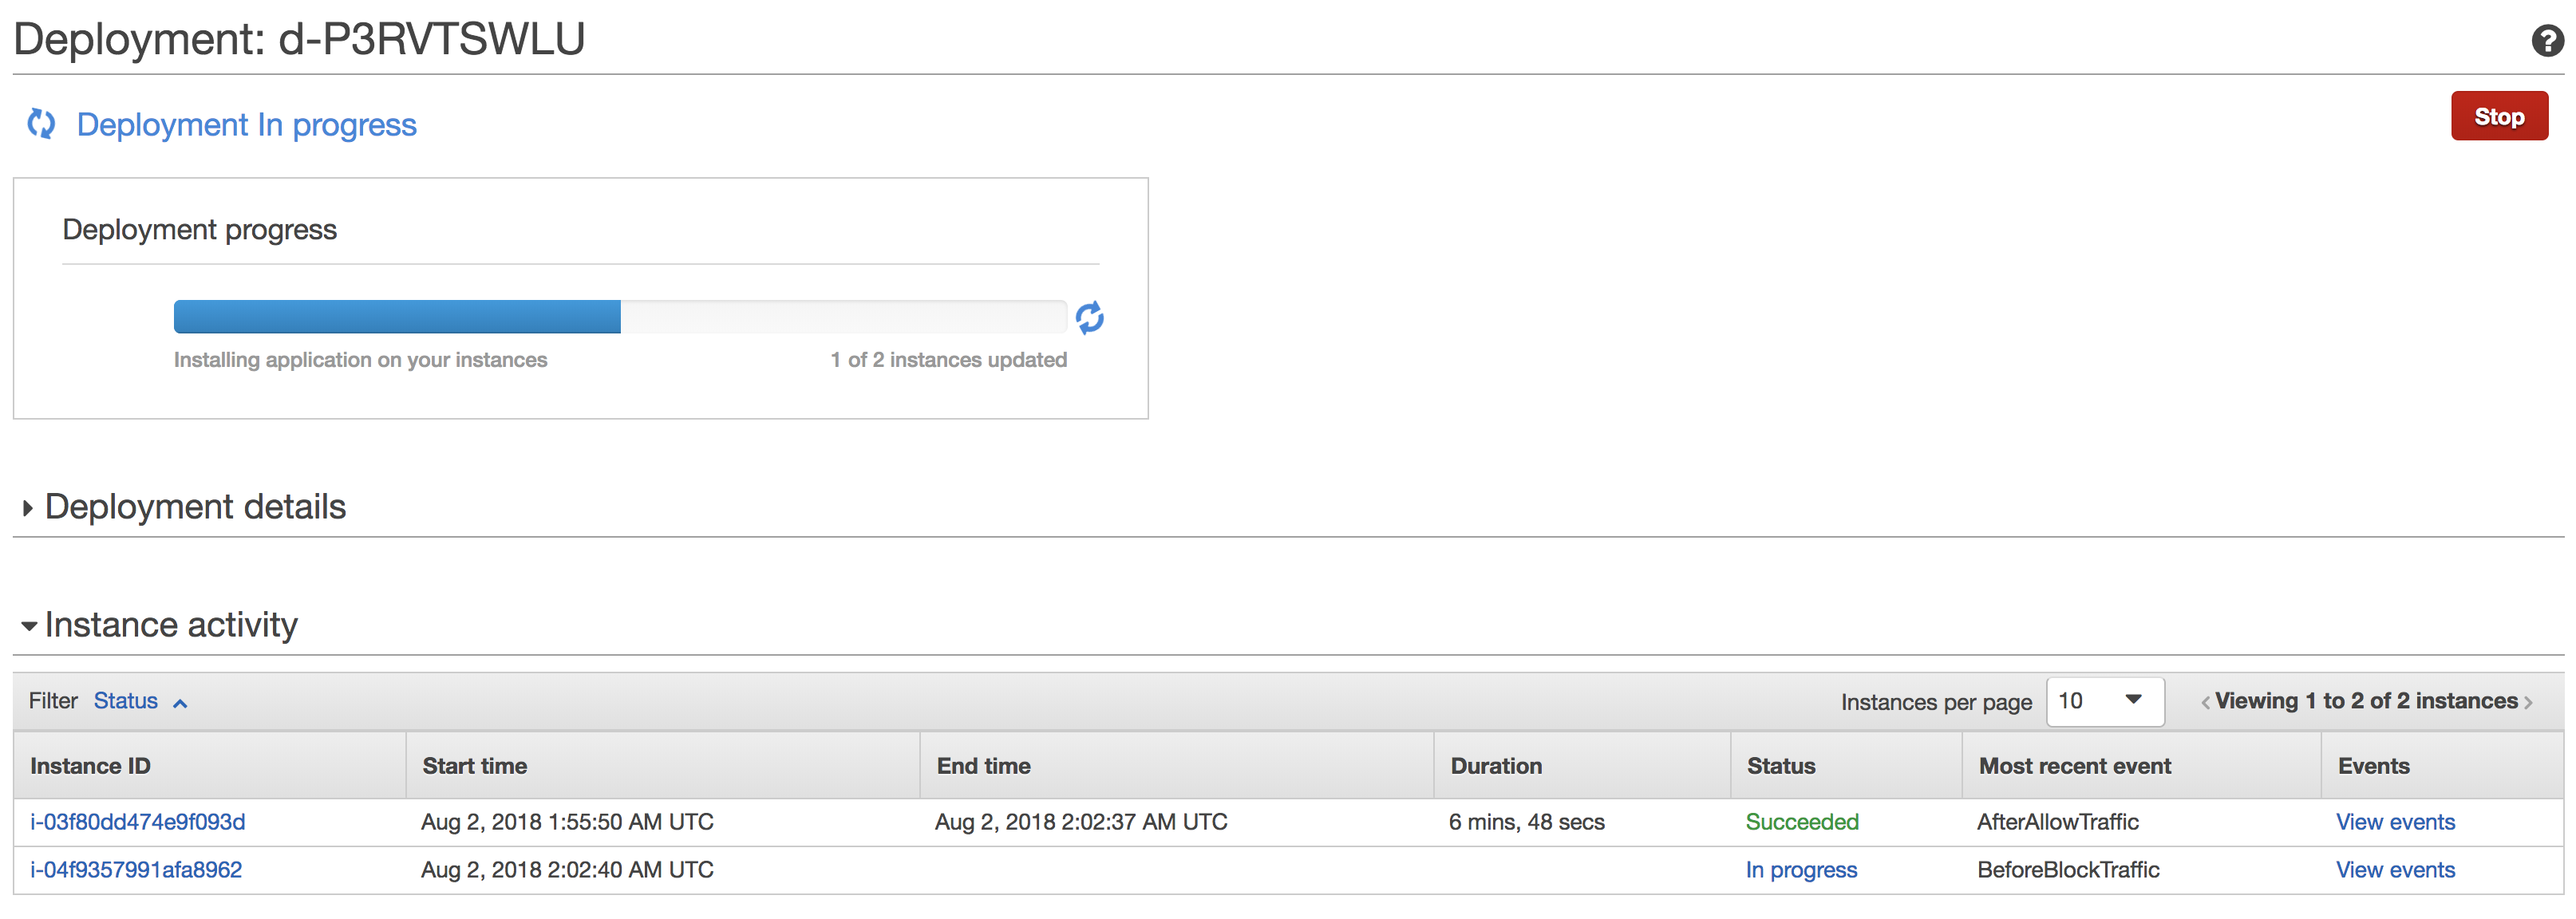
As your deployment is kicked off you can watch the progress in the console. To get more information, click the Deployment ID to dig deeper.
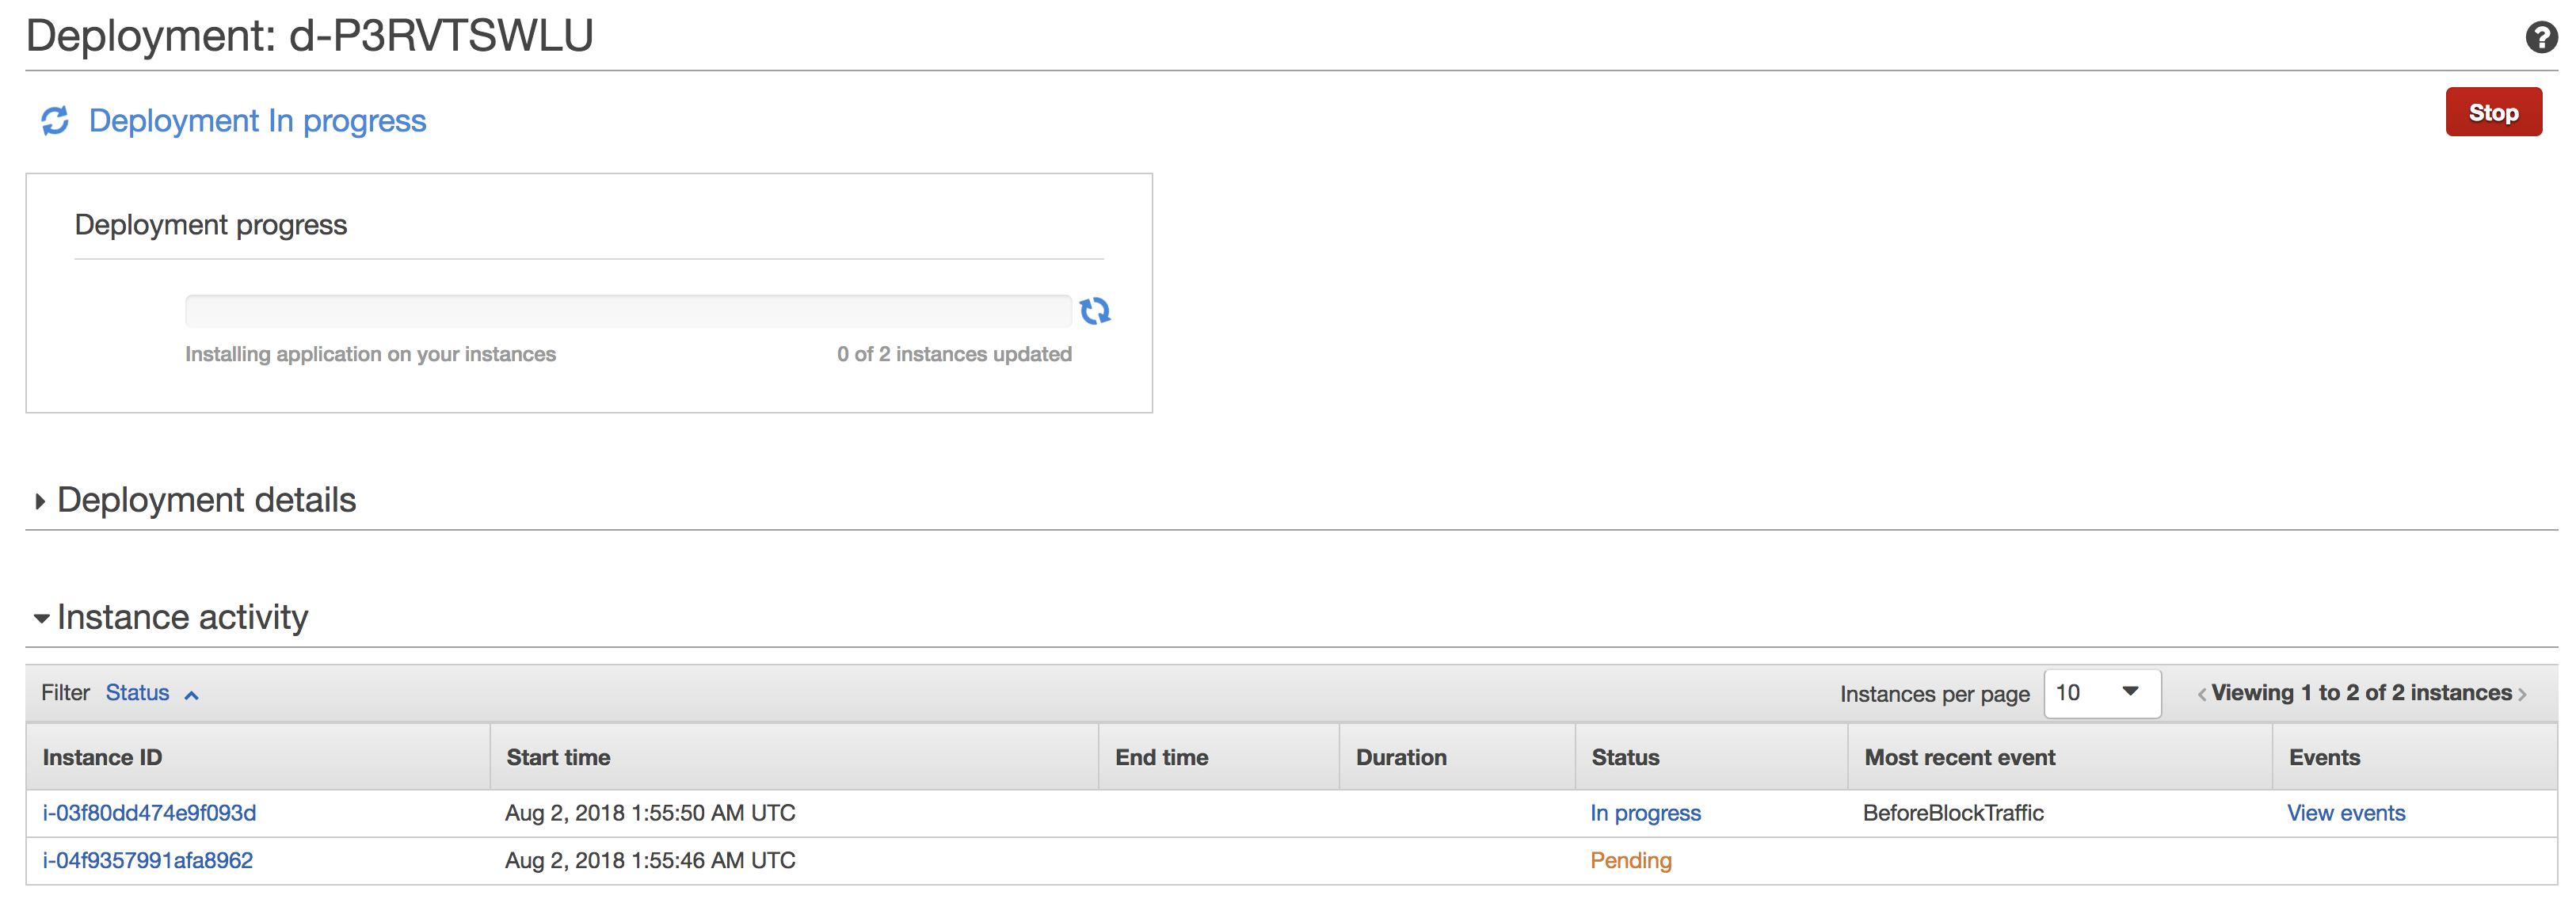
When we drill down into the deployment, we can see that one of my servers is “In progress” while the other is pending. Since I’m doing one at a time, only one of the instances will update for now. To see even more information about this specific instance deploy, click the “View events” link.
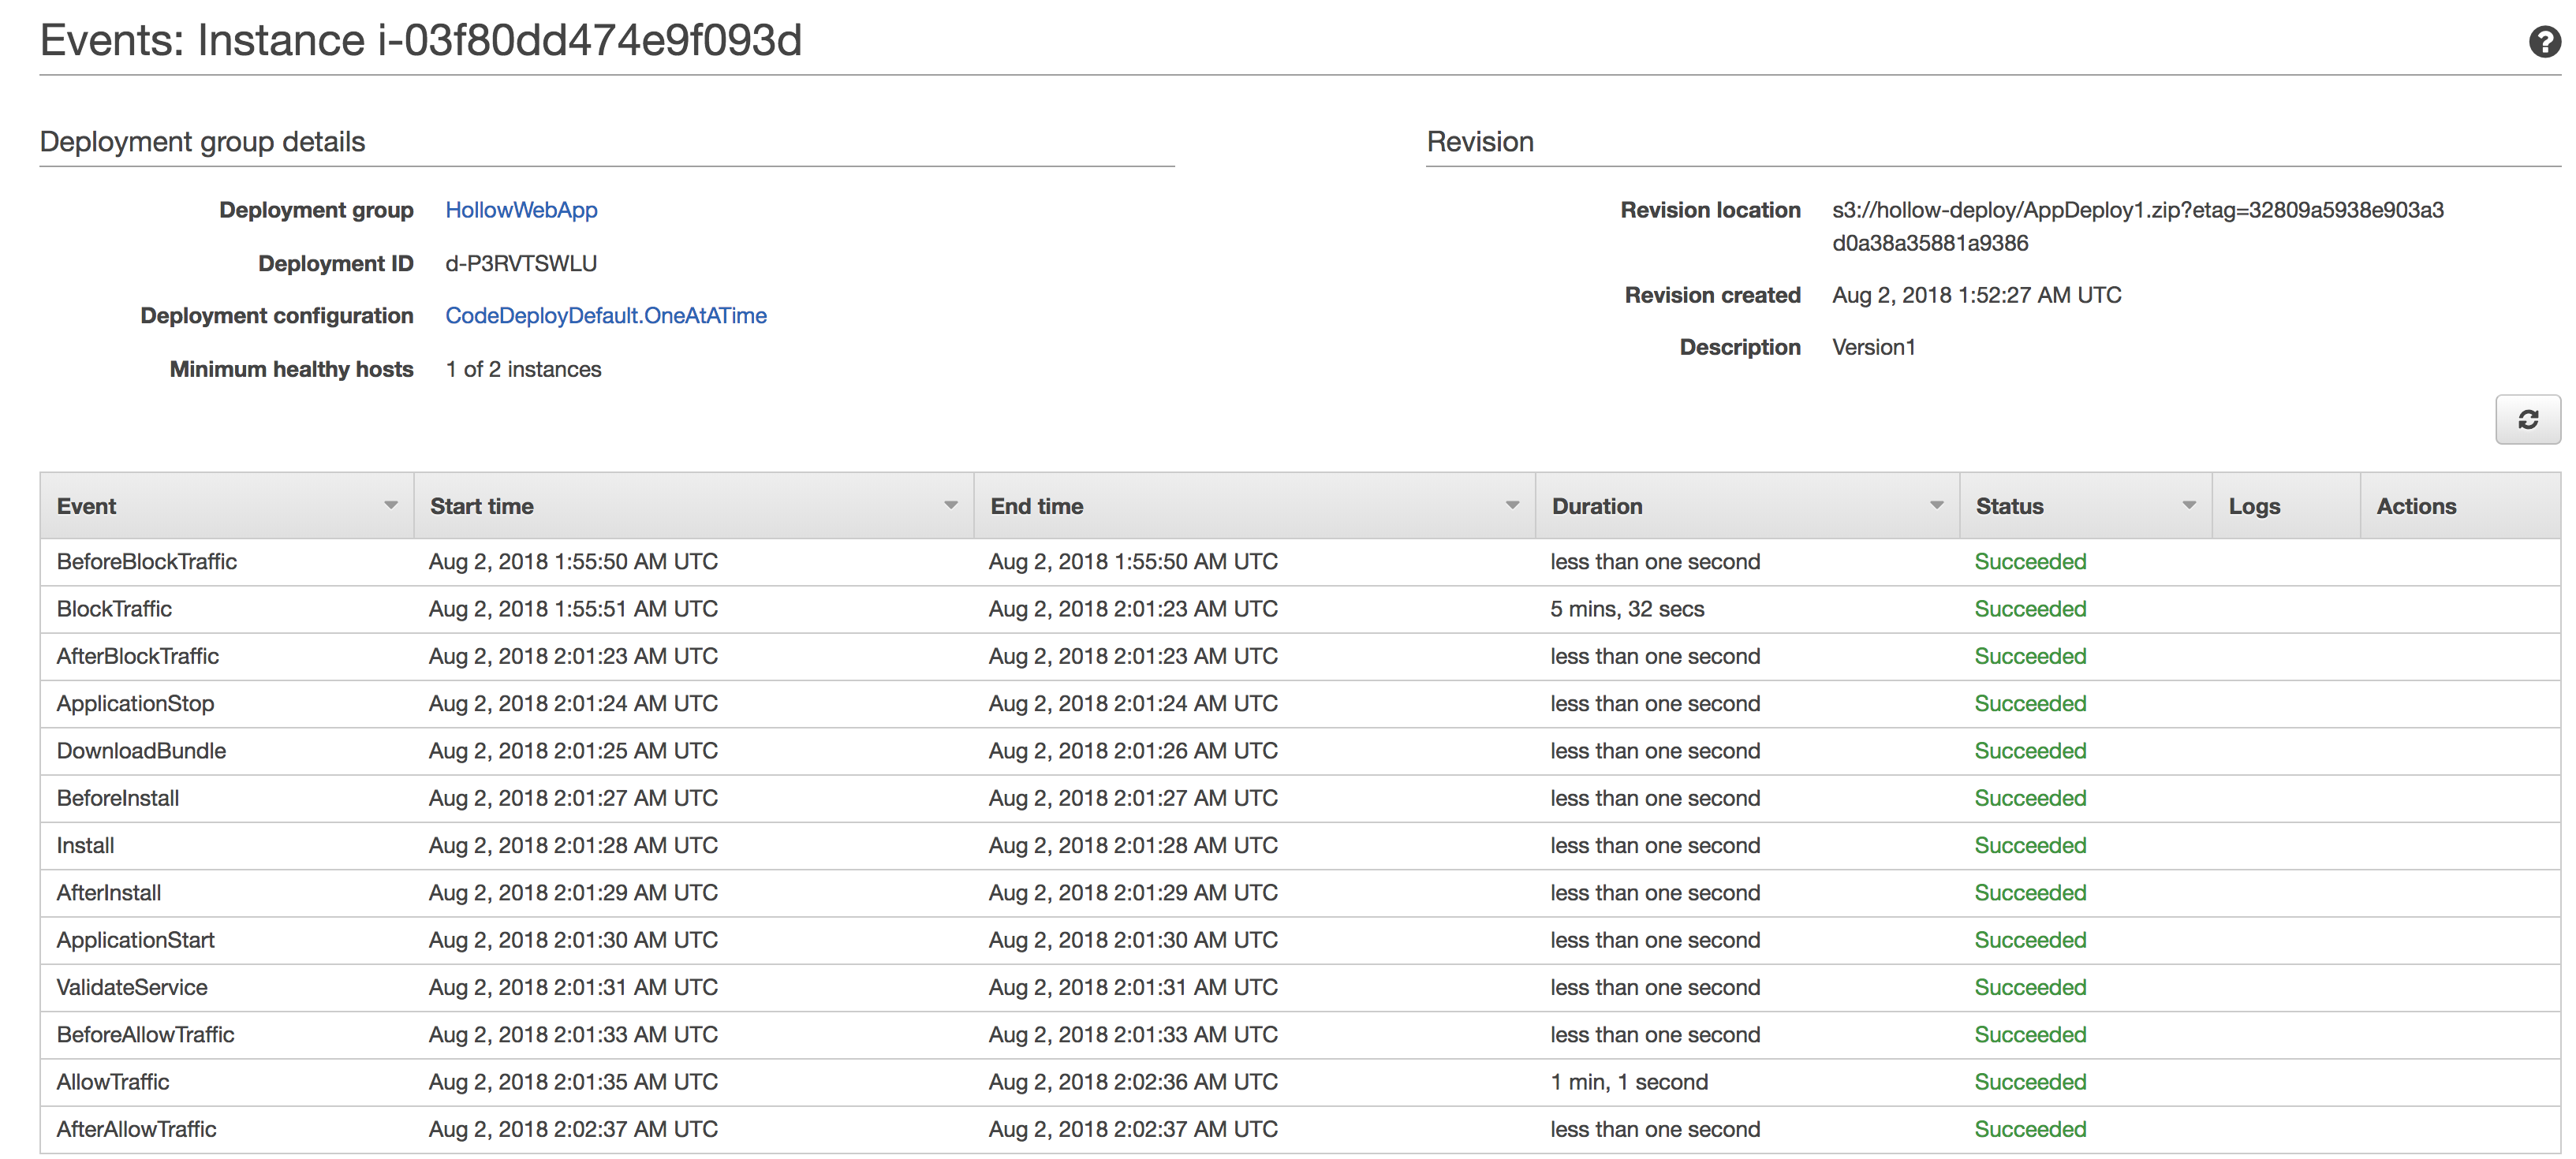
When we look at the events, we can see each of the lifecycle events that the deployment goes through. I’ve waited for a bit to show you that each event was successful.
When we got back to the deployment screen, we see that one server is done, and the next server has started its progression.
When both servers have completed, I check my app again, and I can see that a new version has been deployed. (A slightly better, yet still awful version)