Some things change when you move to the cloud, but other things are very much the same. Like protecting your resources from outside threats. There are always no-gooders out there trying to steal data, or cause mayhem like in those Allstate commercials. Our first defense should be well written applications, requiring authentication, etc and with AWS we make sure we’re setting up security groups to limit our access to those resources. How about an extra level of protection from a Web Application Firewall. AWS WAF allows us to leverage some extra protections at the edge to protect us from those bad guys/girls.
Background on WAF
The AWS Web Application Firewall (WAF) allows us to create custom rules to protect us from things like cross-site scripting, SQL injection, or just blocking traffic from certain geographies. If your site isn’t ready for GDPR maybe you block Europe from accessing your site altogether. Of course WAF can also do things like block specific IP addresses that have been identified as bots, etc but we expect all firewalls to be able to do this. WAF is billed at $5 per web ACL per month and another $1 per rule per ACL per month for the configuration. There are additional usage charges added based on the requests at $0.60 per million web requests.
The AWS WAF can be used with an AWS Application Load Balancer or a CloudFront distribution. If your application is hosted on-prem, you could still leverage the AWS WAF by integrating a CloudFront distribution with your application.
There are several parts to deploying a WAF for your application.
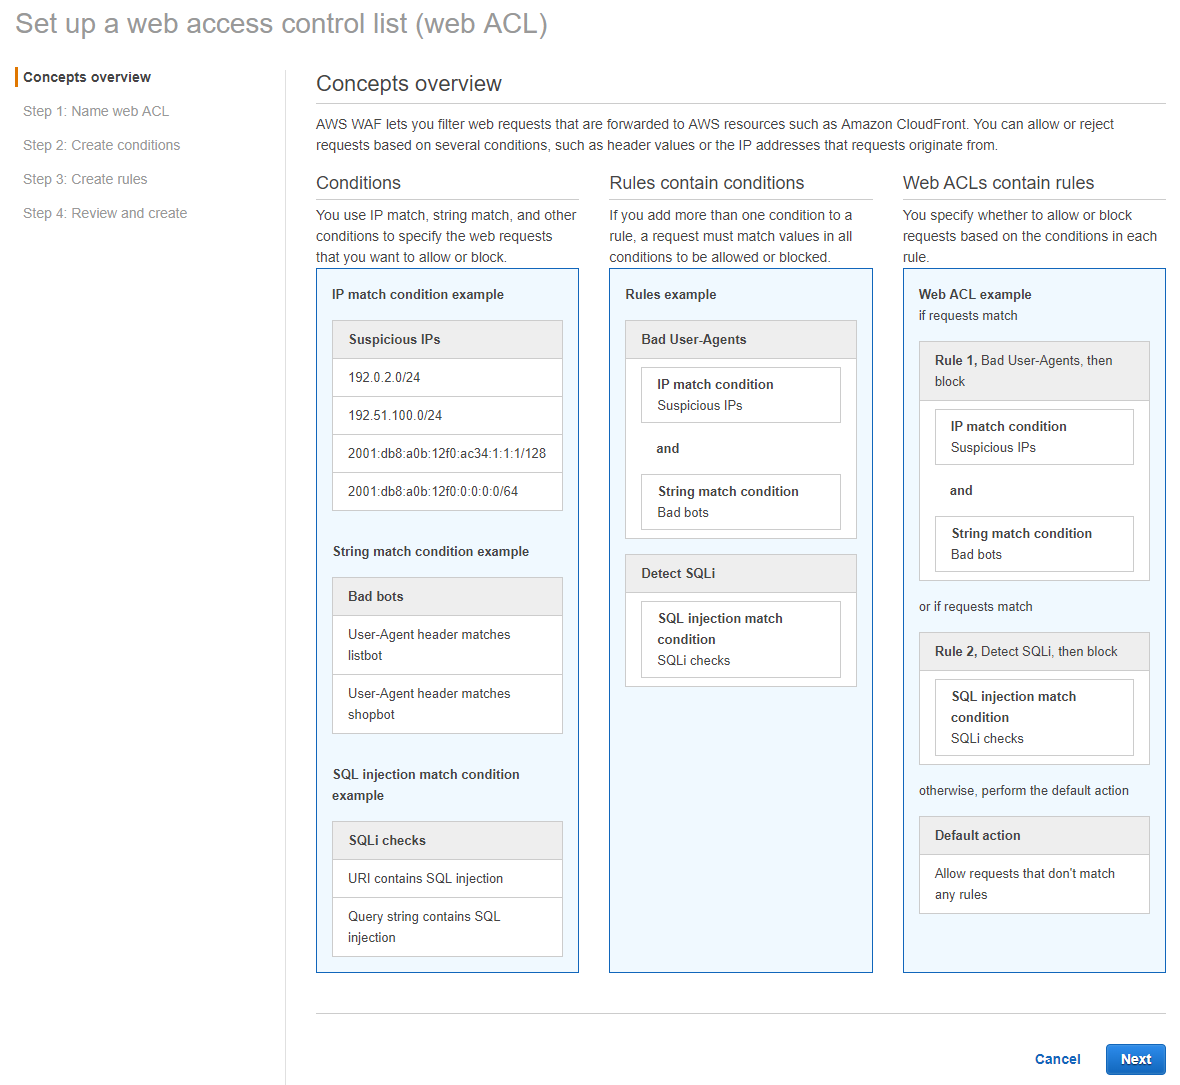
- Conditions - You’ll build a condition to identify the type of traffic or web call that is being made. This could be a source IP Address, a regular expression, a SQL filter, etc. The job here is to identify the types of requests that an action will be take on.
- Rules - Rules will identify if you plan to allow or block traffic that is identified by a condition, or a catch-all. For example, a rule might block IP Addresses identified by Condition 1, block traffic from a specific geopgraphy identified by Condition 2, and allow any other traffic by default.
- Web ACL - A group of rules can be added to a Web ACL and the Web ACL is attached to a resource such as an Application Load Balancer or CloudFront Distribution.
Setup Through the Console
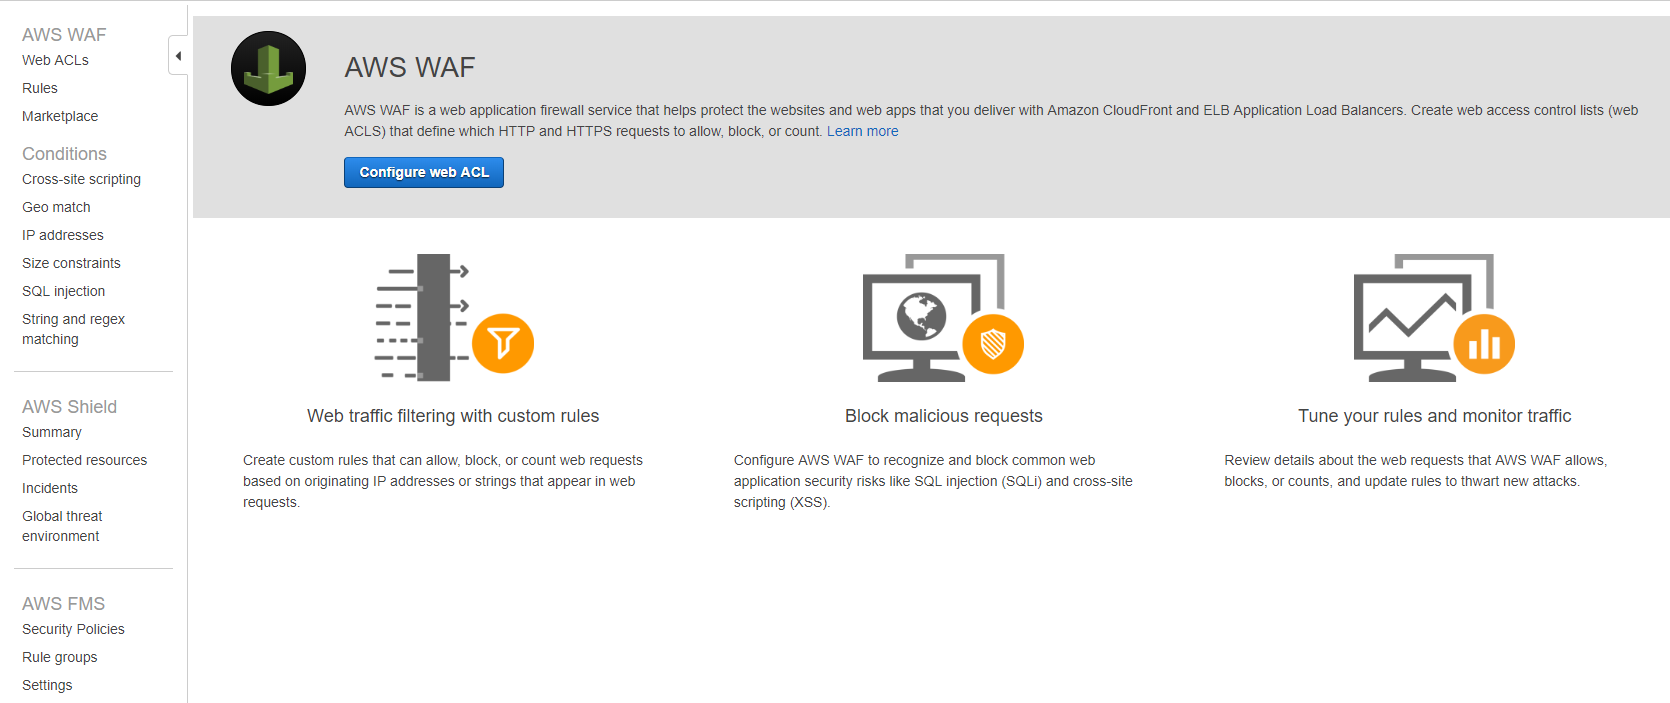
The examples below will use a very basic website behind an AWS application load balancer through the AWS console. To begin, navigate to the AWS WAF and Shield services. A familiar getting started screen will show up where you can add your WAF by clicking the “Go to AWS WAF” button.
When the WAF screen opens, click the “Configure web ACL” button which will start the process of walking us through creating conditions and rules as well as the Web ACL.
The first screen gives you and idea of what will be created and how you might set it up. This screen is informational so read it and when you’re ready, click the “Next” button.
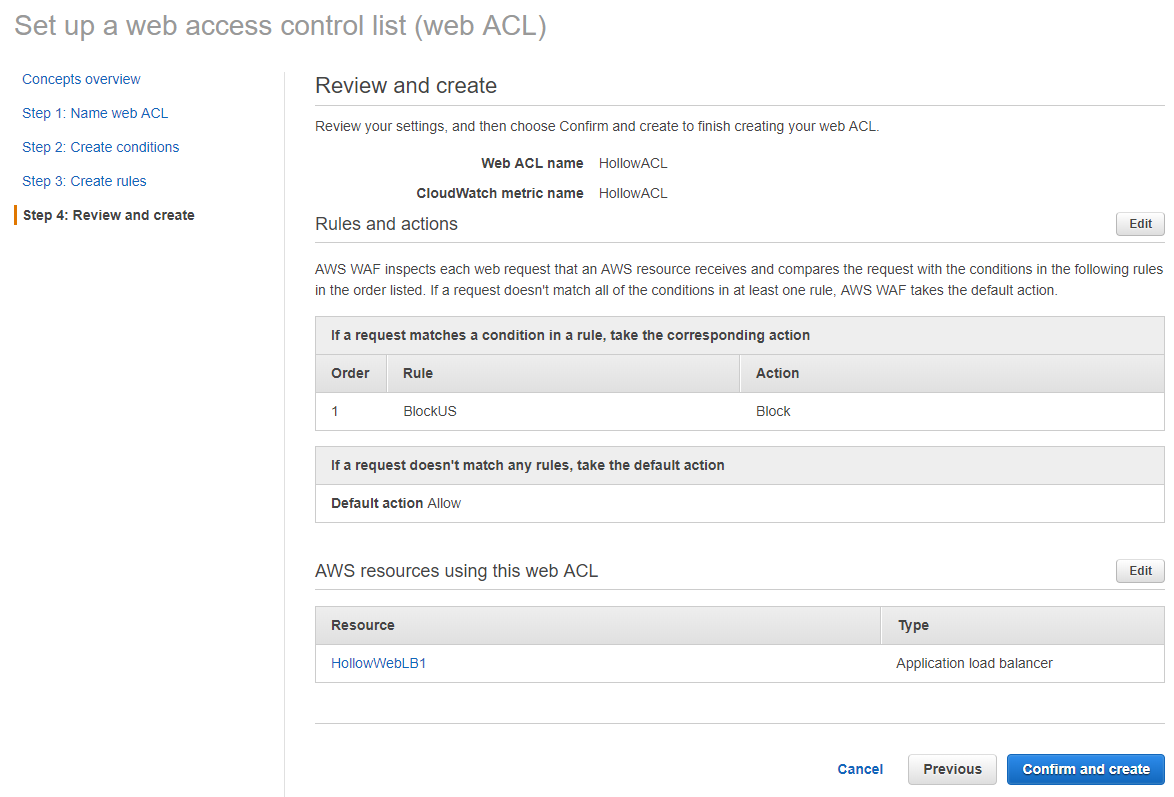
Lets create a Web ACL. I’ve named mine HollowACL and there is a CloudWatch metric that will be created as well that shows the statistics for this ACL in the CloudWatch console. Note: it may be useful to keep these names the same for tracking purposes.
Select the region that this will be available in. If you’re using CloudFront, the region should be “Global”, if you’re using an ALB, select the region your ALB is located. After you select the region, you should be able to select the ALB to associate the WAF ACL with and then click the “Next” button.

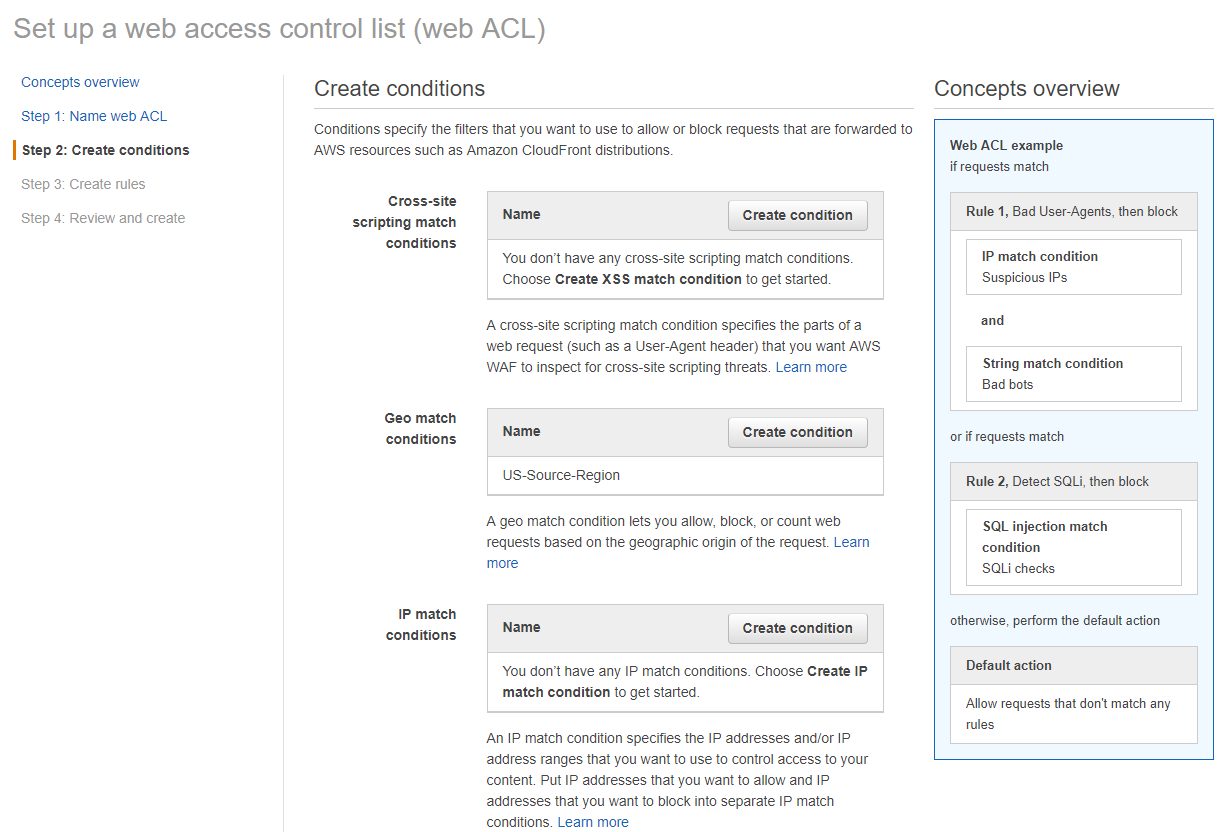
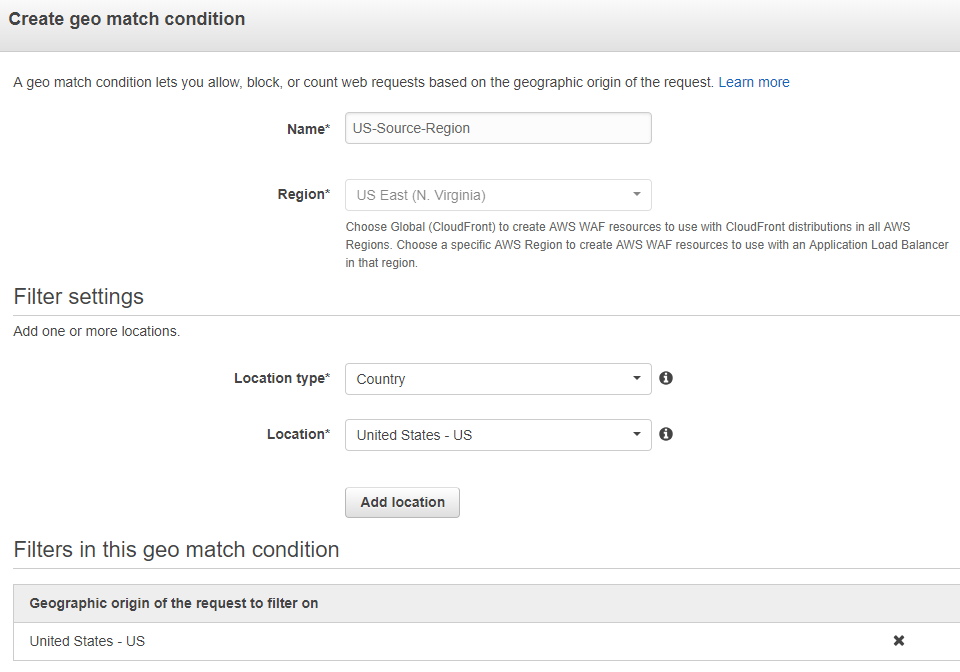
Now it’s time to create the conditions. I’m keeping this simple and will geo-block requests coming from the United States for giggles and grins. Under the Geo match conditions type click the “Create condition” button to create a new condition. Depending on your own requirements, you may have to choose a different condition type which ultimately would ask for different things as part of the rule.
Give the condition a name and again select a region. Since I selected a geo match condition I’ll need to identify which country to block. When done, be sure to click the “Add location” button to add it to the condition.
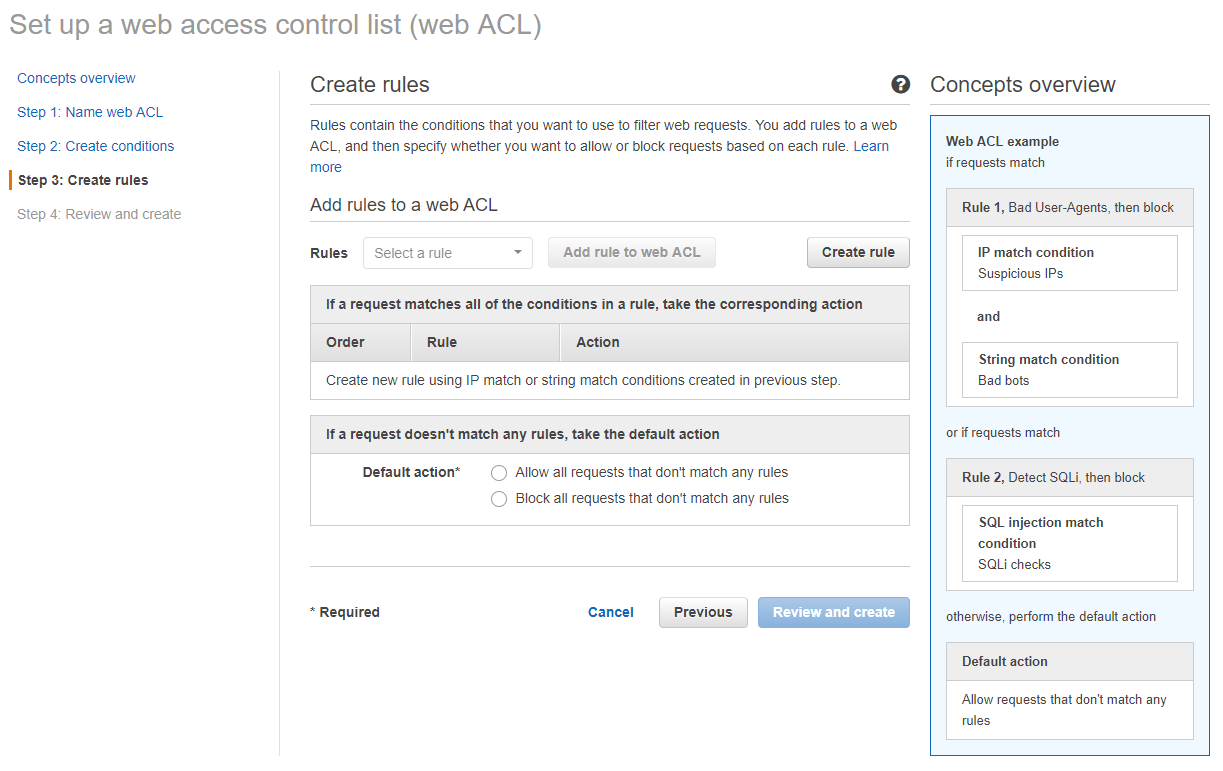
Now that our condition(s) are created, lets move on to rules. Click the “Create rule” button.
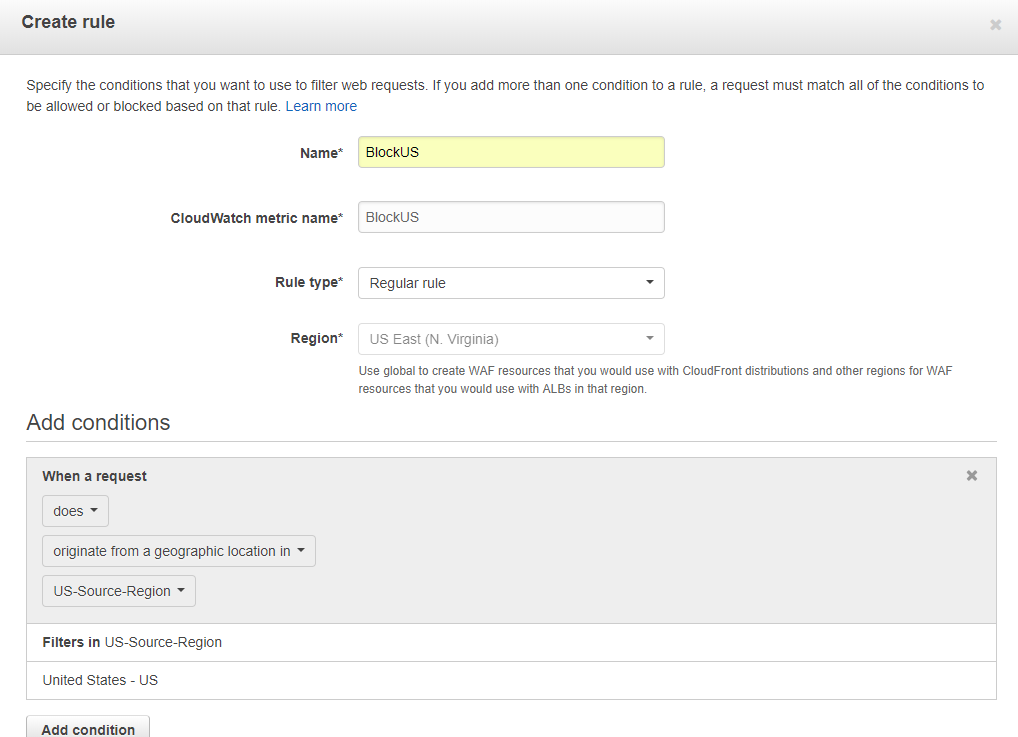
When you create the rule, give it a name and again a CloudWatch metric so we can review the activity later. Select either “regular” or “rate-based” rule depending on if this should always be active. Note: Rate-based rules would be good for brute force attacks where the first couple of times its allowed and then a block rule is triggered on too many attempts.
Under the conditions, select does or does not for a matching condition and then the type of condition (in this case its a geo rule) and then which condition of that type you’re matching. Add further conditions if needed.
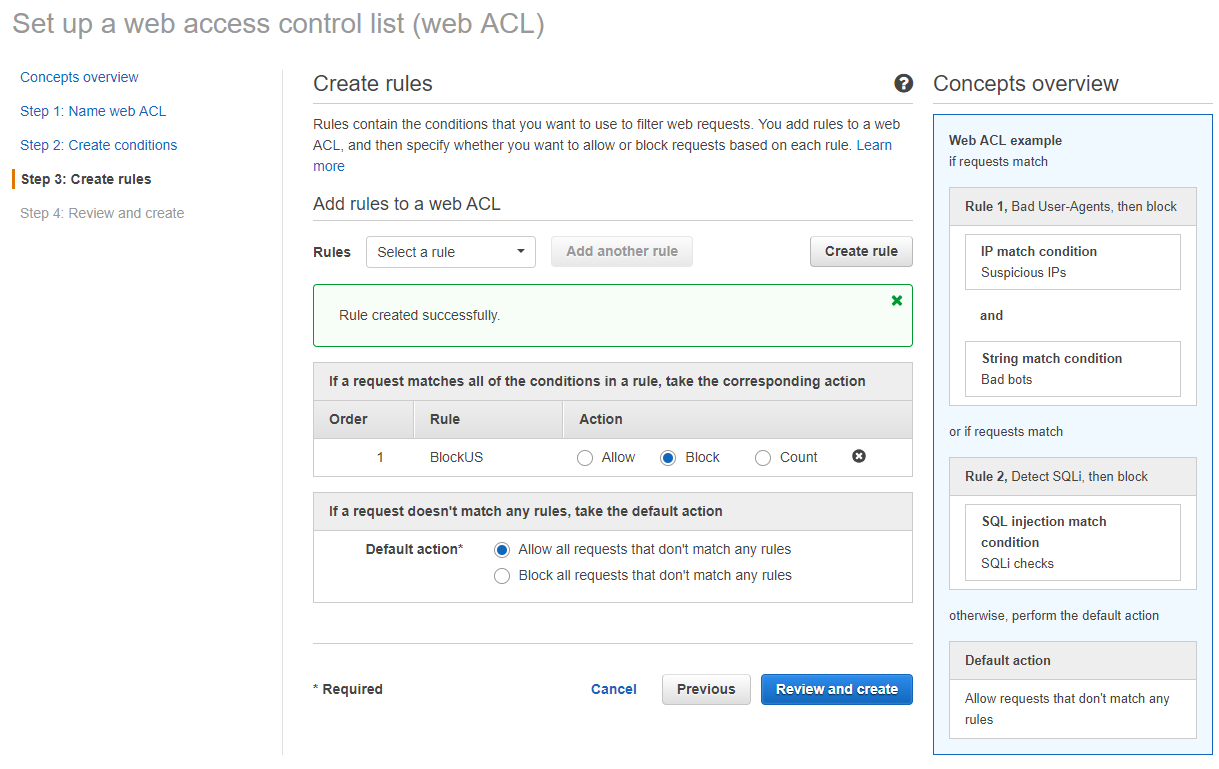
We’re taken back to the web ACL screen where we will select whether traffic that matches that rule should be allowed, blocked or counted. Counted is used to monitor traffic, but not take actions on it. You should also select a default action of allow or deny. Click the “Review and create” button.
Review the settings and then click the “Confirm and create” button.
The Results
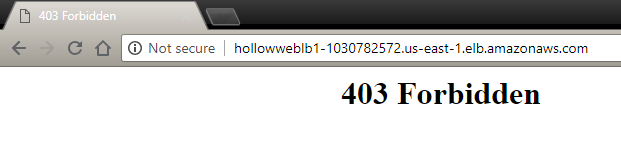
First things first, did it work? Lets try a request to access the web application from a US location (my desktop). We’ll notice that we get a 403 error meaning that we found a live service, but were denied access.
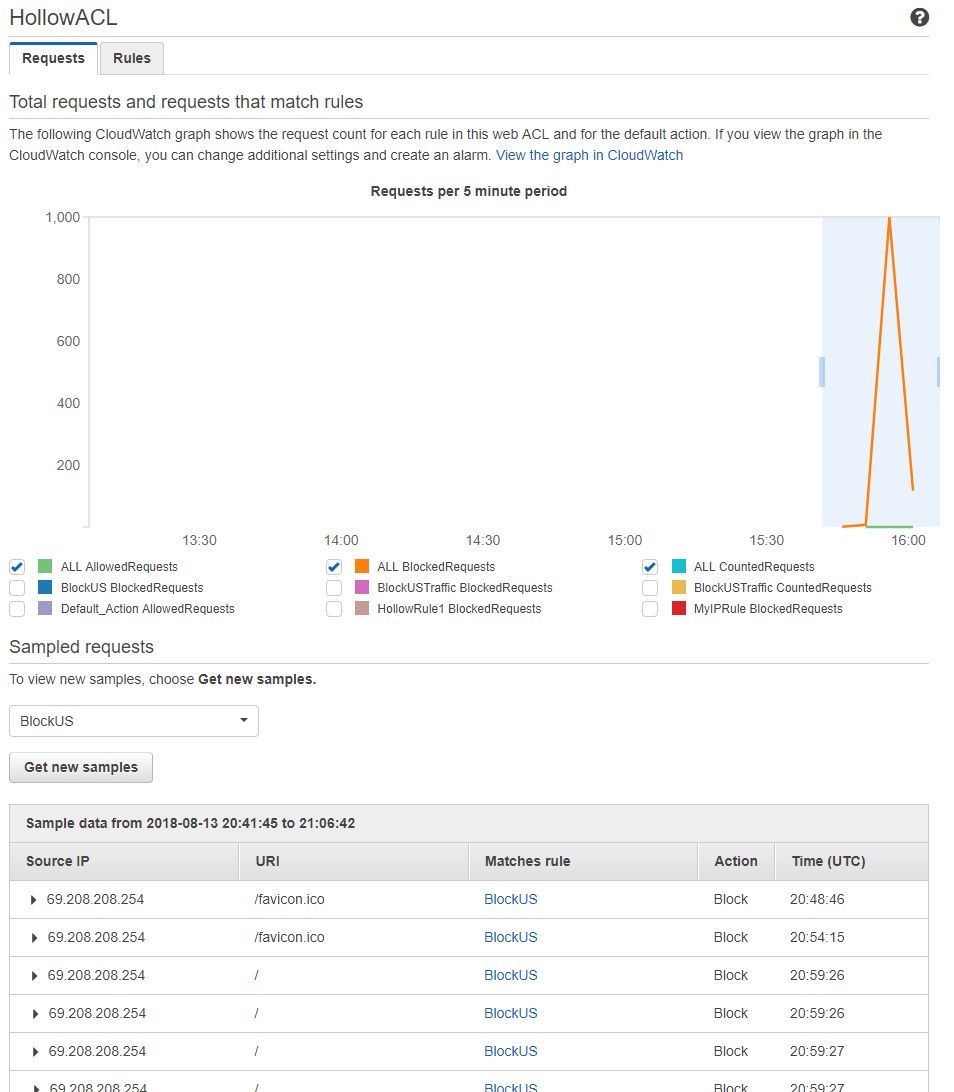
If we look back at the WAF Console, we can select our ACL and see a graph of the metrics we’re looking for. We can also see some samples of the requests that match the rule.
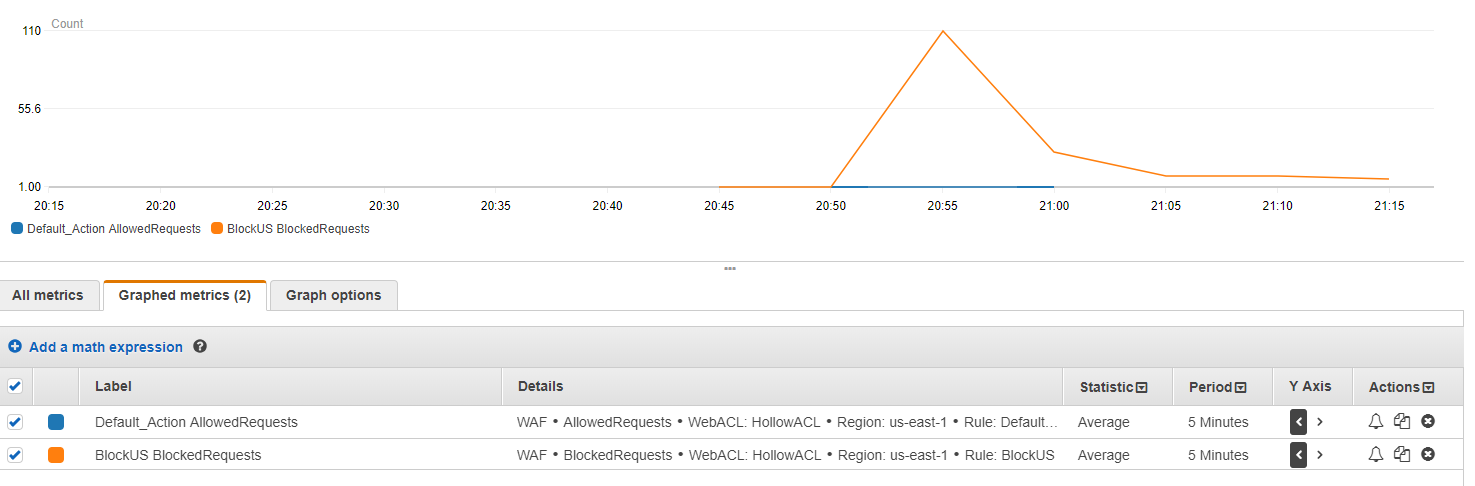
By looking at the CloudWatch portal, we can see even more details and we can create alarms (and subsequently take action on those alarms) if we see fit to do so.
WAF Through Code
As with most things AWS, you can deploy your WAF conditions, rules, and ACLs through CloudFormation. Below is an example of a simple block IP rule deployed through CloudFormation. The code below should get you started but only includes a sample load balancer, ACL, an IPSet, a rule and an association. You should be aware that if you’re working with rules for a load balancer they are denoted by a type of “AWS:: WAFRegional::SOMETHING” whereas WAF objects for CloudFront are just denoted by a type of “AWS:: WAF::SOMETHING”
    "Resources": {

      "HollowWebLB1": {
          "Type": "AWS::ElasticLoadBalancingV2::LoadBalancer",
          "Properties" : {
              "Name" : "HollowWebLB1",
              "Scheme" : "internet-facing",
              "SecurityGroups" : [{"Ref": "InstanceSecurityGroups"}],
              "Subnets" : [{"Ref":"Web1Subnet"}, {"Ref":"Web2Subnet"}],
              "Type" : "application"
          }
      },

      "HollowACL": {
        "Type": "AWS::WAFRegional::WebACL",
        "Properties": {
          "Name": "HollowACL",
          "DefaultAction": {
            "Type": "ALLOW"
          },
          "MetricName" : "HollowACL",
          "Rules": [
            {
              "Action" : {
                "Type" : "BLOCK"
              },
              "Priority" : 1,
              "RuleId" : { "Ref": "HollowRule" }
            }
          ]
        }
      },

      "WAFBlacklistSet": {
        "Type": "AWS::WAFRegional::IPSet",
        "Properties": {
          "Name": {
            "Fn::Join": [" - ", [{
              "Ref": "AWS::StackName"
            }, "Blacklist Set"]]
          },
          "IPSetDescriptors": [
            {
              "Type": "IPV4",
              "Value" : { "Ref" : "MyIPSetBlacklist" }
            }
          ]
        }
      },

      "HollowRule": {
        "Type" : "AWS::WAFRegional::Rule",
        "Properties": {
          "Name" : "HollowRule",
          "MetricName" : "MyIPRule",
          "Predicates" : [
            {
              "DataId" : { "Ref" : "WAFBlacklistSet" },
              "Negated" : false,
              "Type" : "IPMatch"
            }
          ]
        }
      },

      "ACLAssociation": {
        "Type": "AWS::WAFRegional::WebACLAssociation",
        "Properties": {
          "ResourceArn": {"Ref": "HollowWebLB1"},
          "WebACLId": {"Ref" : "HollowACL"}
        }
      }

    }
Summary
The AWS WAF product should likely be part of your perimeter security strategy somehow. Applications build for the cloud should be behind a load balancer and in different AZs for availability purposes and if you’re using native AWS services that means an ALB probably. Why not add some additional protection by adding a WAF as well. If you aren’t sure about how to create the rules you need, checkout the marketplace where there are pre-defined rules for many applications. Try them yourself and see what you come up with.