In this post we’ll start exploring ways that you might be able to better manage your Kubernetes cluster for security or organizational purposes. Namespaces become a big piece of how your Kubernetes cluster operates and who sees what inside your cluster.
Namespaces - The Theory
The easiest way to think of a namespace is that its a logical separation of your Kubernetes Cluster. Just like you might have segmented a physical server into several virtual severs, we can segment our Kubernetes cluster into namespaces. Namespaces are used to isolate resources within the control plane. For example if we were to deploy a pod in two different namespaces, an administrator running the “get pods” command may only see the pods in one of the namespaces. The pods could communicate with each other across namespaces however.
The Kubernetes cluster we’ve been working with should have a few namespaces built in to our default deployment. These include:
- Default - This is the namespace where all our pods and services run unless we specify a different one. This is the namespace our work has been completed in up until this point.
- kube-public - The public namespace is available to everyone with access to the Kubernetes cluster
- Kube-System - The system namespace is being used by your cluster right now. It stores objects related to the management of the Kubernetes cluster. It’s probably smart to leave the kube-system namespace alone. Here be dragons.

So why would we create additional namespaces? Namespaces can be used for security purposes so that you can couple it with role based access control (RBAC) for your users. Instead of building multiple Kubernetes clusters which might waste resources, we can build a single cluster and then carve it up into namespaces if we need to give different teams their own space to work.
Your cluster might also be carved up into namespaces by environment, such as Production and Development. Service Names can be re-used if they are placed in different namespaces so your code can be identical between the namespaces and not conflict with each other.
It’s also possible that you just want to segment some of your containers so that not everyone sees them. Maybe you’ve got a shared service that would be used between teams and don’t want it to show up in each team’s work space. Namespaces can be a great tool for Kubernetes hygiene.
Namespaces - In Action
To get our hands dirty, lets start by listing the namespaces that currently exist in our Kubernetes cluster. We can do this by running:
kubectl get namespaces

There are the three out of the box namespaces we discussed in our theory section. Now let’s create a new namespace with our desired state manifest files as we have in previous posts. We’ll also deploy a naked pod within this container to show that we can do it, and to later show how namespaces segment our resources.
kind: Namespace
apiVersion: v1
metadata:
  name: hollow-namespace
  labels:
    name: hollow-namespace
---
apiVersion: v1
kind: Pod
metadata:
  name: nginx
  namespace: hollow-namespace
  labels:
    name: nginx
spec:
  containers:
  - name: nginx
    image: nginx
Deploy the manifest file above with the:
kubectl apply -f [manifest file].yml
Once the namespace and pod have been created, lets run a quick get pod command as well, just to see what’s happening.

The screenshot shows that we created a new namespace and we created a new pod, but when we did our get pods command, nothing was listed. Thats because our context is still set to the default namespace, as it is by default. To see our pods in other namespaces we have a couple of options.
First we can list all pods across all namespaces if our permissions allow. We can do this by running:
kubectl get pod --all-namespaces
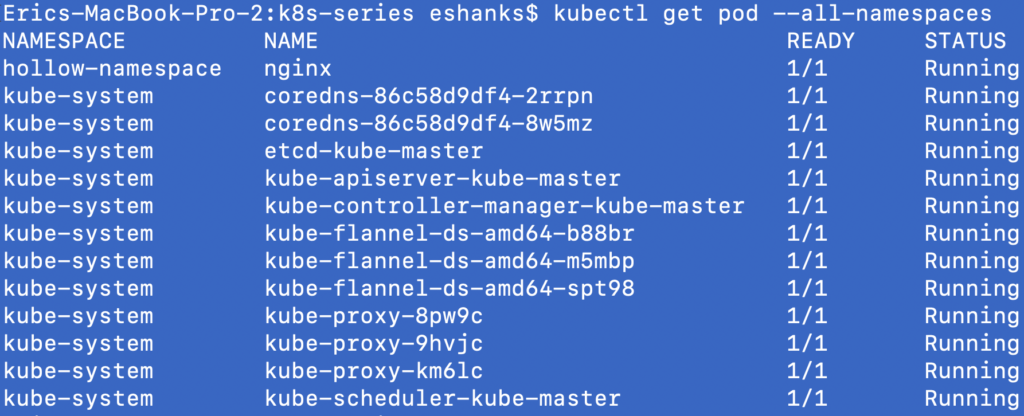
Wow, there are a lot of other pods running besides the ones we’ve deployed! Most of these pods are running in the kube-system namespace though and we’ll leave them alone.
Running our commands across all namespaces can be too much to deal with, what if we just want to see all pods in a single namespace instead? For this we can run:
kubectl get pod --namespace=[namespace name]

Summary
Now we’ve seen how we can logically segment our cluster into different areas for our teams to work. In future posts we’ll discuss namespaces more including how to set the current context so that we are using the correct namespace when we log in to our cluster.
To delete the pod and namespace used in this post run the following command:
kubectl delete -f [manifest file].yml