You’ve been working with Kubernetes for a while now and no doubt you have lots of clusters and namespaces to deal with now. This might be a good time to introduce Kubernetes KUBECONFIG files and context so you can more easily use all of these different resources.
KUBECONFIG and Context - The Theory
When you first setup your Kubernetes cluster you created a config file likely stored in your $HOME/.kube directory. This is the KUBECONFIG file and it is used to store information about your connection to the Kubernetes cluster. When you use kubectl to execute commands, it gets the correct communication information from this KUBECONFIG file. This is why you would’ve needed to add this file to your $PATH variable so that it could be used correctly by the kubectl commands.
The KUBECONFIG file contains several things of interest including the cluster information so that kubectl is executing commands on the correct cluster. It also stores authentication information such as username/passwords, certificates or tokens. Lastly, the KUBECONFIG file stores contexts.
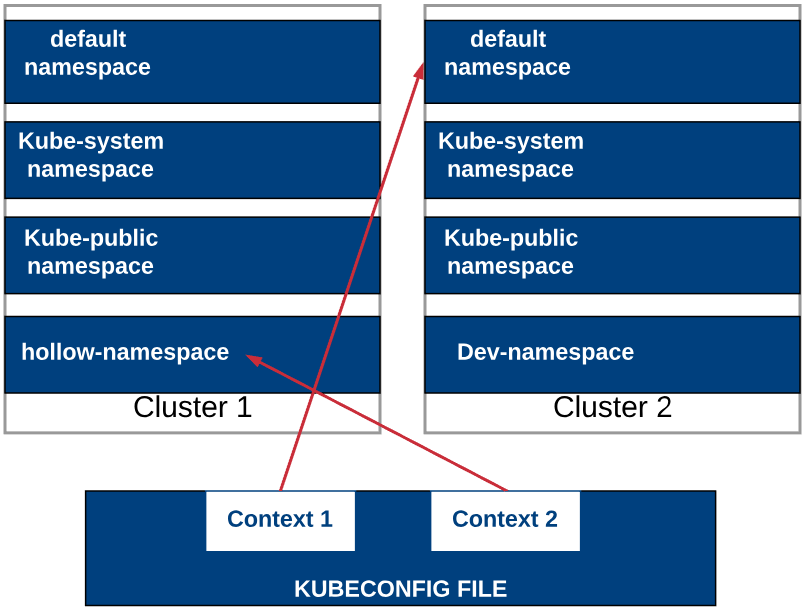
Contexts group access information under an easily recognizable name. So a context would include a cluster, a user and a namespace. Remember in the previous post where we talked about namespaces and how we could logically separate our Kubernetes cluster? Now we can use KUBECONFIG and context to set our default namespaces. No more logging in and being dumped into the default namespace.
KUBECONFIG and Context - In Action
Lets start by deploying a new namespace and an example pod so that we have something to work with.
kind: Namespace
apiVersion: v1
metadata:
  name: hollow-namespace
  labels:
    name: hollow-namespace
---
apiVersion: v1
kind: Pod
metadata:
  name: nginx
  namespace: hollow-namespace
  labels:
    name: nginx
spec:
  containers:
  - name: nginx
    image: nginx
kubectl apply -f {manifest file].yml
Now we’ve got a new namespace named “hollow-namespace” that we can use to test out setting up our context in our KUBECONFIG file. Before we do that, lets take a look at our current context by running:
kubectl config current-context

Based on my setup my context is named kubernetes-admin@kubernetes. Lets take a closer look at the configuration by running:
kubectl config view
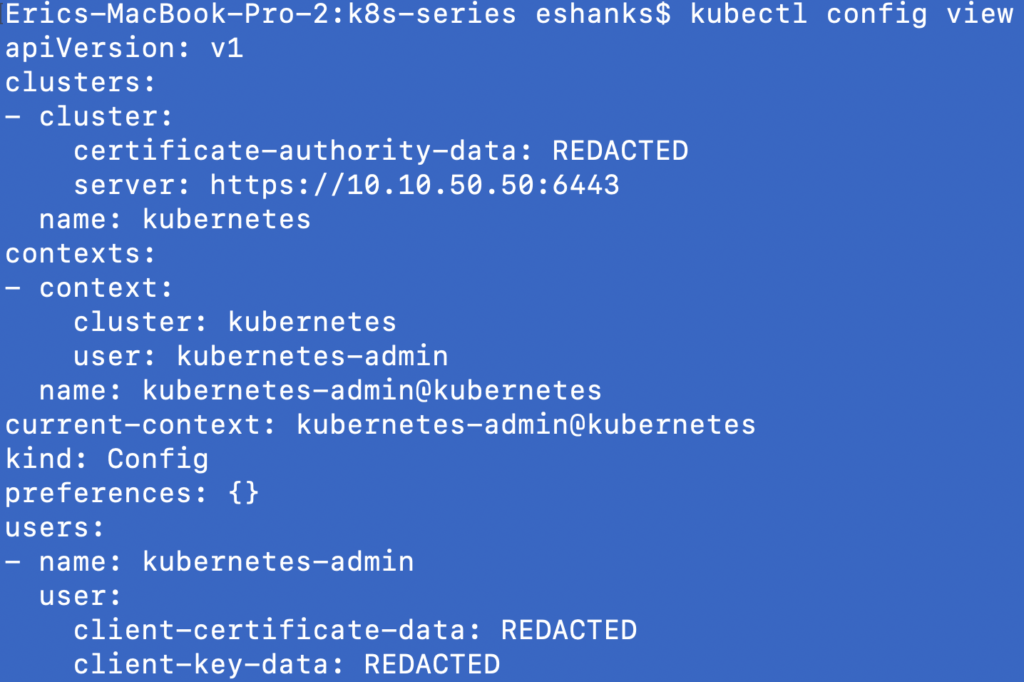
The output from the previous command shows us a good deal of detail about our current configuration. In fact, you can probably find this same information if you open your KUBECONFIG file in a text editor. NOTE: the KUBECONFIG file is probably not named “kubeconfig”. Mine was named admin.conf but the name isn’t really important.
We can see that in our config file, we have a “Contexts” section. This section sets our default cluster, namespace and user that kubectl will use with its commands.
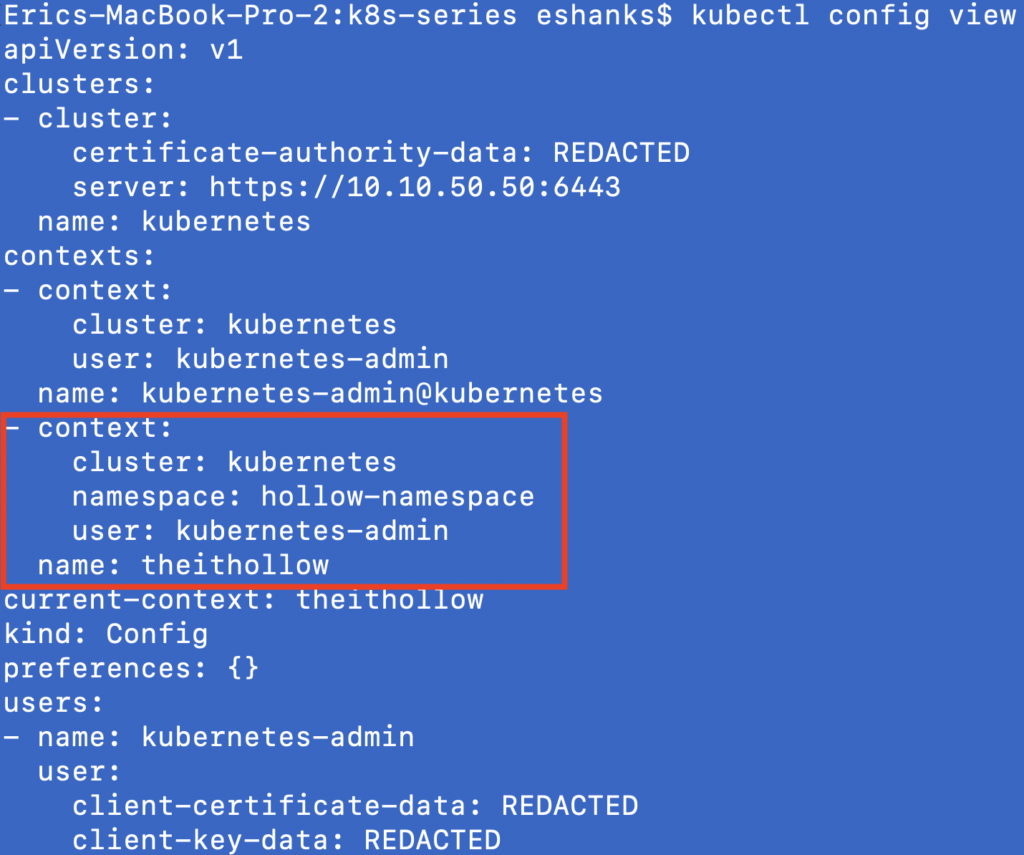
Now let’s update our KUBECONFIG with our new namespace that we created. We can do this via kubectl by running the following command:
kubectl config set-context theithollow --namespace=hollow-namespace --cluster=kubernetes --user=kubernetes-admin
You can create your own context name and change the namespace as you see fit. Since this is for theITHollow, I’ve used that as the context.
Once we’ve set a new context, we can re-run the “config view” command to see if our context changed at all. You should see the context section has been updated.
So if we run our get pods right now, we shouldn’t see any pods because we’re still in the default namespace. Let’s change our context so that we’re using the new namespace. In my case the hollow-namespace. Then we’ll view our current-context again after changing the context in use.
kubectl config use-context theithollow
kubectl config current-context
Lets run a get pods command and if we did everything right, we should see our pod from the “hollow-namespace” instead of the pods from the default namespace.

Summary
After this post you should feel more comfortable not only with namespaces and how they can be set to default, but how to configure connections to multiple Kubernetes clusters. If you’d like to reset your cluster we can run the following commands to delete our namespace and pods, as well as removing the context information that was added and setting our context back to normal.
kubectl config use-context kubernetes-admin@kubernetes
kubectl config unset contexts.theithollow #replace theithollow with your context name
kubectl delete -f [manifest name].yml #Manifest is the file used to deploy the namespace and the naked pod.