This post will focus on deploying our first NSX Gateway/Router and setting up our overlay segments. Before you can start these steps, the Edge nodes should be up and running so that they can support the Tier-1 gateways.
NSX uses two types of routers/gateways. We’ll start by using a Tier-1 (T1) router. These routers are usually used to pass traffic between NSX overlay segments. We could create NSX segments without any routers, but it would require a router to pass traffic between these segments so we will create a T1 router first.
Tier-1 Deployment
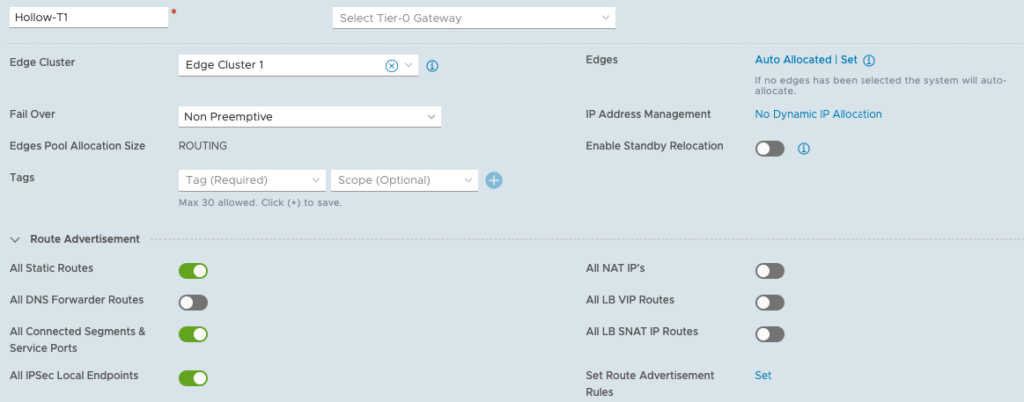
To setup your first Tier-1 router go to the Networking –> Tier-1 Gateways page and click ADD TIER-1 GATEWAY BUTTON. Give the router a name and select the edge cluster from the drop-down. Under route advertisement, enable All Static Routes, and All Connected Segments and Service Ports. For now, this is really all that needs to be done. We’ll revisit this at a later time.
Create NSX Overlay Segments
Segments are layer 2 broadcast domains where we can run our virtual machines. When you create an NSX segment, a portgroup will be created on our VDS virtual switch and then be available for use within the vCenter environment for workloads.
NOTE: creating the segments won’t immediately create portgroups in your vCenter. If nothing is attached to the segment (like a VM) then the portgroup won’t show up.
We’ll create three segments for our workloads.
NOTE: You don’t need VLANs created on the physical network for these networks. These are on the overlay networks created and managed by NSX.
- Web - 192.168.0.1/24
- App - 192.168.1.1/24
- Database - 192.168.2.1/24
Go to Networking –> Segments and then click the ADD SEGMENT button to create a new segment. Fill out the name, and select the T1 router created earlier. Then select the Overlay dropdown and enter the Subnet CIDR for this segment. Then click Save.
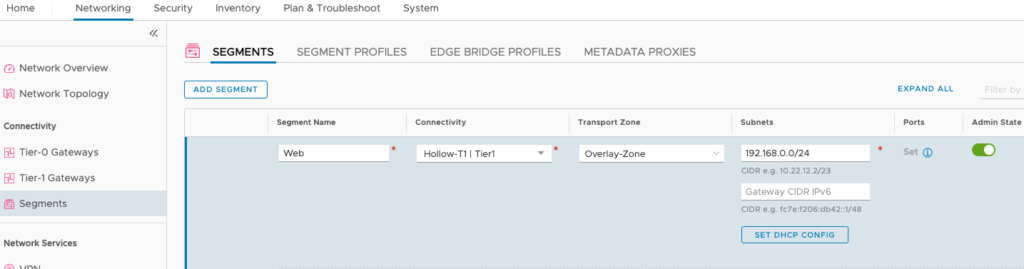
Thats all there is to creating a new segment. Continue filling out the segments for each of the networks you’d like to create.
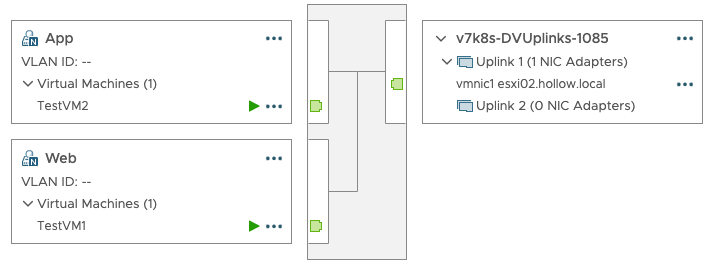
After deploying these segments, I connected a virtual machine to Web and App segments to test connectivity between them. The result was a successful ping between VMs on different segments and in vCenter, you can see the portgroups for those new segments.
NSX VLAN Segments
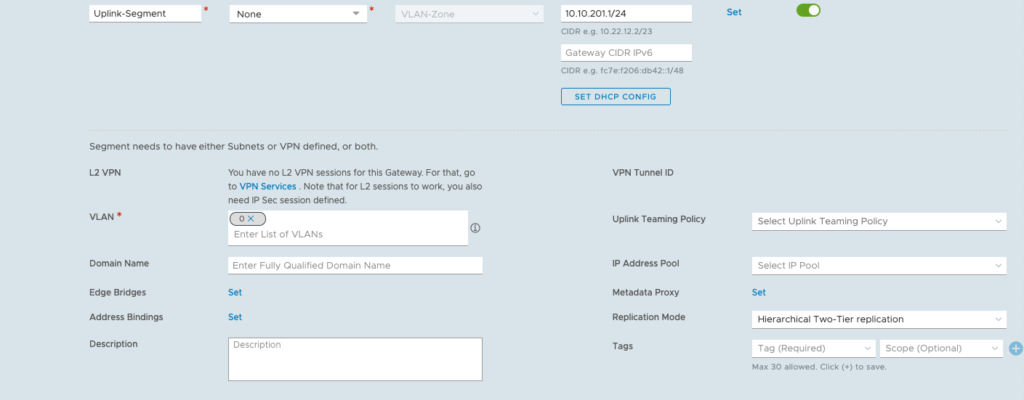
We want to create one more segment for our future Tier-0 router to use to connect to our physical network. I’m naming my segment Uplink-Segment and it belongs to the VLAN-Zone transport zone.
Pay no attention to the connectivity drop down. It shows as required, but it isn’t because you haven’t deployed a T0 router yet to connect it to.
For the subnets, I’ve put in an address on my Edge-Uplinks portgroup. This was my 201 VLAN from the previous examples. The other important thing to note is the VLAN ID. You need to set this, but it should be set to 0 since tagging is done at the vSwitch level.
Summary
After setting up our Tier-1 router and the overlay segments, you should be able to deploy some virtual machines to those portgroups and have them communicate with each other. There is no North/South routing configured yet for your physical network to access the overlays. This will be covered more during the deployment of the Tier-0 router in the next post.