This is part of an ongoing series on OpenShift as a platform for containers, VMs, AI workloads, and developer tooling. In this post we’ll set up a CI pipeline using OpenShift Pipelines to automatically build and push a container image for the Brix Pizza demo app whenever code is pushed to GitHub. If the application is going to run on OpenShift, it makes sense to build and test it there too. Your CI environment and your production environment become the same platform, which means fewer surprises at deployment time.
In the next post we’ll complete a deployment step and use OpenShift GitOps (ArgoCD) to deploy whatever image this pipeline produces.
What is OpenShift Pipelines?
OpenShift Pipelines is a cloud-native CI/CD solution built on Tekton, which is an open-source pipeline framework. Tekton pipelines run as Kubernetes resources. Pipelines are defined as YAML, and everything lives in the cluster alongside your workloads.
The execution model is worth understanding before diving into the YAML. There are several types of objects that you’ll see in this post. The first item is a task.
A task is a sequence of steps that run inside a single Kubernetes pod. This might include things like cloning code or run unit tests. You could add multiple items as part of a single task, but having each step as a self-contained unit makes them easily shared between pipelines.
A Pipeline is an ordered set of Tasks, and each Task in the pipeline gets its own pod. So when a pipeline runs, you’ll see multiple pods spin up and terminate in sequence. If you want to pass information between tasks in your pipeline, you an use the shared workspace.
A workspace is shared storage (backed by a PVC) that gets mounted into every pod, allowing the output of one Task to flow into the next. For example if in your first task you clone a git repo, that code would then be stored in a workspace and available in the Task 2 pod that comes next.
You’ll also work with a few other objects like a PipelineRun. This is simply the invocation of a Pipeline. If you ran the same pipeline two times, there would be two pipelineruns.
The Pipeline We’re Building
For the example in this blog post, we’ll be using the Brix Pizza demo app. This is a fun app that might be used for a fictional pizza place called Brix Pizza. It’s a golang web server with a MySQL database requirement. In the details below we’ll configure OpenShift Pipelines to download the Brix Pizza code base, run some unit tests on them, and if the unit tests succeed, build a container, and push the image to Quay (our container registry).
CI pipelines like this, speed up development, standardize operations, and reduce errors. Nothing gets built unless the tests pass, and the whole process happens without manual intervention. It’s a critical step to let developers worry about code. OK, maybe the developers worry about their prompts these days, but you get the idea.
The CGO Problem
Before we get into the YAML, there’s one thing worth calling out specific to the Brix app. It uses go-sqlite3 for local development which requires CGO to be enabled at build time — meaning the build environment needs gcc available.
There’s a subtle gotcha here with the image choice. golang:1.25-alpine uses musl libc, which is missing pread64, pwrite64, and off64_t — syscalls that go-sqlite3 expects from glibc. Using Alpine will fail the build with cryptic C compiler errors even though CGO is enabled. The fix is to use the Debian-based golang:1.25 image instead, which has glibc.
Setting Up the Quay.io Secret
Before we can use the pipeline, we’ll need to provide the pipeline with the credentials to push images to Quay.io. The key thing here is that Buildah looks for a file named config.json inside its credentials workspace.
So if I’m creating the secret for my “brix” namespace, i’l use a command like the one below. It pulls the quay authentication configuration form a file named config.json.
oc create secret generic quay-push-secret \
  --from-file=config.json=/tmp/config.json \
  -n brix
The Custom Task
Because of the CGO requirement we need a custom Task for the test step. (Lets assume this custom task requirement was expertly added by your author to highlight the usage of custom tasks.) Many of the tasks in OpenShift Pipelines are ready to use by default, but in a lot of cases you’ll want to create tasks with your own custom logic.
So we need to create a custom task that can run our test suite for golang and includes the appropriate prerequisites. The Task defines a single step that runs inside a golang:1.25 container, installs gcc, runs the test suite with race detection and coverage, then fails the pipeline if coverage drops below 70%.
Of course you can apply a configuration file via YAML and an oc apply command, but since we’re learning, lets use the OpenShift Console. In the OpenShift Pipelines navigation menu we’ll find tasks. You can see a list of tasks if you’re looking across all the namespaces and these are available for you to use out of the box.
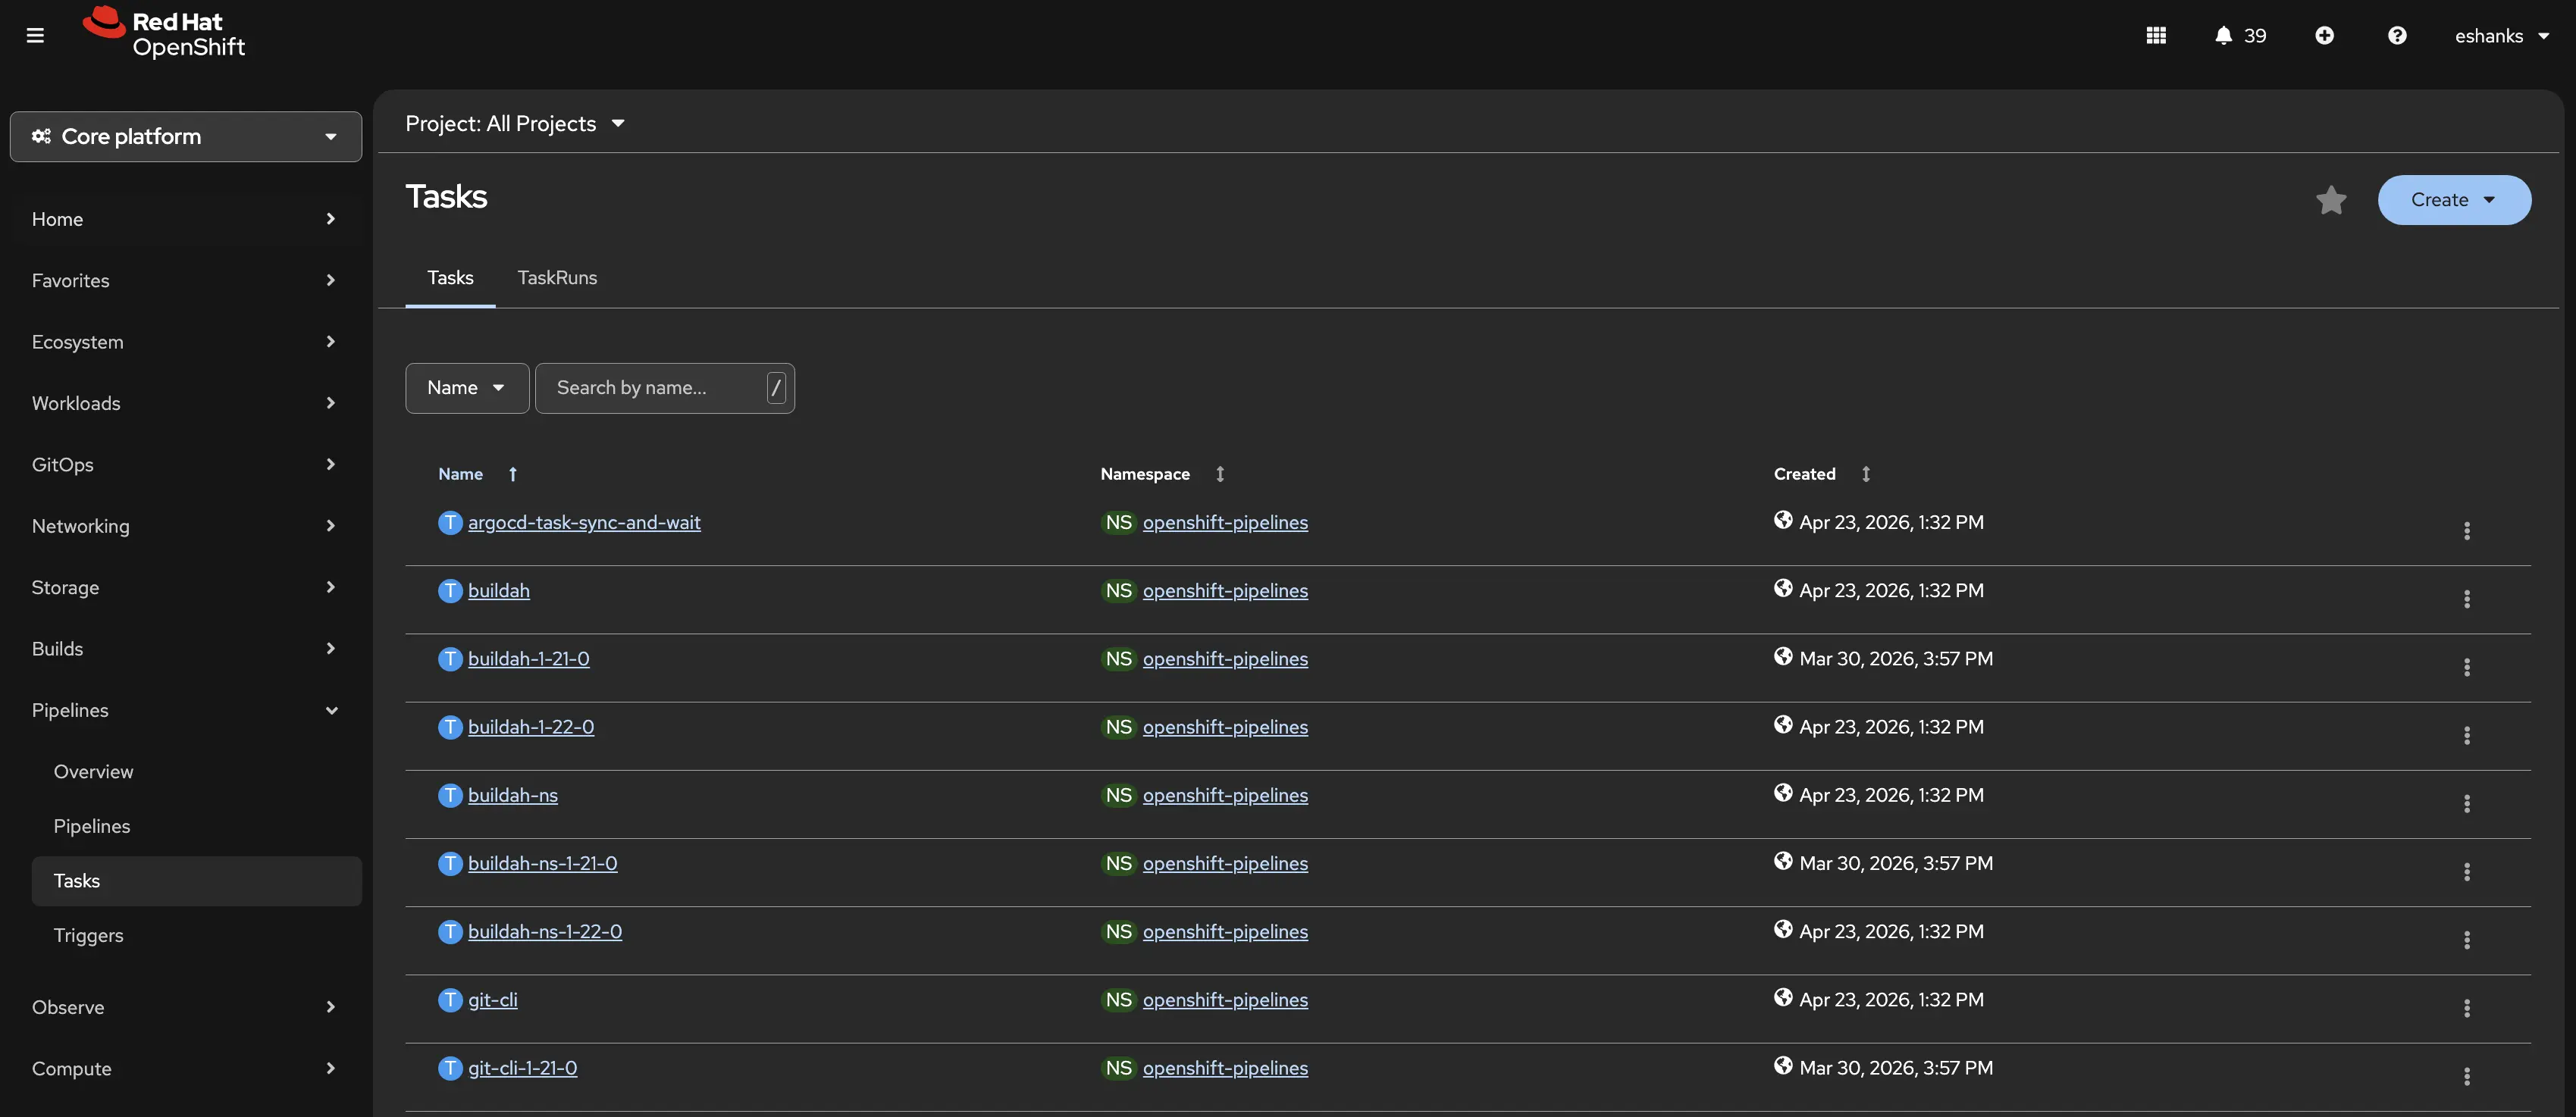
Click the Create dropdown and then select Task. Here the new task editor will appear. You’ll see an editor that lets you enter your custom YAML, and on the right you’ll find help about how to fill out your YAML manifest.
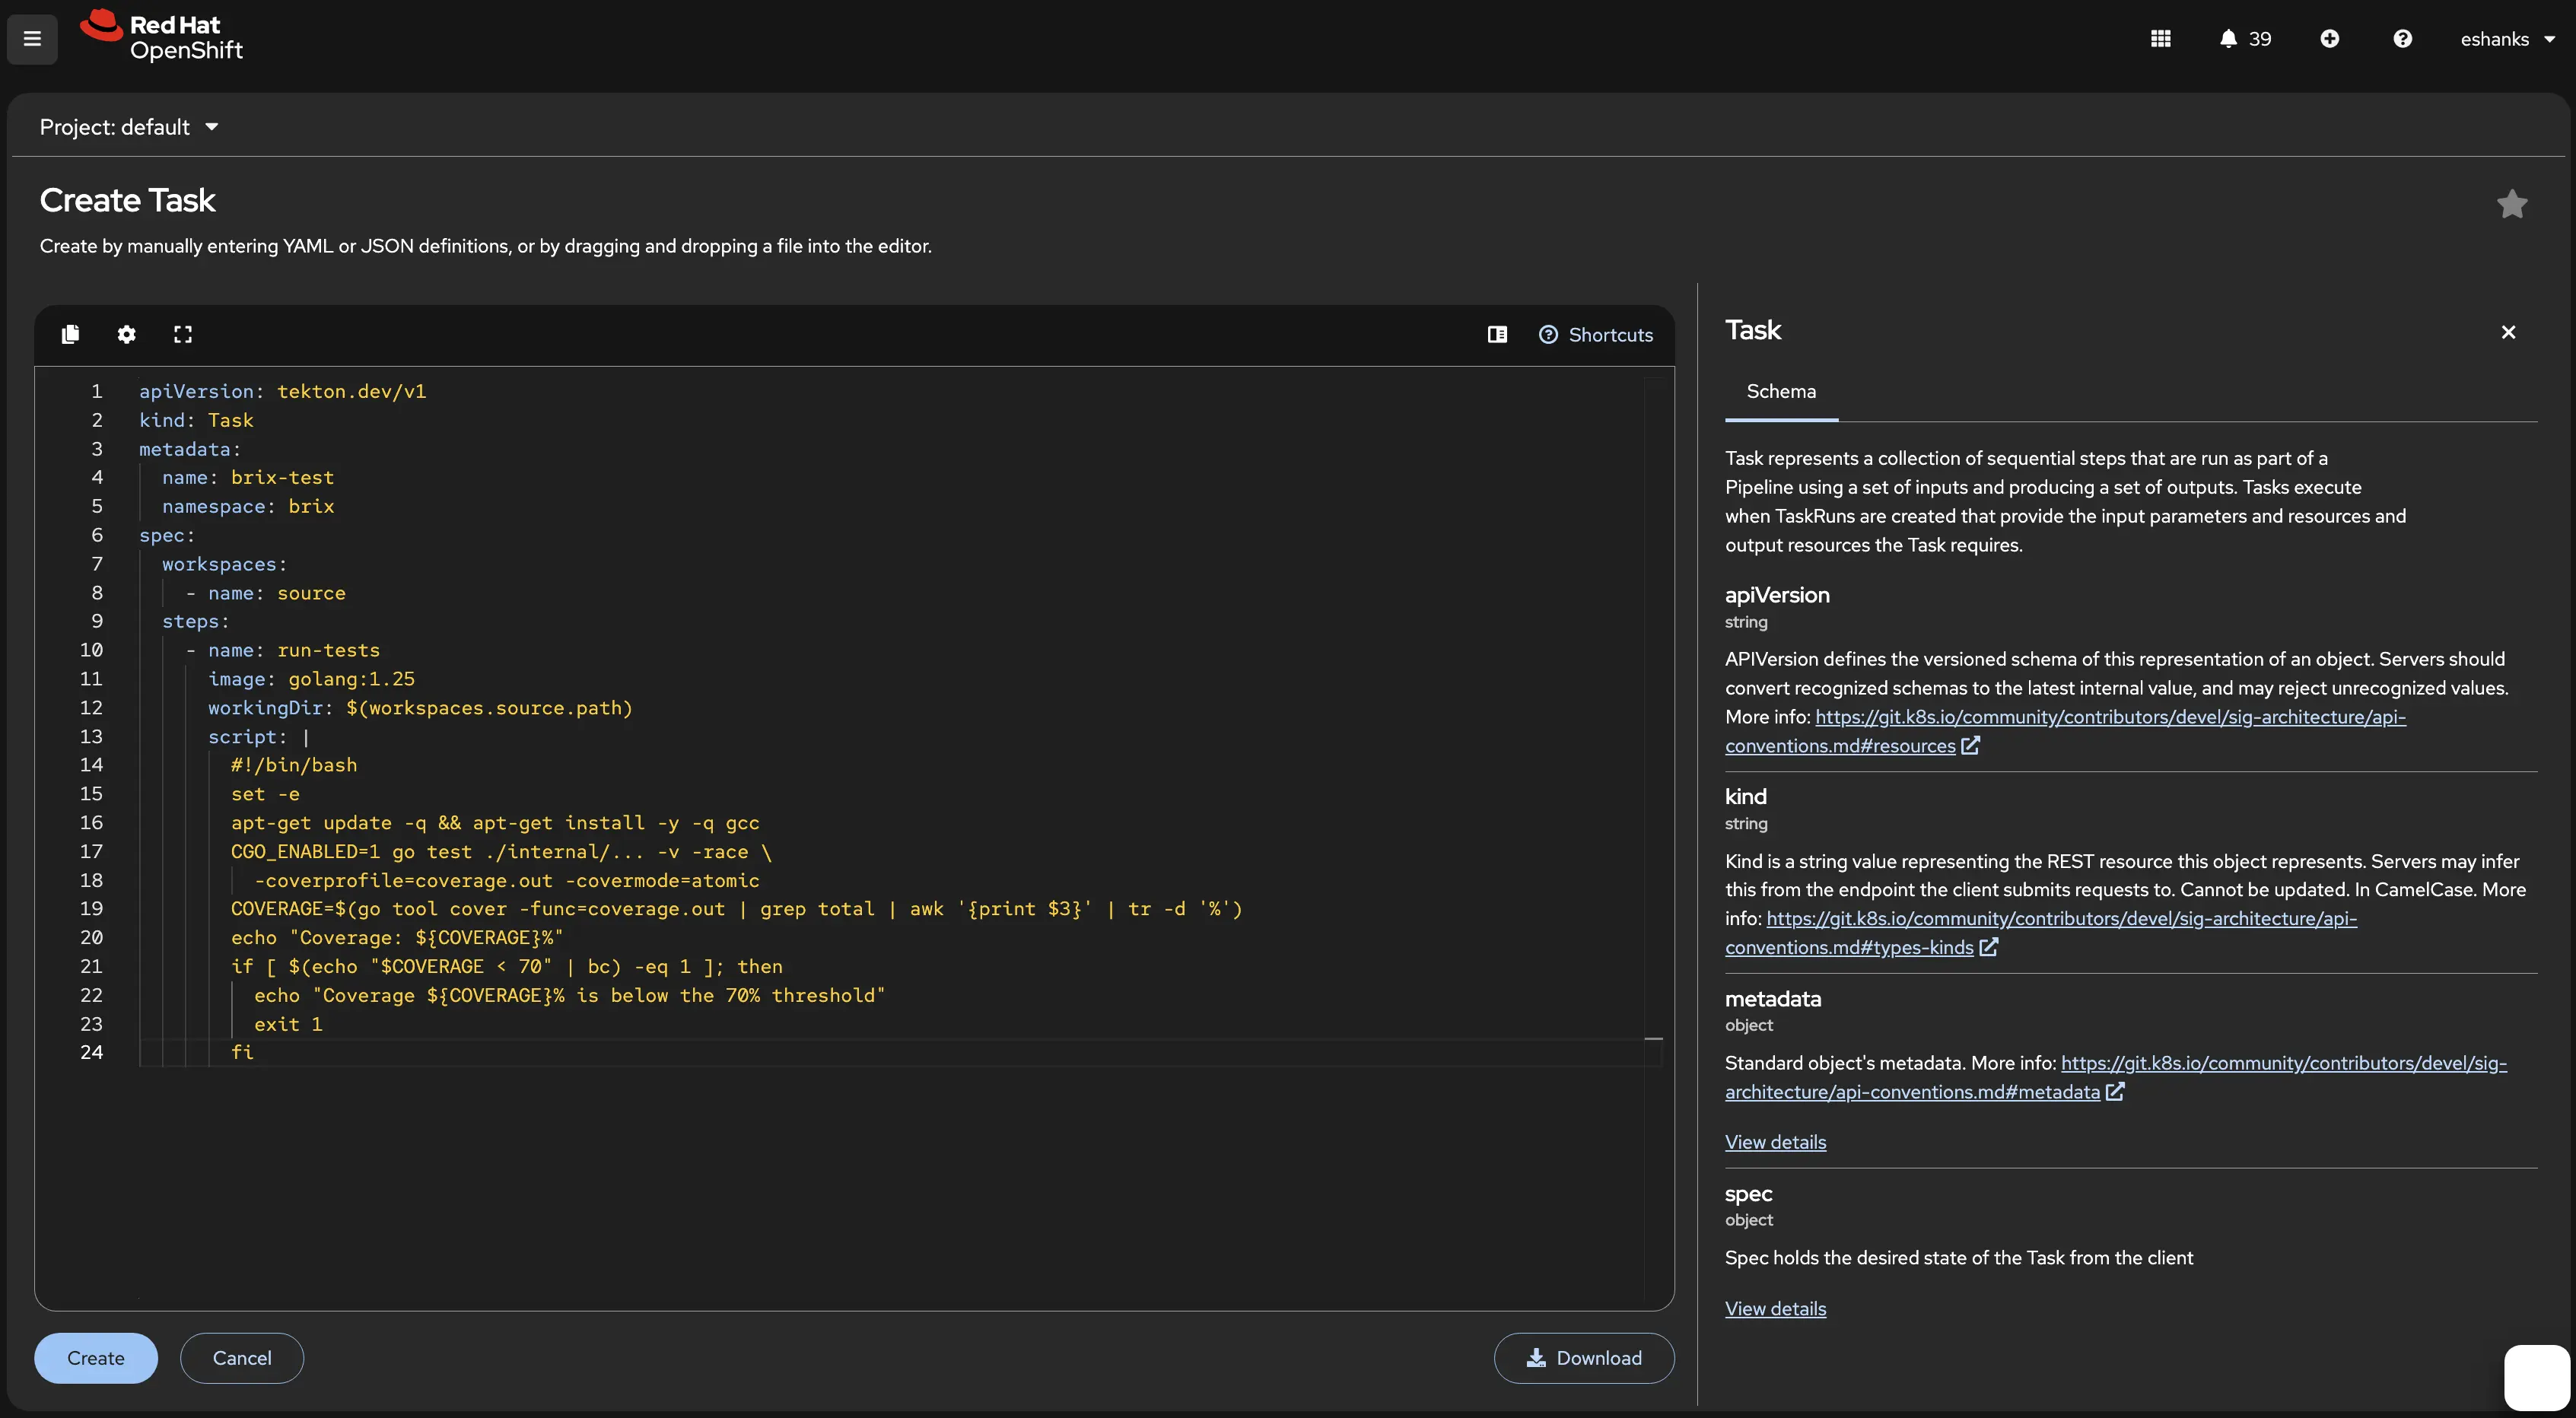
Here’s the YAML I used for the example above but remember you can configure your tasks however you need for your apps.
apiVersion: tekton.dev/v1
kind: Task
metadata:
  name: brix-test
  namespace: brix
spec:
  workspaces:
    - name: source
  steps:
    - name: run-tests
      image: golang:1.25
      workingDir: $(workspaces.source.path)
      script: |
        #!/bin/bash
        set -e
        apt-get update -q && apt-get install -y -q gcc
        CGO_ENABLED=1 go test ./internal/... -v -race \
          -coverprofile=coverage.out -covermode=atomic
        COVERAGE=$(go tool cover -func=coverage.out | grep total | awk '{print $3}' | tr -d '%')
        echo "Coverage: ${COVERAGE}%"
        if [ $(echo "$COVERAGE < 70" | bc) -eq 1 ]; then
          echo "Coverage ${COVERAGE}% is below the 70% threshold"
          exit 1
        fi
The Pipeline
Now let’s define the Pipeline itself. A Pipeline is just an ordered sequence of Task references with parameters and shared workspaces wired together. While this post won’t show how to add all of the tasks in the pipeline, the full YAML can be found later in this post.
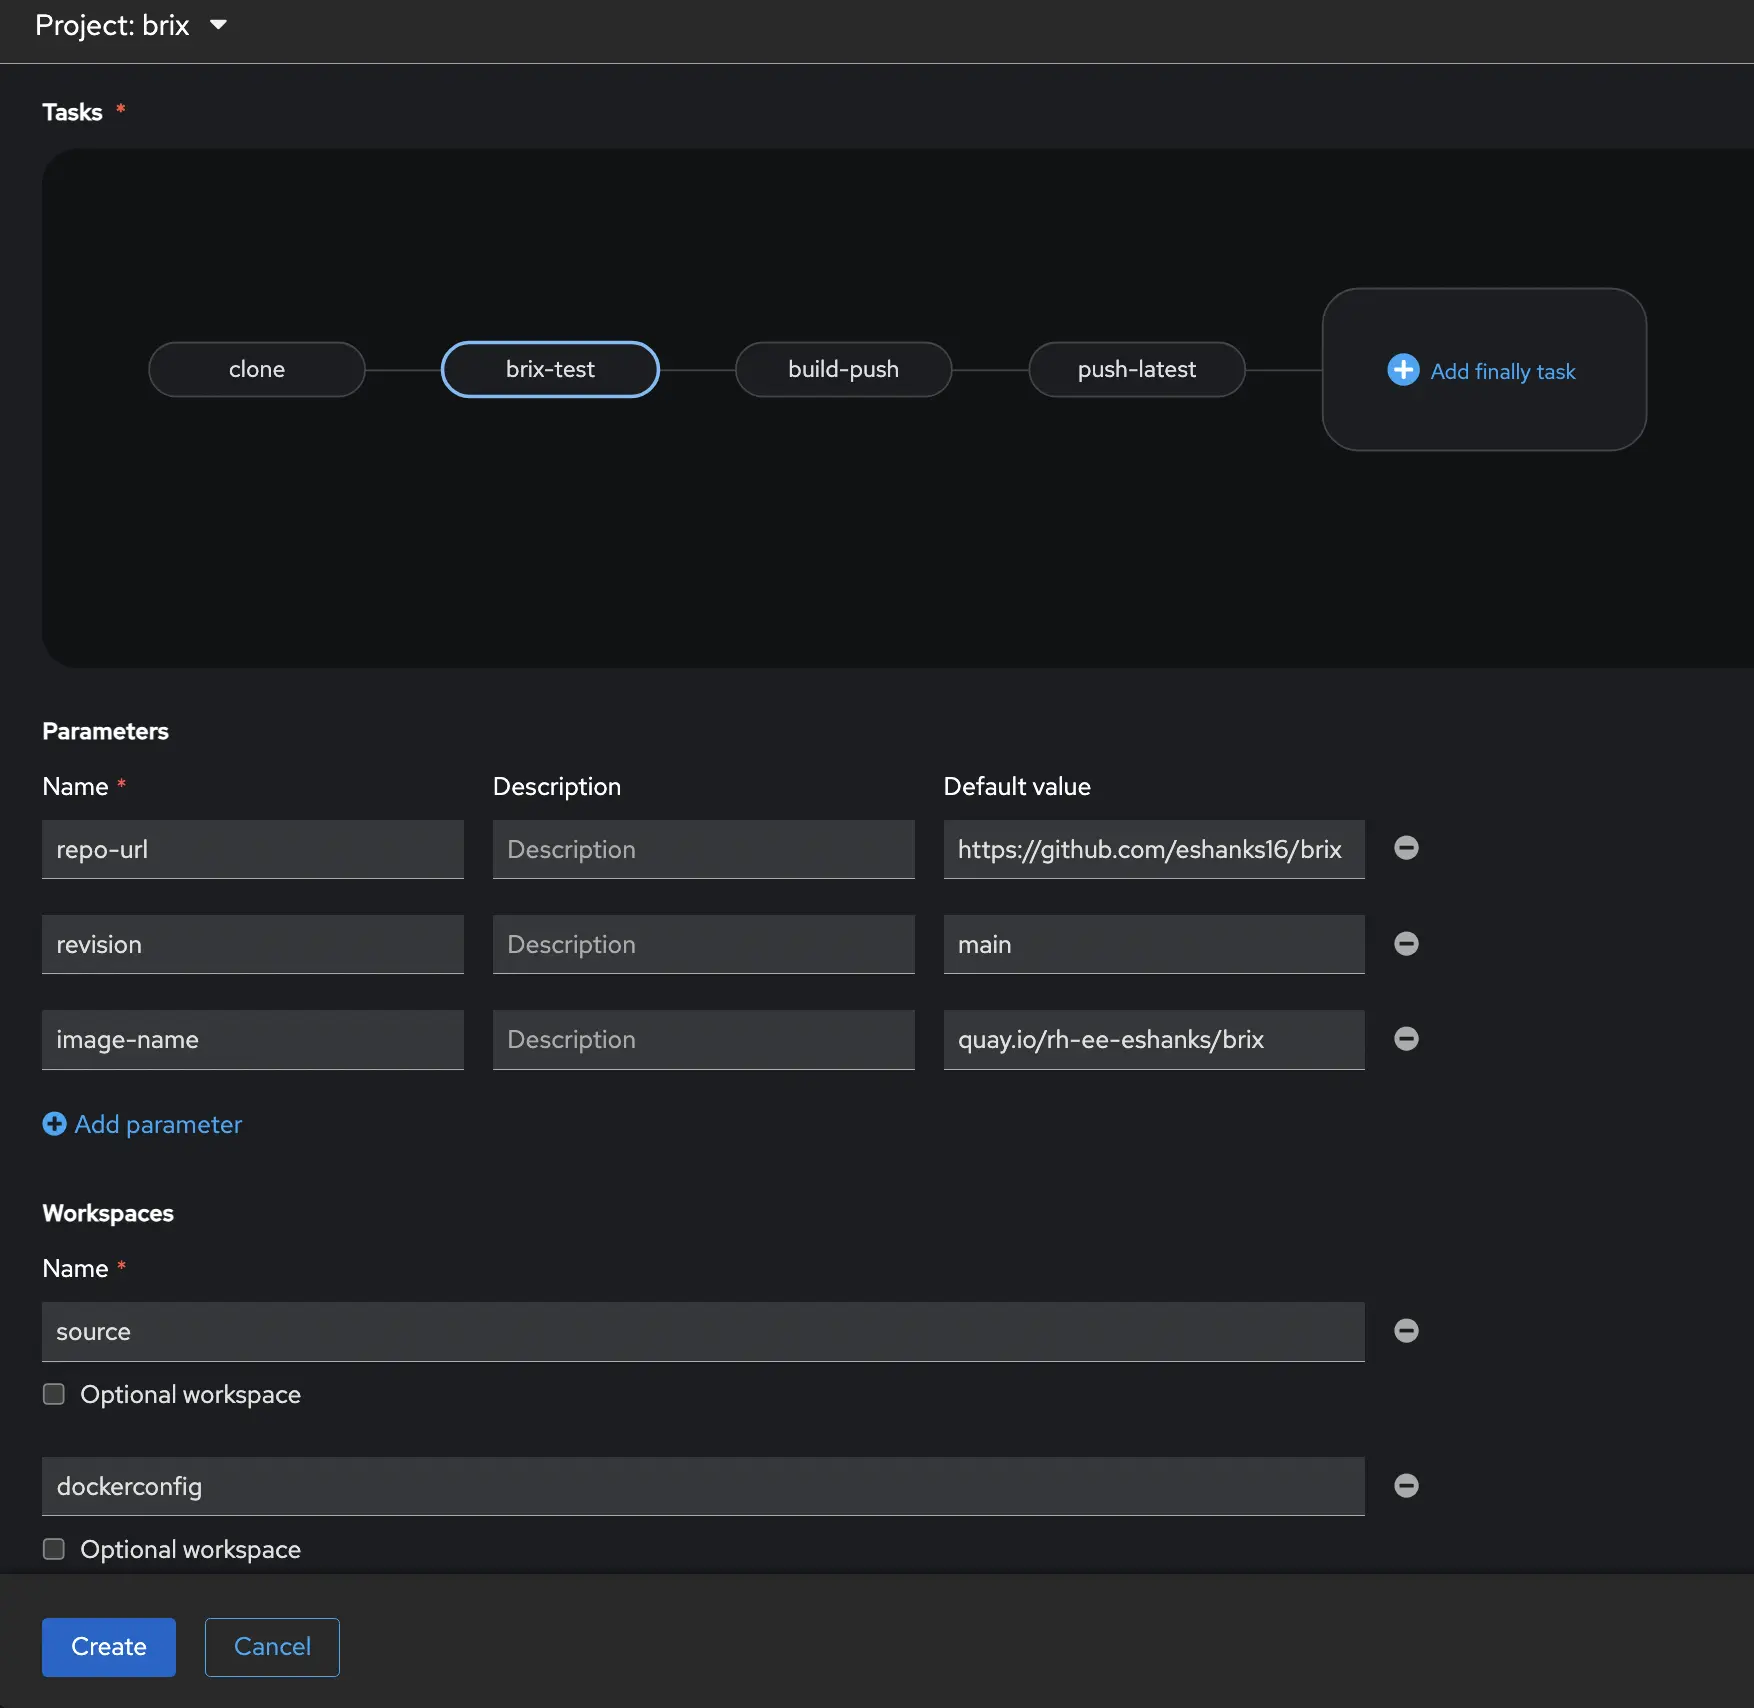
From the Pipelines Navigation Item you can click the Create dropdown and choose Pipeline. When the editor opens, you’ll see a form that requires you to enter a name for your pipeline, a graphical task editor, and Parameters and workspaces.
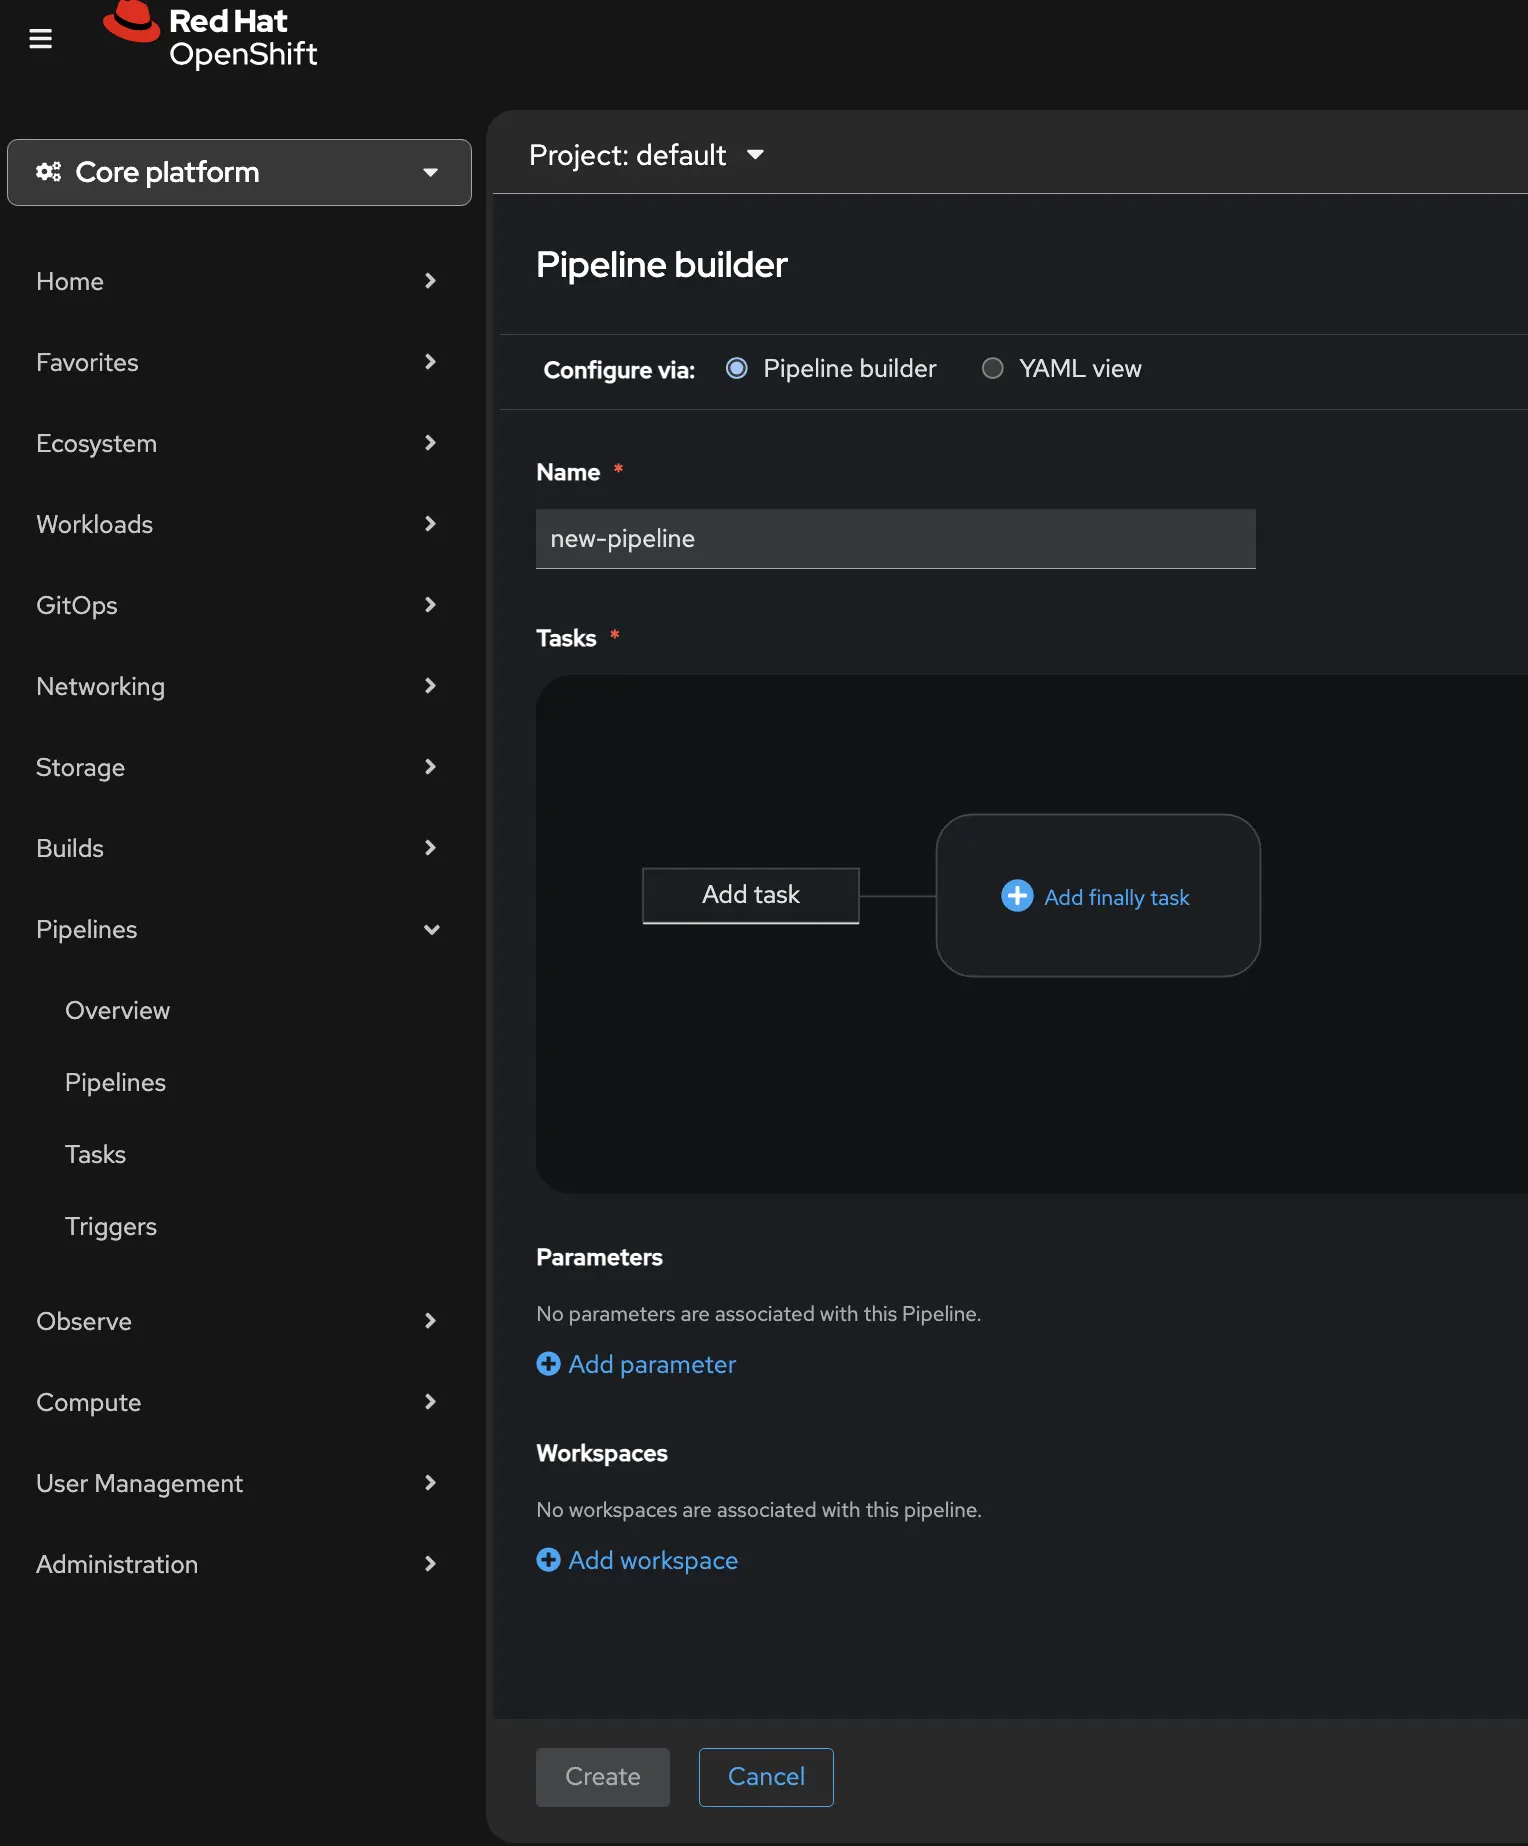
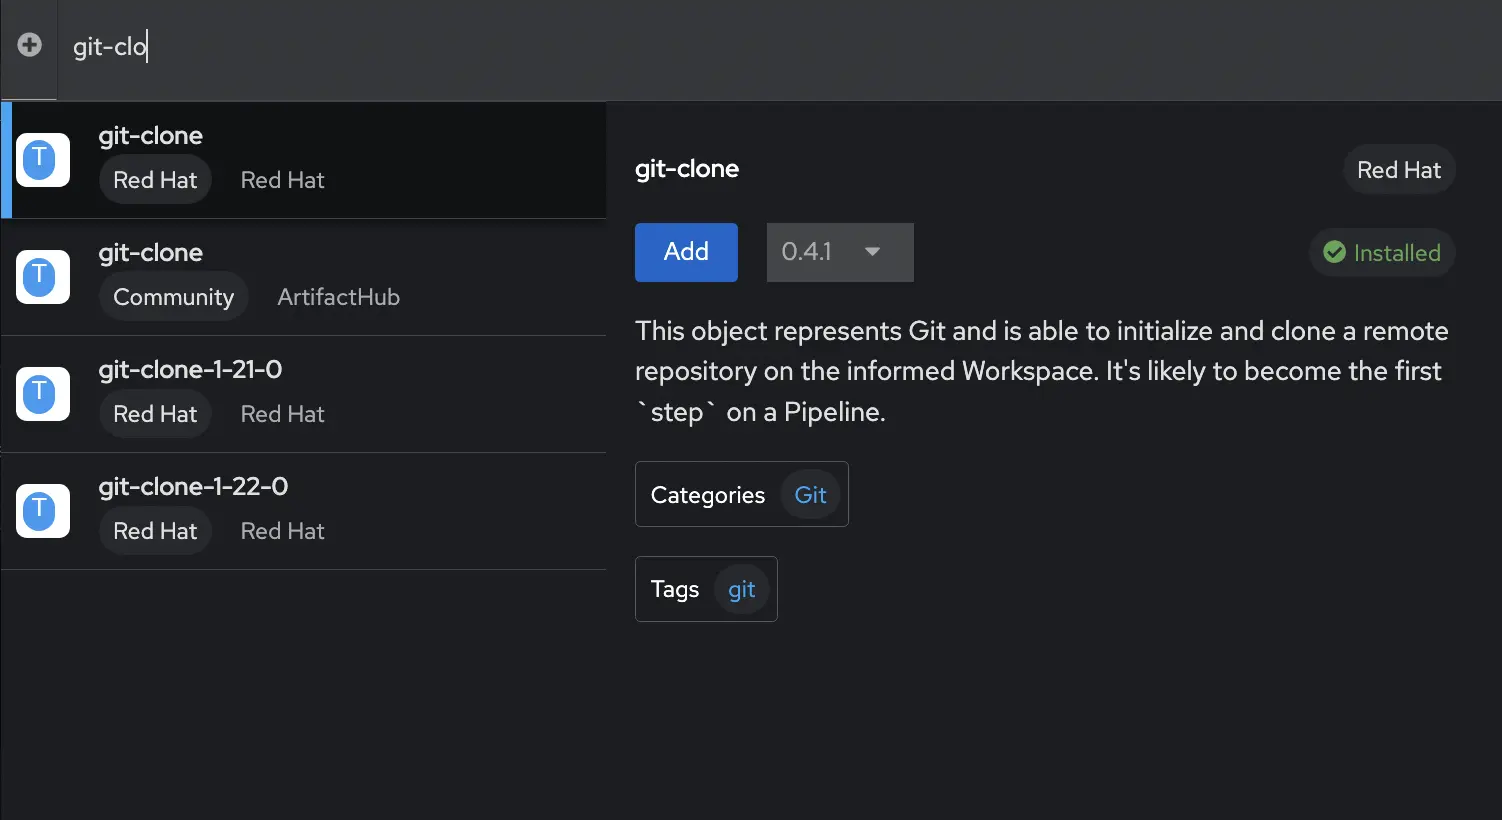
You can add individual tasks from tasks graphical UI. By clicking on the Add task box it will open a new window and you can search for the task you want to add to your pipeline. A new window will open where you can search for your task. In my case, the first task I want to add is a git-clone operation. This will pull my code from my git repository. When I add this task, notice that I need to enter some variable information into the pipeline tasks such as the git URL. These can be hard coded into the pipeline, or you can have a Parameters section and the tasks will reference the parameters. This makes it easier to create a reusable pipeline file without hard coded values. Notice the parameters section under the Tasks, and the Task variable on the right side of the screen.

You will also notice that in the output we create a workspace to store the code that was downloaded, and in the “Workspaces” section of the pipeline you define this workspace. This makes sure the task is outputting our code to the workspace (or persistent volume) that our pipeline is using.

Continue building the rest of the tasks in your pipeline in a similar fashion. Additional tasks will need similar parameters associated with each of them.
In the end, my YAML looks like the code below so I can quickly reuse this code for other projects.
apiVersion: tekton.dev/v1
kind: Pipeline
metadata:
  name: brix-ci
  namespace: brix
spec:
  params:
    - name: repo-url
      type: string
      default: https://github.com/eshanks16/brix
    - name: revision
      type: string
      default: main
    - name: image-name
      type: string
      default: quay.io/rh-ee-eshanks/brix-pizza
  workspaces:
    - name: source
    - name: dockerconfig
  tasks:
    - name: clone
      taskRef:
        resolver: cluster
        params:
          - name: kind
            value: task
          - name: name
            value: git-clone
          - name: namespace
            value: openshift-pipelines
      workspaces:
        - name: output
          workspace: source
      params:
        - name: URL
          value: $(params.repo-url)
        - name: REVISION
          value: $(params.revision)
        - name: DELETE_EXISTING
          value: "true"
        - name: SSL_VERIFY
          value: "true"

    - name: test
      runAfter:
        - clone
      taskRef:
        name: brix-test
      workspaces:
        - name: source
          workspace: source

    - name: build-push
      runAfter:
        - test
      taskRef:
        resolver: cluster
        params:
          - name: kind
            value: task
          - name: name
            value: buildah
          - name: namespace
            value: openshift-pipelines
      workspaces:
        - name: source
          workspace: source
        - name: dockerconfig
          workspace: dockerconfig
      params:
        - name: IMAGE
          value: $(params.image-name):$(tasks.clone.results.COMMIT)
        - name: DOCKERFILE
          value: ./Dockerfile
        - name: CONTEXT
          value: .
        - name: TLSVERIFY
          value: "true"

    - name: push-latest
      runAfter:
        - build-push
      taskRef:
        resolver: cluster
        params:
          - name: kind
            value: task
          - name: name
            value: buildah
          - name: namespace
            value: openshift-pipelines
      workspaces:
        - name: source
          workspace: source
        - name: dockerconfig
          workspace: dockerconfig
      params:
        - name: IMAGE
          value: $(params.image-name):latest
        - name: DOCKERFILE
          value: ./Dockerfile
        - name: CONTEXT
          value: .
        - name: TLSVERIFY
          value: "true"
The full pipeline:
- Clones the code from git
- Runs my custom unit-tests
- Builds the image with a SHA that matches my commit in Git
- Builds an image with the latest tag. (Note: There is a better way to do this by tagging the existing image but for this post I just did 2 builds.)
The full pipeline is shown below from the UI.
Connecting to GitHub with Pipelines as Code
With the pipeline defined, we need to wire it up to GitHub so that a push event automatically creates a PipelineRun. (i.e. when we push code to git, how does OpenShift know that we did that to trigger the pipeline?) We’ll then need to setup our repository in both the OpenShift Pipelines and in Github.
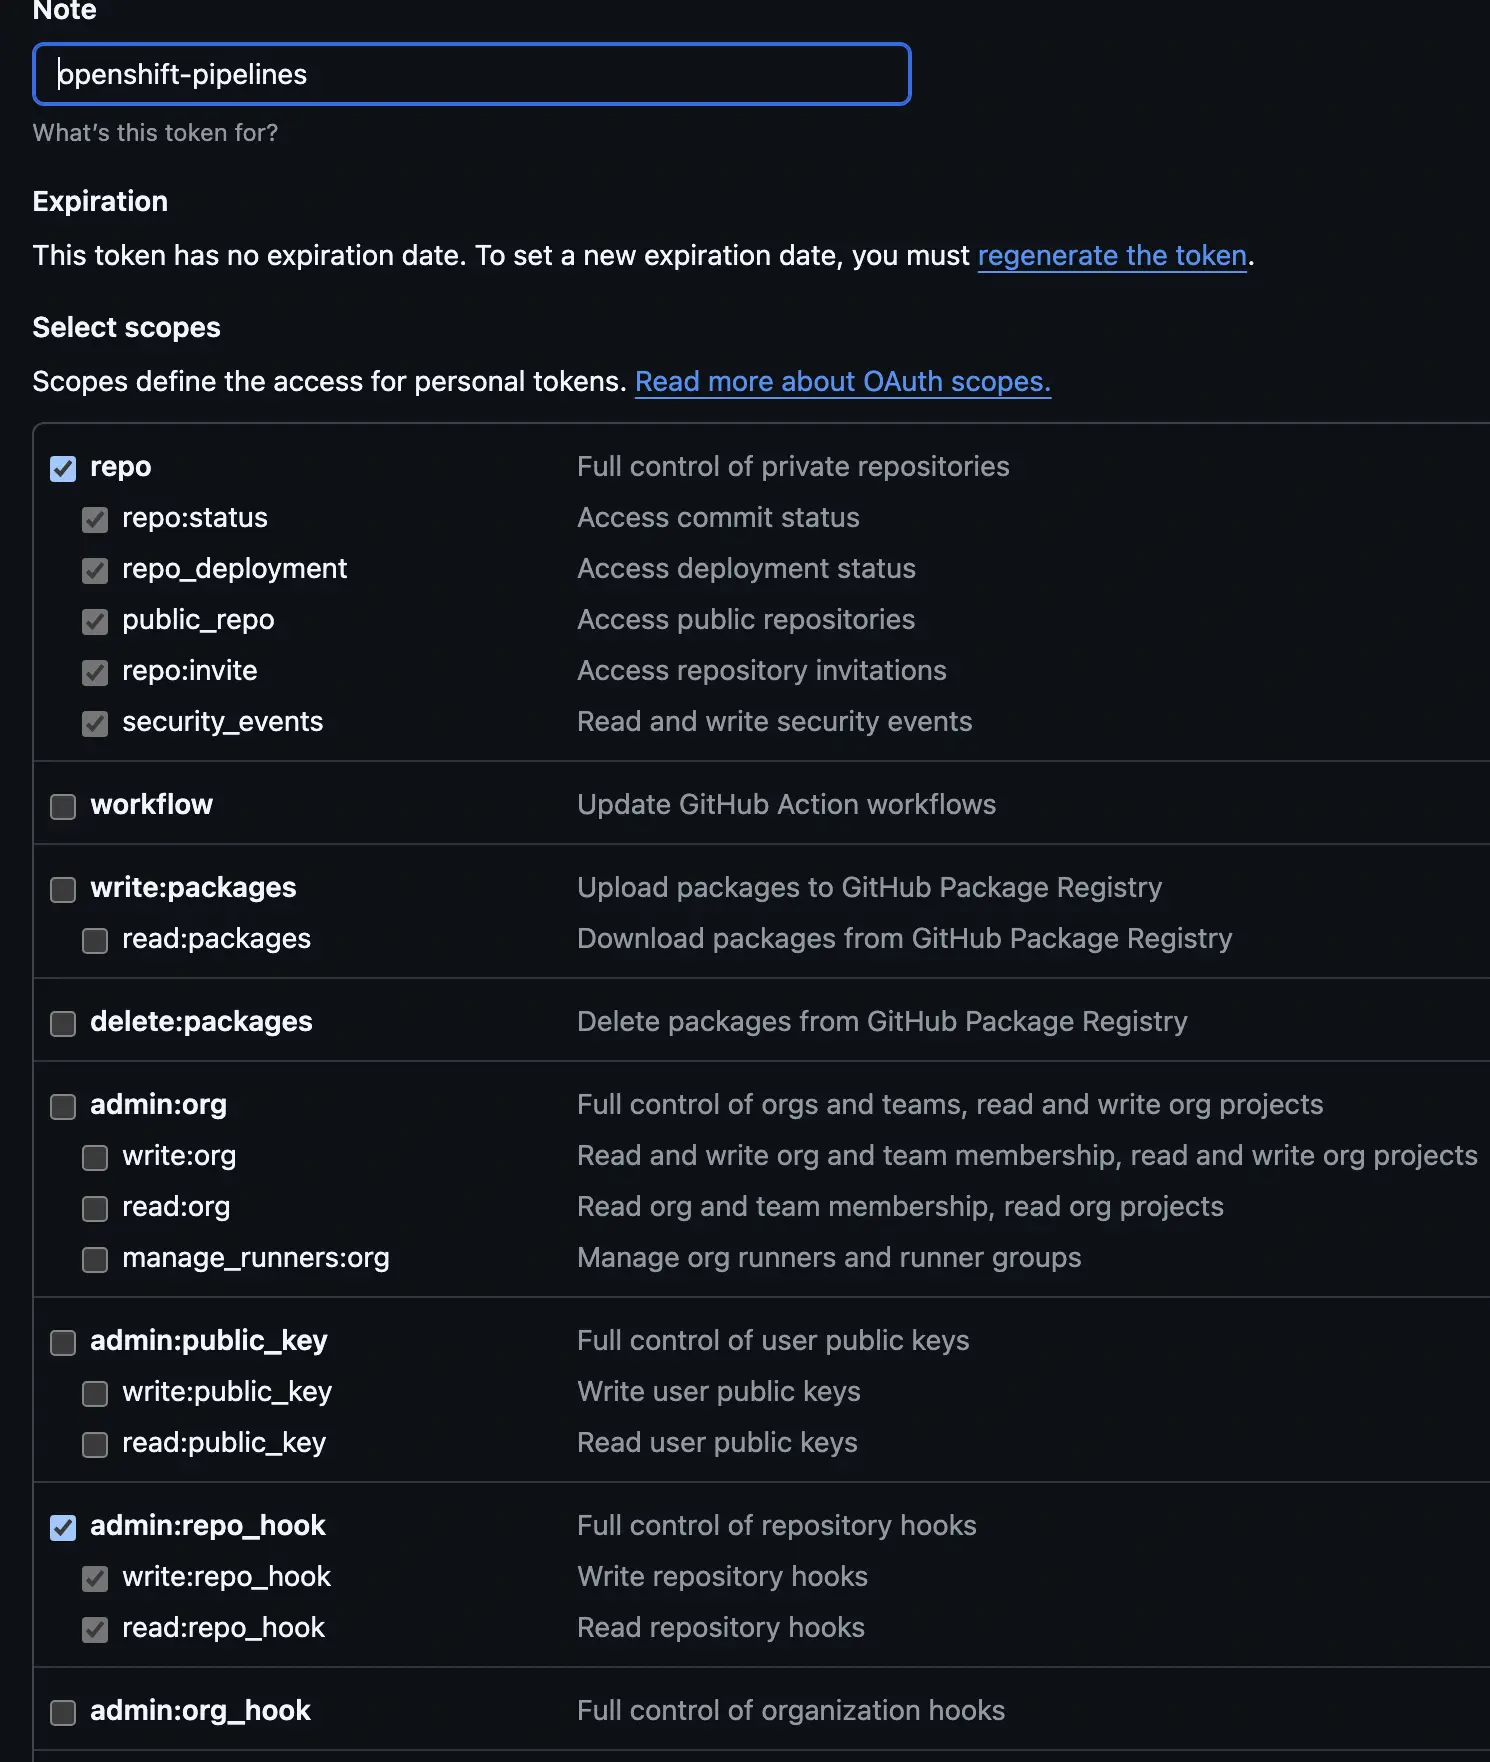
First, we want to go to Github and create a classic personal access token. This can be found under the developers tab of your github profile. Create a new secret token with an expiration that matches your goals and security requirments. Then give the token permissions to the repo and to repo_hooks.
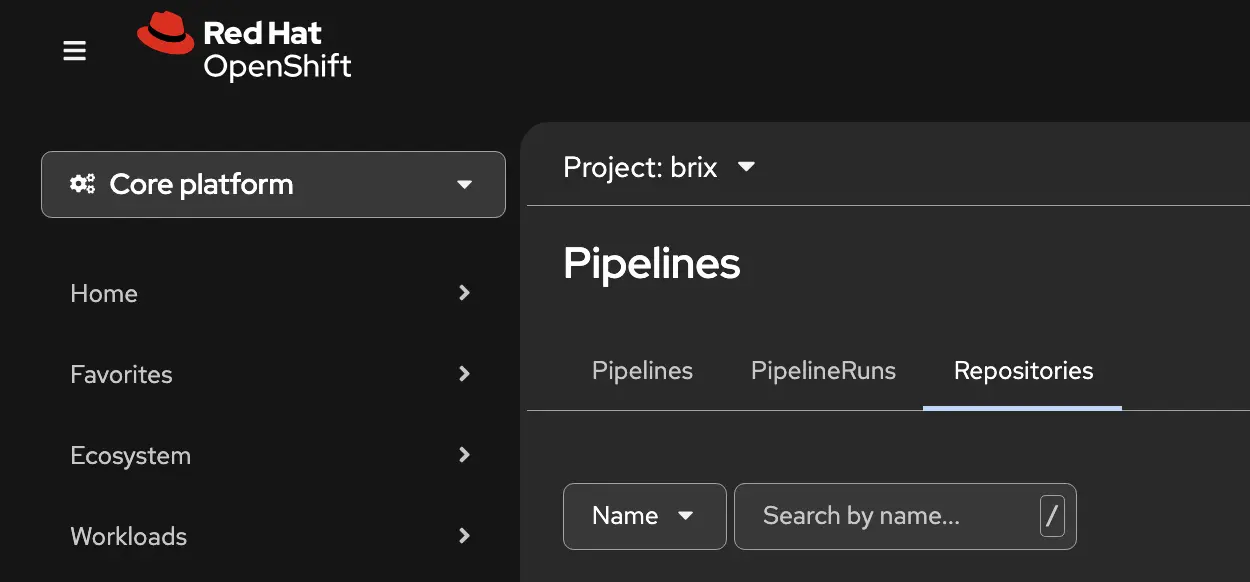
Now, from the OpenShift Pipelines console go to the Repositories tab. Here you can create a new repository connection for your pipeline.
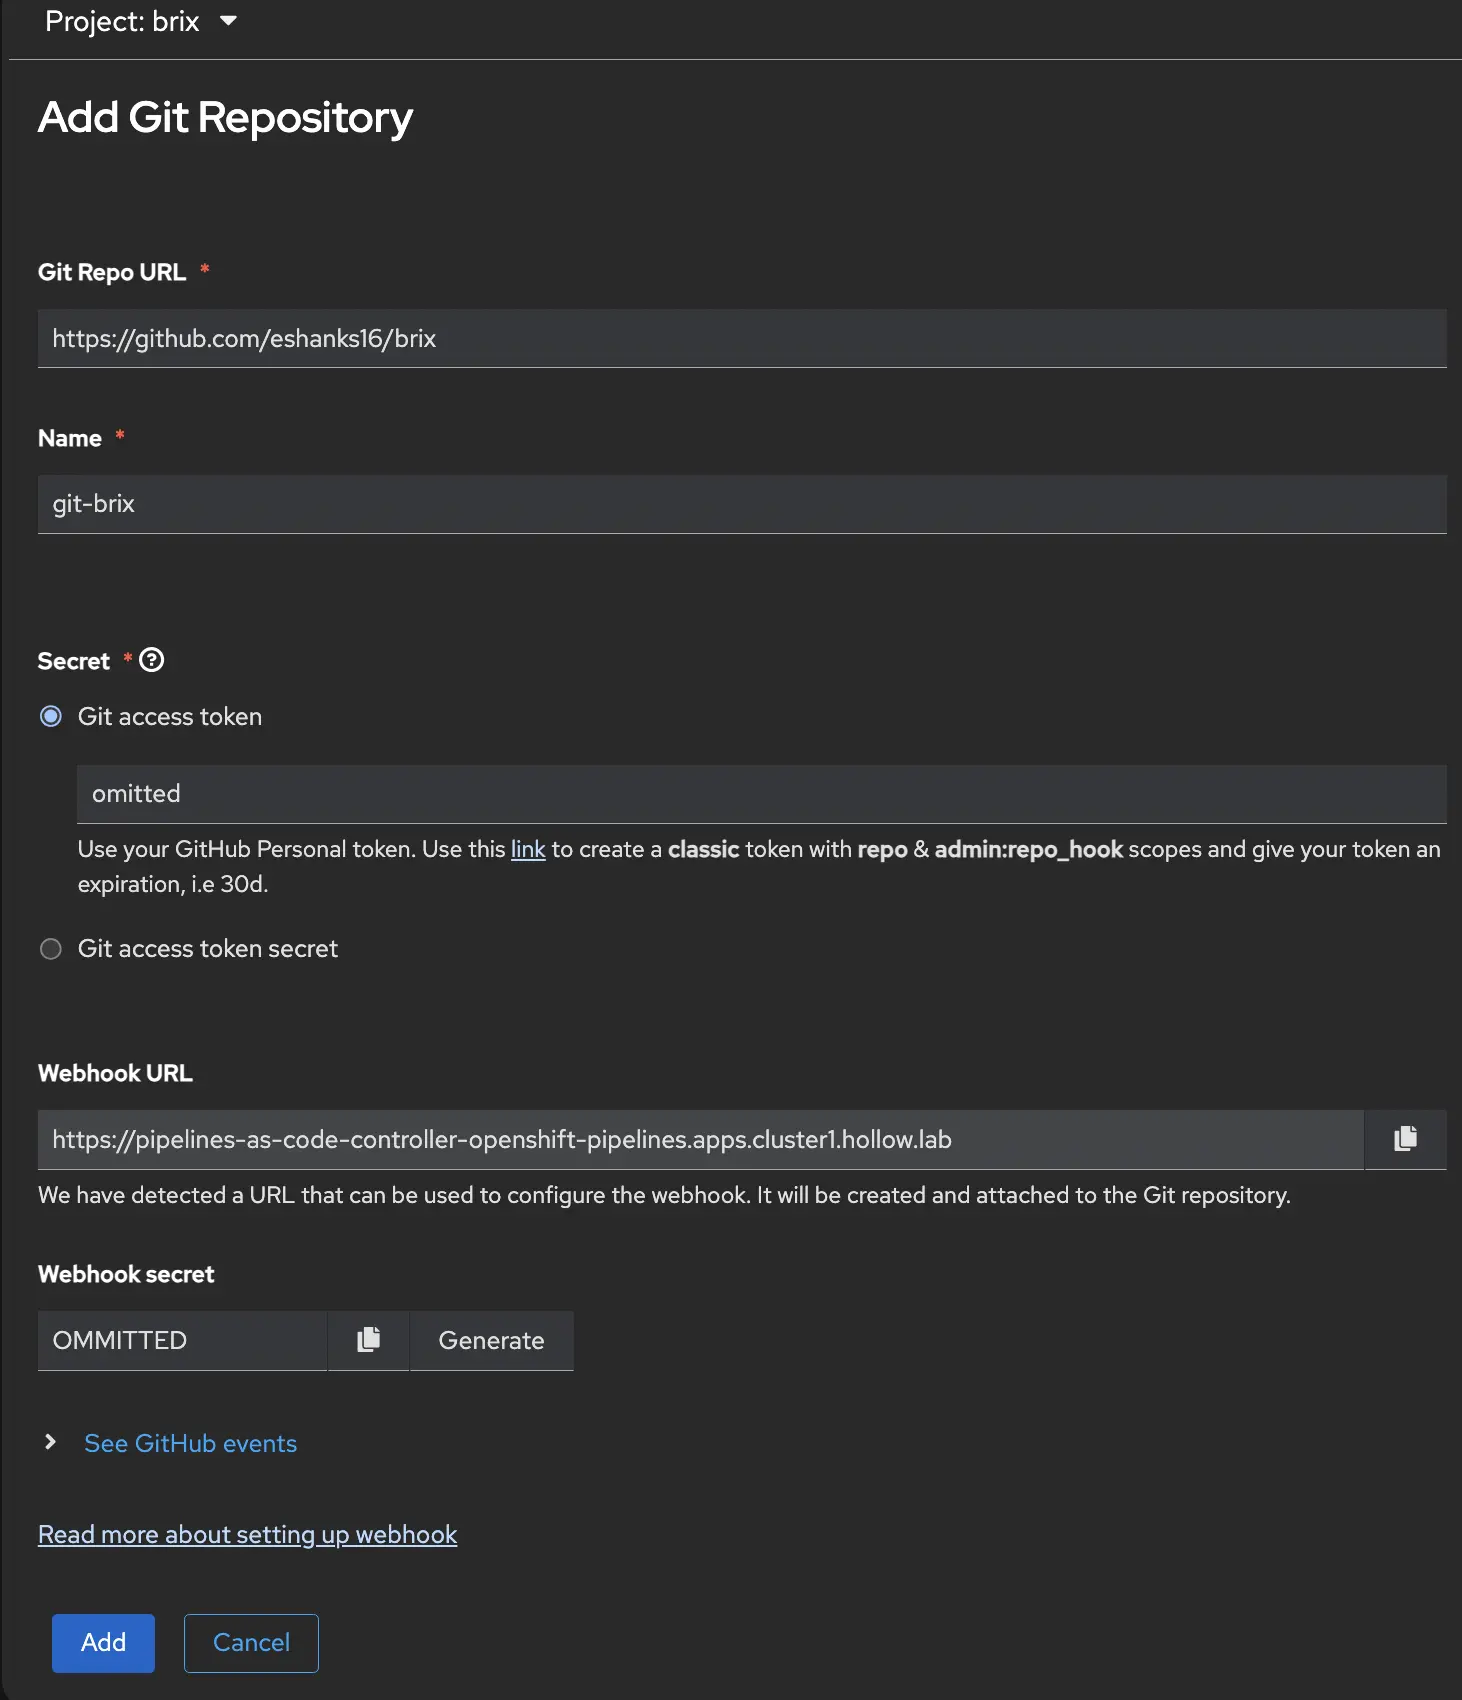
In the window that opens up, provide the information for your git repo, a common name, the git access token that you created in the previous step (you’ll notice some instructions on how to set that up are listed below the field.)
You’ll then be given a Webhook URL which is the URL that Github will send metadata to when a commit happens. You’ll need this in a minute, along with a webhook secret which is how Github authenticates with your pipeline.
NOTE: Your webhook URL needs to be publicly accessible assuming your git repository is not using your internal DNS server.
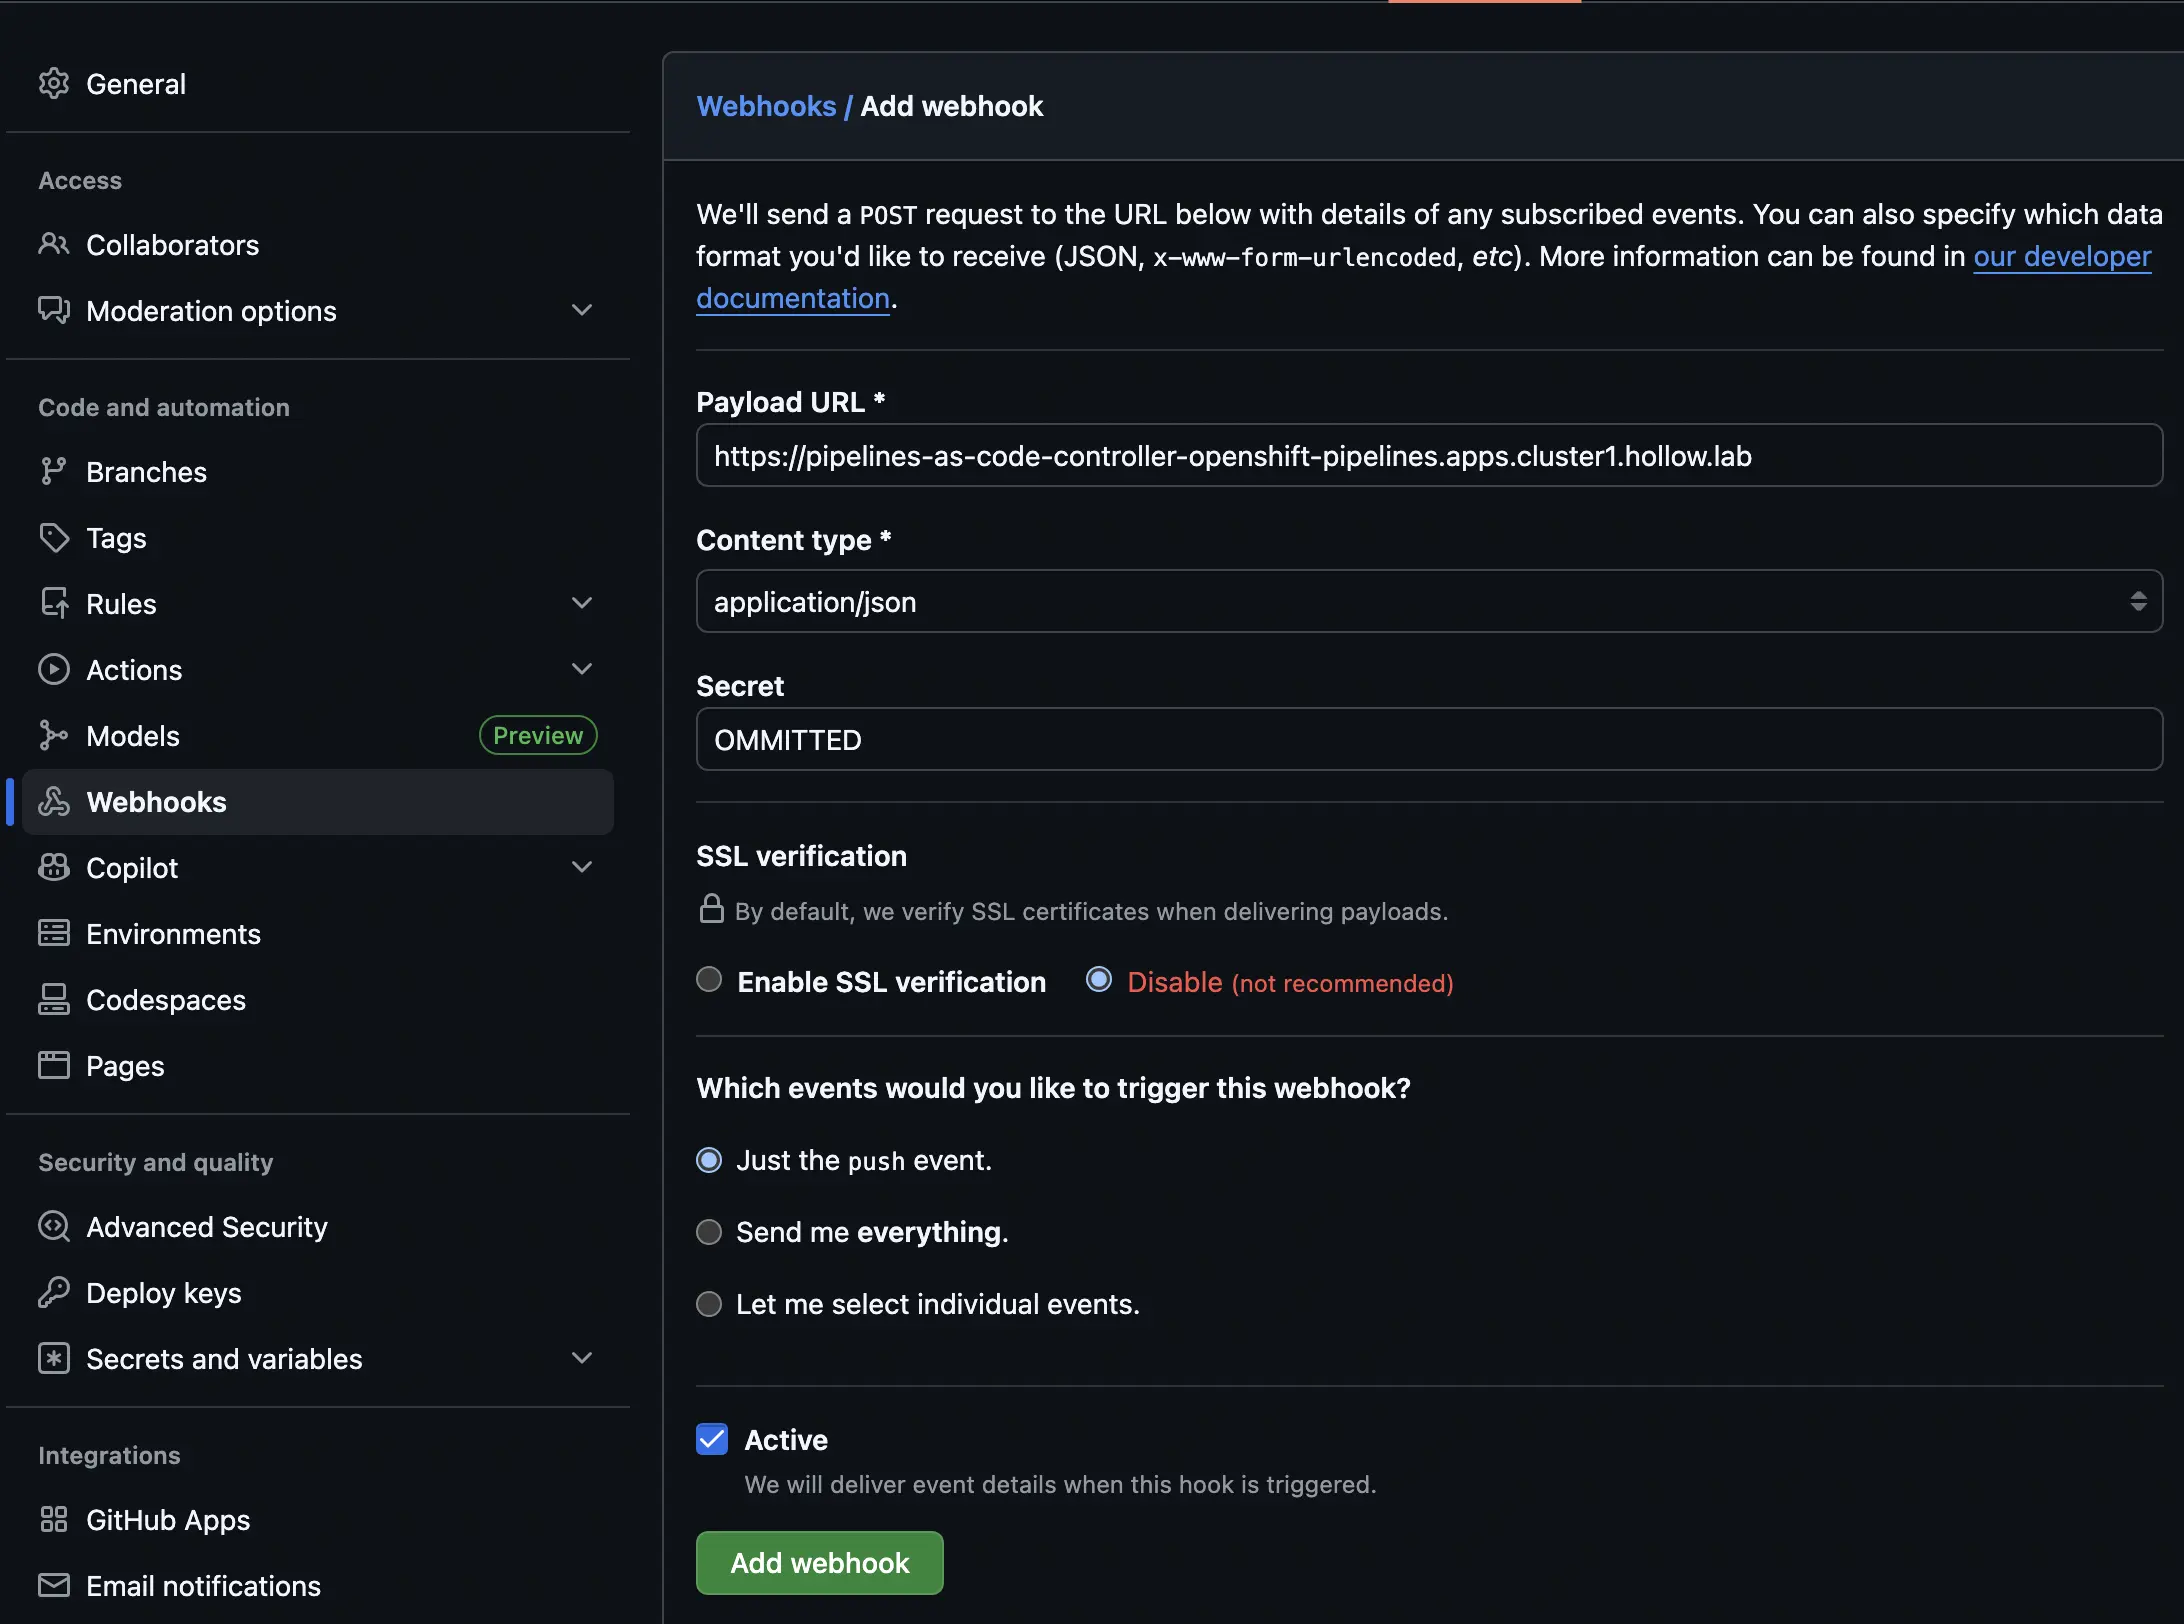
Now, back over to Github again, we can go to the Webhooks tab of the repositories settings. Here you’ll provide the webhook URL as the Payload URL, the content type is application/json and you’ll provide the webhook secret. If you’re naughty like me, you can disable TLS verification unless you’re using proper certificates like you should for a production system.
At this point you can then decide what events should be sent to your pipelines. i.e. Trigger on everything or just a push. The click the Add Webhook button.
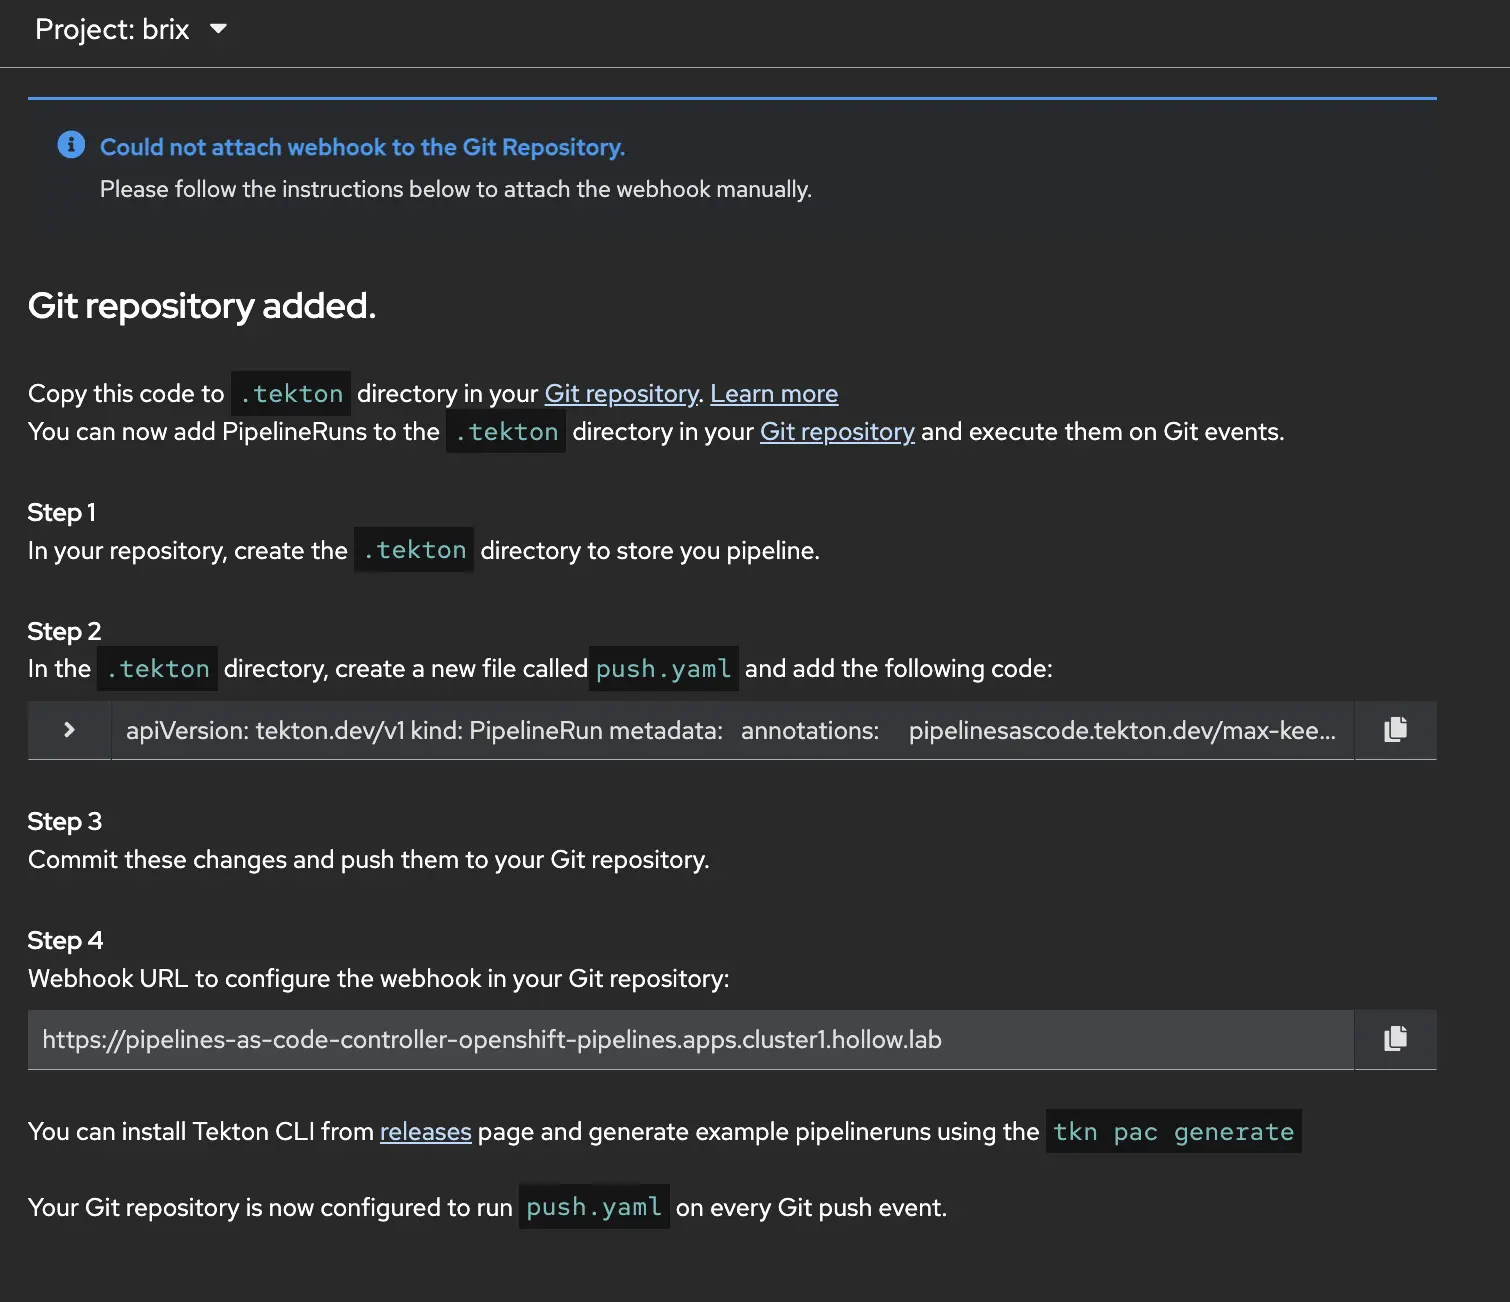
When you go back to OpenShift Pipelines the next page gives you instructions on how to create a ./tekton repository with a yaml file in it. The instructions are pretty clear that you’ll create a file that has the instructions to run the pipeline when a webhook is triggered.
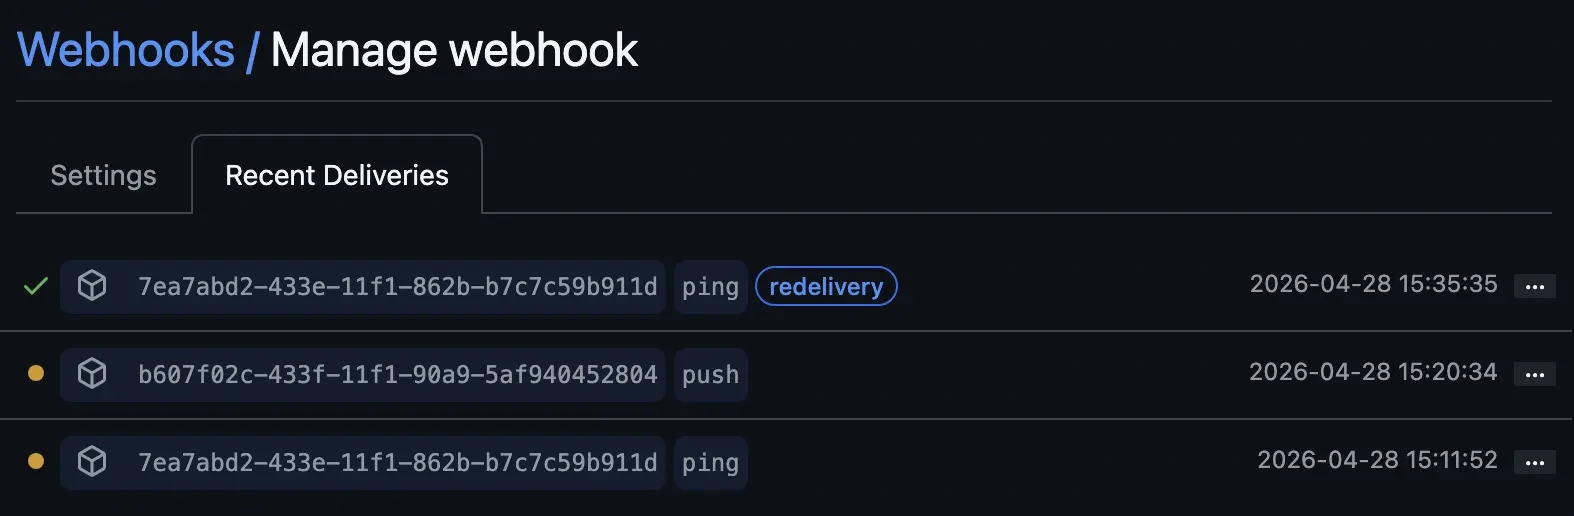
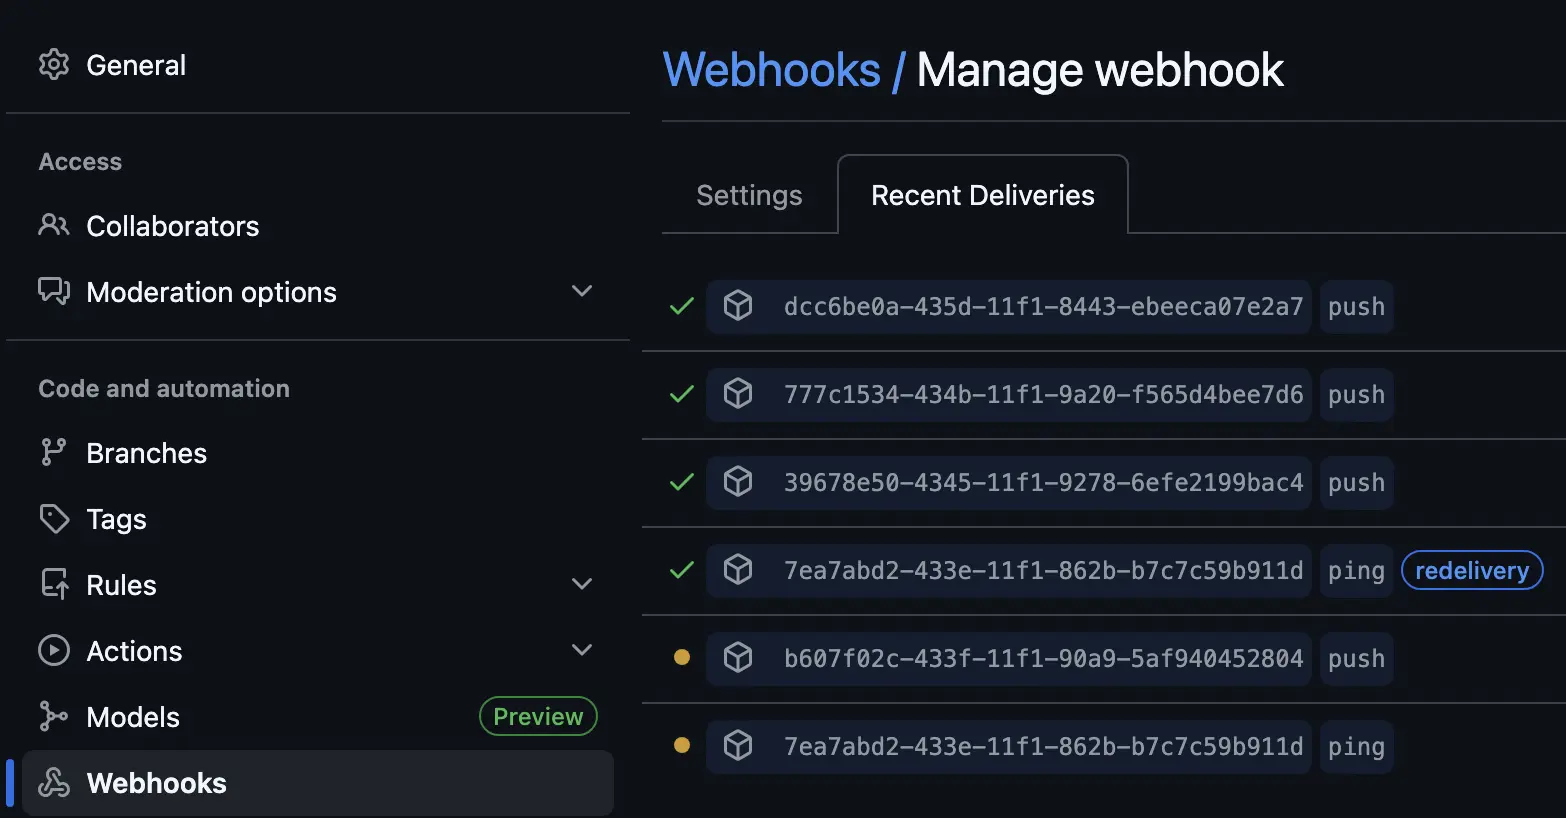
When you finish setting up the YAML file in the ./tekton directory in your git repo, you can then check the recent deliveries on your webhook. You should see a green check when you have communication working.
Running It
Our pipeline is built and we’re ready to test. It will of course work the first time right away out of the box with no issues just like all CI pipelines do. Let’s check to make sure, by running it manually through the OpenShift console before we try our automated webhook from Git.
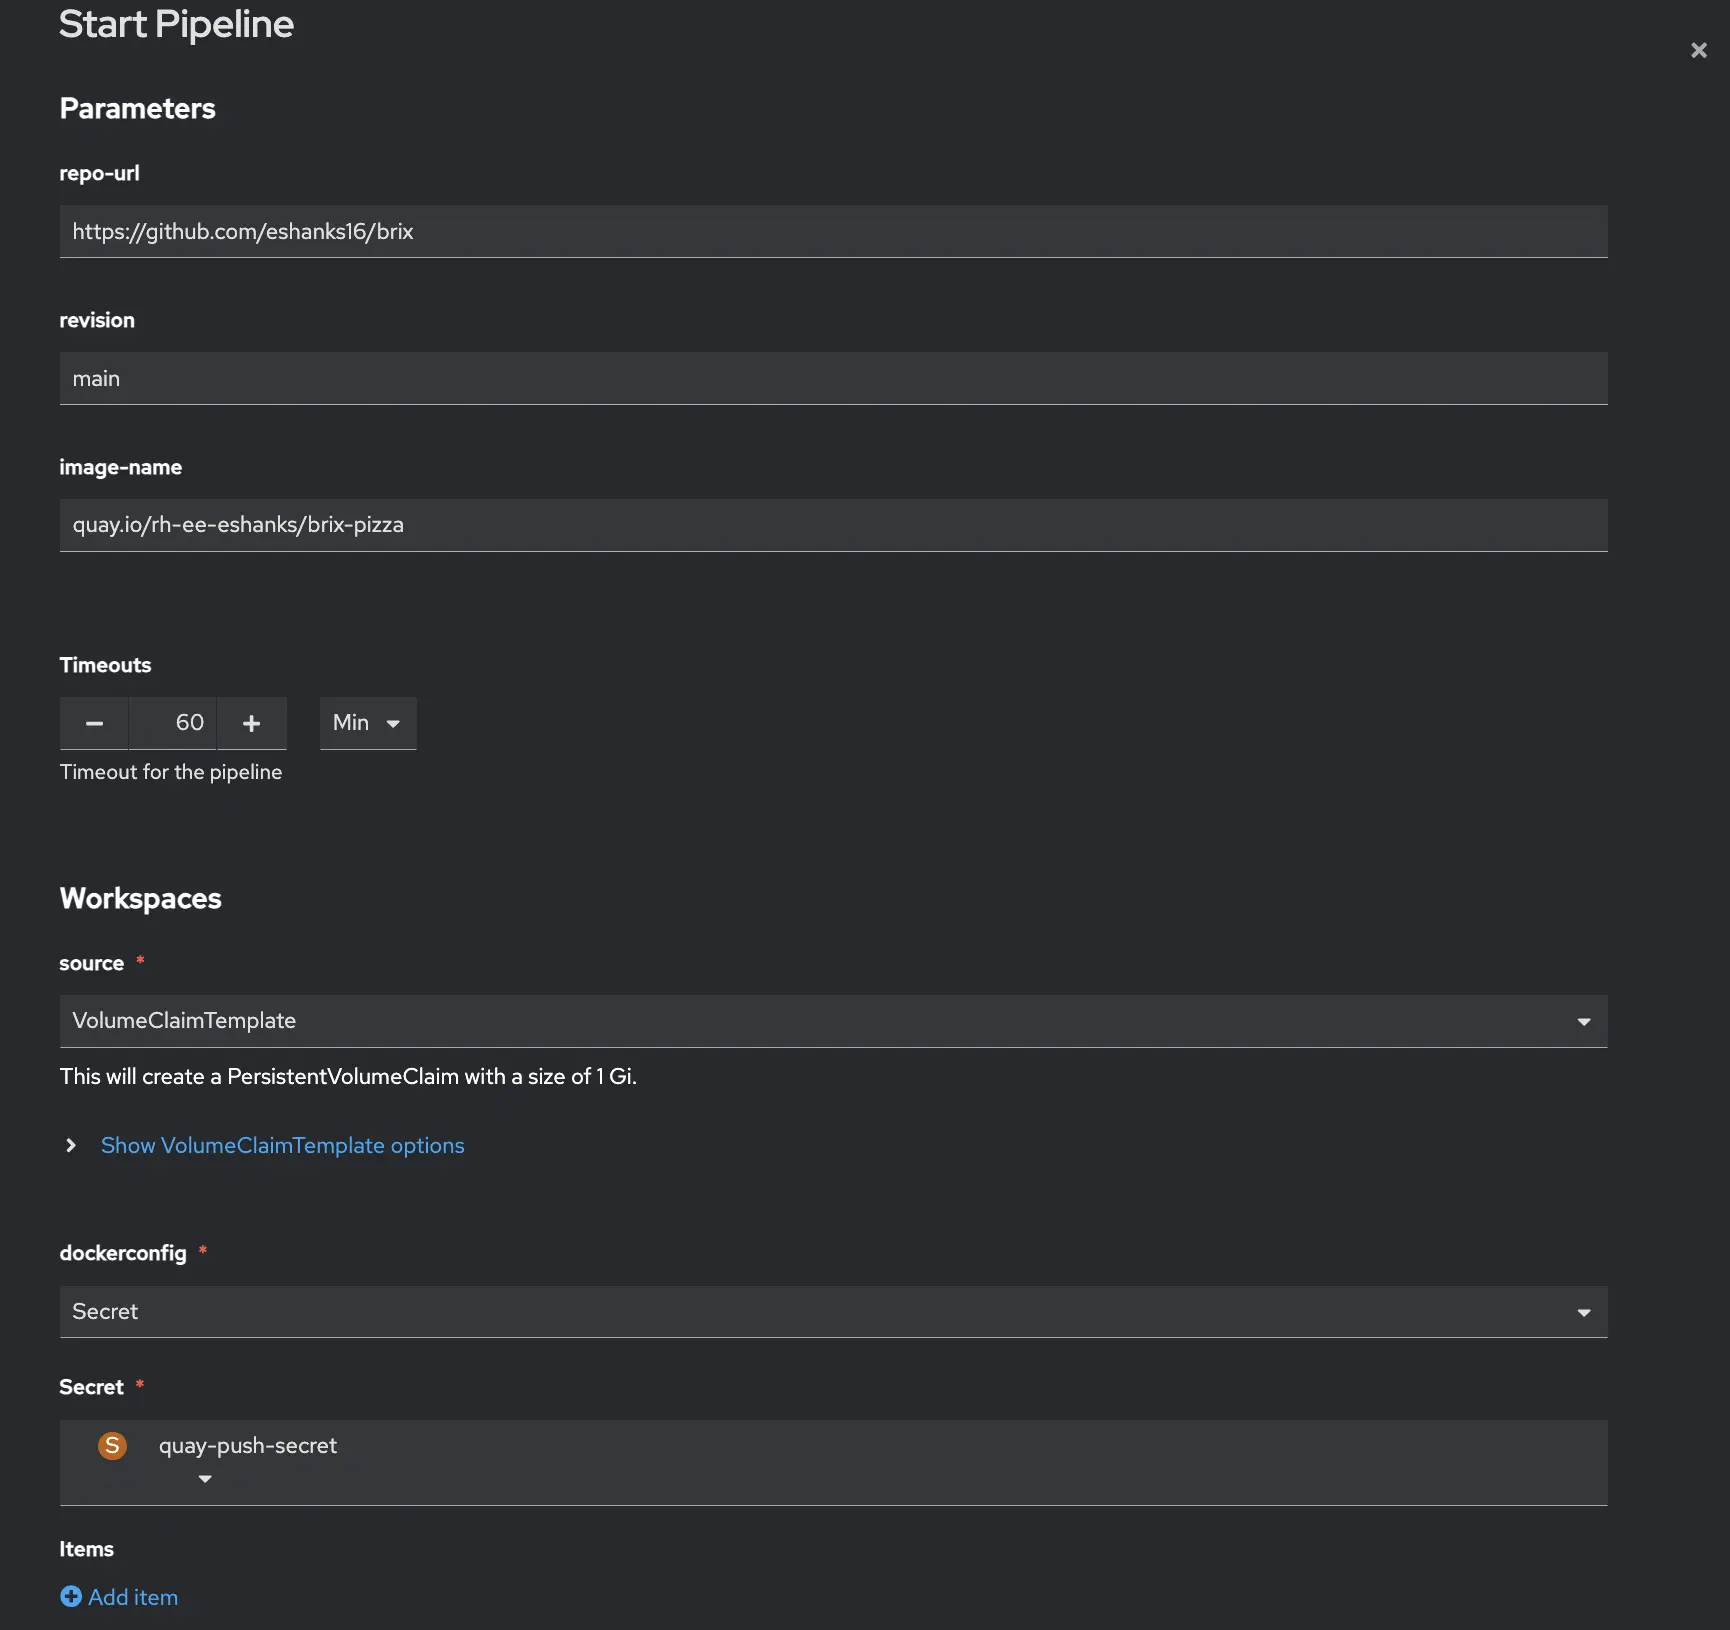
If we located our Pipeline, we can click the Kabob menu (three vertical dots) and choose run. When you do this you’ll get a window that asks for the parameters for your run. They should be filled in with your defaults. Update any parameters before continuing. In my case the main thing I needed to update was to set a VolumeClaimTemplate so that it will spin up a new PVC for my workspace when the job runs based on my storageclass, and I need to mount my quay secret that has credentials to authenticate to quay.
Once you’ve submitted your pipeline run, you can see each task in the graphical viewer. Each task will show up green if it succeeds or red if it fails so you can see where in the pipeline the issue occurs. If you do have issues there are logs and details within the pipeline run screens to help you.
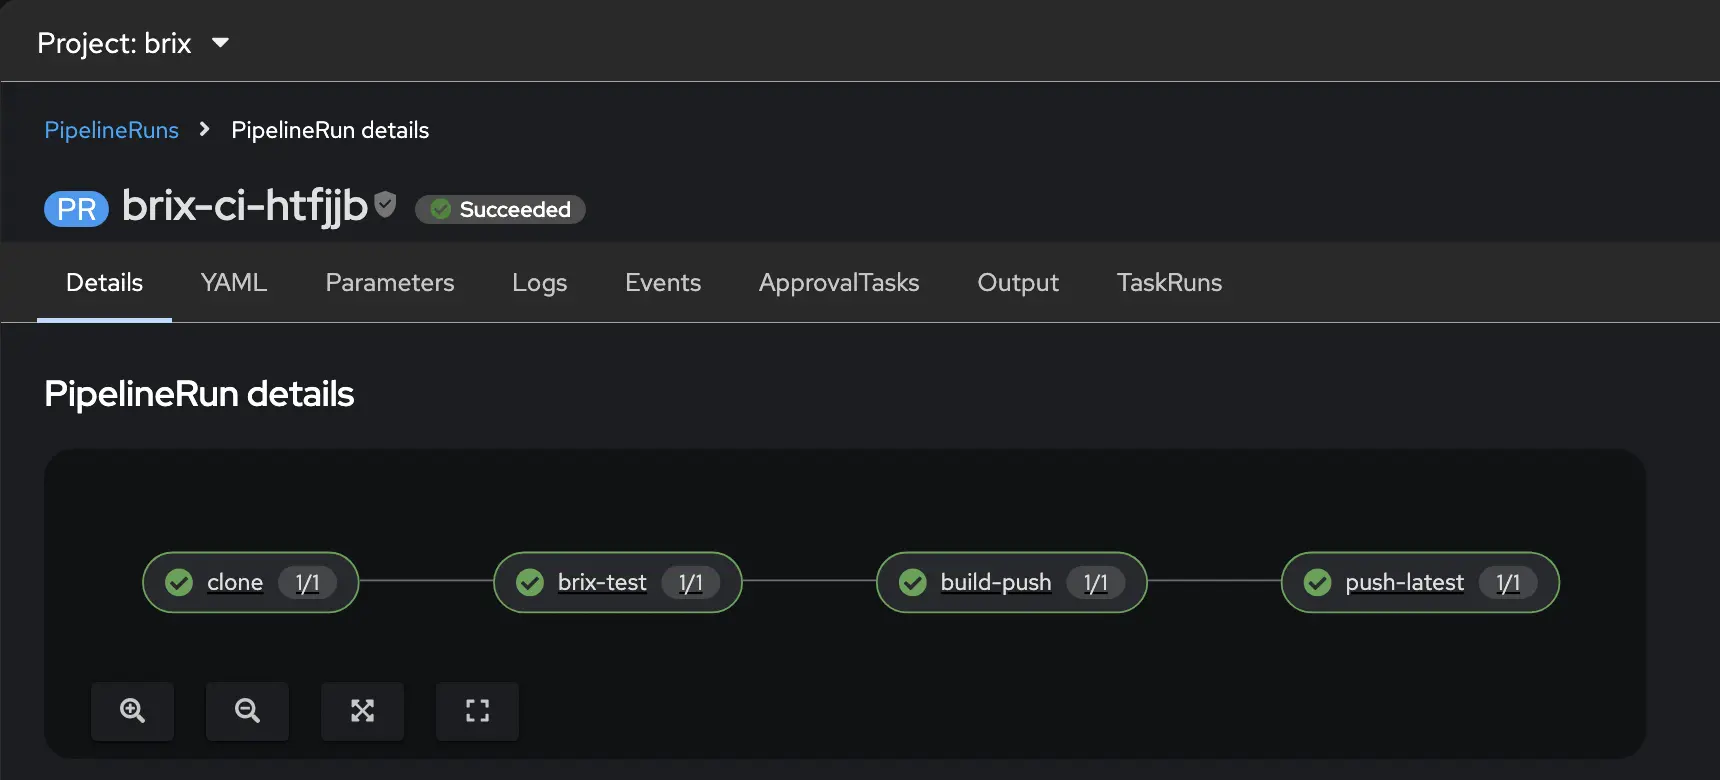
OK, thats great, but the real test is to see if we can submit a new commit to the main branch of our git repository and have the pipeline run all by itself. I’ve done this and it worked as expected. The pipeline run triggers from git but runs similarly to how we’e manually triggered it in the previous step.
From the Github repo, we can check on our webhook to see if the push to our pipeline URL is working.
If you’d prefer to follow along the pipeline through a cli to maybe capture logs or something, you can use the tkn cli with your OpenShift authentication from the oc login command. Just authenticate with the oc cli as normal and then you can install the tkn cli to check on pipelines.
tkn pipelinerun list -n brix
tkn pipelinerun logs -f -n brix
As the pipeline finishes we see our container image stored in quay so that its ready for deployment to our OpenShift clusters. Note: We’ll use this image in other posts like our GitOps post.
When it finishes you should see your image in Quay.io with two tags — the full git commit SHA and latest:
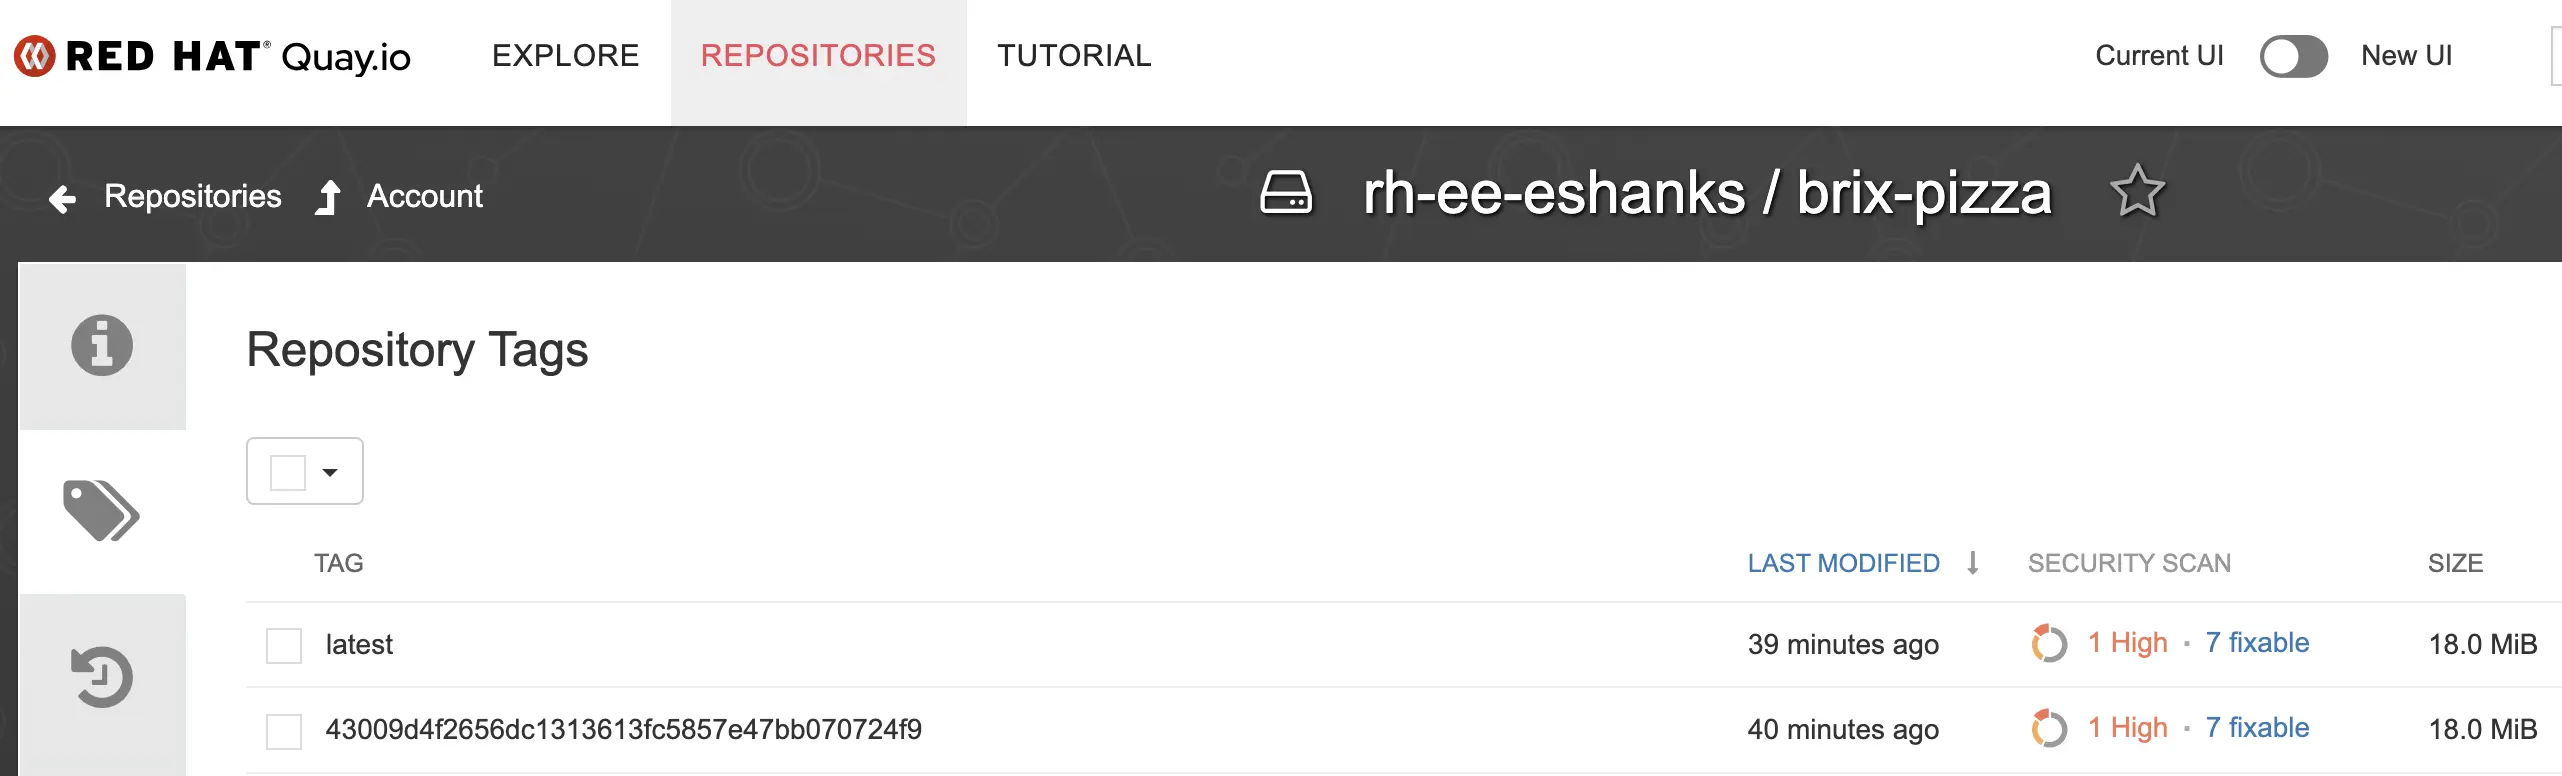
Thanks to Quay’s image scanning it looks like I have a vulnerability to fix. Luckily I can update my code and have this pipeline re-run to get me a new image automatically. Or, maybe this tells me I should have some vulnerability scanning in my CI pipeline instead. A discussion for another time.
What’s Next
At this point we have automated CI for our Brix Pizza application. Every push to main runs the tests, builds the image, and pushes it to Quay.io with no manual steps. If this were a production app, you might take this further by adding security scans, code smells, and actually deploying the app for functional tests. Since the pipeline runs on OpenShift, deploying the app is pretty simple, so your functional tests can be run as well from this pipeline.
In the next post we’ll set up OpenShift GitOps using ArgoCD to watch a Git repository for deployment manifests and automatically sync them to the cluster whenever the image changes.