Microsoft IPAM (IP Address Management) is a feature that was released in Windows Server 2012 to help administrators manage decentralized DHCP and DNS Servers. Previously administrators may have needed to use spreadsheets to keep track of DHCP Scopes, IP Addresses DNS Names etc but with IPAM installed, a single server can refresh all of this data and put it in a single, always up to date place.
Deployment Guidelines
There are a few things you should know before installing IPAM.
DO: Install on a Server that is joined to the domain.
DO: Install on a Server that has network connectivity to your DNS, DHCP and Domain Controllers. The IPAM Server needs to be able to directly communicate with the services that they provide.
DON’T: Install on a Domain Controller. This is not supported.
DON’T: Install on a DHCP Server. This will prevent IPAM from discovering other DHCP Servers and is not supported.
Install IPAM Role
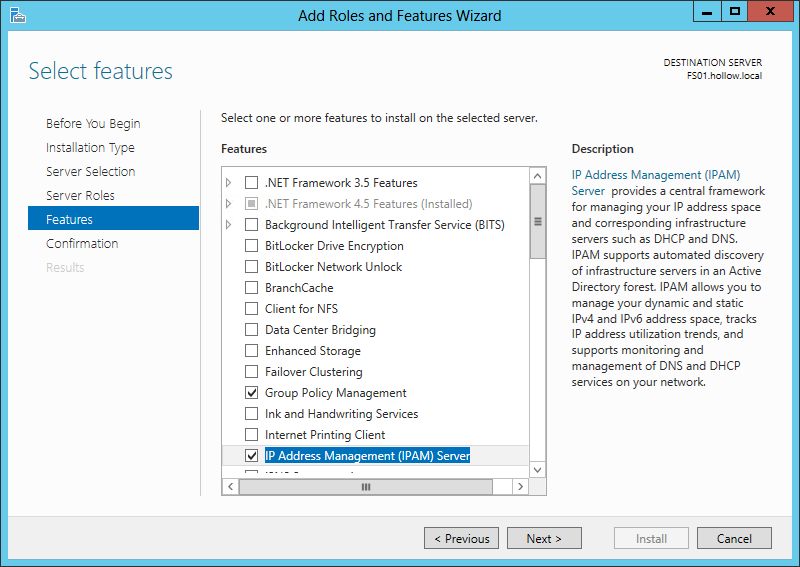
The IPAM Server role is added like all the server roles in Server 2012. From the Server Manager go through the Add Roles and Features wizard. Make sure to select the IPAM Server under features.
Setup IPAM
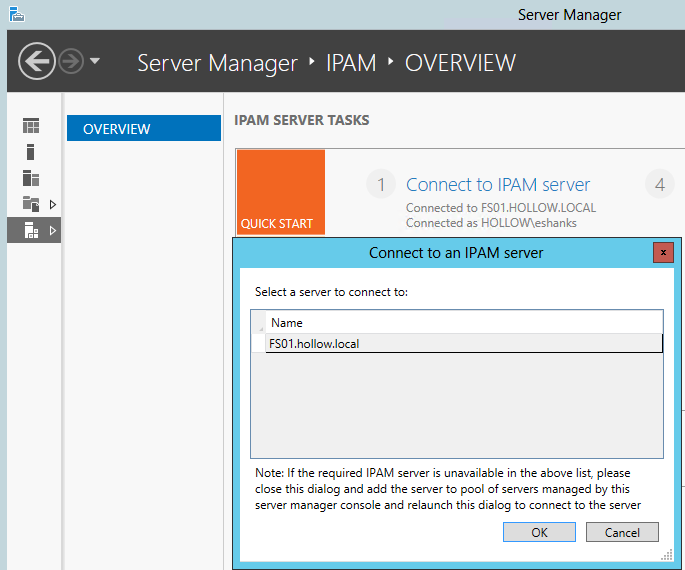
Once IPAM has been installed, use Server manager and go through the steps which are neatly ordered 1-6. Connect Server Manager to the IPAM server you just installed.
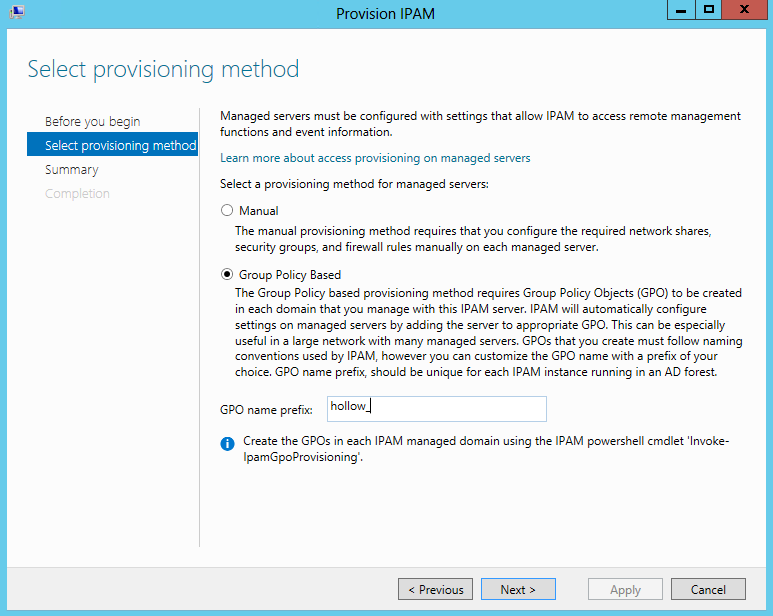
Step 2 is to provision IPAM. A wizard will pop up and give you some instructions. On the second page of the wizard, you need to make a decision about whether you will manually configure all of your security groups, firewall rules, etc. on each of your DHCP Servers, DNS Servers and Domain Controllers. I chose to forgo this method and choose the default option of using Group Policy. Notice that you’ll be required to put in a GPO Prefix.
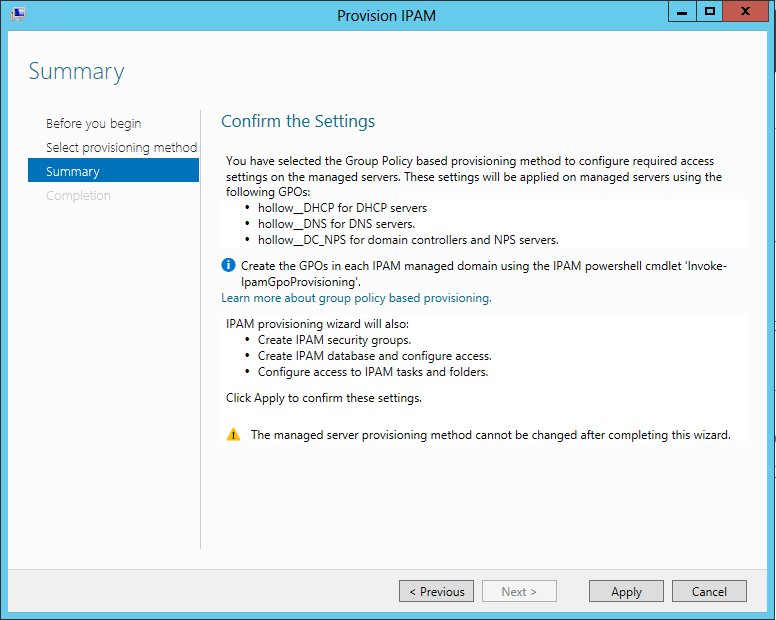
Review the Summary and take notice to the fact that three new GPOs will be configured, each starting with your GPO Prefix (in my case hollow_)
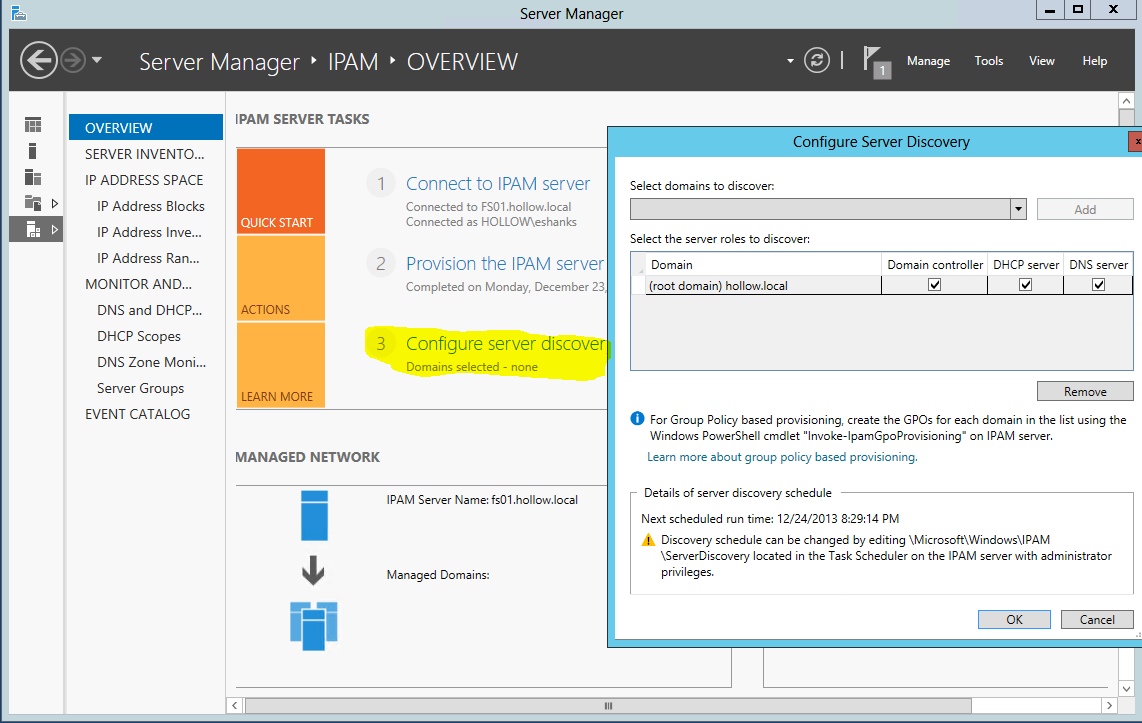
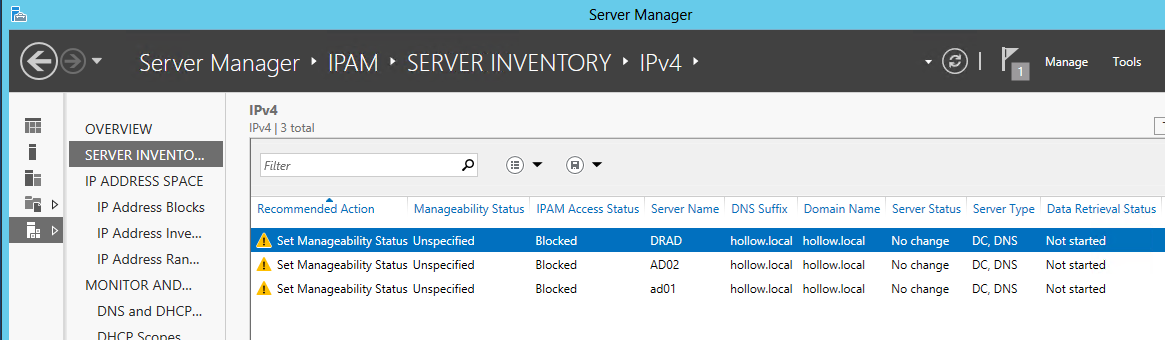
Now we move on to Step 3. Which is doing the server discovery. What Servers do you plan on managing with this IPAM Server? I’ve chosen all of the server types.
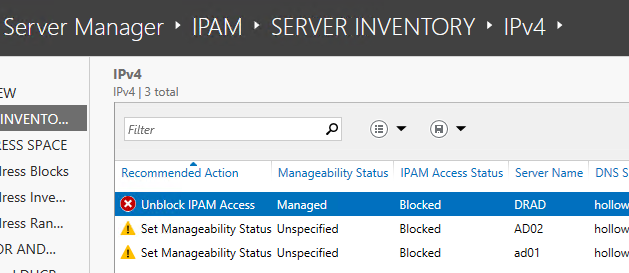
Step 4 will attempt to discover the server types that you’ve selected. In the Server Inventory will show your servers listed, but will have an alarm about the server manageability status. Before you can set the manageability status the GPOs have to be deployed. The GPOs that you created in the wizard earlier haven’t been deployed yet and need to be invoked from PowerShell.
Note: I’m not sure exactly why this is a separate step, and furthermore not sure why this couldn’t have been done from the same Server Manager window you’ve been running through all along. RANT OVER.
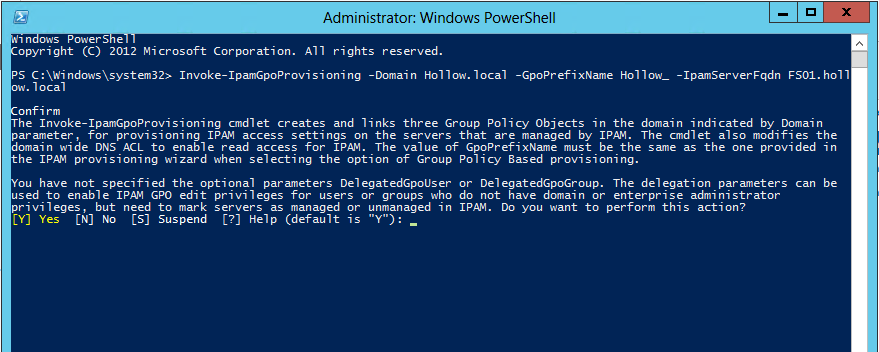
In order to deploy the GPOs, the “Invoke-IpamGpoProvisioning” cmdlet needs to be run from PowerShell.
Run from a PowerShell prompt.
Invoke-IpamGpoProvisioning -Domain DOMAINNAME -GpoPrefixName GPOPREFIX -IpamServerFQDN IPAMSERVERNAME.DOMAINNAME
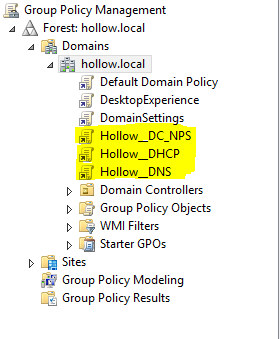
When finished you should see your GPOs listed in Group Policy Management.
Go back to Server Manager and look at your inventory again. Click Edit Server.
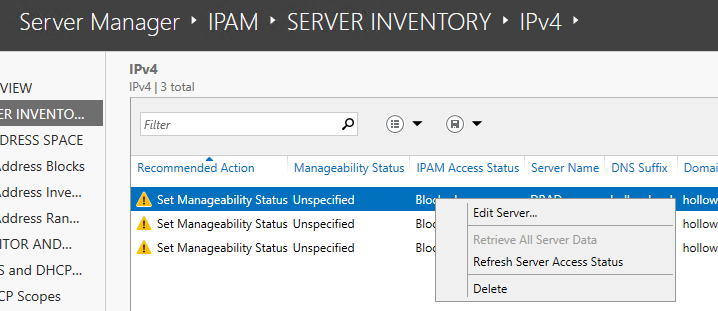
Chose the server types you plan to manage and choose “Managed” as the manageability status.
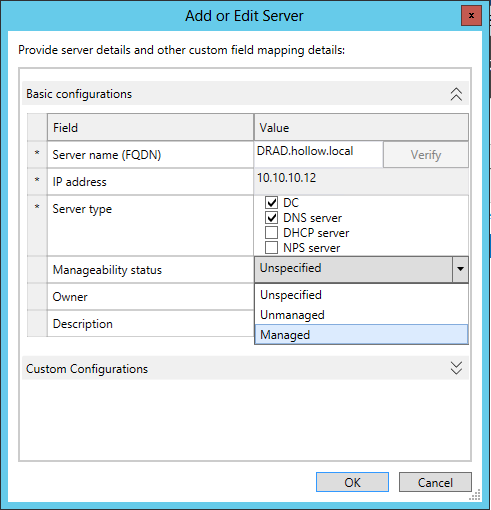
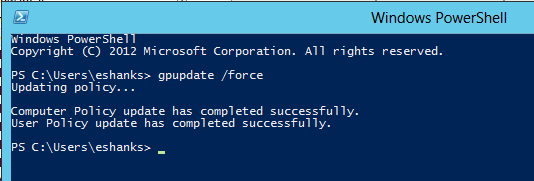
Once this is complete you may see a Red X indicating an error. This is likely due to the GPO not being applied yet. If this happens you can login to the server in question and run the “GPupdate /Force” command to get the server to re-read the GPOs assigned to it.
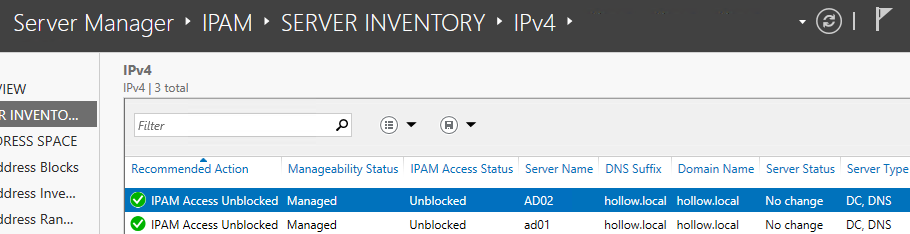
When finished your Server inventory should look something like this.
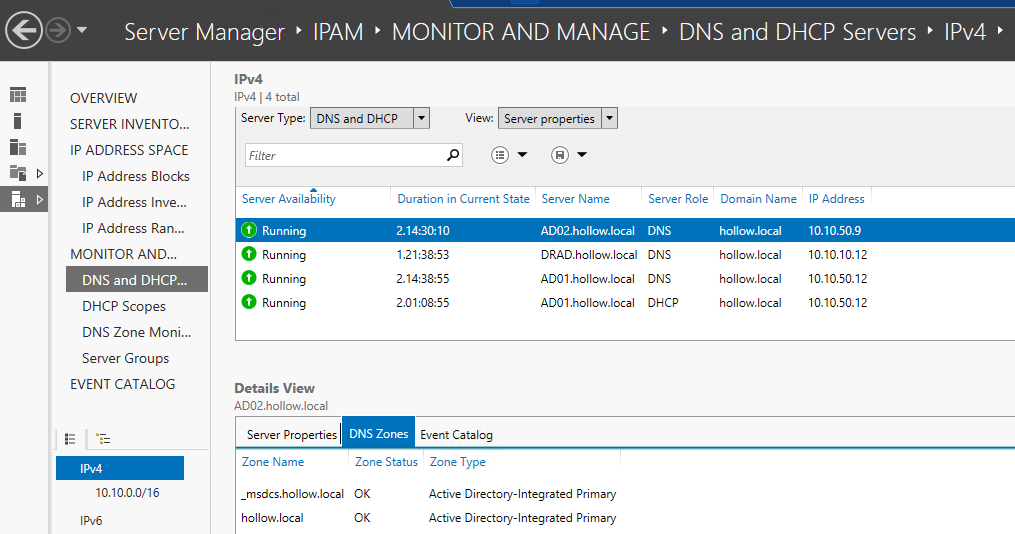
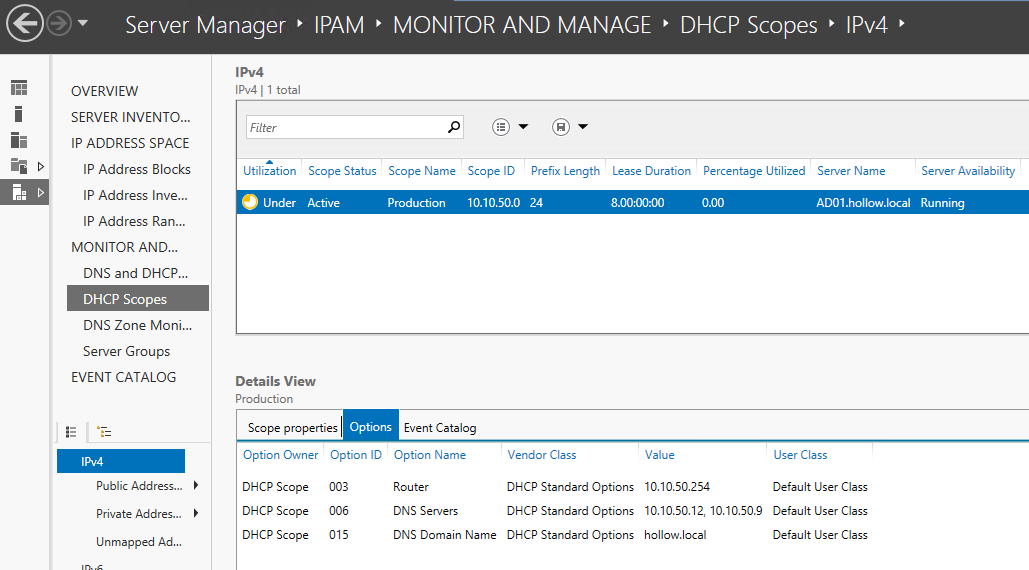
IPAM USAGE
When you’ve finished your setup, you can use IPAM to do things like manage your IP Addresses, manage DNS Zones and review auditing and logs.