You’ve got to be a serious geek to want to install your own SSL Certificates on your home NAS. I mean come on, who really has their own certificate authority sitting around at home and is so annoyed with a little warning page when they access the GUI? Well, since you’ve landed on this page, I assume that I’m in some similar company :)
Login to your Synology NAS and open the control panel. Click Security and then the “Certificates” tab at the top. You’ll notice the subtle “Self-signed certificate” status blazoned in red lettering. Don’t worry, thats what we’re going to fix. 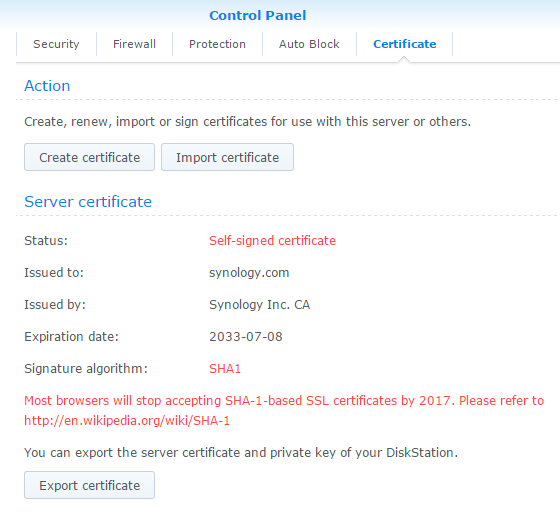
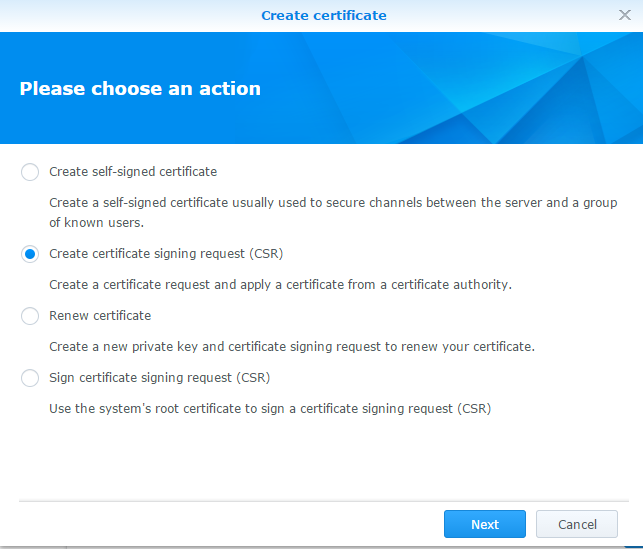
Click the create certificate button to open a certificate wizard. Once the wizard opens, click the radio button next to “Create certificate signing request (CSR). Click Next.
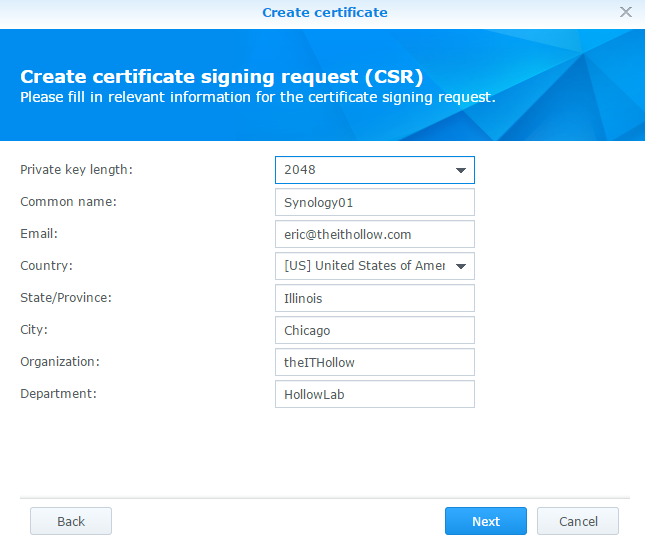
Enter some information about your new certificate. Private key length (the larger the more secure of course), a common name which should match the NAS DNS name, and then some additional information about your organization and locality. Click Next.
Once done, click the download button to download the CSR and the private key.
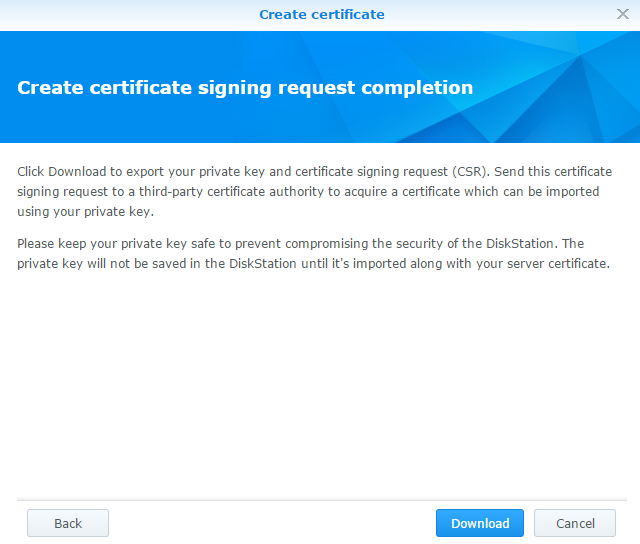
You’ll need to extract the files to a folder that you can access.

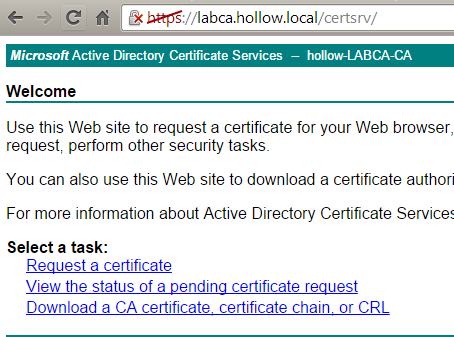
Go to your certificate server to request a certificate. In my case I’m using a Microsoft Certificate Authority so I can go to https://[CASERVER]/certsrv/ . If you need help setting up your home lab certificate authority, check out one of my previous series to get you going.
Click on Request a certificate.
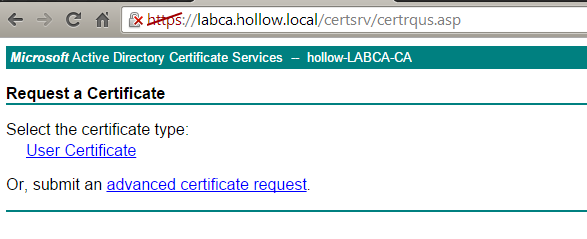
Choose “advanced certificate request”
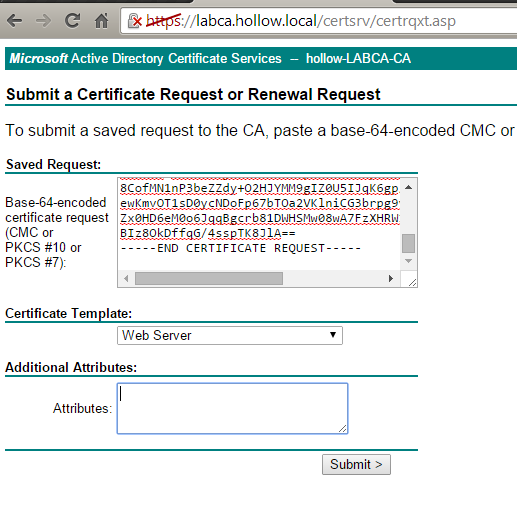
Open the CSR that you downloaded from your Synology array and paste the contents into the certificate request field. Click Submit.
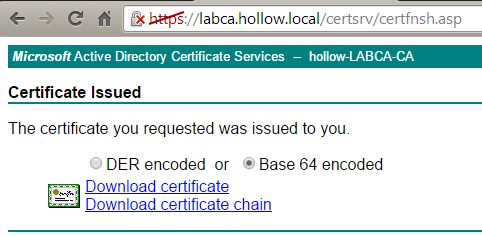
Click Base 64 encoded and then choose “Download certificate”.
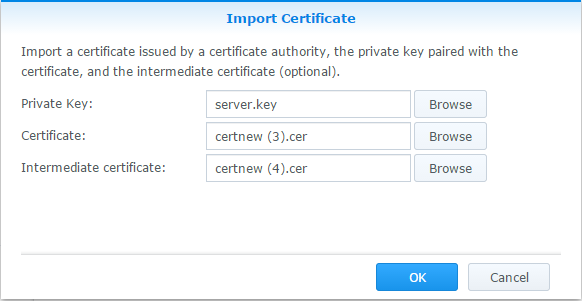
Go back to the Synology administration page and click the “Import certificate” button. Here, you’ll need to locate three files.
- The Private Key - This file will be one of the two files that were originally downloaded from the Synology and was in the compressed file with the CSR.
- The Certificate - This file will be the file we just downloaded from the certificate authority.
- Intermediate certificate - This file will be the Root Cert or an Intermediate Cert. You can get this at the https://[CASERVER]/certsrv/ on the main page. Click the “Download a CA Certificate, certificate chain or CRL”.
Click OK
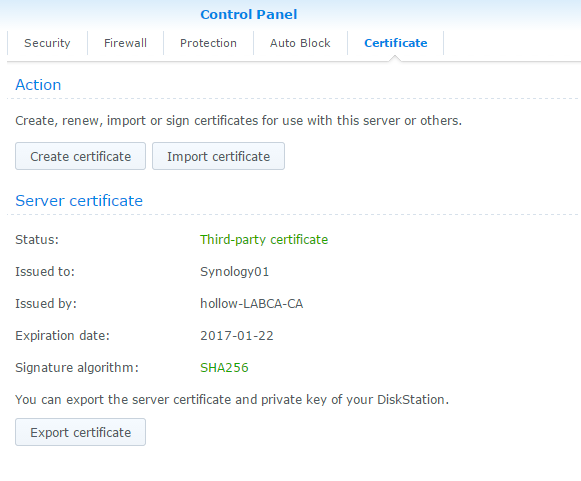
Look at that! Now we’ve got some great looking green statuses! Cool!
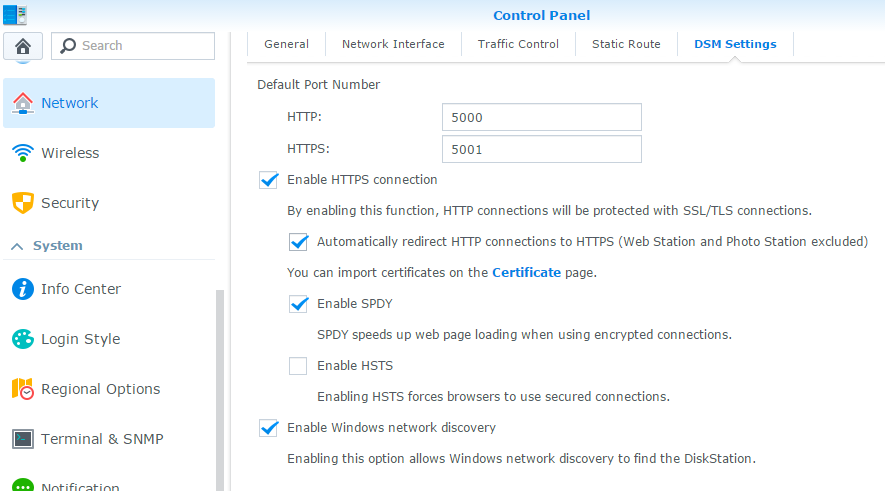
To ensure that you’re using the new certificates to connect to your NAS, go to the Network section in control panel and then the “DSM Settings” tab. Click the “Enable HTTPS connection. If you’re like me, I didn’t want to type in that pesky “S” on HTTP"S” every time so I checked the box to automatically redirect http connections.
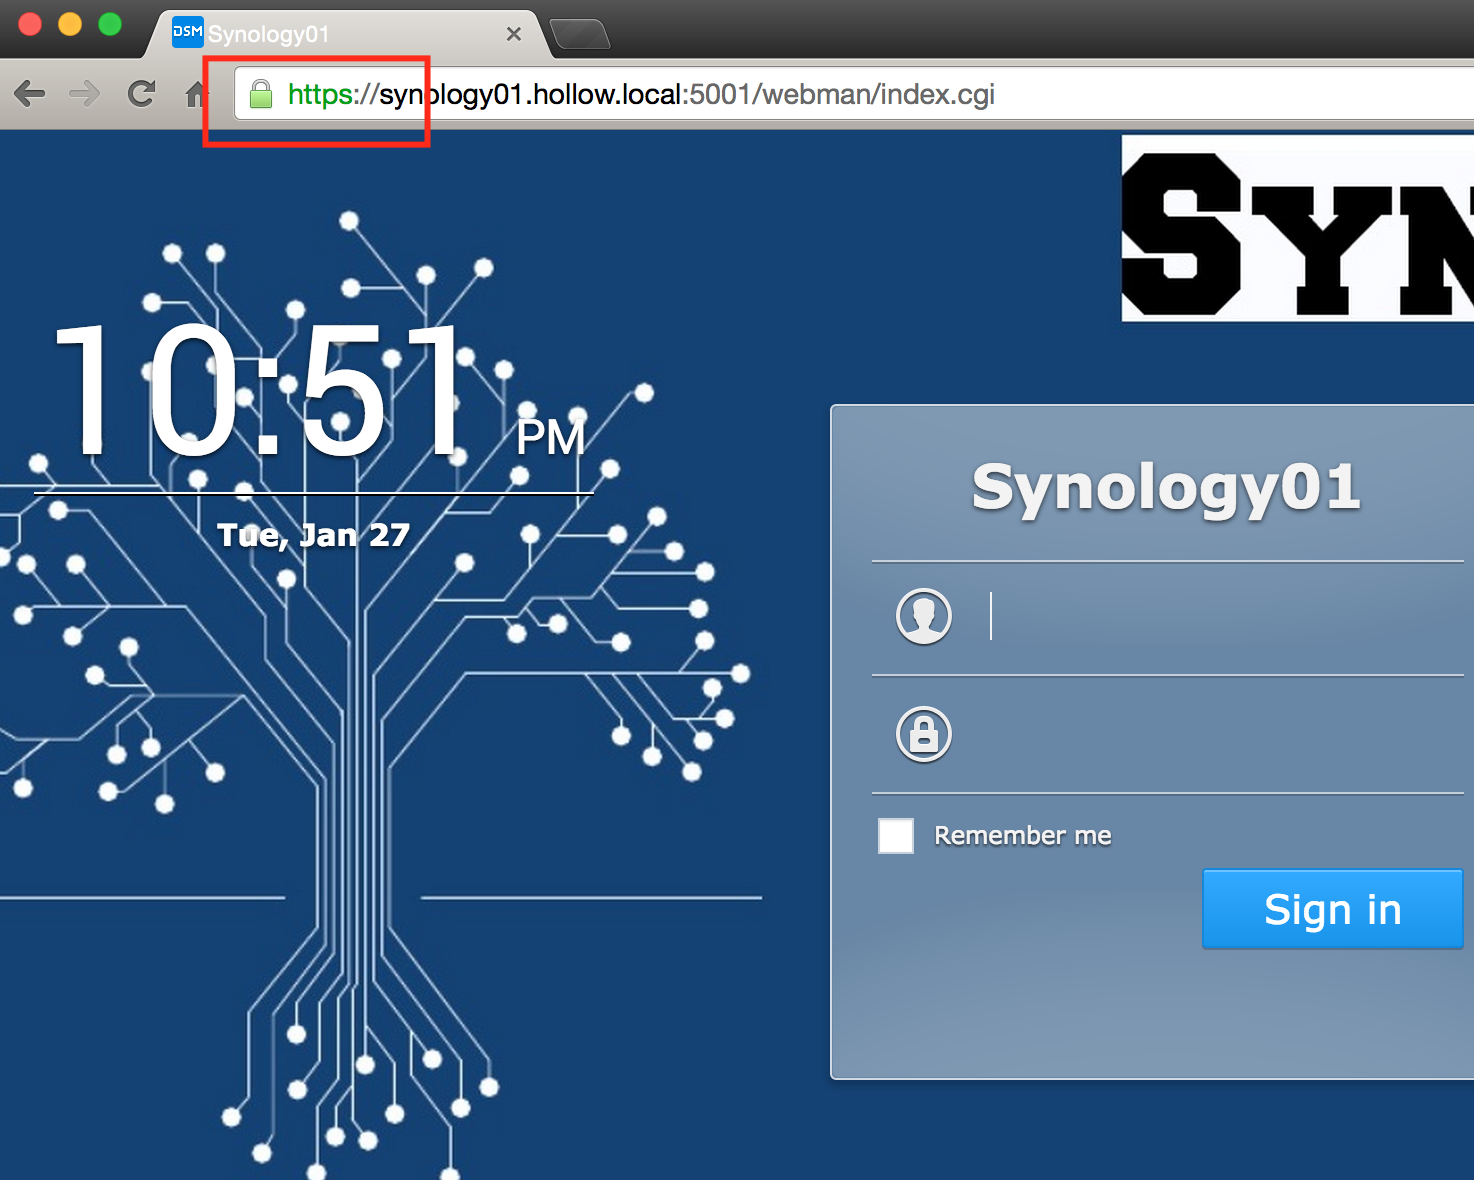
Go Access your NAS and look for the sweet https:// valid certificate indicator in your favorite browser.