I’ve written about deploying clusters in the past, but if you are a TMC customer, those steps can be skipped altogether. TMC will let us deploy a Kubernetes cluster and add it to management, all from the GUI or CLI.
For this example, I’ll create a new Kubernetes cluster within my AWS account. Before we setup the cluster, we need to configure access to our AWS Account so that TMC can manage resources for us.
Connect AWS Account
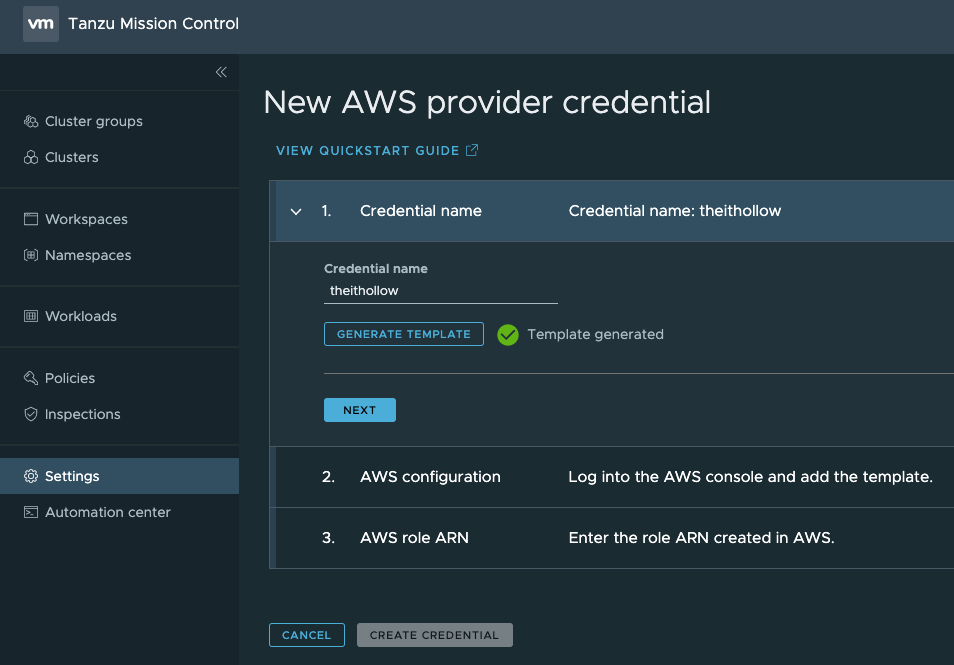
Within TMC in the settings menu, we click Connect Account. From there, we provide a name for the credentials and once done, we click “generate template”. This template will be downloaded and is a CloudFormation Template applied to our AWS Account.
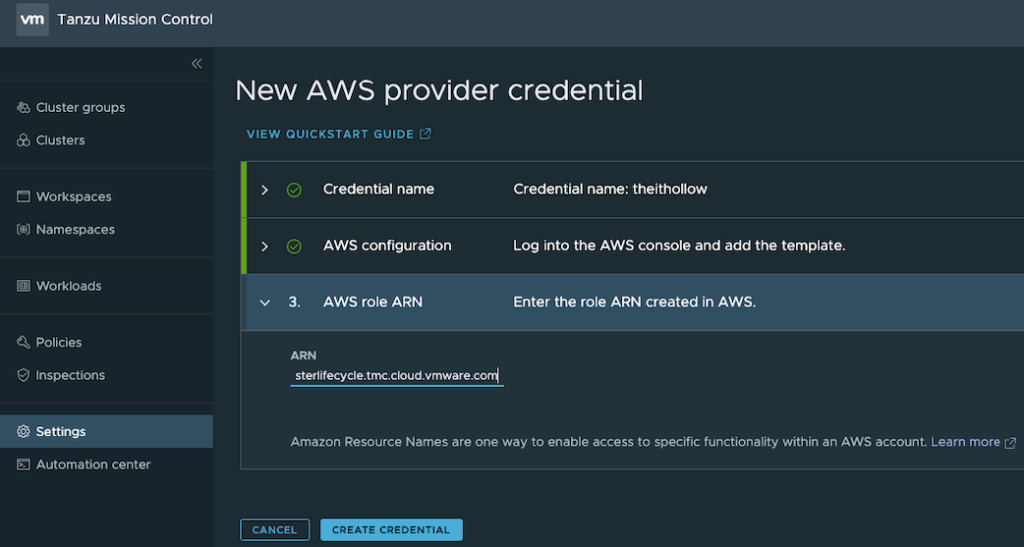
Step 2 of this process explains the steps to deploy the CloudFormation template in your AWS Account.

Step 3 we enter the ARN of the role created in the Cloud Formation Template.
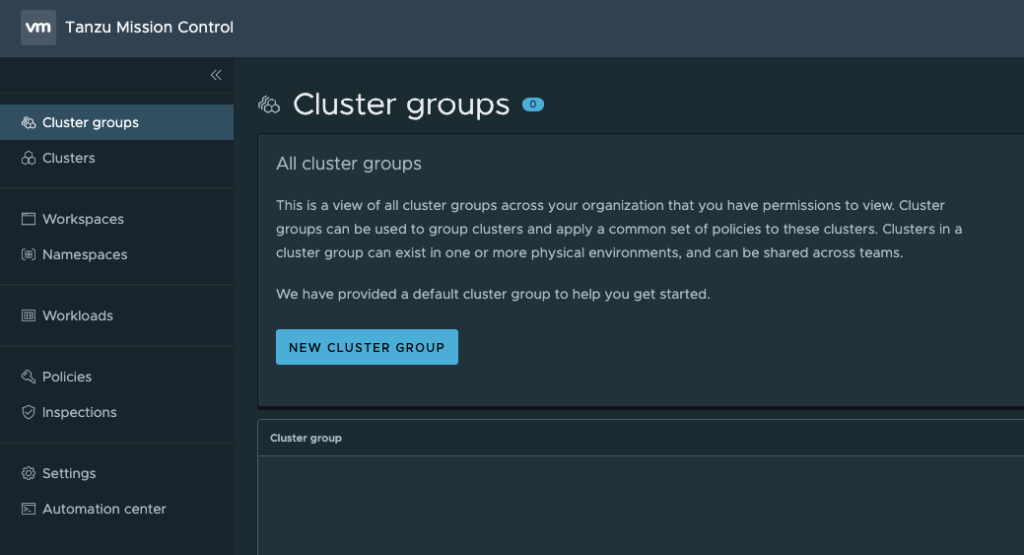
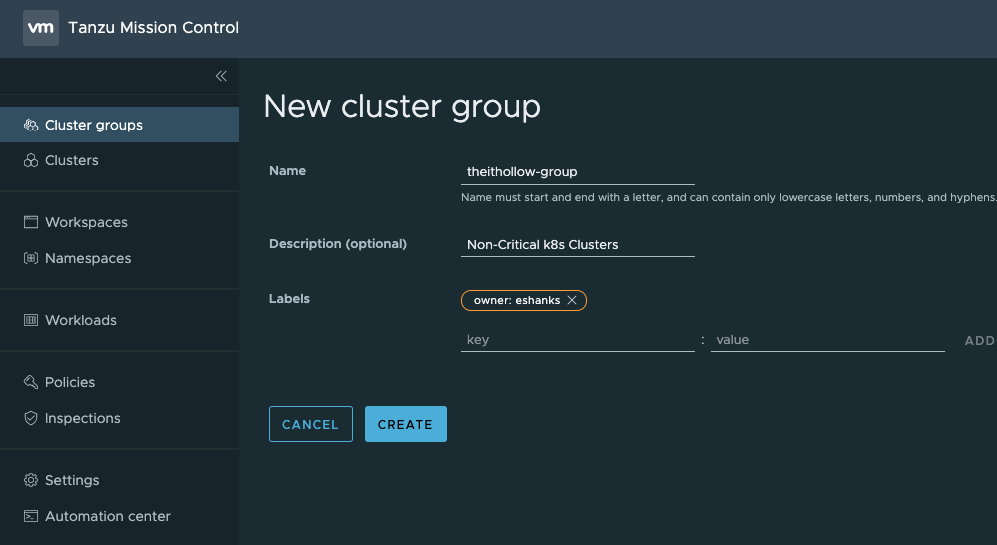
Create a Cluster Group
Cluster Groups are just what they sound like. A grouping of Kubernetes clusters. These are used for organizational purposes, but also to configure multiple clusters at one time. The configuration hierarchy will apply configs at the group level first, but can be overridden by lower level configs.
Under the Cluster Groups menu, we’ll click the “New Cloud Group” button to setup a new group.
Here we’ll give the group a name and a description. We can also apply tags here which is a really useful feature for organizing your clusters between team members. I’ve added an owner tag with my username.
Create a Cluster
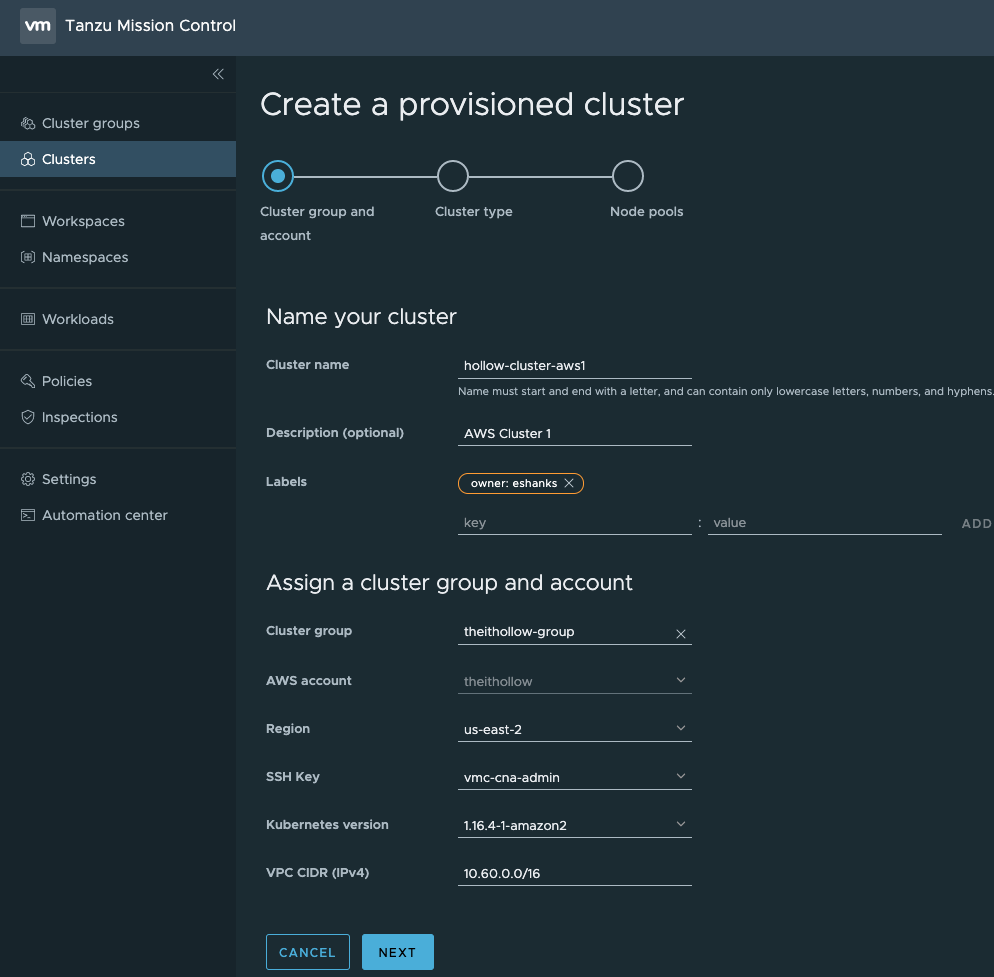
Now that we’ve setup the credentials and permissions in our AWS Account, and have a cluster group, we can begin to deploy a cluster. Under the clusters menu, we’ll click the “New Cluster” button and then select the account we created in the previous steps.

The next screen, we enter details about our desired cluster. For example, I’m providing a cluster name and description as well as tags again. But I also specify the cluster group that it should be applied to, the account it will reside in, the region where it will be deployed and SSH keys. We also provide the version of Kubernetes to deploy and the VPC CIDR we want to use.
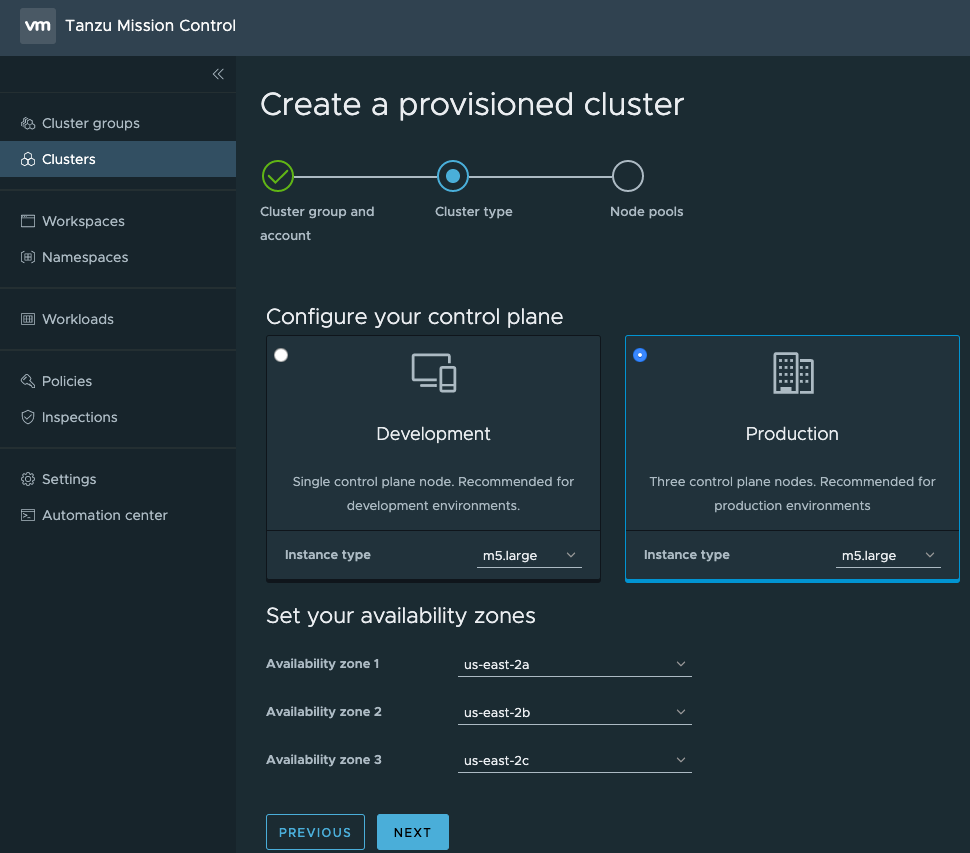
On the following screen, we have to deside information about the Availability zones to deploy within, as well as whether this is a lab environment of production grade. The differences are whether or not you have high availability and load balancers for your cluster. Also, be sure to watch the type of nodes, some can be more expensive than others.
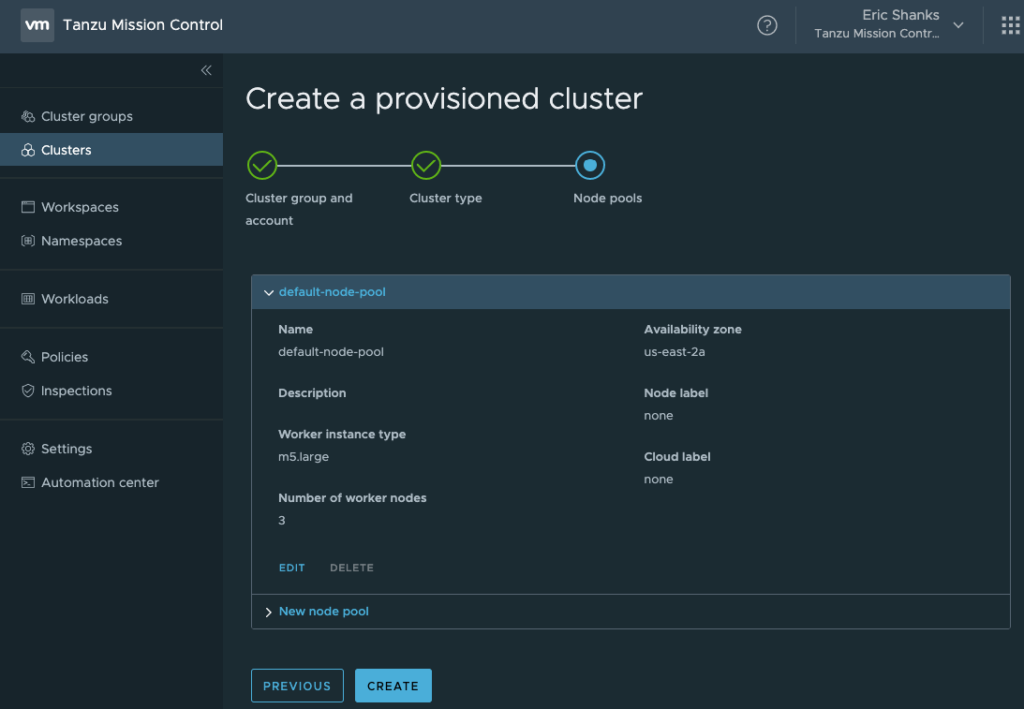
Review your settings and click the “Create” button.
When you click create, you can switch over to your AWS console and watch the new resources get spun up for you. You could also watch the TMC console for updates.
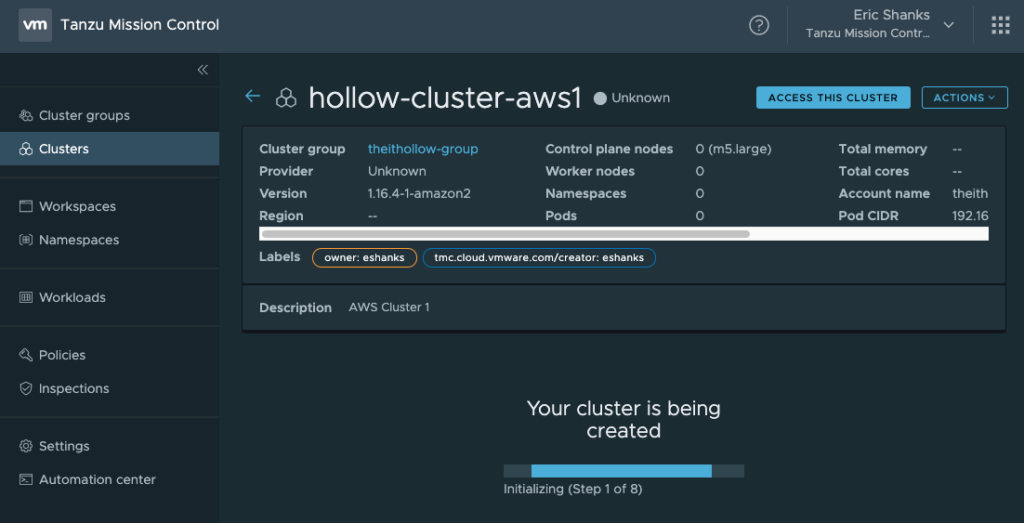
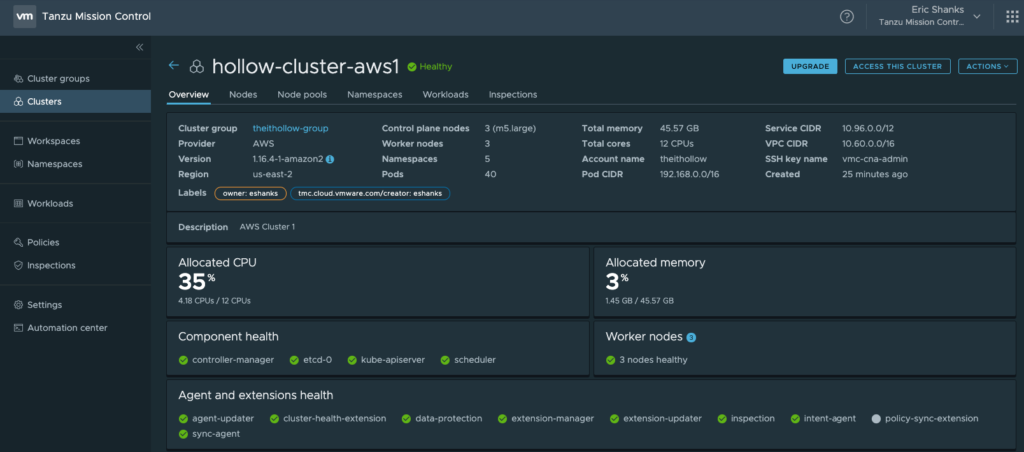
Once the cluster is built, we’ll see some details about the component health, nodes, etc.
Access Your Cluster
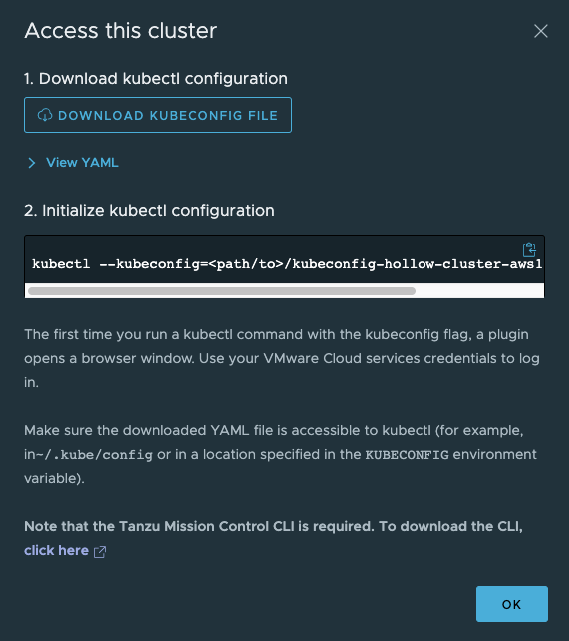
OK, last step should be accessing your cluster. To do this, we can use the “Access this cluster” button in the top right hand corner of your cluster health screen.
This screen will give you the details to download a KUBECONFIG file with your credentials, how to initialize the kubectl config and mentions that you’ll need to download the TMC CLI and place it within your system’s path.
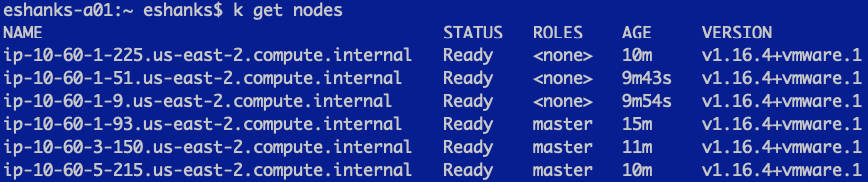
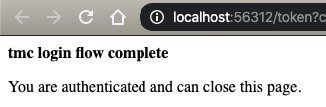
I’ve added my KUBECONFIG file and placed the TMC CLI in my path. After this I tried to run a simple get command as you can see here.

Once I did this the first time, my chrome browser opened up and provided this information, stating that my authentication flow is complete.
Once done I can start running my kubectl commands and I’ve got a working cluster!