The cloud doesn’t need to be a total shift to the way you manage your infrastructure. Sure, it has many differences, but you don’t have to redo everything just to provision cloud workloads. One thing you’ll probably want to do is connect your Active Directory Domain to your cloud provider so that you can continue to administer one group of users. Face it, you’re not going to create a user account in AD, then one in Amazon and then another one in Azure. You want to be able to manage one account and have it affect everything. Microsoft Azure allows you to extend your on-prem domain to the Azure portal. This post focuses on the AD Connector and doing a sync.
NOTE: Microsoft has recently been moving services from its “Classic Portal” over to the new Azure portal. However, some resources you’ll notice look like they come from an older portal. While this is confusing, Microsoft has added the services to the Azure portal menu, but you may be redirected to a different screen to configure them. Active Directory is one of these services at the time of this blog post.
Azure Preparation
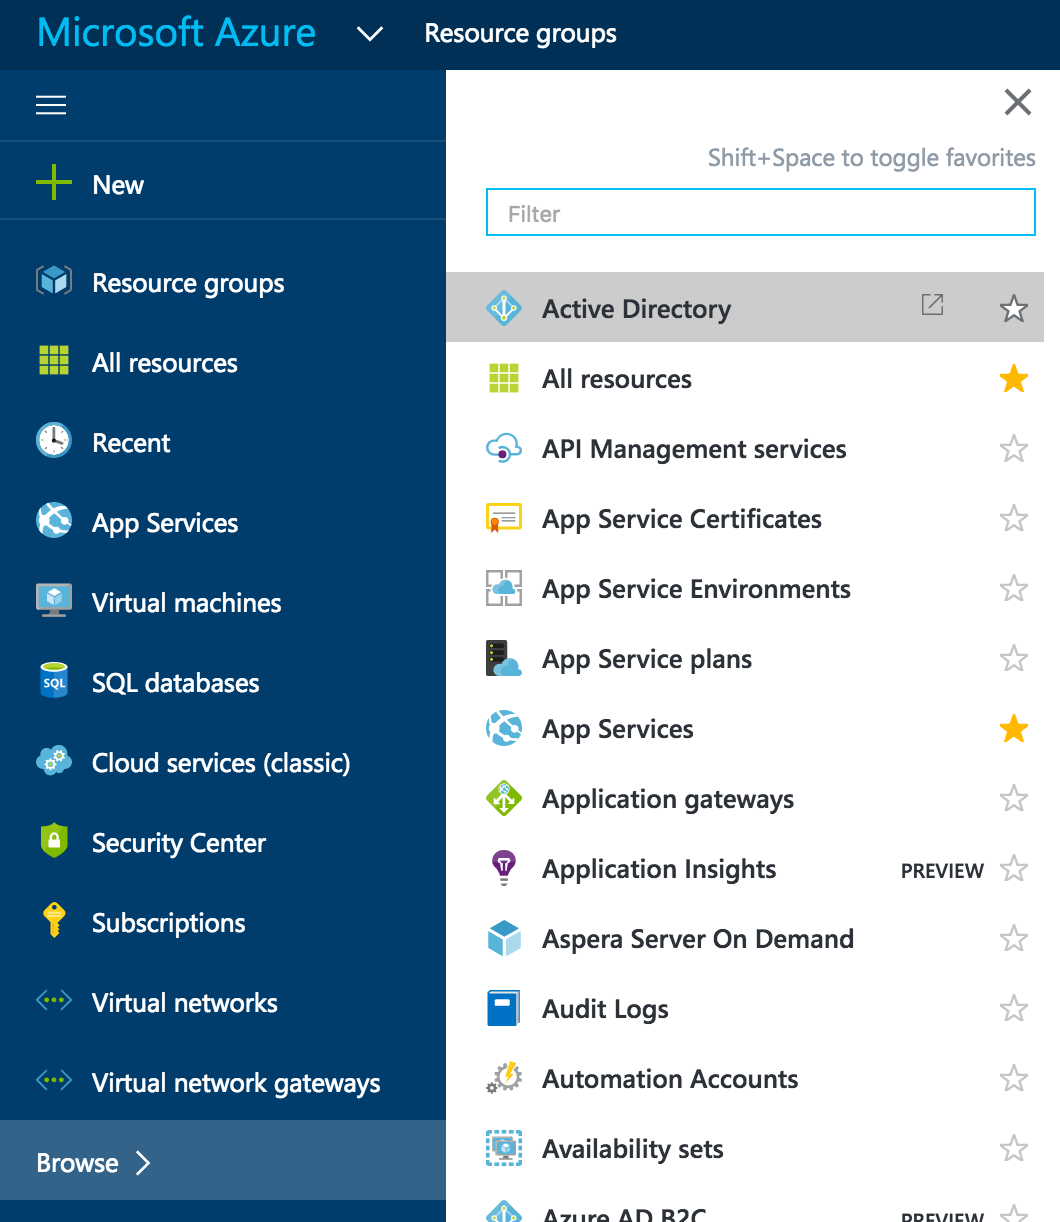
Make sure that you have a routable domain name listed in directory services. To do this, go to your Azure portal login and go to Browse –> Active Directory
NOTE: Microsoft recently ported Azure Active Directory over from the Classic Portal to the new Resource Manager portal. Steps in this post should be similar, but screen shots may be different as of 9/27/16 when Azure AD went GA on ARM.
When the Active Directory Screen comes up, go to the Domain’s page. Here you’ll notice an on.microsoft.com domain which is the default domain added when you setup the service. You can add a domain here as long as you own the domain. I’ve added my domain name here and got it verified by following the process located here: Guided Walk Through
NOTE: You may notice that your account already had a custom domain name added if you’re using Office365 for email services. If the account used to setup an Azure account is the same as Office365 account, they will share these resources.
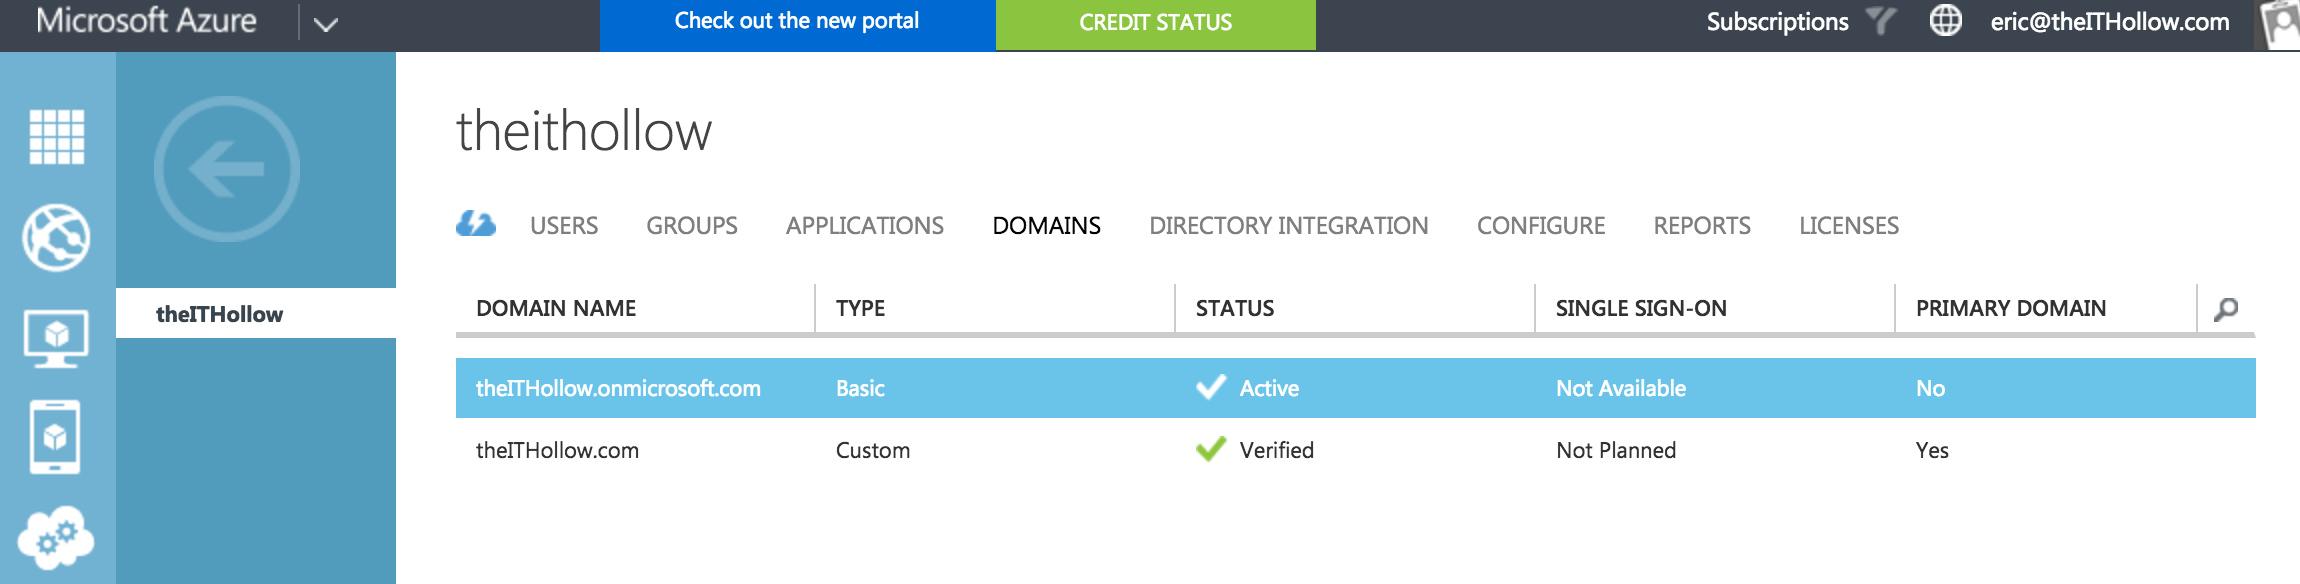
Once you’ve gotten your domain setup, you can set your primary domain so that your users show up with the custom domain instead of the .onmicrosoft.com default domain thats given to you when you sign up.
Install Azure AD Connect
Now that Azure is setup and ready, we need to install the Azure AD Connect Utility on your server. The first thing to be done is to download the utility. This utility will give you several options for installation. This post focuses on a directory sync but federation is also an available option.
Before you begin, make sure that .Net Framework 4.2.1 or later is installed. I’m assuming for this post that you’re running the AD Connect installer on a Windows Server 2012R2 server. Run the installer and agree to the license terms and privacy notice. (There may or may not be a quiz on those at the end so be prepared.)
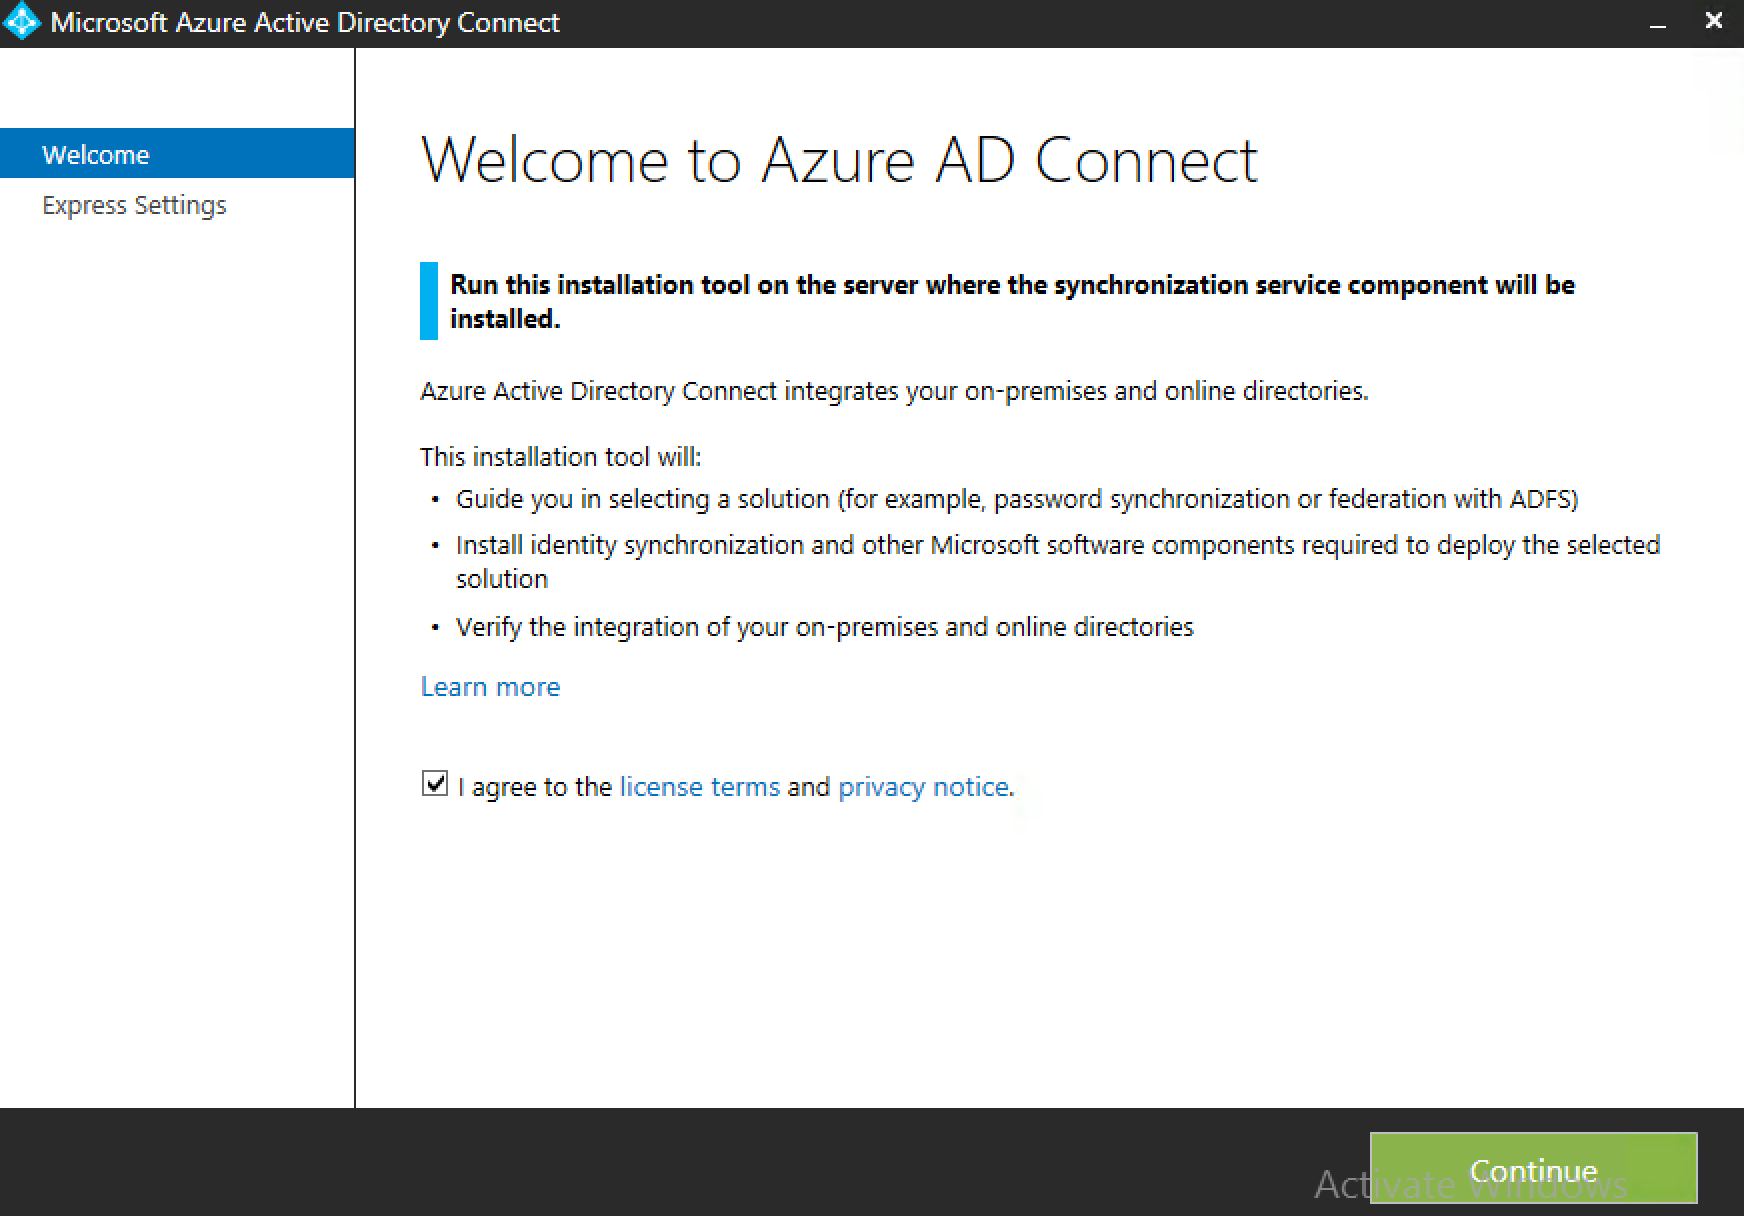
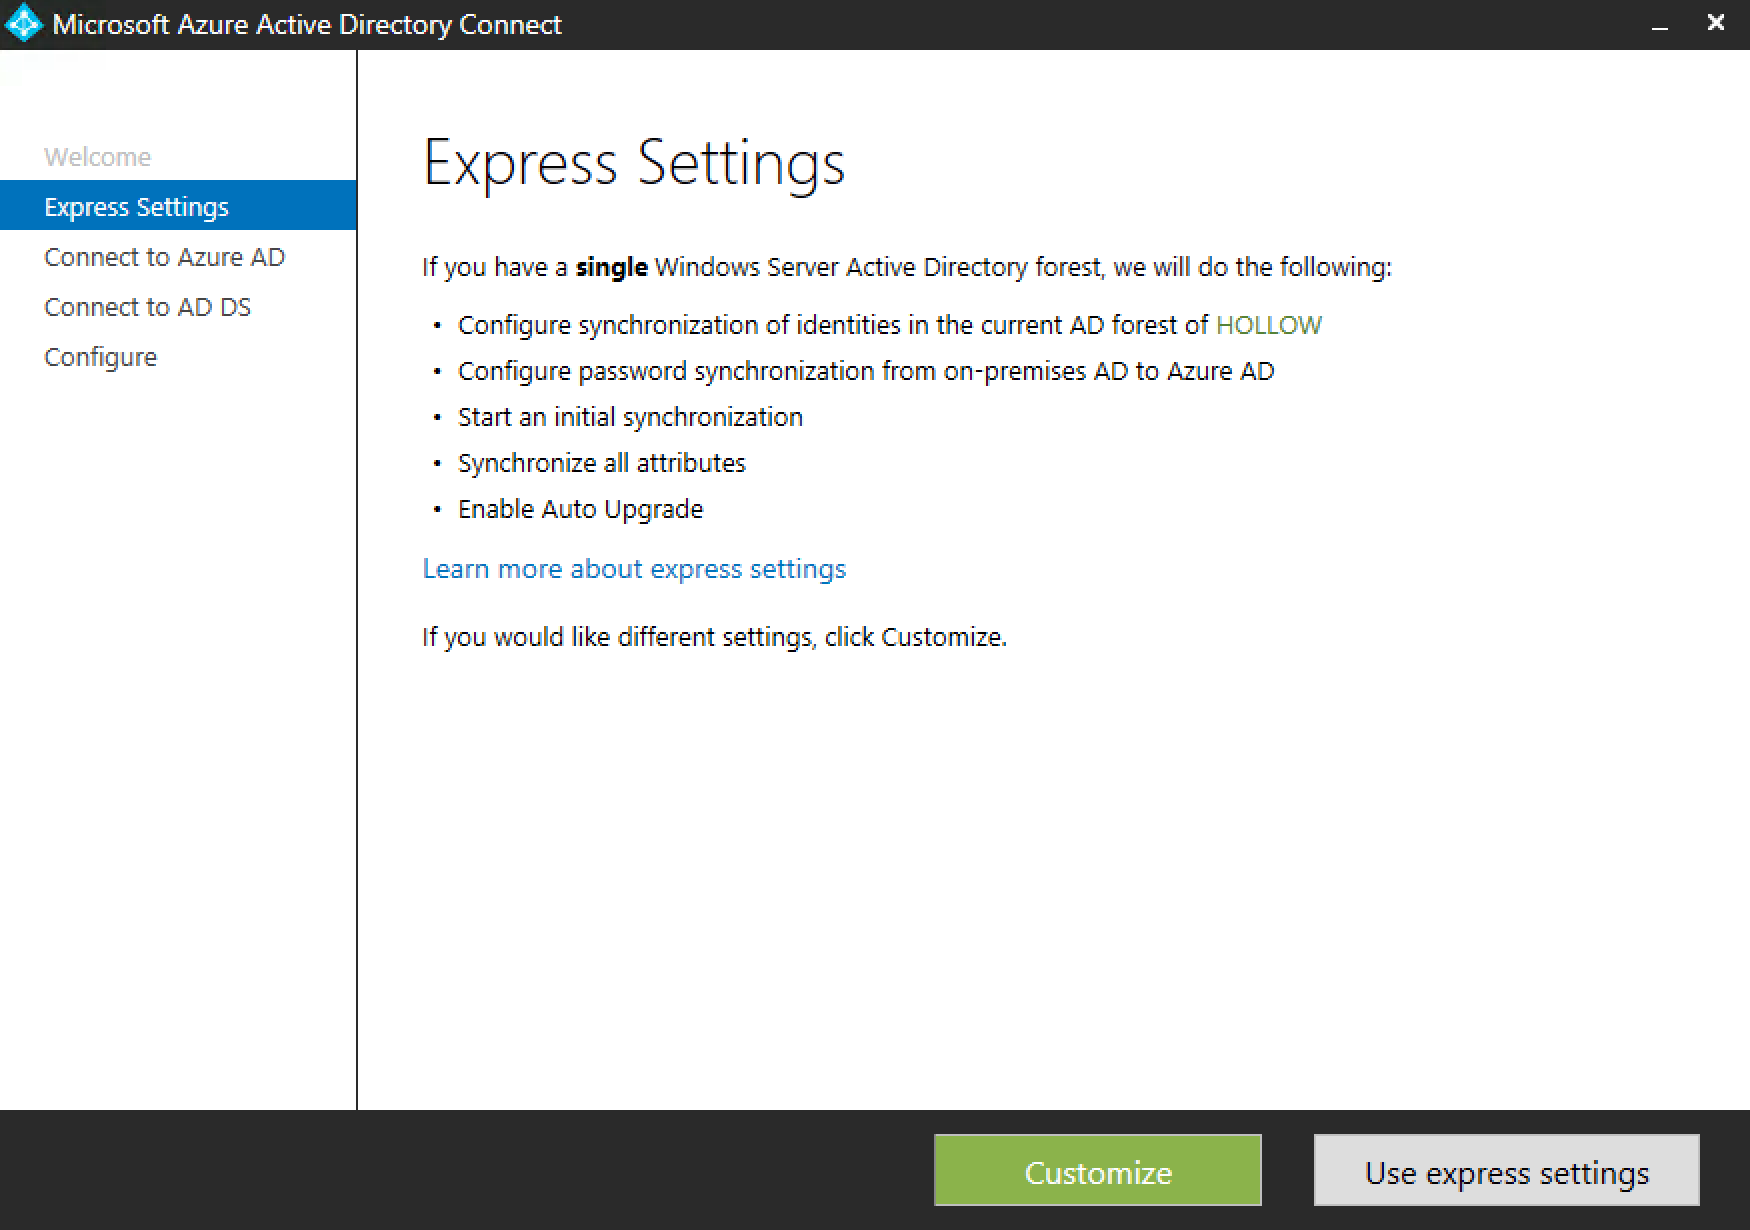
The next screen will let you choose whether or not to use a customized install or the express settings. Even if you want to go express, doesn’t it make you feel better to use the customized one so you can at least see the pieces being configured? I chose customize.
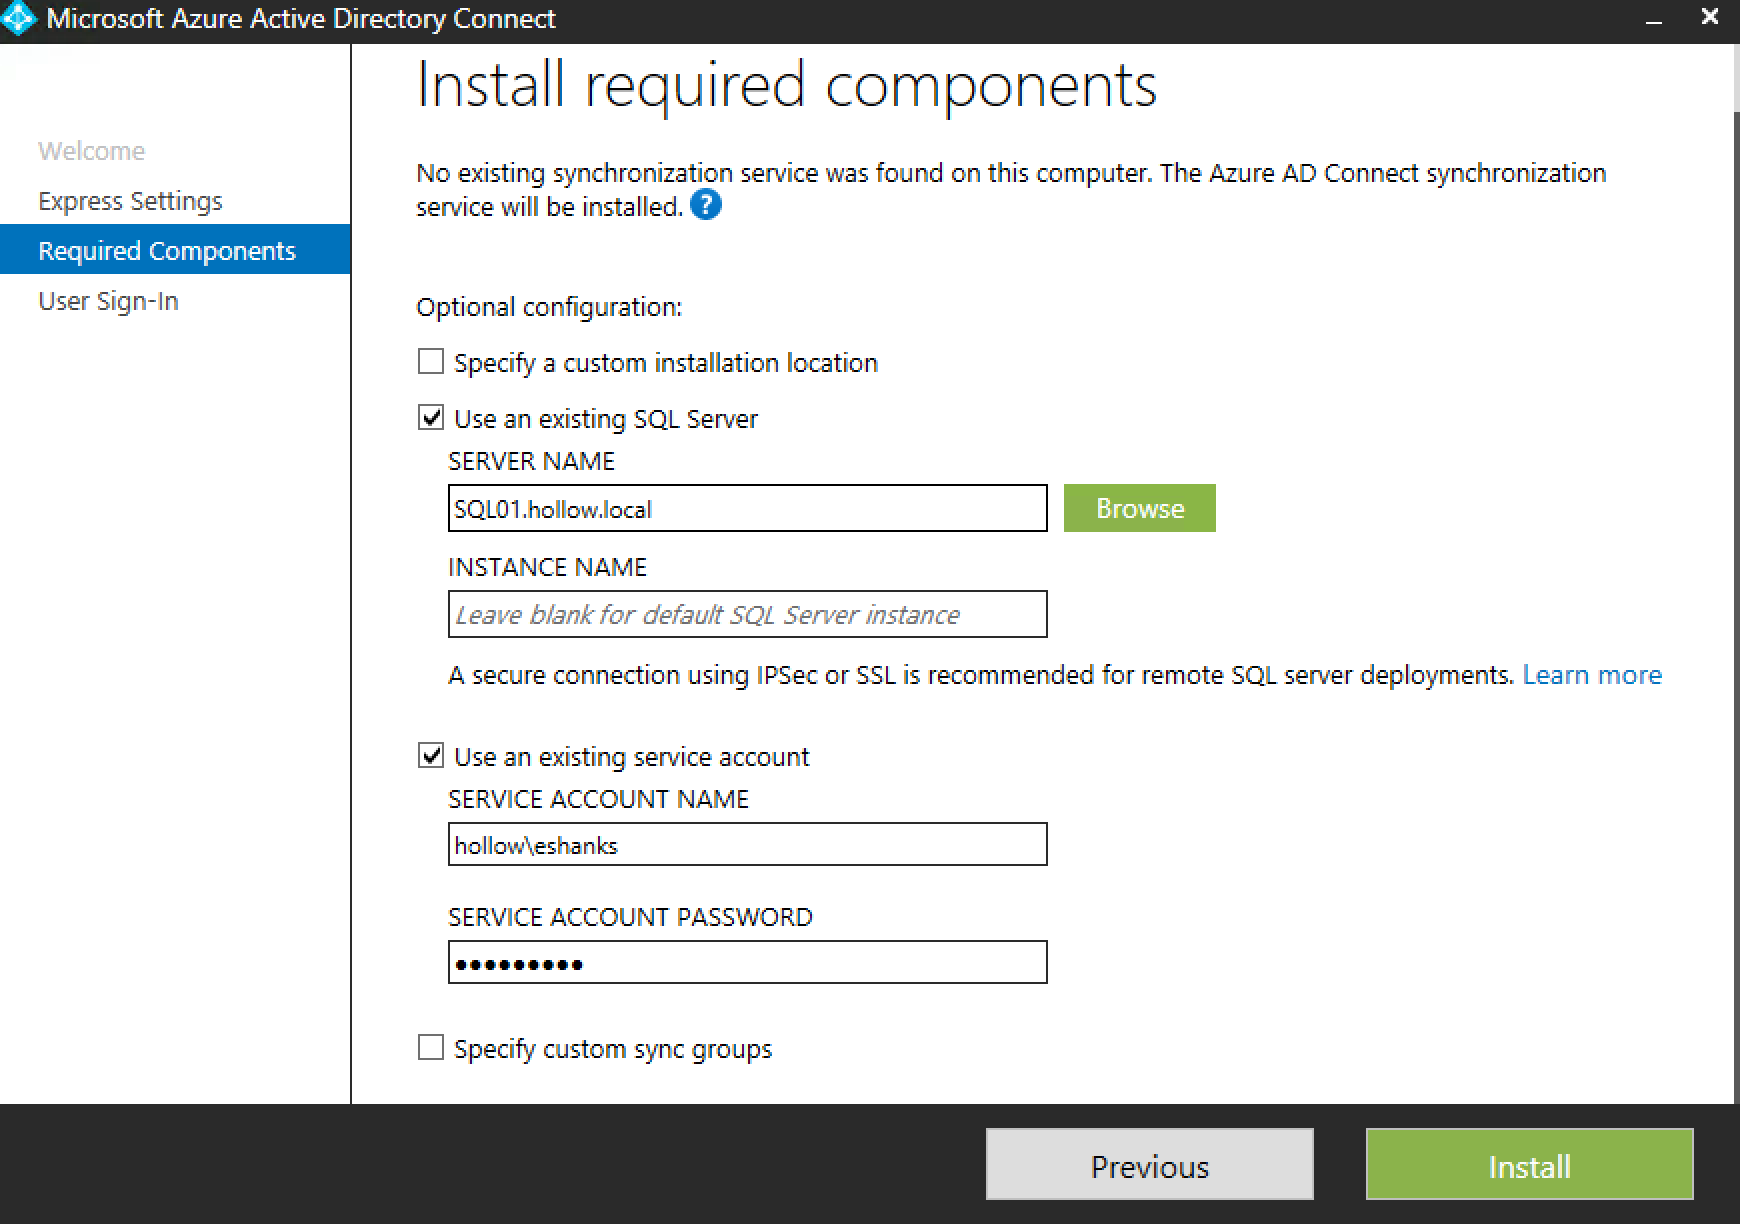
The next screen lets you change the location of the install, whether you want to use an existing SQL database, a service account of your own, and customized sync groups. I modified the SQL server to use my own SQL database, and entered my own service account that the utility will run under. Click Install.
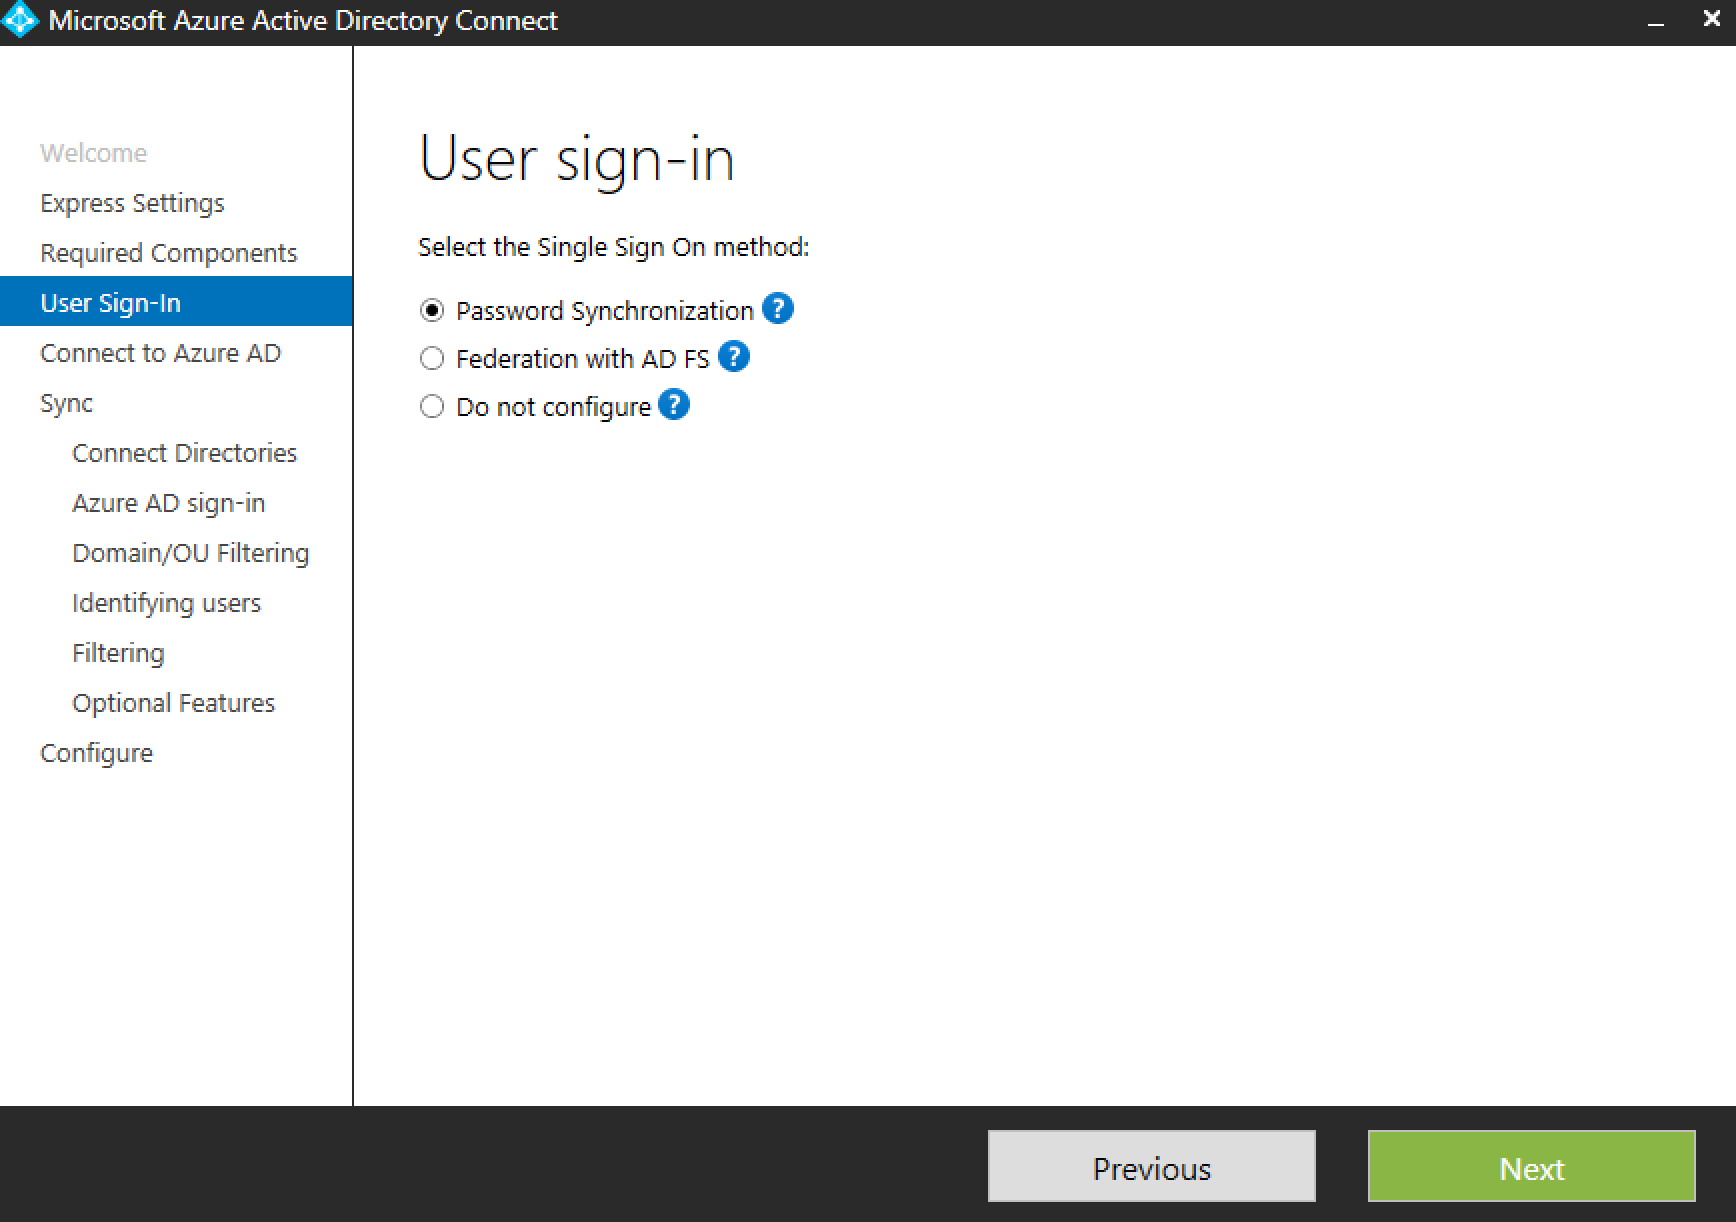
Under User Sign-In, select the method that will be used. Password Synchronization might not be the best way to manage this for an Enterprise since there will be a bit of a lag between syncs and stores a password hash in the cloud. The benefit is that it’s easy to setup. A Federation instance with AD FS may be considered the more secure option for an enterprise so that it keeps all the data on-prem and only passes a token for authentication. Anyway, this post is for a Password Synchronization setup. Click Next.
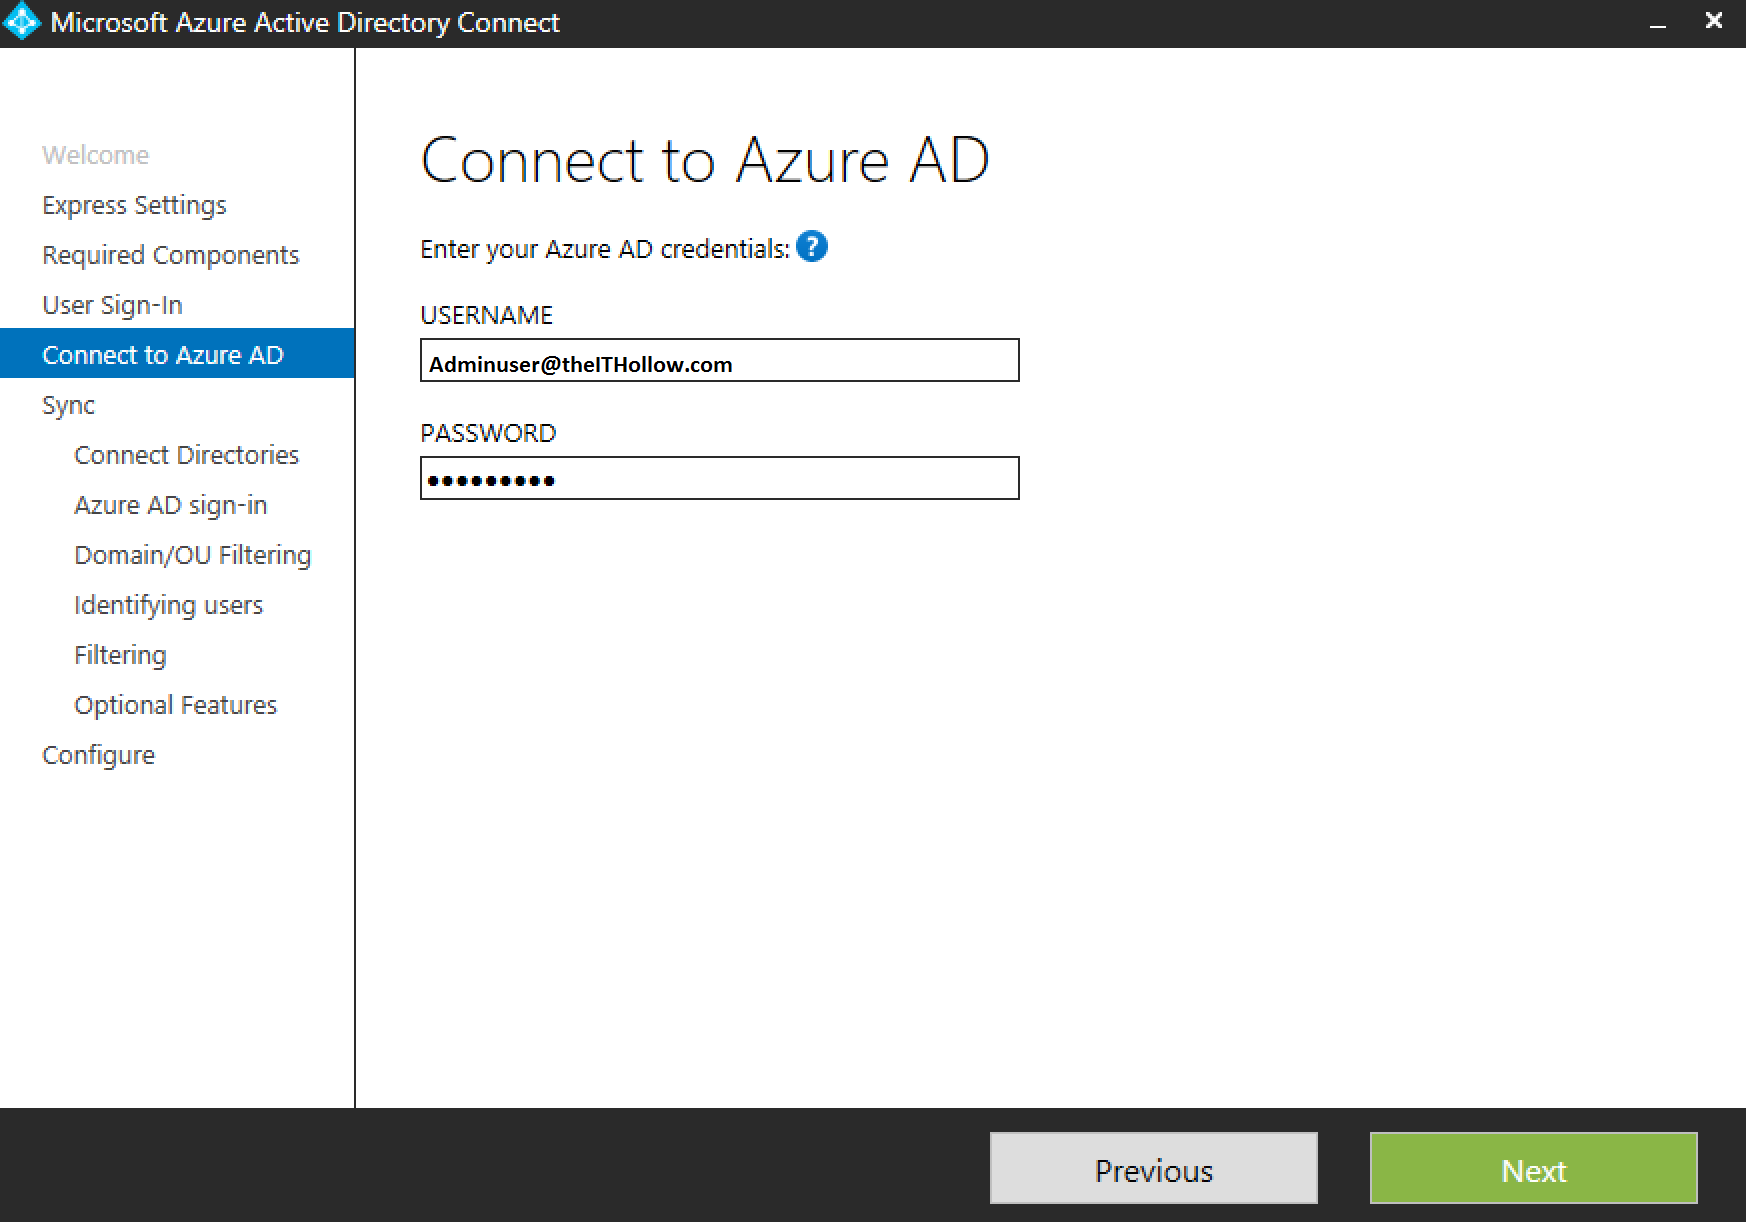
Next, enter Azure Credentials that will be used to create a service account. Click Next.
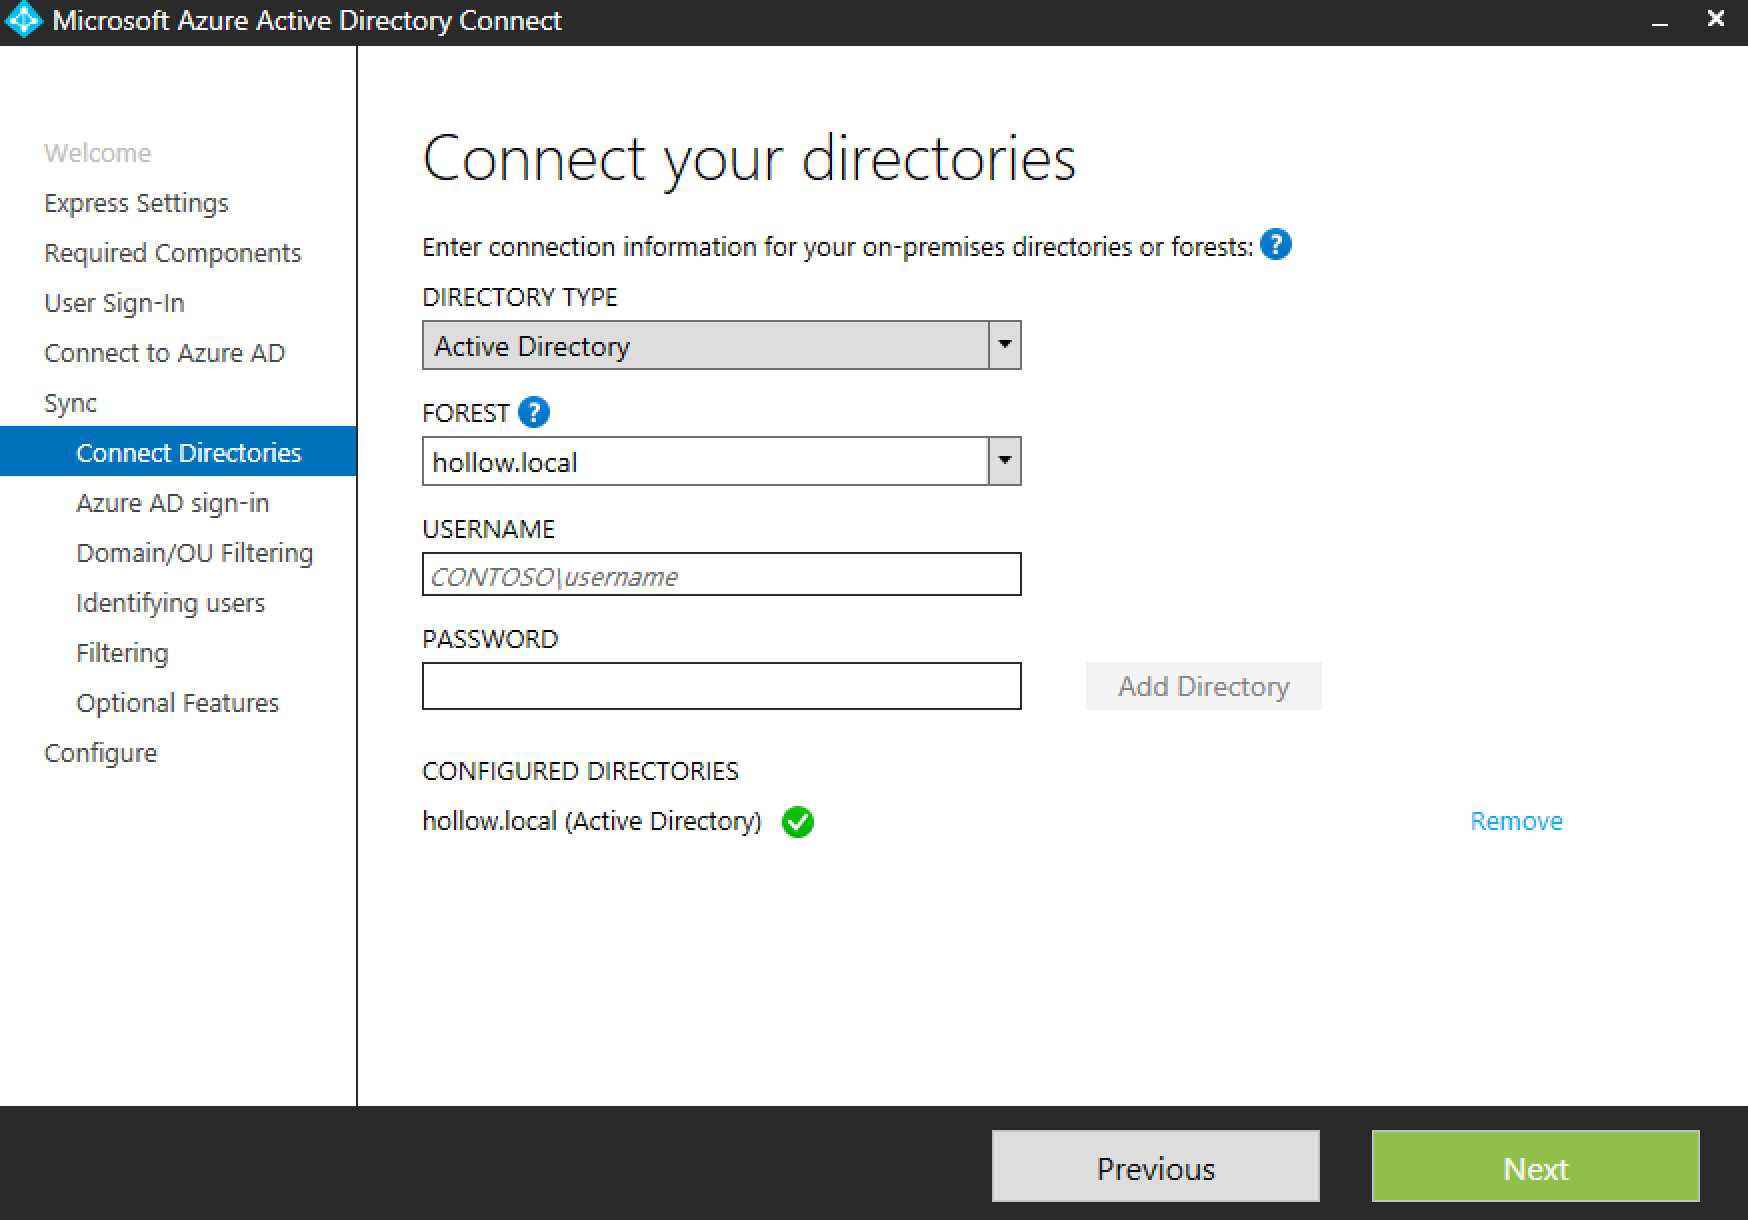
Next, add your local domain information. A verification step will be completed after the directory is added, to ensure that it has proper login information. Click Next.
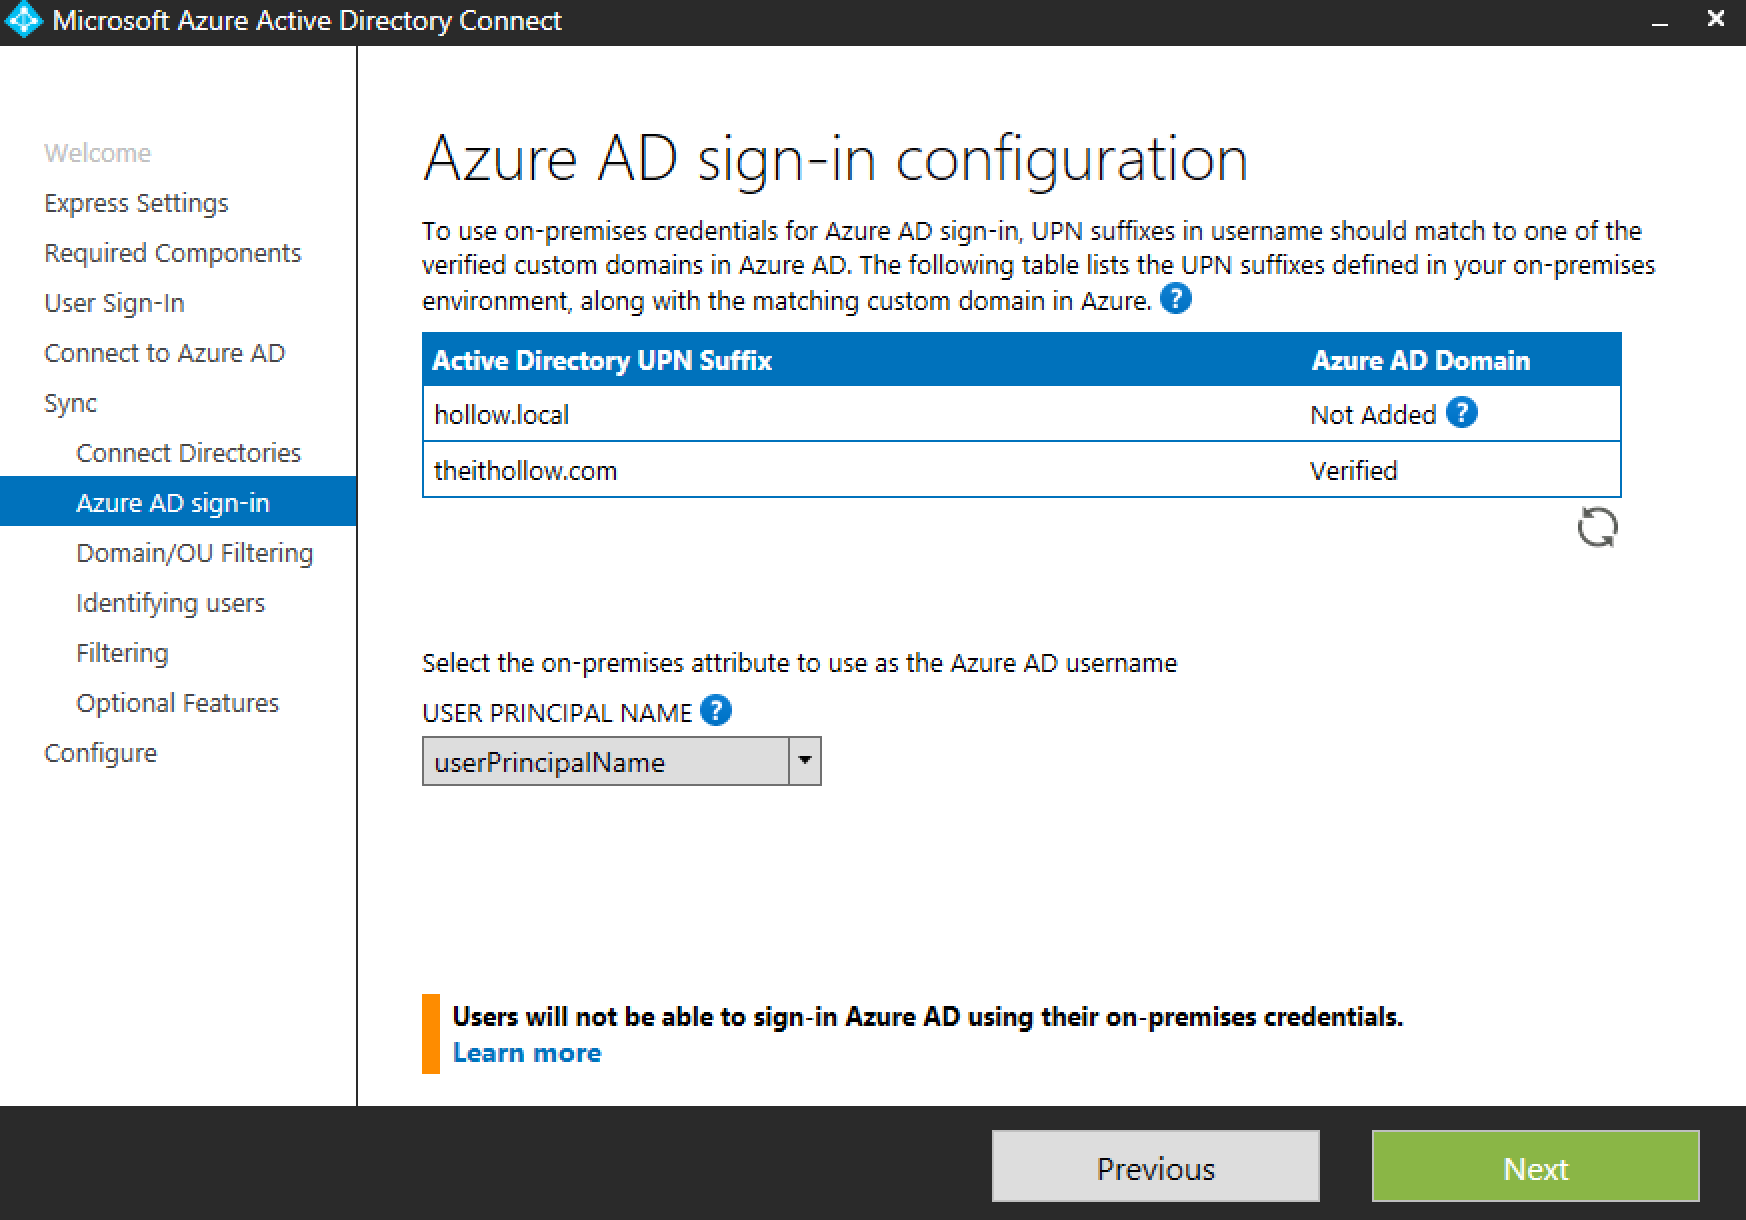
Next you’ll need to select the attribute to use as the login. I’ve chosen the User Principal Name. Remember when we added our domain to the Azure portal and verified it? The name here has to match one of the UPN suffixes that are in Azure.
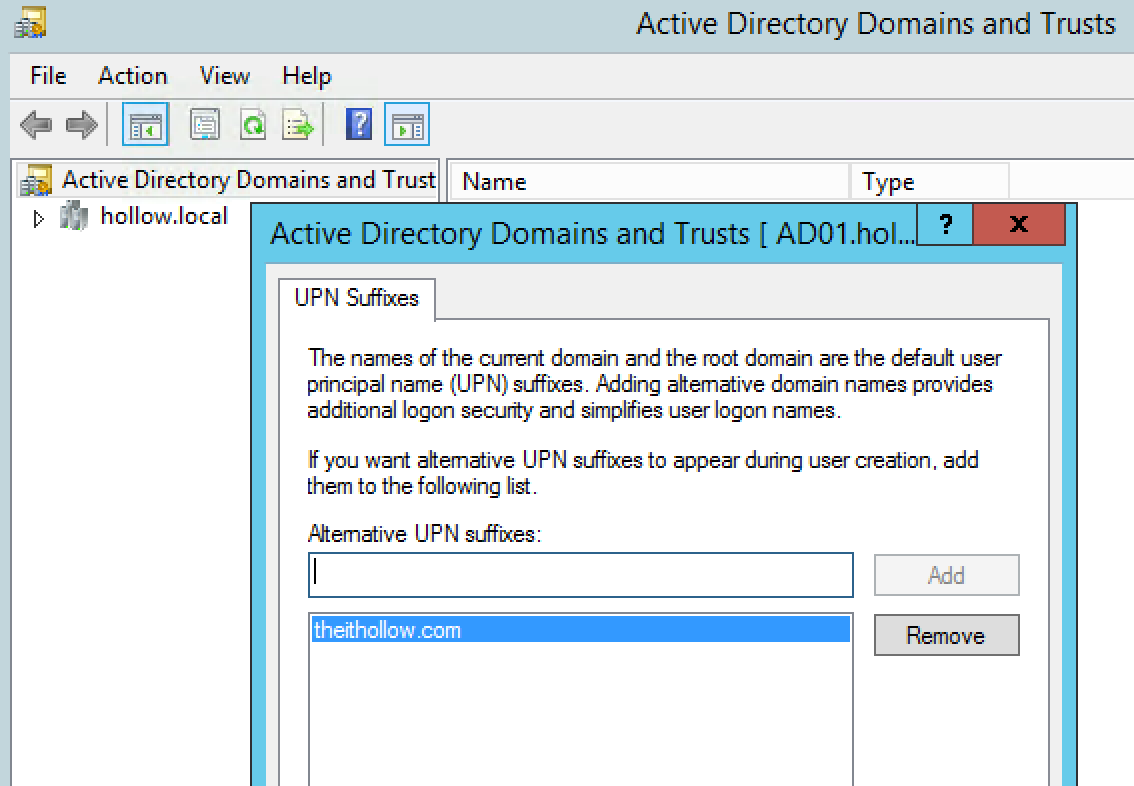
NOTE: If you are like me and had a .local domain this won’t work and you’ll need to add a UPN suffix to your domain in the Domains and Trusts console.
Click Next.
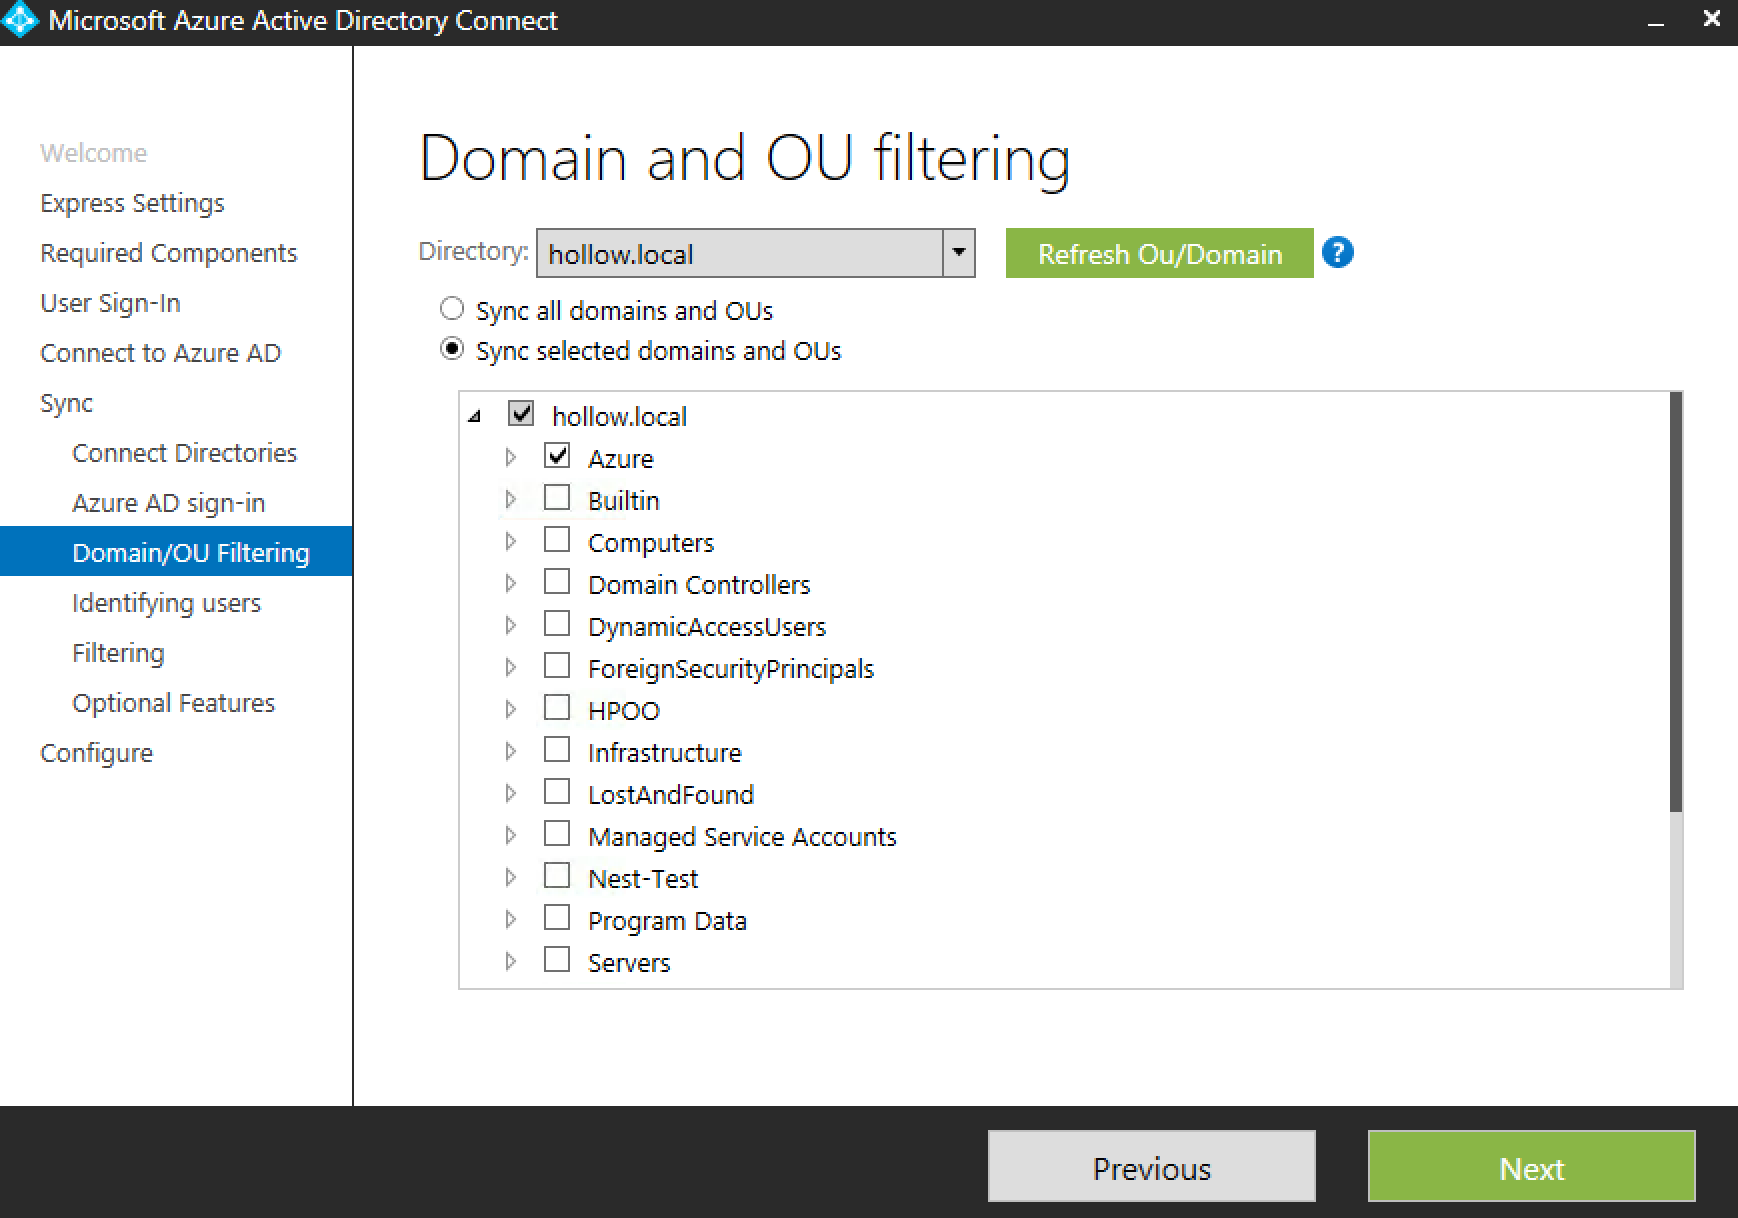
Next, you can select specific OUs to sync or sync everything. I limited my domain sync to only a few OUs. Click Next.
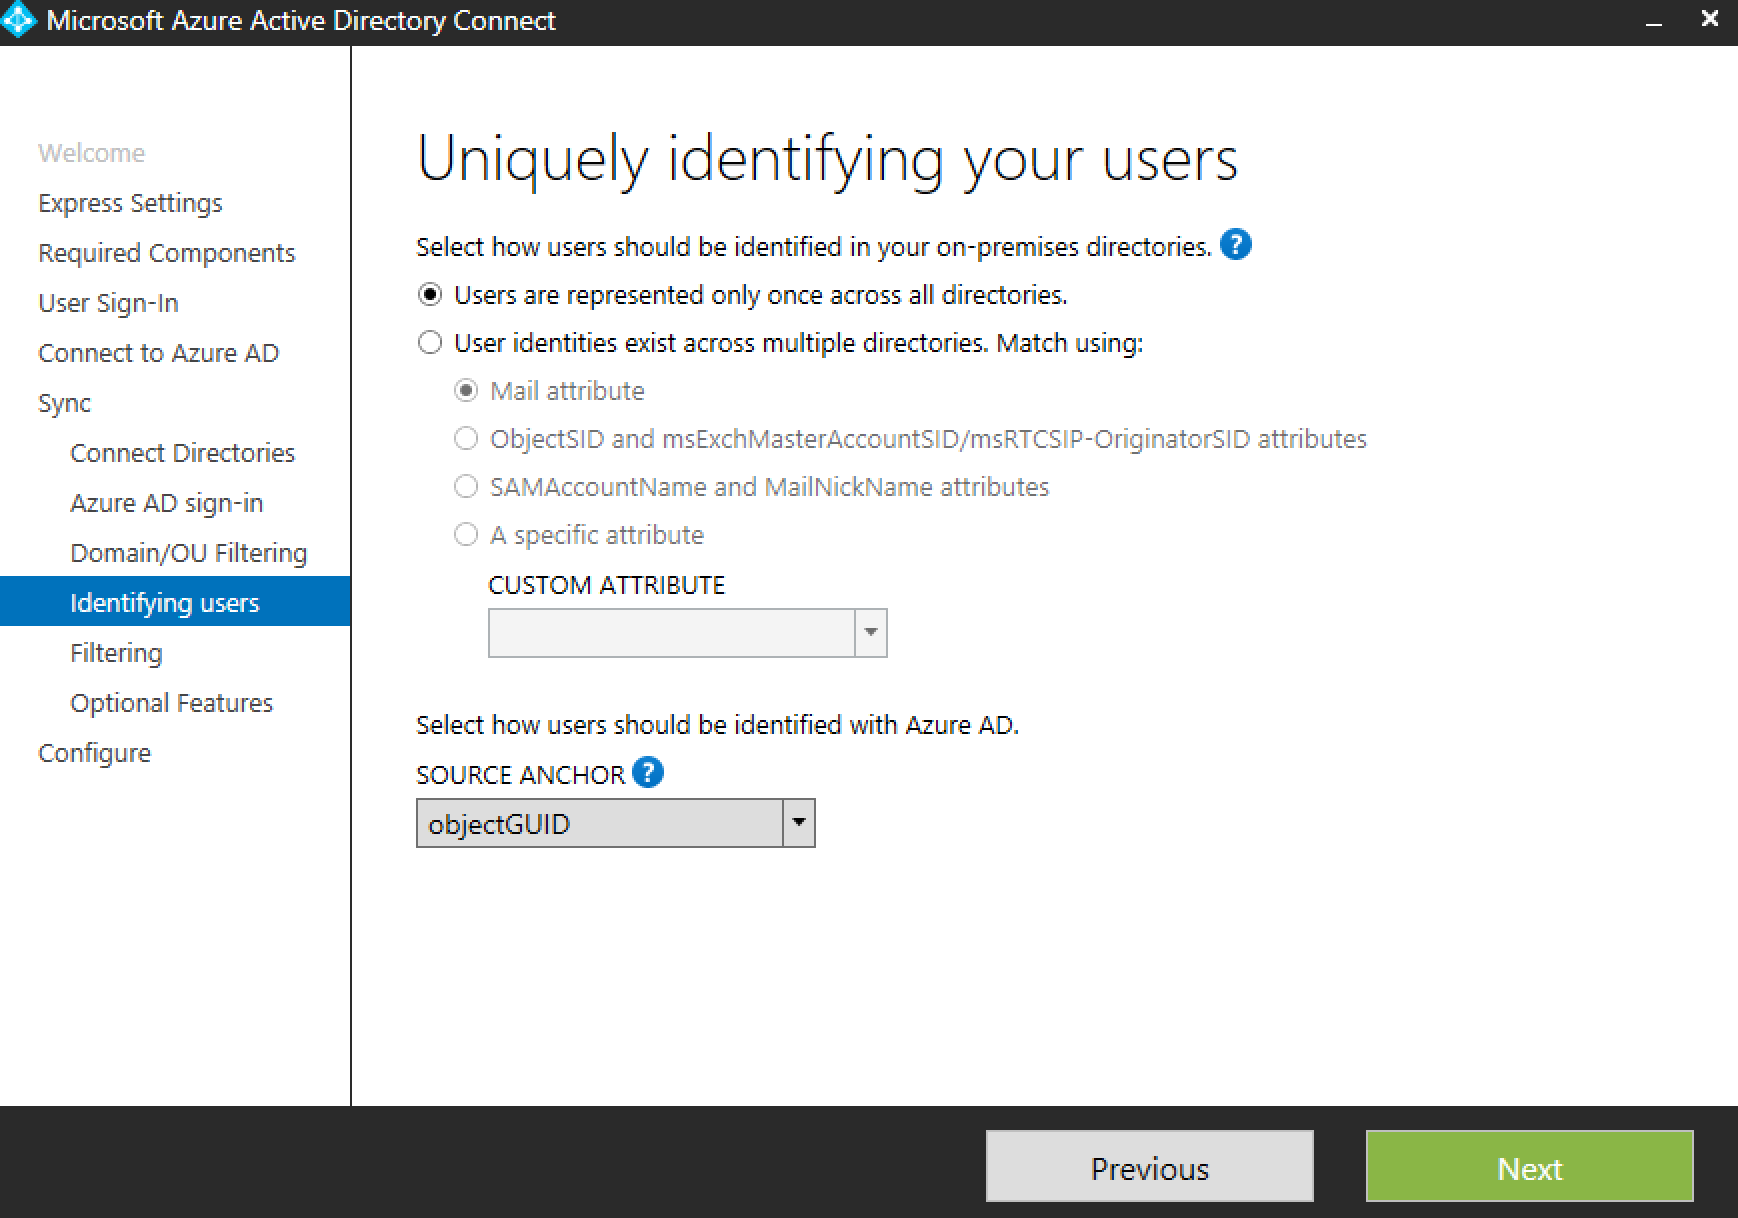
The next screen asks how to handle duplicate ids across directories. Since I’m in a single forest with users that won’t overlap, the default selection works for me. Click Next.
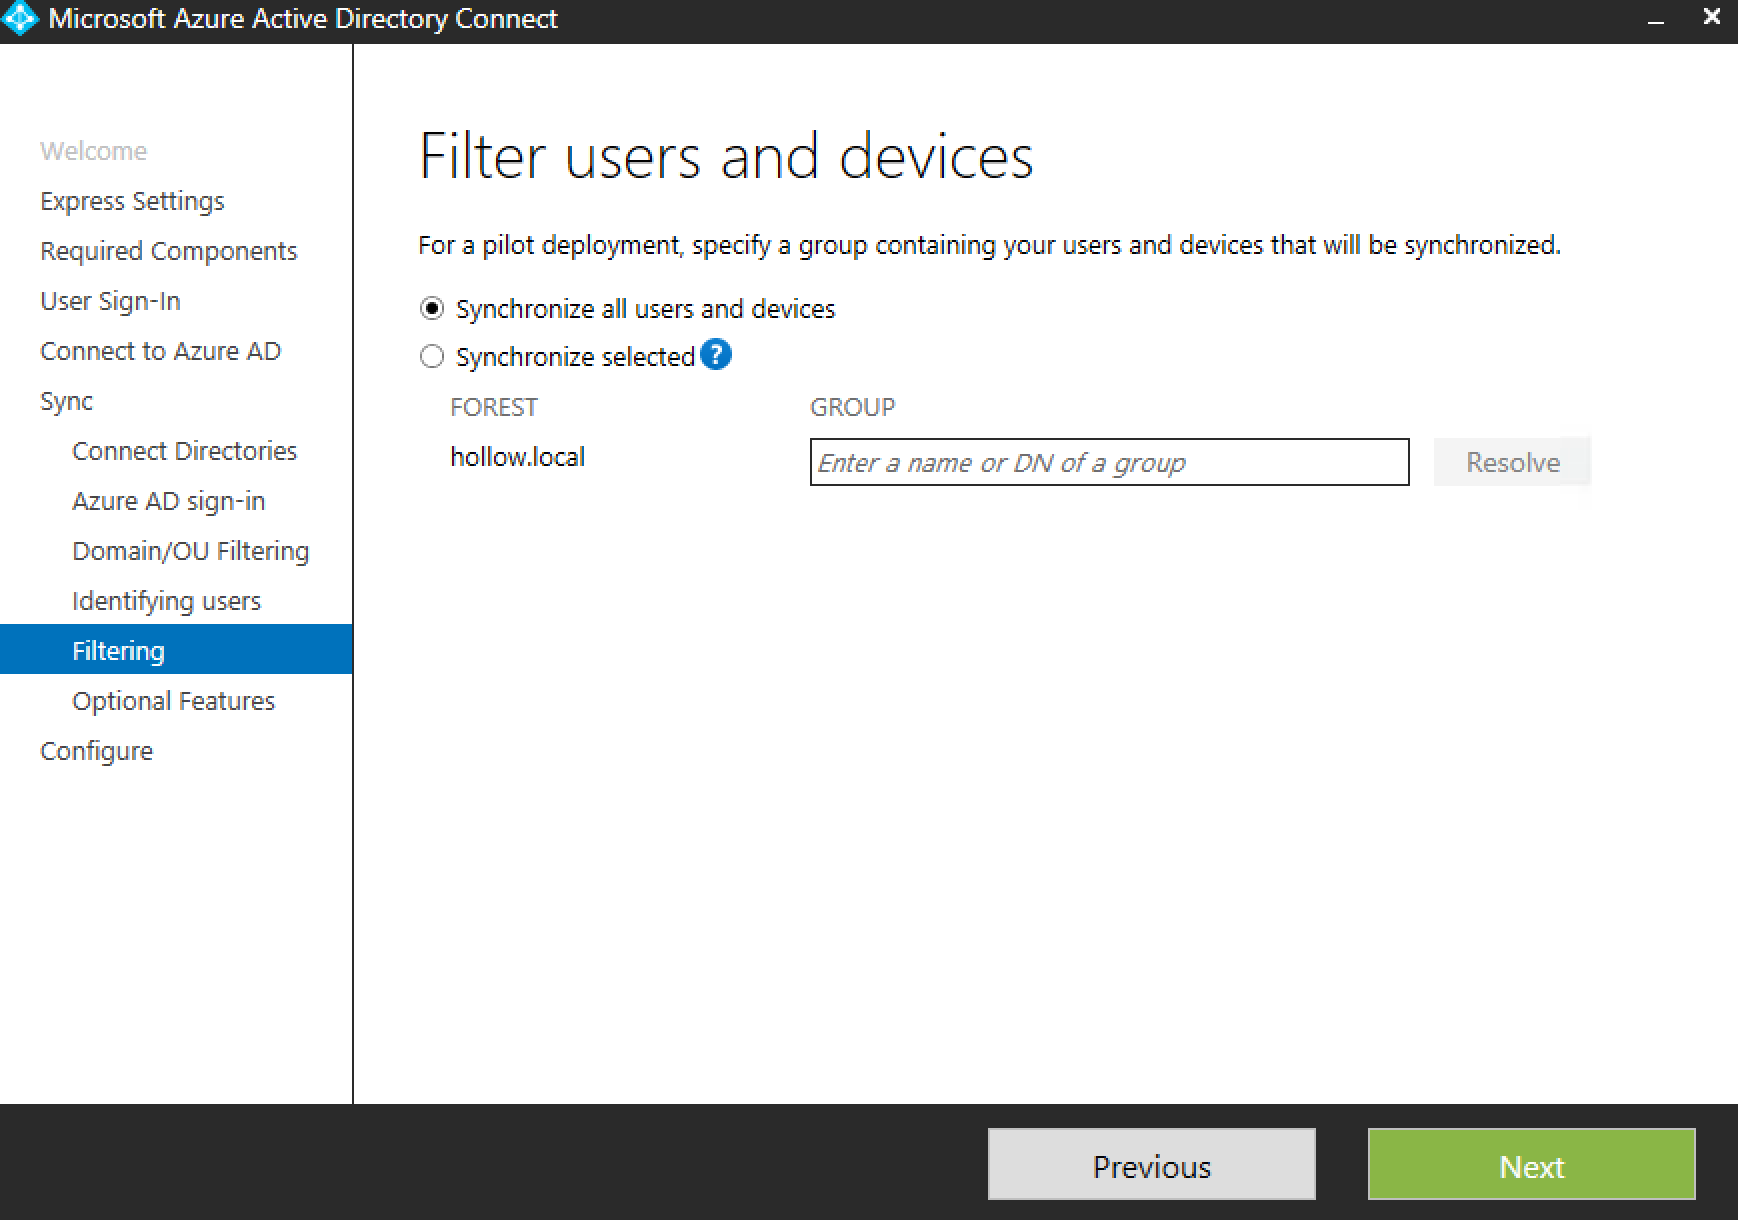
Next, you can further filter users. For instance if you earlier selected the whole domain to sync, but only want one security group to be synced, you can add that filter here. I’ve synchronized all users on this screen because I’ve filtered by a couple of specific OUs that will only contain my Azure users. Click Next.
The next screen allows for some additional features to be added. Additional filtering can be added through “Azure AD app and attribute filtering”. “Password writeback” allows for Azure account passwords to be changed and then sync’d back to the on-prem AD. “Directory extension attribute sync” allows for your AD attributes to be sync’d to Azure. Click Next.

On the last screen, you’ll have the option to start a sync as soon as the configuration completes and/or stage the config so you can see what will happen before the sync occurs. Click Install.
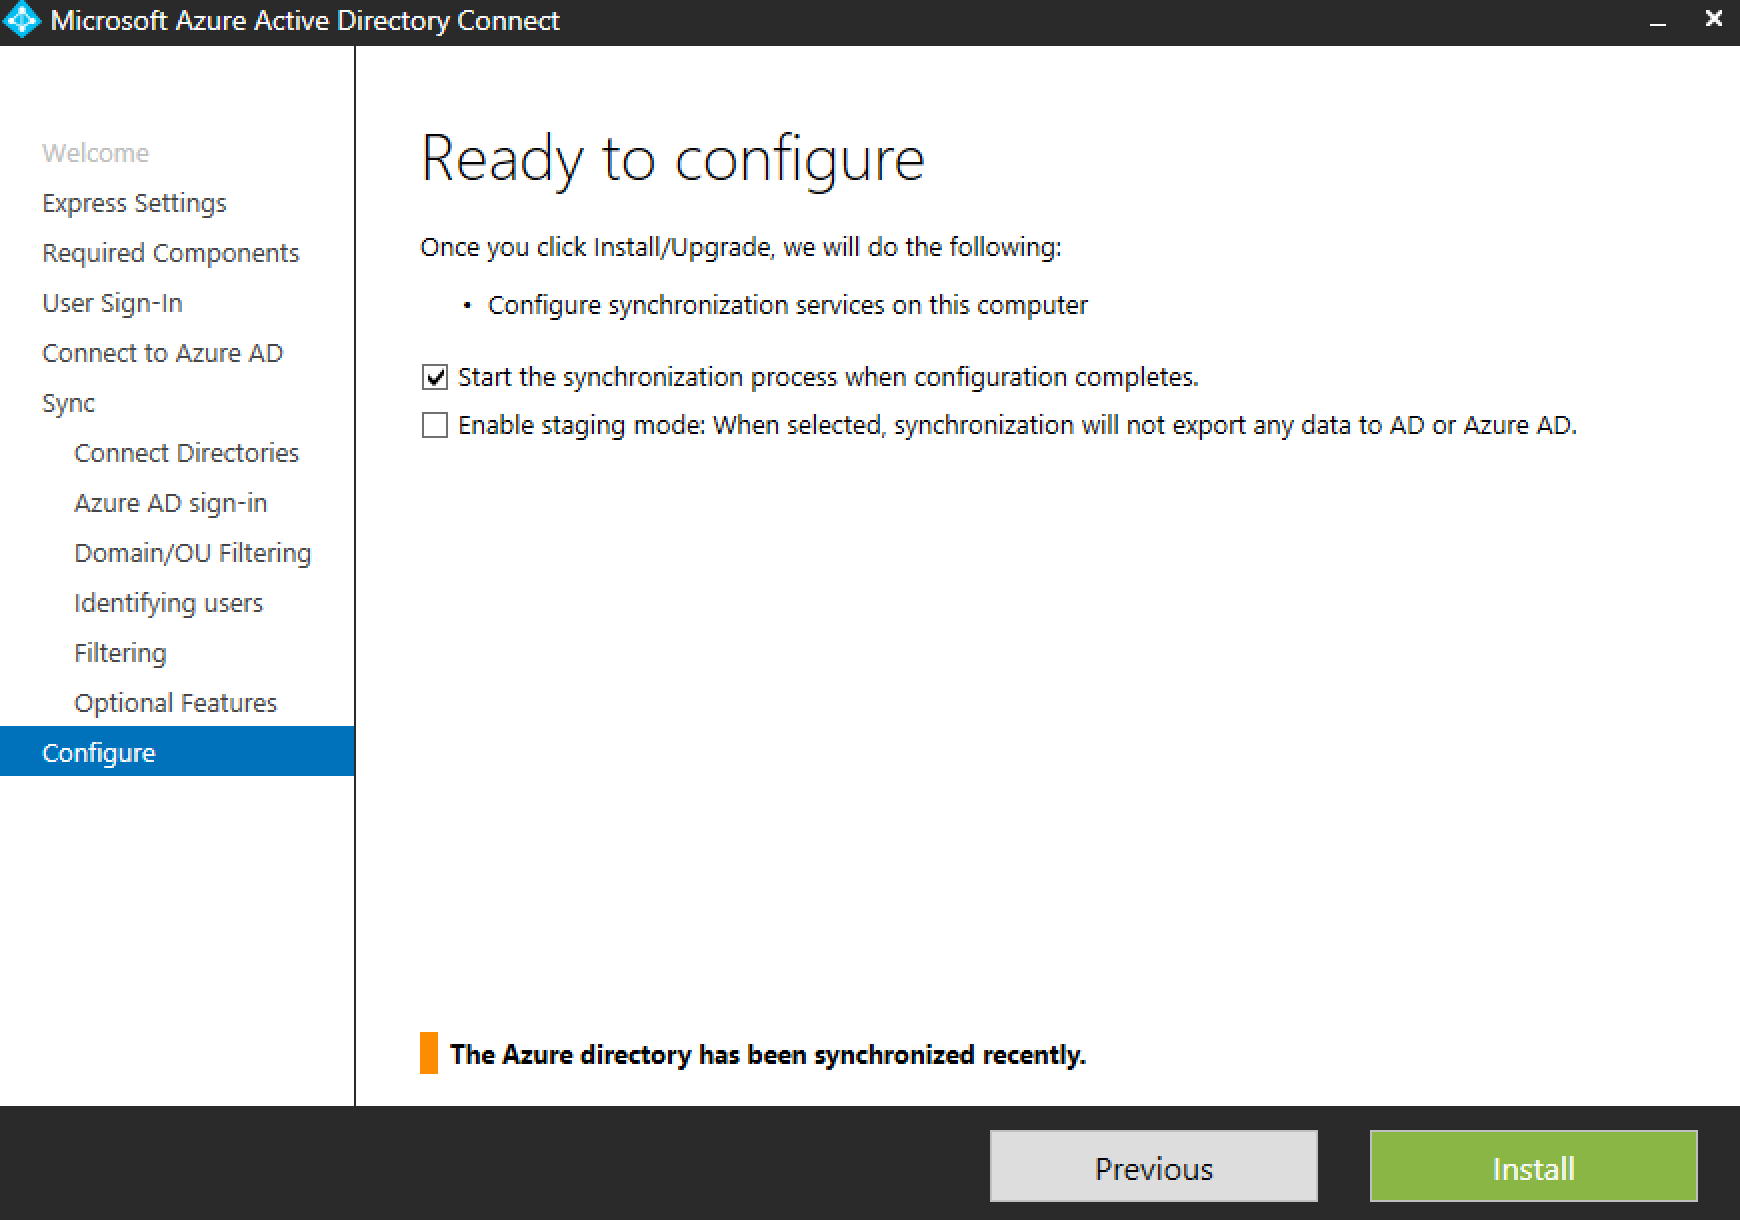
Wait for the configuration to complete.
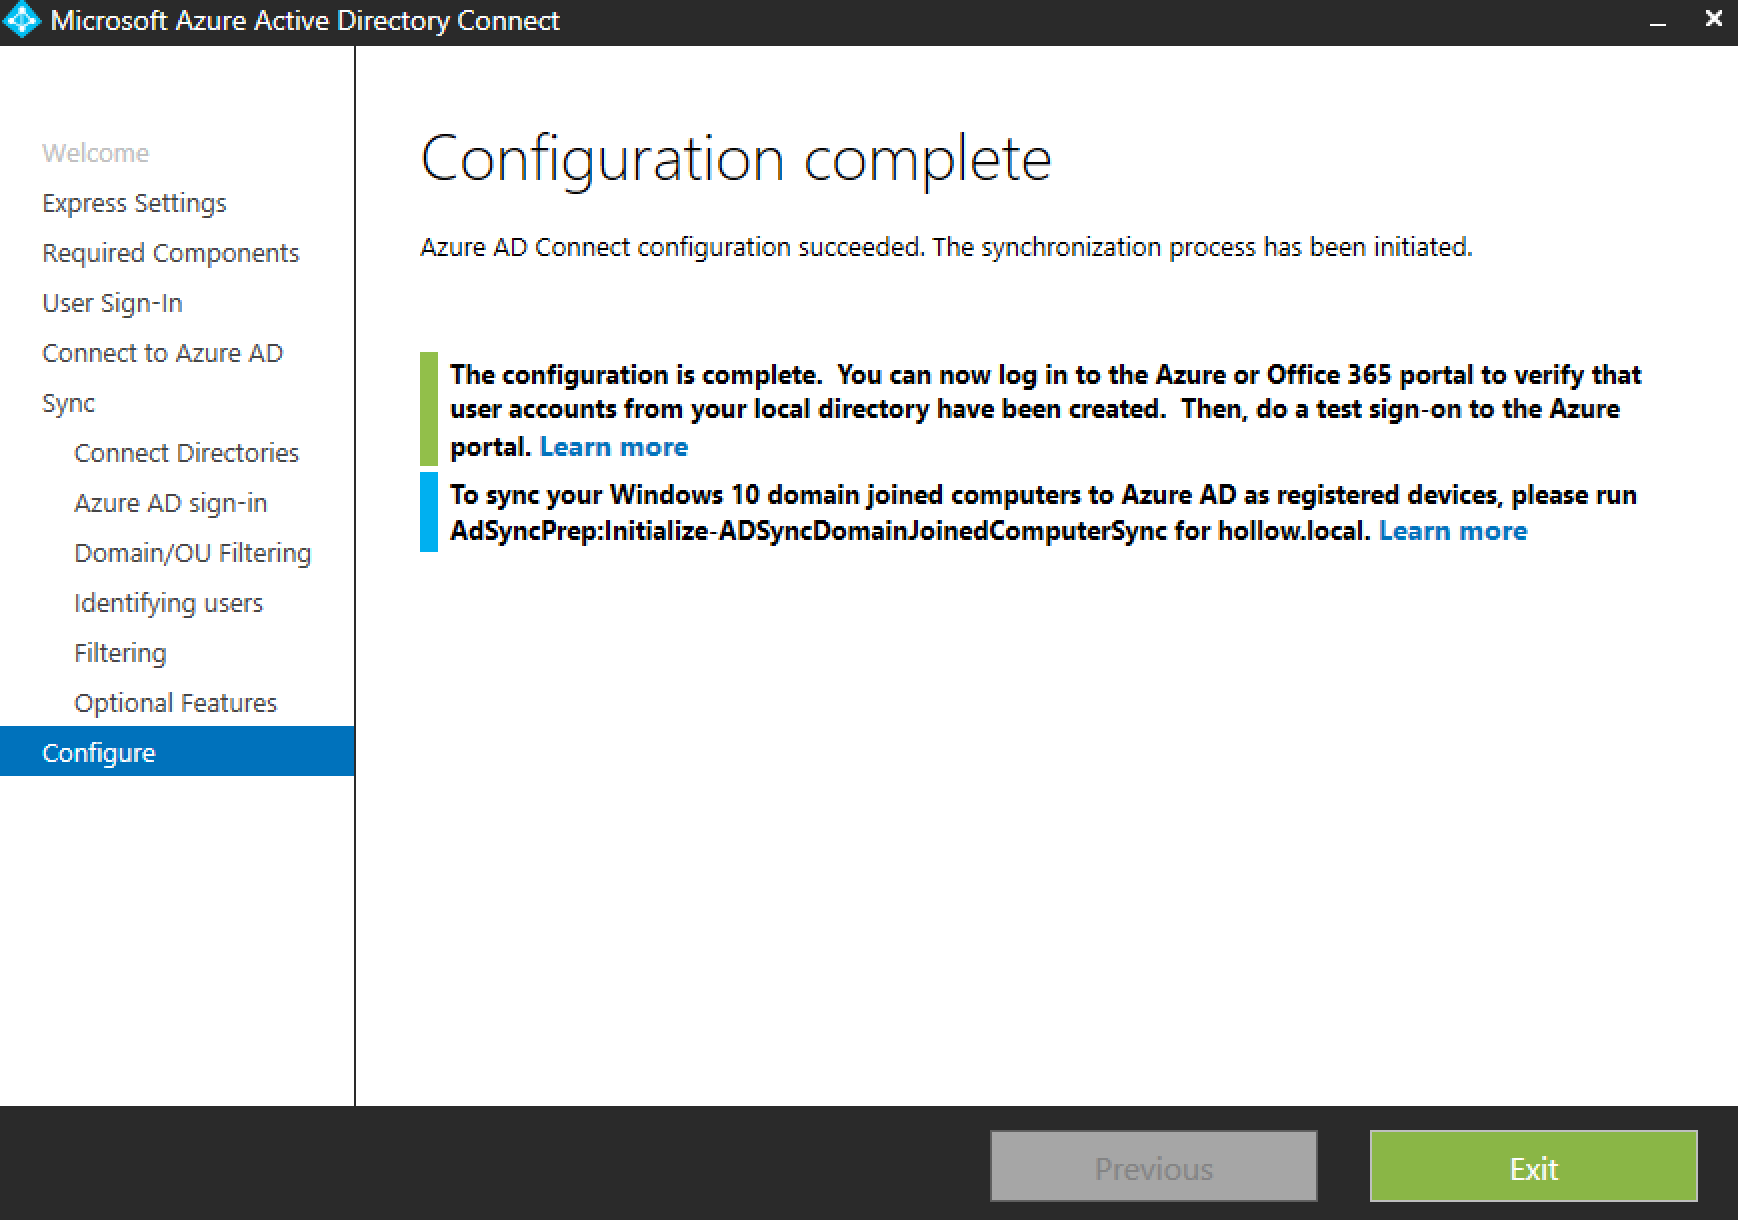
The Results
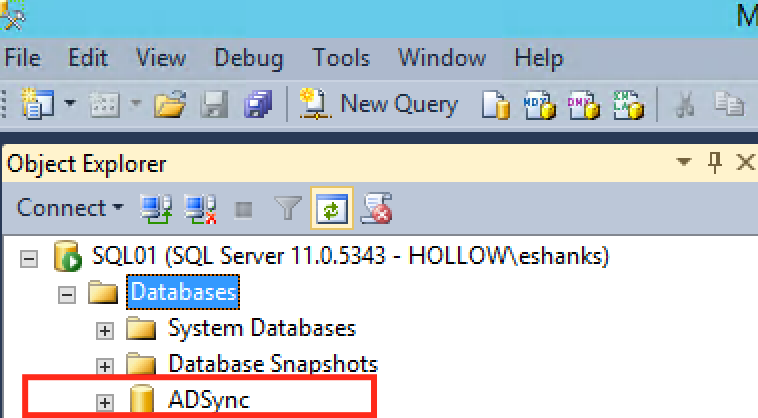
Once the install and configuration is complete, you’ll notice a new database named “ADSync” has been created in your SQL server.
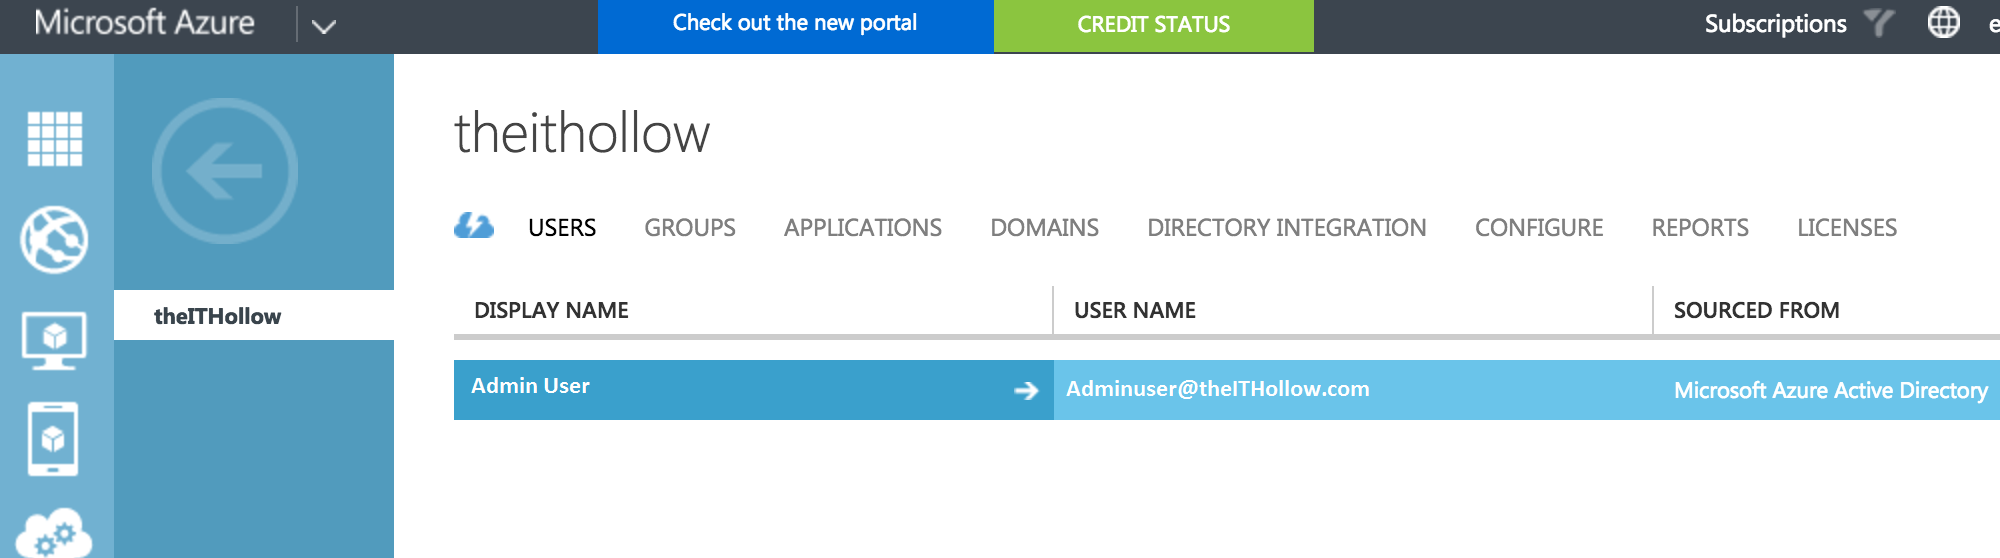
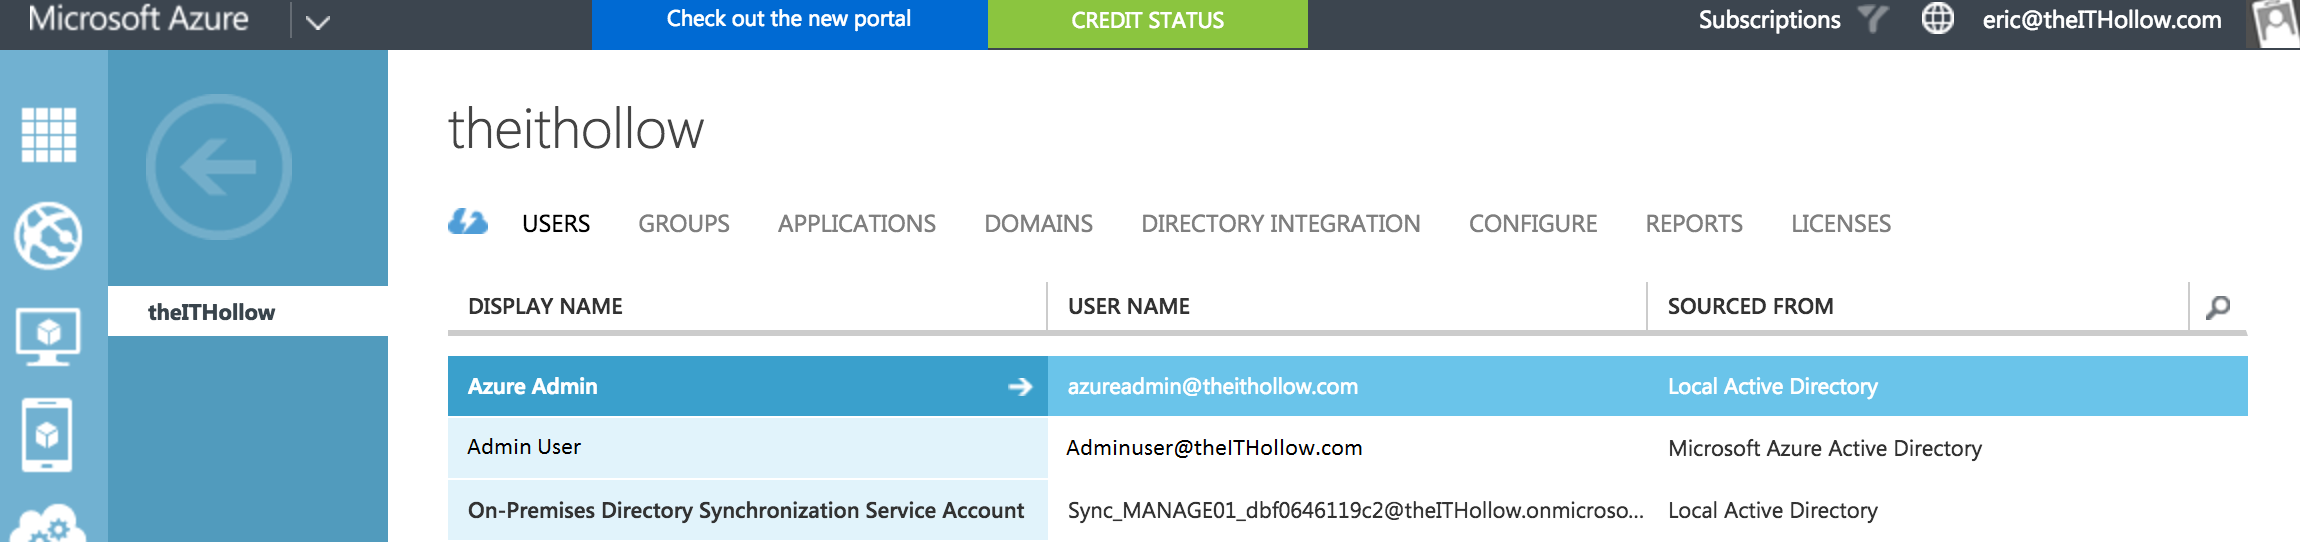
Log back into your Azure portal and look at your list of users. There should be more listed now and you should be able to see a “Sourced From” field that shows where they came from. Also notice that there is an On-Premises Directory Synchronization Service Account as well.
Now you can login to your Azure portal with the accounts provisioned in your own on-premises Active Directory domain.