Amazon announced a new service at re:Invent 2018 in Las Vegas, called the AWS Transit Gateway. The Transit Gateway allows you to connect multiple VPCs together as well as VPN tunnels to on-premises networks through a single gateway device. As a consultant, I talk with customers often, about how they will plan to connect their data center with the AWS cloud, and how to interconnect all of those VPCs. In the past a solution like Aviatrix or a Cisco CSR transit gateway was used which leveraged some EC2 instances that lived within a VPC. You’d then connect spoke VPCs together via the use of VPN tunnels. With this new solution, there is a native service from AWS that allows you to do this without the need for VPN tunnels between spoke VPCs and you can use the AWS CLI/CloudFormation or console to deploy everything you need. This post takes you through an example of the setup of the AWS Transit Gateway in my own lab environment.
Architecture
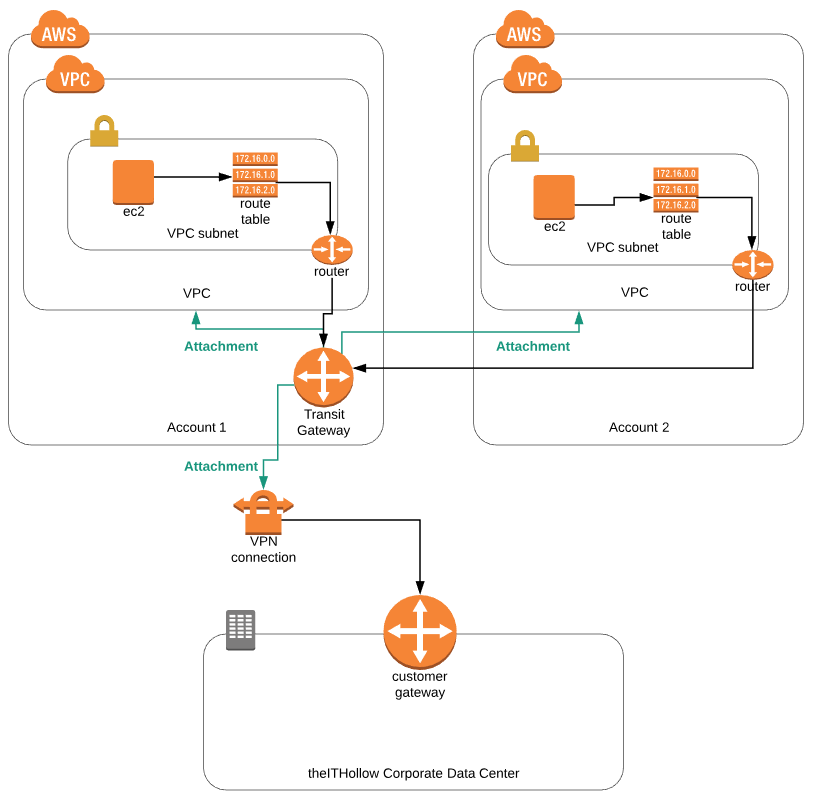
Before we talk about the setup steps, lets take a look at what we’ll be building. The diagram below shows the overall configuration. At the bottom of the diagram we have my on-premises home lab which will be inter-connected to the AWS cloud through a VPN connection terminating a on the Transit Gateway. The Transit Gateway will live within Account 1 and will need to be attached not only to a VPN tunnel, but also to a VPC within the same account and another VPC in a second (spoke) account. The rest of the setup depends on route tables to ensure that EC2 instances will direct traffic destined between VPCs or Data Centers through this transit gateway service.
Setup Transit Gateway Between AWS VPC
First, lets take a look at setting up the Transit Gateway so that machines in different VPCs can communicate with each other through it. To begin, login to the AWS console under the account you want your Transit Gateway to be owned, and look for the Transit Gateways menu under the VPCs window. Click the “Create Transit Gateway” button.

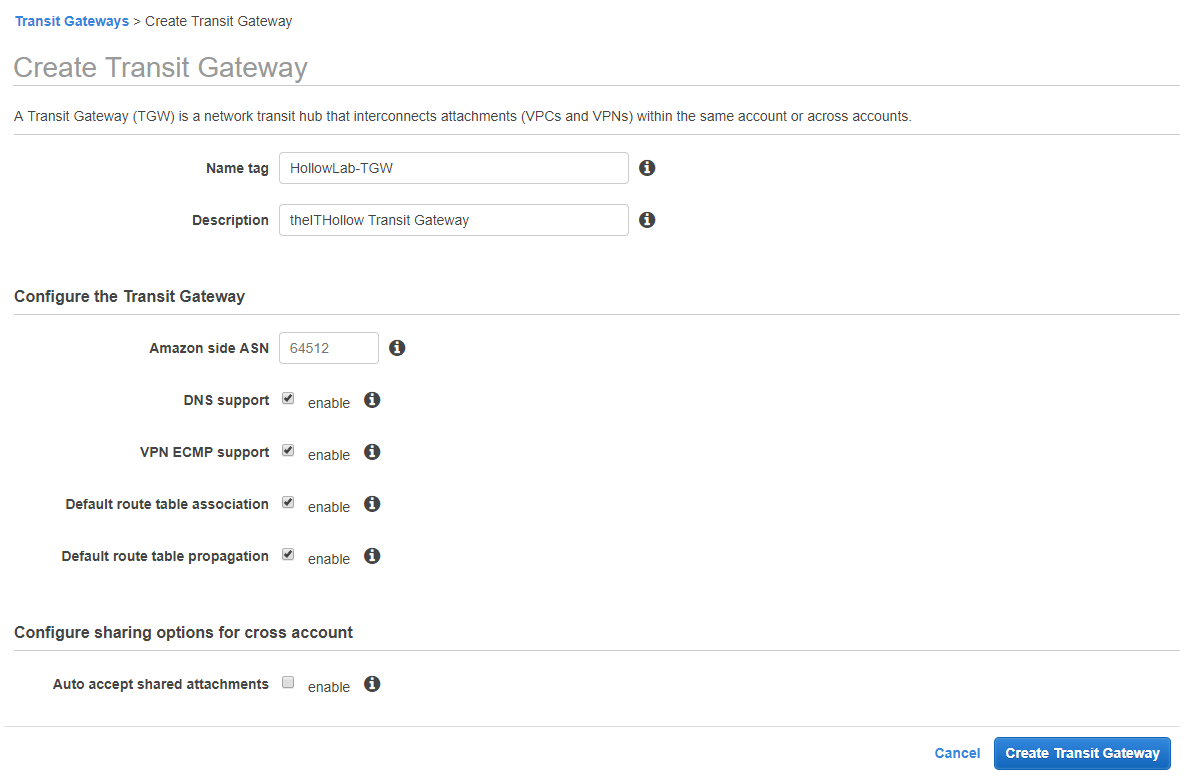
Go through the create transit gateway wizard and fill in the information. Enter a name and description so that its easily identifiable. After that you can specify the Amazon ASN or leave it the default. Next, decide if you want to allow DNS to be used through the Transit Gateway, as well as multi-pathing and route options. Lastly, select whether you want to automatically accept any shared attachments. I’ve disabled this so that you can see what happens if you don’t select this option in your environment. Click the “Create Transit Gateway” button.
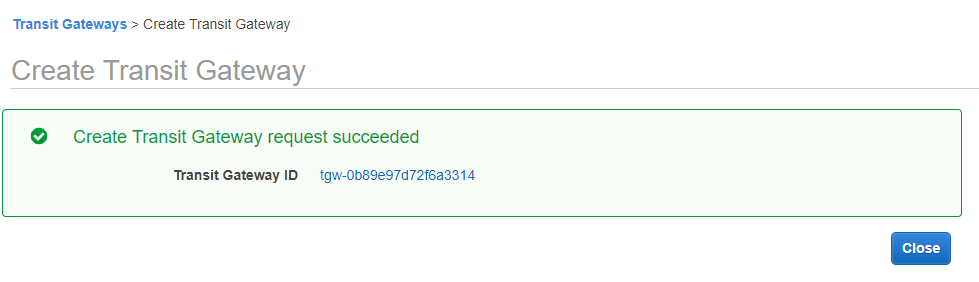
When complete, you should get a success message. Click close.
Once the Gateway is created we’ll need to attach that gateway to one or more Virtual Private Clouds (VPCs), and then later one or more VPN connections. We’ll start with the VPCs. Now attaching the gateway to a VPC within the same account is pretty simple, but before you attach it to a VPC in another account, you must first share the Transit Gateway resource with the other account(s). To do this, follow the instructions in a previous post where I covered the new Resource Access Manager (RAM) service. The steps to share a Transit Gateway can be located here on this post.
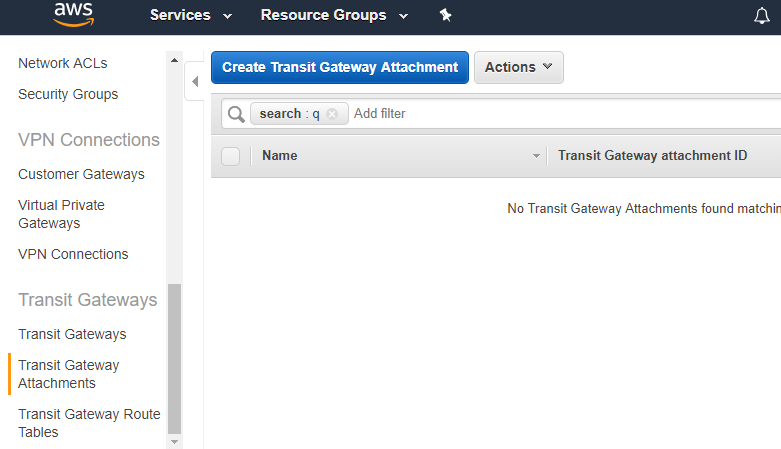
Now, assuming you’ve shared your Transit Gateway to at least one more account, lets continue with the attachment of the the gateway to a pair of VPCs. To do this, we’ll stay logged into the account we deployed the gateway with and navigate to the “Transit Gateway Attachments” menu under the VPCs console. Click “Create Transit Gateway Attachment” button.
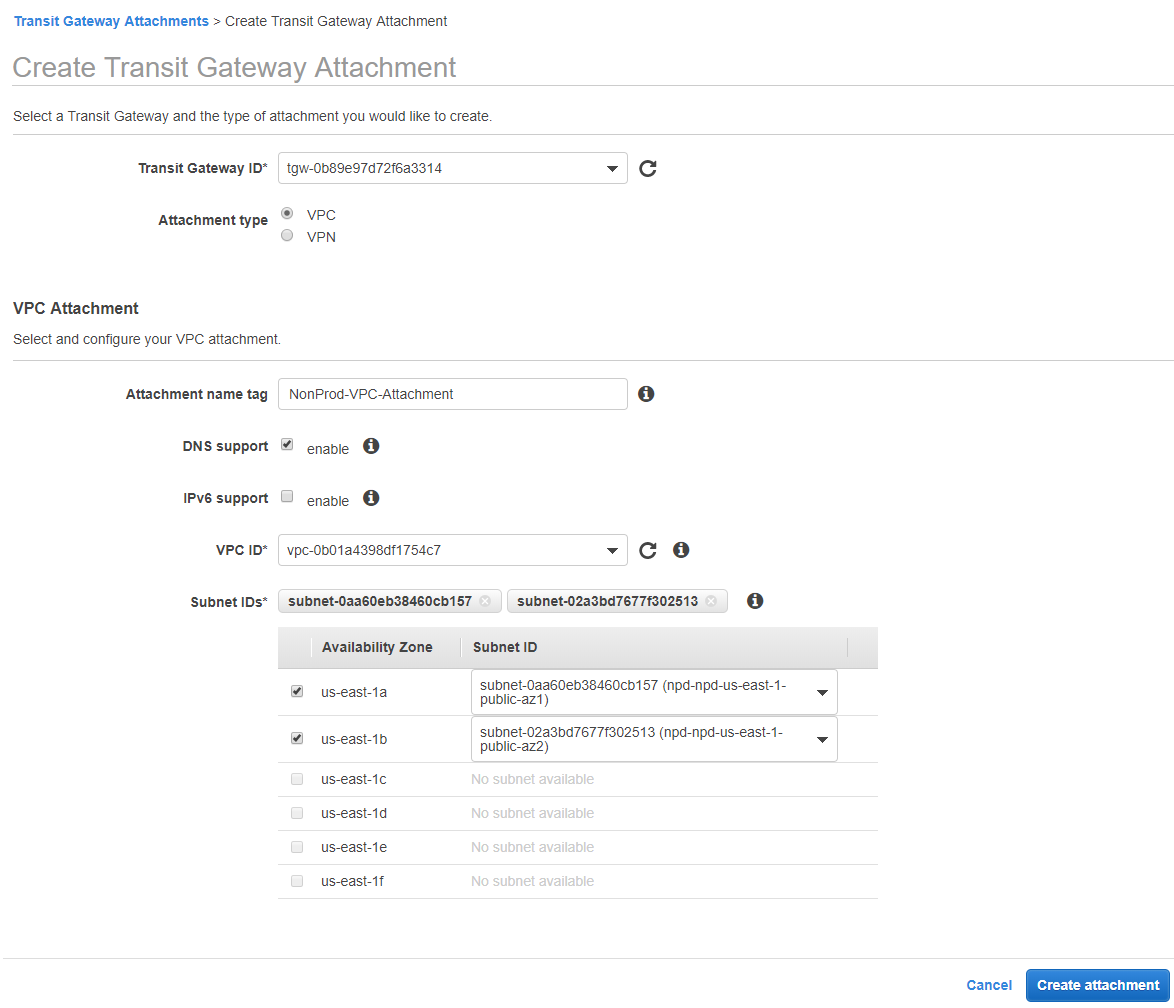
First, Select which transit gateway that should be attached. If you’re just getting started, select the one we built earlier. Under attachment type, select VPC. For the attachment section, give the attachment a name and identify if you want to allow DNS and IPv6 over this gateway. Then select which VPC this Transit Gateway should be connected. Once you select the VPC from the drop down, you’ll also need to select which subnets it will be attached to. It’s best to pick one subnet in each Availability Zone to provide better uptime, but you you may ONLY select one subnet from each AZ. Don’t worry, it can be accessed from the rest of the subnets within the same AZ, but you can only attach it to one subnet per AZ. Click the “Create Attachment” button.
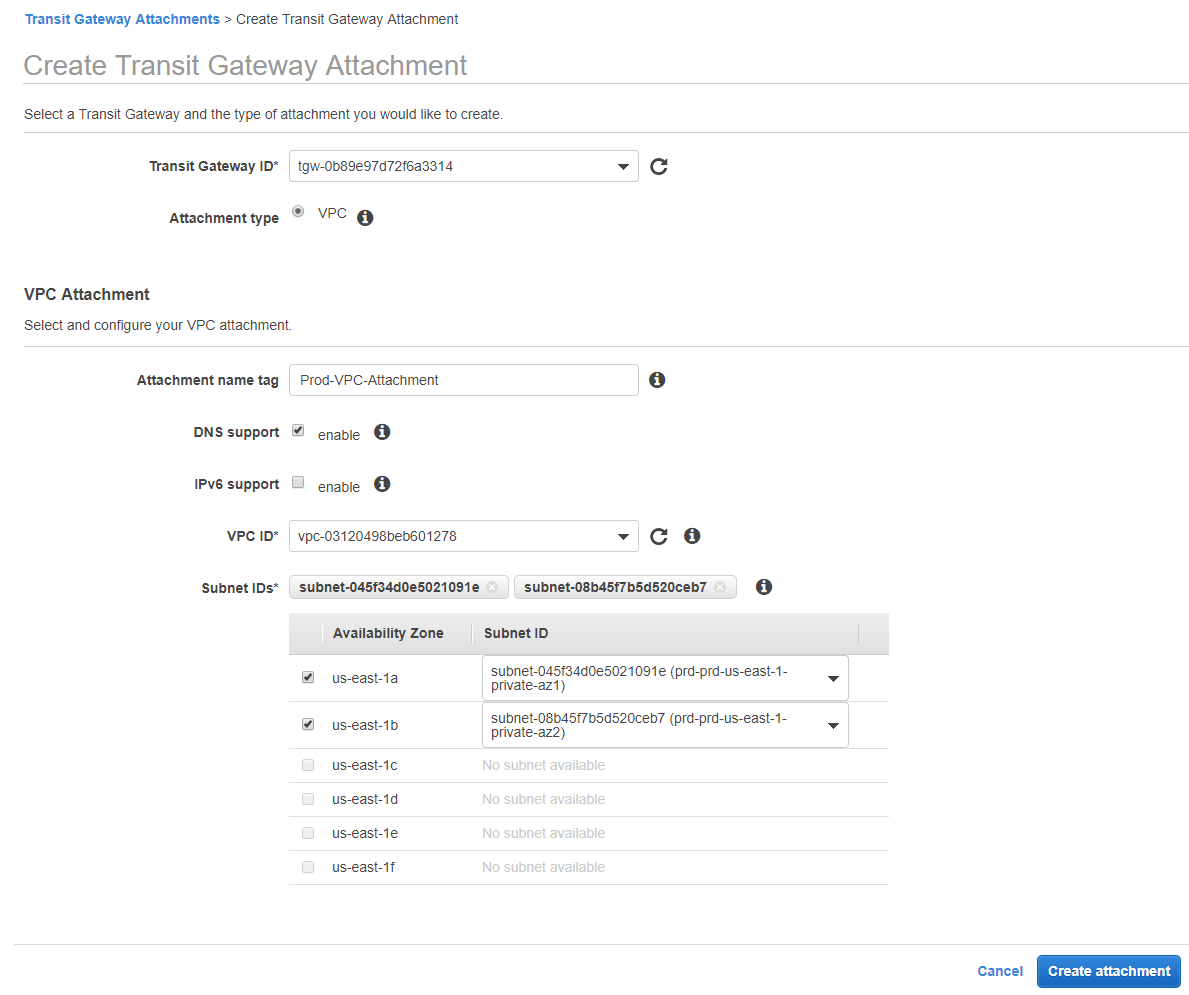
Now, we’ll switch over to the other account where we have another VPC. This should be the account you shared the TGW with through the Resource Access Manager. In this account we need to go through the same steps as above, but notice that your only attachment type here is “VPC”. You may only attach a Transit Gateway with a VPN that exists within the same account as of the time of this blog post. Fill out your attachment information with the secondary VPC as you did before.
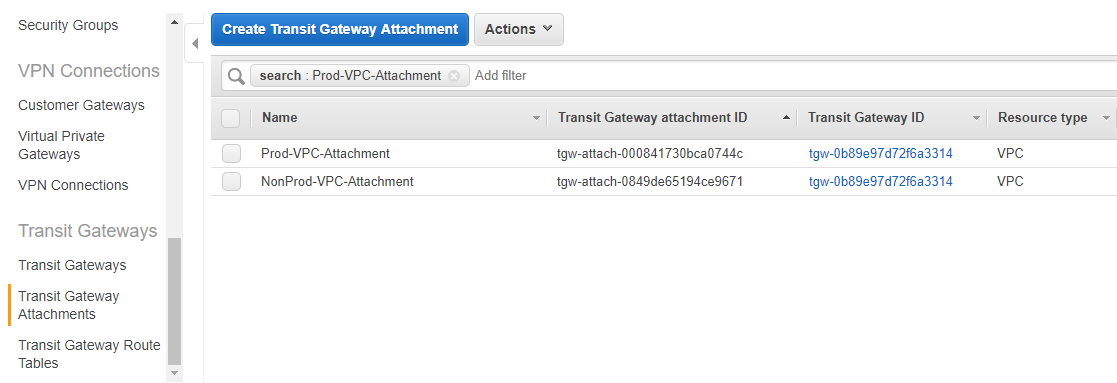
If you selected the option to “auto accept shared attachments” when we created the Transit Gateway, the attachments are done. If you didn’t select that, then you need to go back to the account where you deployed the TGW and accept the attachment from the “Transit Gateway Attachment” menu. You can see below that the attachment isn’t valid until it’s been accepted from this account.

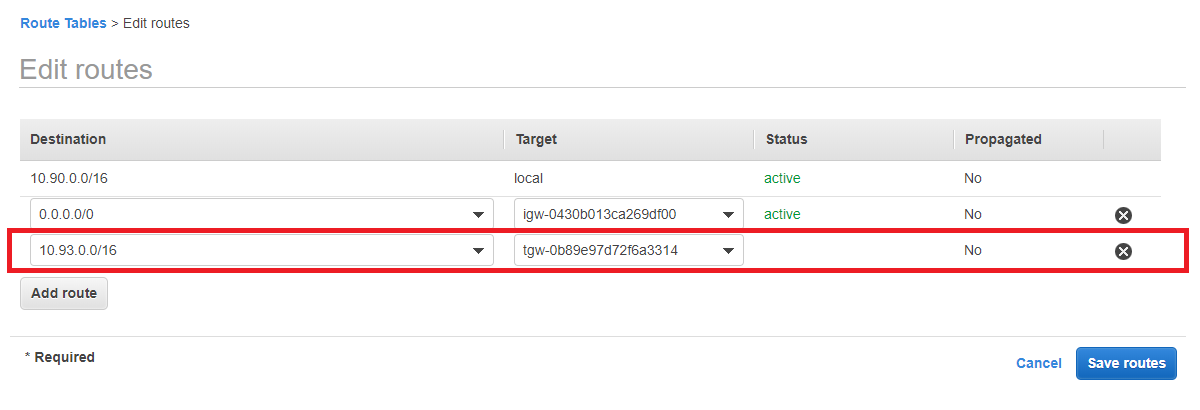
The Transit Gateway should now be ready to go for your workloads to transport data between VPCs. The last step you need to do to make that work, is to update your subnet route tables so that the traffic destined for the opposite VPC has a target of the Transit Gateway that was attached.
Setup Transit Gateway with VPN
Now, our VPC should be connected properly, lets connect a VPN to the Transit Gateway as well. To do this, we’ll go back to the account where the Transit Gateway was created and navigate to the “Transit Gateway Attachments” menu. Within this screen we’ll create another attachment.
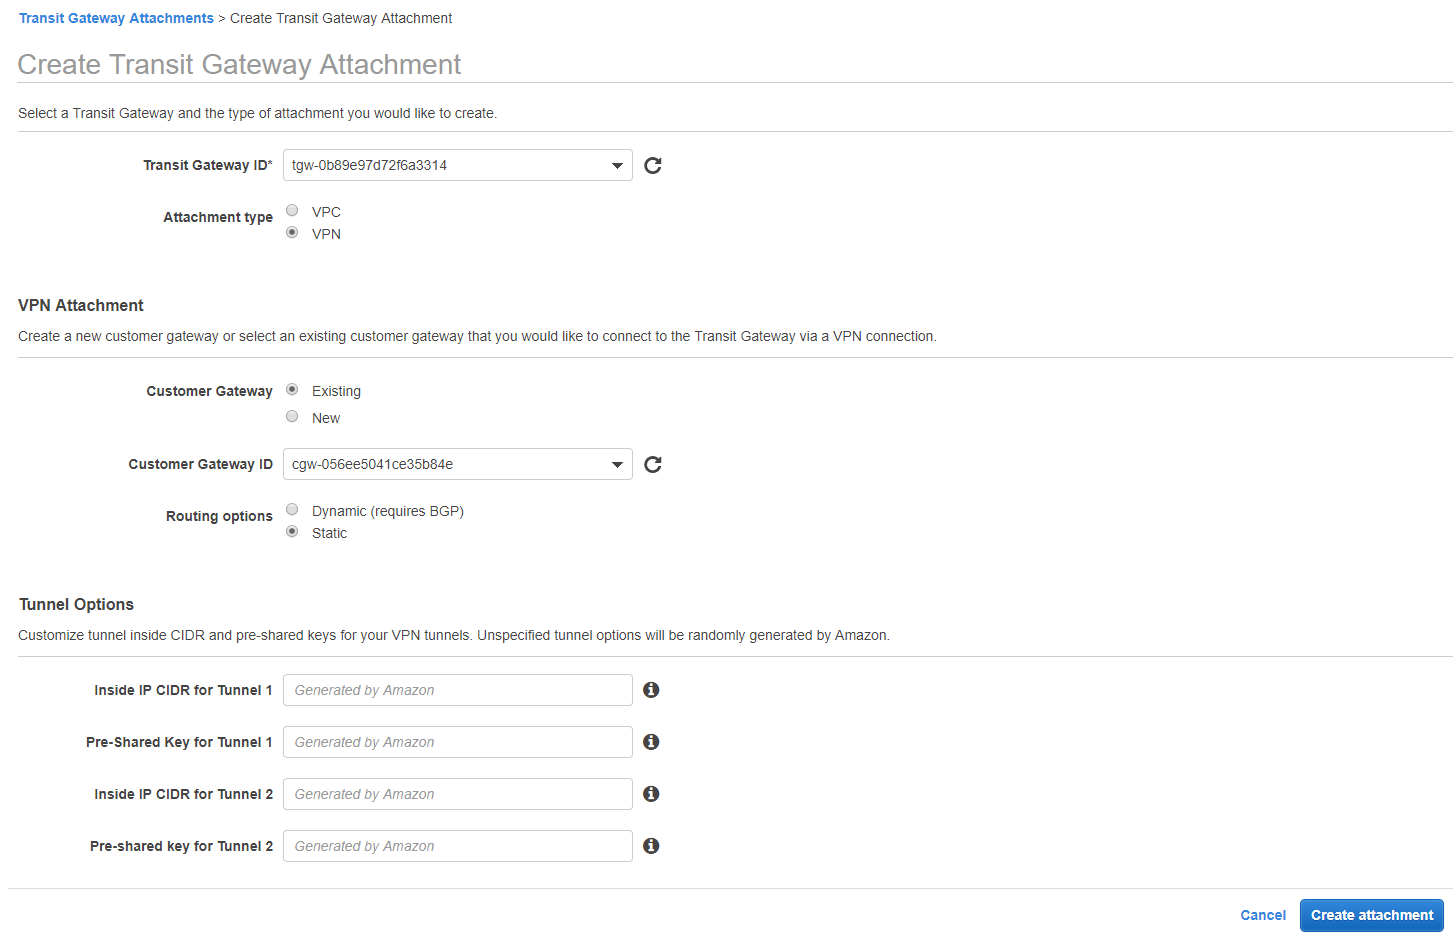
This time, when we create the transit gateway attachment, we’ll select VPN. When you select VPN, you’ll then see options for setting up the VPN with an existing Customer Gateway (public data center endpoint for the other end of the VPN) or to create a brand new CGW. You then have the option of using dynamic routing via BGP, or adding static routes. After this, you can specify some specifics for the Tunnel IP or pre-shared keys if you would like but it’s not necessary. Click the “Create attachment” button.
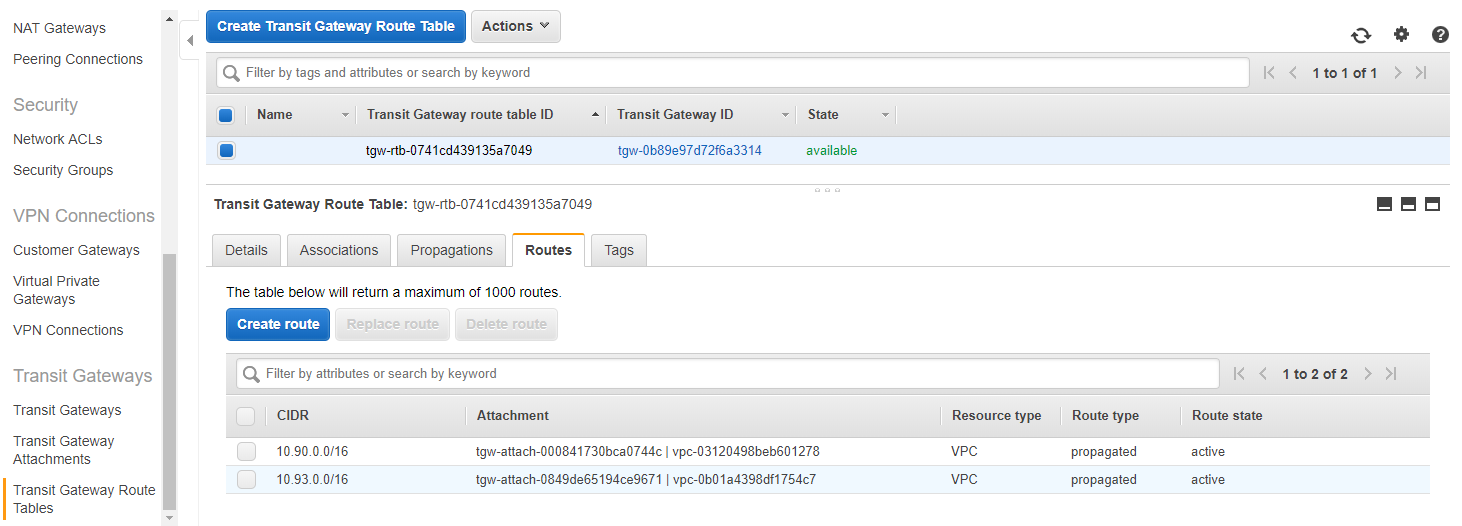
You’ll be able to see the VPN Connection information in the same place you would if you were using a VGW which is under the VPN connection menu. You’ll need the Public endpoint etc to create the VPN connection from the data center side. While the tunnel is coming up though, we’ll also need to add a static route if you didn’t use BGP (like I did), so we’ll go to the “Transit Gateway Route Tables” menu and click the “Create route” button after selecting our Transit Gateway.
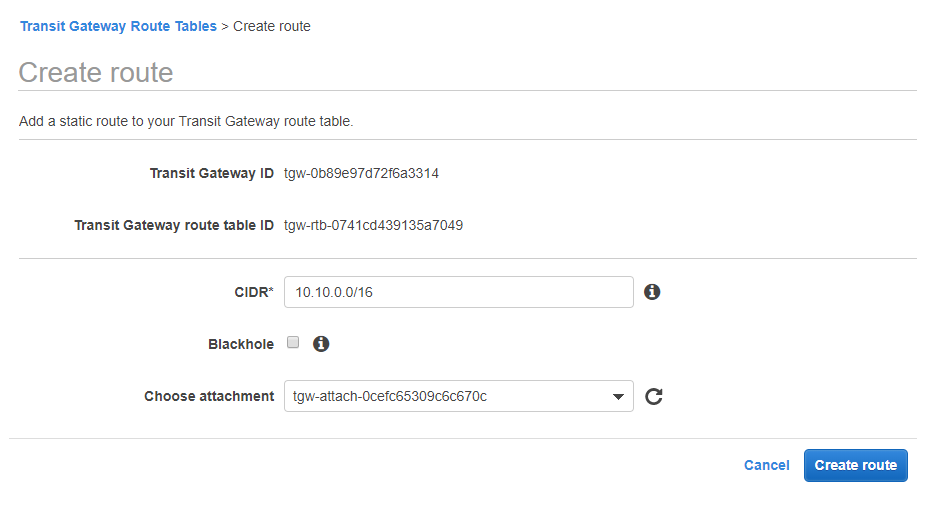
Now, I’ll add a route for my on-premises infrastructure so that my VPC workloads can access my data center through the Transit Gateway VPN connection.
Summary
It may seem like there were a bunch of steps here, but this is really pretty simple to get setup. Especially considering this can be done through CloudFormation and not having to build a VPN tunnel for every spoke VPC that is deployed. It’s a really nice solution over VPC Peering and over the old Transit VPC solution provided by third parties. Good luck with your configurations.