Virtual infrastructure has a lot of advantages, but one of the biggest time savers is being able to provision new virtual machines quickly from a template. As part of this series we’ve covered, how to deploy harvester, how to setup a new virtual network , how to create a new virtual machine, and how to backup and restore VMs. In this post we’ll take a look at how we can create templates and deploy harvester VMs from templates.
Create a Template from an Existing VM
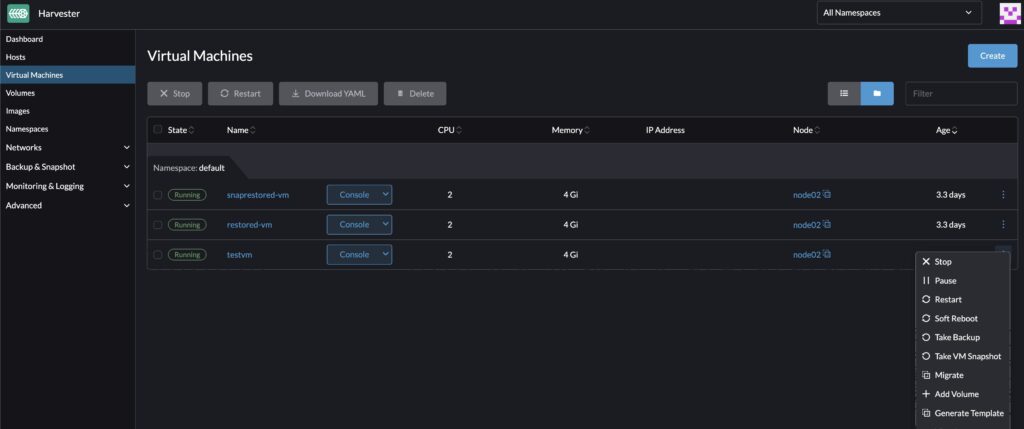
Before we can deploy any new virtual machines from a template we need to create a template, so this is where we’ll start this post. To create a template from a VM, it couldn’t be simpler. Find a VM that you’d like to use as the base image for your templates, and select " Generate Template" from the kabob menu for that VM.
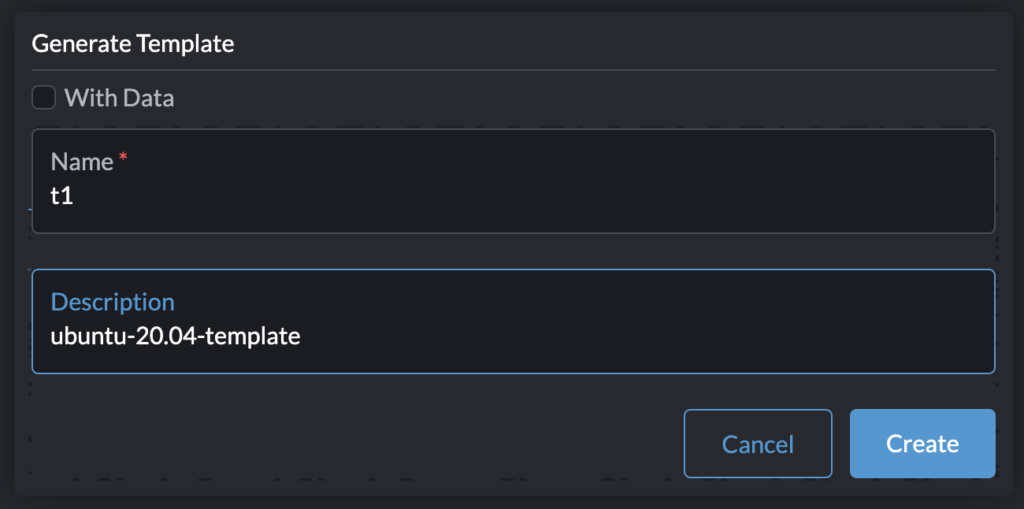
Step two of this process is to give the template a name and a description. There is also a checkbox to select whether or not you want the data as part of this template. This checkbox basically takes your snapshot of the virtual machine disks. If you don’t select the “With Data” checkbox, then all the settings for your VM such as the virtual network, size of disks, etc will all be set for you when you use it to deploy a new VM, but none of your configurations inside the virtual machine’s OS will be included. Both options might be useful for your situation, but in my lab, I’m taking a backup of the data as well.
NOTE: I found that creating a template with a long name caused it to fail. I found this bug stating that restores might fail if the template name is longer than 40 characters, so if you have problems, try using a short name for the template name.
Create a Harvester VM from Template
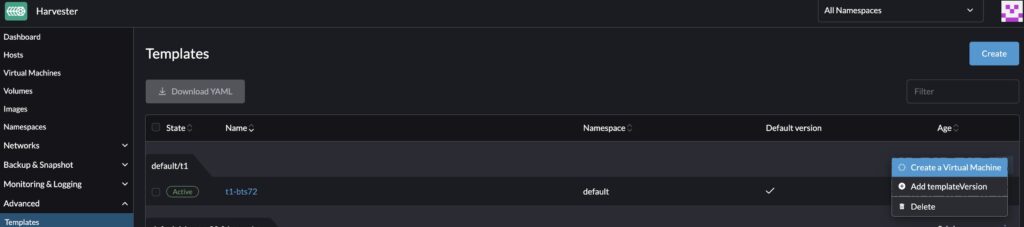
Once our snapshot has completed, we can use that snapshot to deploy a new virtual machine with all our virtual machine settings intact. Go to the " Templates" menu under the Advanced settings in the Harvester UI. Click the “Create a Virtual Machine” from the options menu.
This will take you to the VM creation page and the “VM from Template” option will already be checked, and the virtual machine configuration options such as the CPU/Memory settings will already be filled in. You can modify these settings as you choose.
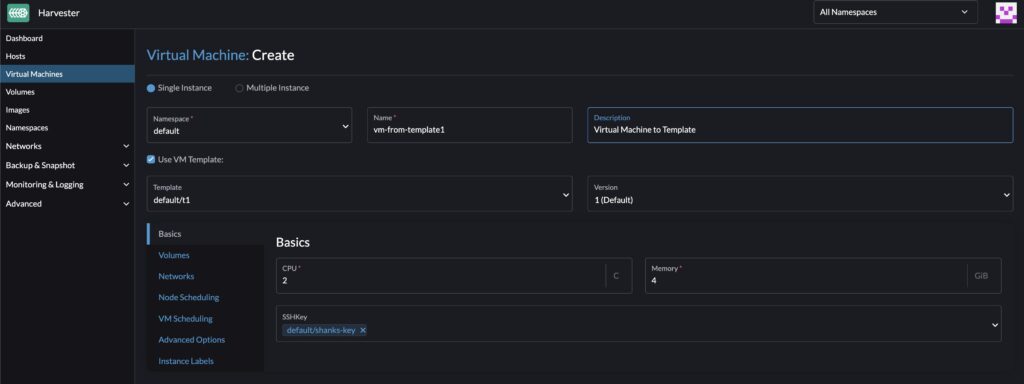
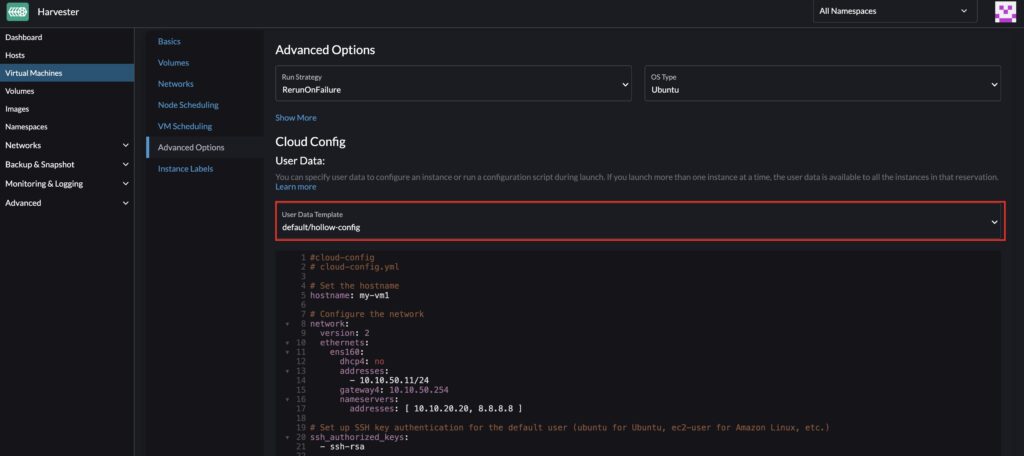
I would focus your attention on the Advanced Options section of the template. Obviously, we don’t want to deploy a new virtual machine to our network with the exact settings as our template. We want to customize the VM with a new IP Address, or other settings but start with our template as the defaults. In the Advanced Settings you can set your “data template.” If you haven’t created one yet, you can choose the " create new" option from the drop down to create your data template. The data template is basically a cloud-init config file. After you’ve created a User Data template, you an select it from this drop down and again modify it for this specific VM we’re creating. I’ve modified the static IP Address.
I’ll also point out that you can create other config templates including a network template which allows you to quickly set the network interfaces used with your VM. When you’re all done with your tinkering, you can click the " Create" button to start building your VM from template.
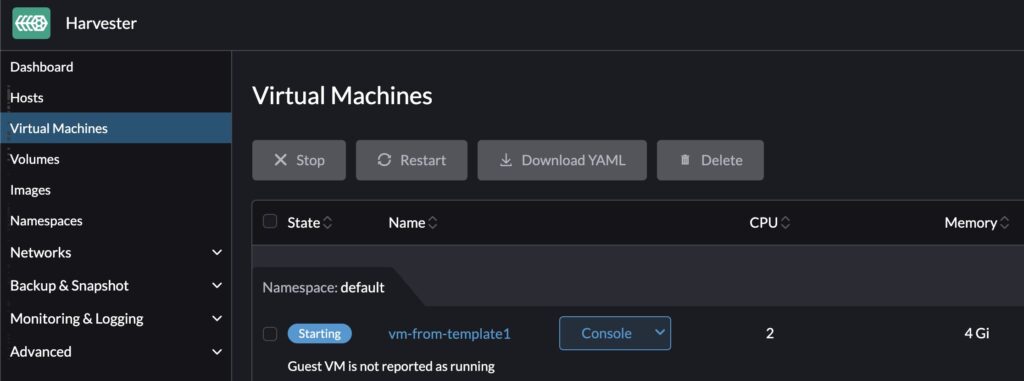
As your VM is being created, you’ll see some information in your " Virtual Machine" list from the Harvester UI.
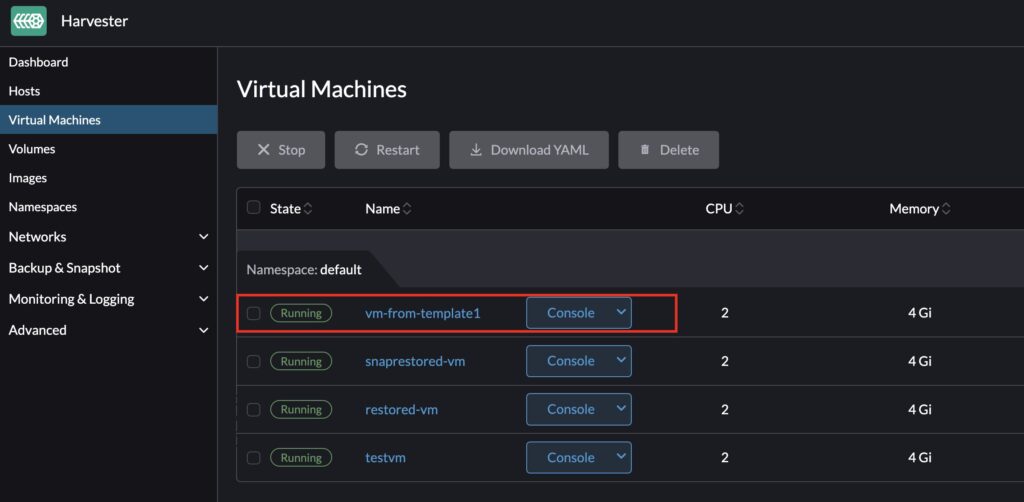
Eventually your VM will be built and you can access the console to complete any remaining work to your new virtual machine.
Summary
Creating virtual machines from a template is a pretty critical component of virtual infrastructure these days. Harvester, in conjunction with snapshots and cloud-init configs gives us the capability to create new VMs from a copy of an operating system installation and customize it so that we can quickly spin up new VMs in a reasonable amount of time.